![]()
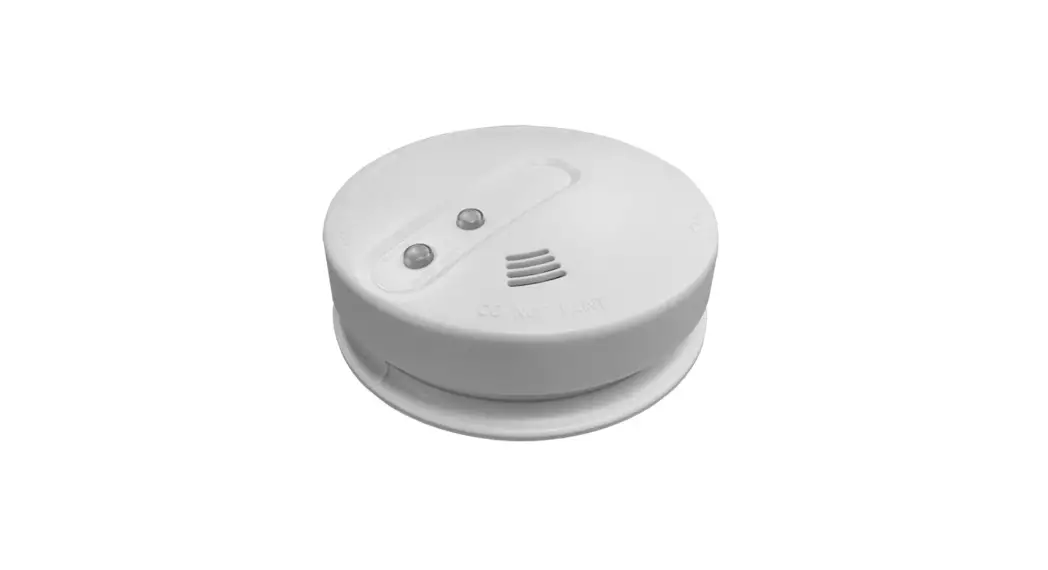
AUTO RESETTING SMOKE DETECTOR
With Power Monitoring
Specifications
| Detection Type | Photoelectric Chamber |
| Power Source | 9-16 Volts DC |
| Standby Current | 25mA |
| Alarm Current | 20mA |
| Buzzer Output | 85db @ 3 meters |
| Output Relay | N/O and N/C Contacts 100mA max |
| Dimensions | Ø100mm x 55mm |
| Standards: | GB4715-2005, EN14604, UL217 |
Operation & Testing
During Normal Operation the LED flashes every 45 seconds.
Pressing the Test Button will activate test mode, triggering both the Relay and the Buzzer.
The smoke alarm will automatically reset when all the smoke has cleared.
Hush feature. Whilst the smoke detector is in activated, pressing the test button for 1 second, will silence that smoke detectors sounder. This will not hush the controllers sounders or other smoke detectors connected
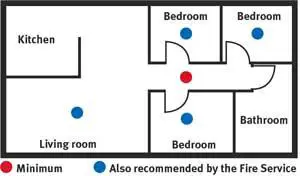
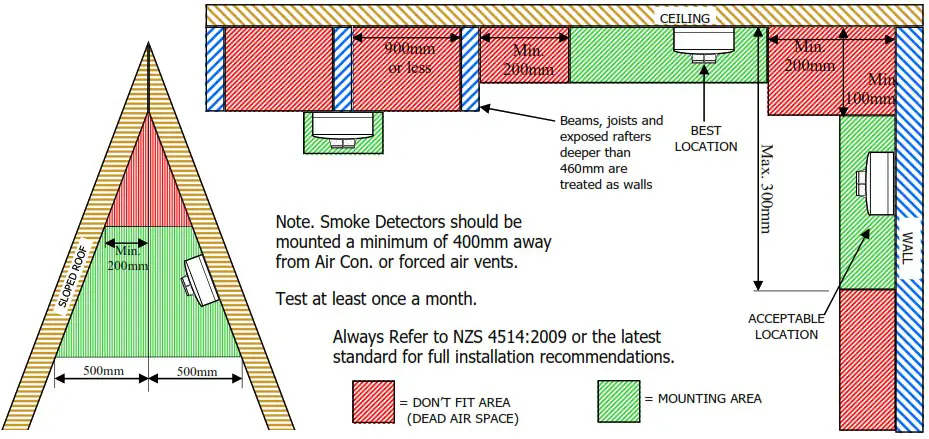
Suggested Mounting Locations
Smoke alarms must be located in escape routes on all levels within the household unit.
On levels containing sleeping spaces, they must be installed within the sleeping space, or within 3 metres of every sleeping space door. And they must be audible through closed doors.
Always Refer to NZS 4514:2009 or the latest standard for full installation recommendations.
Service & Maintenance
Once a month: Press the test button to trigger the detector. Note, putting the alarm panel in programming mode, will prevent the alarm sirens from triggering as well.
Every 6 months: Vacuum or blow dust out of the detector to help reduce false alarms.
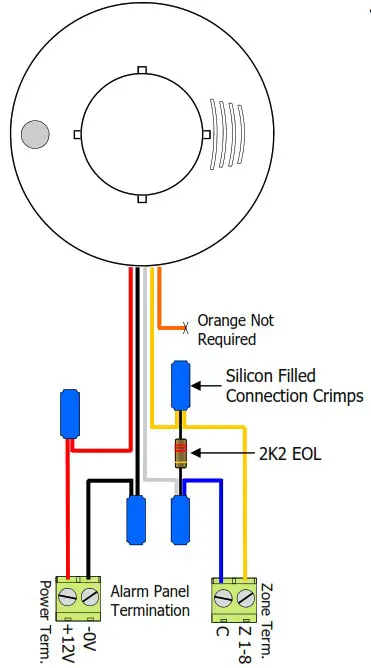
Connection Diagram
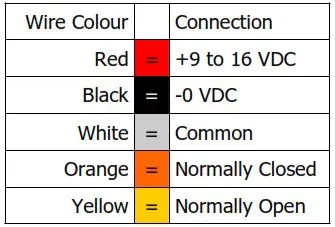
Power Monitored Contacts
If the Power supply drops off, the Alarm contacts will Activate.
Note. Do not Install photo electric smoke detectors, until all construction has been completed.
Panel Programming (ESL, Elite S & S-Lite only)
You will need to tell the panel what zone the smoke detector is connected to.
In Program mode press <PROGRAM> <123> <ENTER> then put in the zone (1-8) that the smoke is on <1-8> <ENTER> now turn On option <5> <ENTER>.
With this feature turned On, when the smoke detector is triggered the Alarm will activate even if the system is disarmed. Also the sirens will pulse On and Off making a different sound to a normal burglary alarm. The user will have to clear the alarm with their normal alarm code.
i.e. P 123 E 8 E 5 E (zone 8 is now a 24 Hour Fire zone)
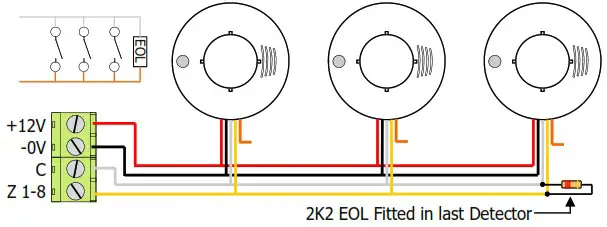
Multiple Detectors in Parallel Connection (using N/O Contacts)
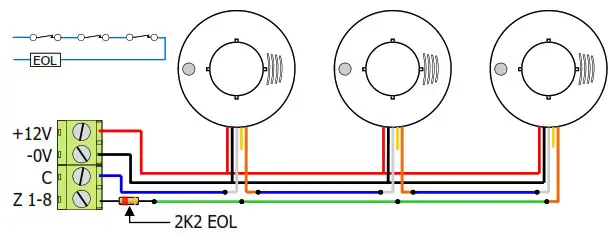
Multiple Detectors in Series Connection (using N/C Contacts) Daisy-chain wiring
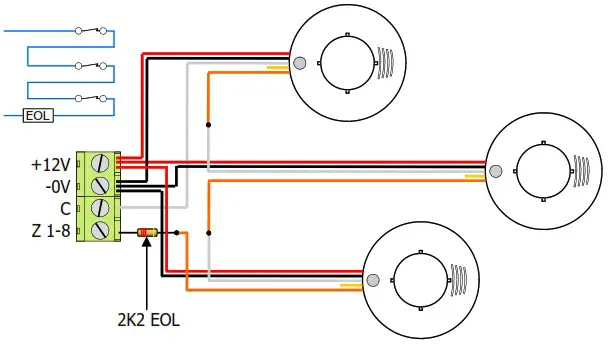
Multiple Detectors in Series Connection (using N/C Contacts) Individual wiring
![]()
ARROWHEAD ALARM PRODUCTS Ltd.
1A Emirali Road, Silverdale 0932, AUCKLAND
Ph. 09 414 0085
www.aap.co.nz
v2.02![]()


