
TOMADO TWM8001W Washing Machine
TWM8001W
Product Description: The TWM8001W is a washing machine that has been in production since 1923 and is known for its quality, excellent service, and being the best choice.
Product Information
- Model: TWM8001W
- Languages: NL (Dutch), EN (English), DE (German), FR (French)
- Pages: 3-101
- Symbols used: Information, advice, tip or recommendation; General danger; Warning; Danger of electric shock; Dangerously hot surface; Fire hazard
- Product Dimensions: 10 parts including a top plate, control panel, power cord, drum, pump filter, water drain hose, adjustable feet, door, detergent drawer, and water inlet hose
- Accessories: 4 x caps, 1 x water inlet hose, 1 x user manual for cold water
Product Usage Instructions
Electric Installation
- Connect the washing machine to a grounded outlet that is protected.
- Only the manufacturer, maintenance representative or an authorized person should replace a damaged power cord.
- Never use an extension cord or multiple plugs to connect the washing machine.
- Do not unplug the washing machine if there is flammable gas nearby.
- Do not use detergent containing solvents as this may release toxic fumes, damage the appliance, and cause fire and explosion hazards.
Installation and Connection
- The space where the washing machine is placed must meet specific requirements.
- Remove the cardboard and foam from the washing machine.
- Lift the washing machine and remove the packaging material underneath. Make sure to remove the small triangular piece of foam [A] at the same time as the packaging material. If this is not possible, lay the appliance on its side and remove it by hand.
Handle with care. - Remove the tape that secures the power cord and water drain hose.
- Remove the water inlet hose from the drum.
- Before using the washing machine for the first time, remove the transport bolts at the back of the appliance to avoid damage. Remove the bolts, including the rubber parts, and keep them for future use. Cover the openings with caps.
- Use a level and wrench to level the washing machine. Adjust the adjustable feet until the washing machine is level, then tighten the locking nuts with a wrench.
Symbols used in this document
i
Information, advice, tip or recommendation
Warning
General danger
Warning
Danger of electric shock
Warning
Danger of hot surface
Warning
Danger of fire
It is important that you carefully read all the instructions.
EN – 28
SAFETY INSTRUCTIONS
Please read these instructions before operating the appliance and retain for future use. Please, do not use the washing machine without reading the instructions for use first. · Check for any damage to the packaging or the appliance during transportation. Never use a damaged appliance, but contact your supplier. · Failure to observe the instructions for use or inapproriate use of the appliance may result in damage to the laundry or the appliance, or injury to the user. Keep the instruction manual handy, near the appliance. INSTALLATION LOCATION AND SURROUNDING · Keep the appliance clear from heat sources and direct sunlight to avoid plastic and rubber parts to corrode. · Do not install the appliance in a room where the temperature can drop below 5°C, as the parts of the appliance may be damaged in case of water freezing. Do not install the appliance in humid environments or rooms containing explosive or caustic gas. In case of water leakage or water splashes let the appliance dry in the open air. · Never use flammable sprays or substances in the immediate proximity of the appliance. INSTALLATION · Place the appliance on a level and stable solid (concrete) base. · Adjust the appliances adjustable feet to ensure the appliance is standing level and balanced. · Before the first use of the appliance, remove the transport bolts, as switching on a blocked appliance can result in serious damage. The manufacturer will not be responsible for any damage in cases of such damage. · Before connecting the appliance to the power mains, wait for at least 2 hours until it reaches room temperature. · The door cannot be opened during washing machine operation.
EN – 29
· Before washing clothes for the first time, the appliance shall be operated once with a full programme without any clothes inside.
· After the washing cycle, close the water tap and pull out the plug from the power socket. Never pull the cord itself.
· Dispose the packing materials according to local regulations. Keep the material out of reach of children. Danger of suffocation.
· Before using the appliance, it must be calibrated. Follow the instructions in this manual.
ELECTRICAL INSTALLATION
Connect the appliance to a grounded power socket protected by a fuse complying with the values on the rating plate. · Pay special attention and be sure that the appliance is not placed on the power cord. To avoid danger, a damaged power cord may only be replaced by the manufacturer, its service agent or similarly qualified persons.
If the appliance is damaged, it must not be operated unless repaired by the manufacturer, its service agent or similarly qualified persons. · The appliance may not be connected to the power mains using an extension cord.
Do not connect the appliance to the power mains using an external switch device such as a programme timer, or connect it to power mains that is regularly switched on and off by the power supply provider. · Do not connect the appliance to an electrical outlet intended for an electric shaver or hair dryer. · The mains plug must be accessible after installation.
Never use an extension cord or a multiple plugs for making a connection.
Do not pull the plug out of the power socket if there is flammable gas around.
Never pull out the plug with wet hands. Always unplug the appliance when it is not being used and close the watertap.
EN – 30
· Connection to water and power supply has to be executed by an adequately trained technician or expert.
· Any repair and maintenance pertaining to safety or performance should be done by trained experts.
· In case of a defect, only use approved spare parts by authorized manufacturers.
· In case of incorrect appliance connection, incorrect use, or servicing by an unauthorized person, Tomado will not be responsible for any damage as such damage will not be covered by warranty.
WATER INSTALLATION
The appliance is equipped with a single inlet valve and can be
connected to the cold water supply only. · To connect the appliance to the water supply, make sure to use
the supplied water supply hose and gaskets. The water pressure has to be between 0.05 and 1.0 MPa (0.5 – 10 bar). · Always use the supplied new water supply hose to connect the appliance to the water supply; do not reuse an old water supply hose. · The end of the water discharge hose should reach into a water drain line. · Check the connections of the water supply hose, the water tap and the water discharge hose for possible problems due to changes of water pressure. If the connections loosen or leak, close the water tap and get it repaired. Do not use the appliance before the pipes and hoses are installed properly by authorized persons.
At higher washing temperatures, the door glass will heat up. Be careful to avoid burns. Keep children and animals far away from the machine while it is operating.
Do not remove the drain pump filter while there is still water in the appliance. Big quantities of water can leak out, and there is a risk of scalding due to hot water.
EN – 31
WATER OVERFLOW PROTECTION
If the water level in the appliance rises above normal level, then the excess water level protection will be activated. It will shut off the water supply and start pumping out the water. The program is interrupted and an error is reported. CHILD SAFETY · Before closing the appliance door and running the programme, make sure there is nothing except laundry in the drum (e.g. if a child or animal climbed into the appliance drum). · Keep the detergents and softeners out of reach of children. · Do not let children aged 3 years and under come near the appliance, unless they are under constant supervision. · This appliance may be used by children aged 8 years and above and by persons with reduced physical, sensory or mental capabilities or lack of experience and knowledge if they have been given supervision or instruction concerning use of the appliance in a safe way and if they understand the hazards of inappropriate use. Children are not allowed to play with the appliance. · The appliance may not be cleaned or maintained by children, unless this is done under supervision. · Children should be supervised that they do not play with the appliance. · Do not climb or sit on the appliance. · The appliance is made in compliance with all relevant safety standards.
OPERATION AND MAINTENANCE
Do not use detergents that contain solvents as this could lead to release of poisonous gases, damage to the appliance, and risk of fire and explosion. · Only use the appliance for washing laundry as described in the instruction manual. The machine is not intended for dry cleaning. · Only use agents for machine washing and care of laundry. Tomado will not be responsible for any damages or discolouration of gaskets and plastic parts resulting from incorrect use of bleaching or colouring agents.
EN – 32
· In case of a defect, only use approved spare parts by authorized manufacturers.
· Make sure that all pockets are emptied. Sharp and rigid items such as coins, brooches, nails, screws, stones etc. may cause serious damages to this machine.
· Remove all objects from pockets such as lighters and matches before use the appliance.
· Fabric softeners or similar products should be used as recommended in their instructions.
· Never try to open the door forcefully. The door will unlock shortly after the end of a cycle.
· Please do not close the door with excessive force. If it is found difficult to close the door, please check if the clothes are properly inserted and distributed.
· In case of incorrect appliance connection, incorrect use, or servicing by an unauthorized person, the user shall bear the cost of any damage as such damage shall not be covered by warranty.
· When cleaning the appliance, only use non-corrosive descaling agents. Follow the manufacturer’s instructions of the cleaning agent. Finish the descaling process with several rinse cycles in order to remove any residual acid (e.g. vinegar etc.).
· The warranty does not cover consumables, minor deviations in colour, increased noise that results from appliance age and which does not affect the functionality of the appliance, and aesthetic defects on components, which do not affect the functionality and safety of the appliance.
TRANSPORT/TRANSPORT AFTER INSTALLATION · If you intend to move the appliance after it has been installed,
then it should be blocked by inserting at least one transport bolt. Before inserting the transport bolt, disconnect the appliance from the power mains. · Accumulated water must be drained out of the appliance. · The appliance is heavy. Transport with care. Never hold any protruding part of the appliance when lifting. The door of the appliance cannot be used as a handle.
EN – 33
INTENDED USE · The appliance is intended solely for household use. If the appliance
is used for professional, for-profit purpose or purpose exceeding normal use in a household, or if the appliance is used by a person who is not a consumer, the warranty period shall be equal to the shortest warranty period required by relevant legislation. · This appliance is intended to be used in household and similar applications such as: – staff kitchen areas in shops, offices or residential type
environments; – farm houses; – by clients in hotels, motels and other residental type
environments; – bed & breakfast type environments; – areas for communal use in blocks of flats or in launderettes. · The appliance is not intended for use by persons (including children) with physical or mental impairments, or persons with lacking experience and knowledge. These persons should be instructed about the use of the appliance by a person responsible for their safety. OLD APPLIANCE · Remove the door or deactivate the lock when disposing of the appliance. Children are known to have gotten themselves locked in old appliances. To forestall such a situation, break your appliance’s door lock and tear off the electrical cables. This marking indicates that this product should not be disposed with other household wastes throughout the EU. To prevent possible harm to the environment or human health from uncontrolled waste disposal, recycle it responsibly to promote the sustainable reuse of material resources. To return your used device, please use the collection systems or contact the retailer where the product was purchased. They return and can take this product for environmental safe recycling.
EN – 34
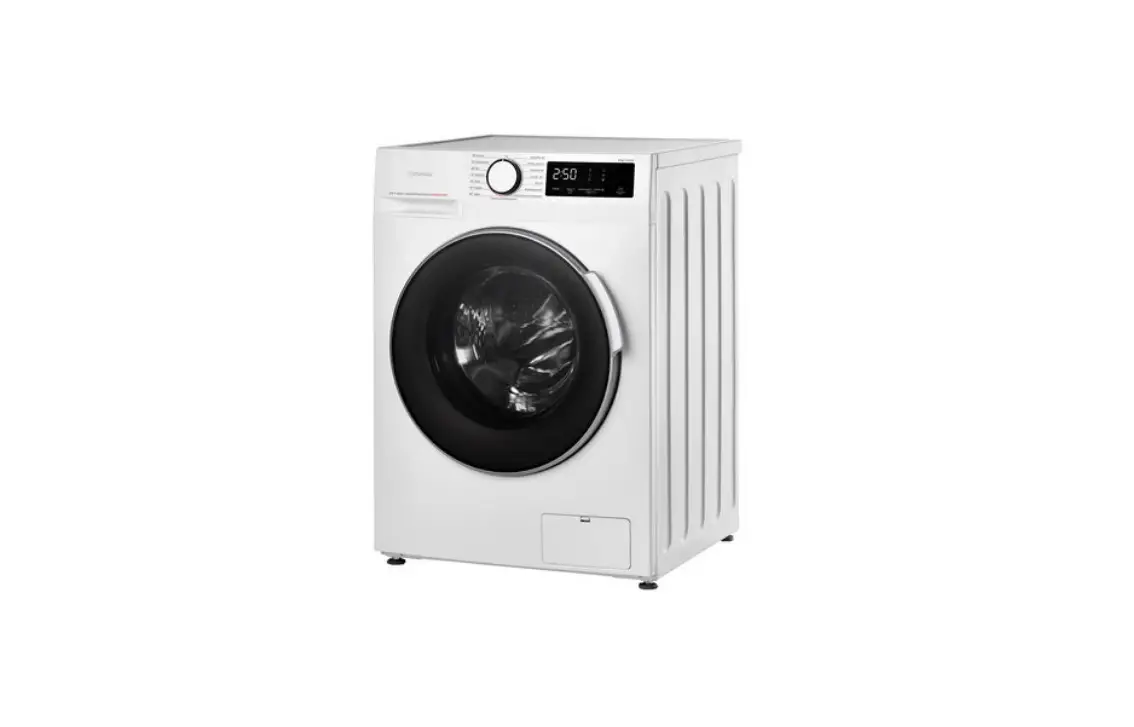
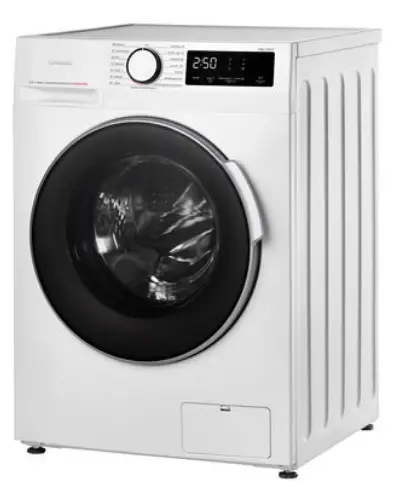
1. Top cover 2. Control panel 3. Power supply cord 4. Drum 5. Pump filter 6. Water discharge hose 7. Adjustable feet 8. Door 9. Dispenser tray 10. Water supply hose
PRODUCT DESCRIPTION
1
10
2 3 9
4
8 5
6
7
4 x cover caps
1 x supply hose for cold water
1 x user manual
EN – 35
INSTALLATION AND CONNECTION
REQUIRED SPACE FOR INSTALLING
WARNING!
· Stability is important to prevent the product from sliding across the installation site! Make sure to level the appliance and install it on a stable base in longitudinal and traverse direction by rotating the adjustable feet.
· Make sure the appliance doesn’t stand onto the power cord. · Make sure to observe the minimum required clearances from the walls as indicated in the figure.
W 20 mm
i The room in which the appliance is placed must meet the following requirements:
1. Dry, level and stable solide base 2. Avoid direct sunlight 3. Sufficient ventilation 4. Room temperature is above 0°C 5. Keep far away from heat sources such as coal, gas or wood burning appliances.
UNPACKING THE APPLIANCE
WARNING!
· Move the appliance with at least two people and wear protective clothing, such as sturdy gloves. · Packaging material (e.g. films, styrofoam) can be dangerous for children. · There is a risk of suffocation! Keep all packaging away from children.
1. Remove the cardboard box and the styrofoam packing.
2. Lift the washing machine and remove the base packaging. Make sure the small triangle foam [A]
is removed with the bottom packaging together. If not, lay the appliance down on one side and
carefully remove it manually.
A
3. Remove the tape securing the power supply cord and water discharge hose.
4. Take the water supply hose out of the drum.
REMOVING THE TRANSPORT BOLTS
WARNING! Before the first use of the appliance, the transport bolts must be removed from the back of the appliance. A blocked appliance may be damaged when it is switched on for the first time. The warranty does not apply in cases of such damage!
Loosen the 4 transport bolts with a spanner.
Remove the bolts including the rubber parts and keep them for future use
Close the holes using the cover caps
EN – 36
LEVELLING THE APPLIANCE
WARNING! · The lock nuts on all four feet must be screwed tightly against the housing to ensure the appliance stands steady on its feet.
Use a level and a spanner to level the appliance. 1. Loosen the lock nut with a spanner. 2. Turn the foot until it reaches the floor. 3. Level the appliance in longitudinal and traverse direction by rotating the adjustable feet. 4. After adjusting the feet, firmly tighten the lock nuts with a spanner against the housing.
CONNECTING THE WATER SUPPLY HOSE
WARNING! To prevent leakage or water damage, follow the instructions in this chapter. · Make sure not to kink, crush or modify the water supply hose.
i Tighten the water supply hose by hand, firmly enough for the hose to have
a good seal. After connecting the hose, the seal must be checked for any leaks. Do not use pliers or similar tools when connecting the water supply hose as this could damage the nut thread. 1. Connect the water supply hose to the water inlet valve on the back of
the appliance. 2. Connect the other end of the water supply hose with the aqua stop to
a water tap with cold water.
CONNECTING THE WATER DISCHARGE HOSE
WARNING! · Make sure not to kink or protract the water discharge hose. · Connect the water discharge hose properly, otherwise it could result in damage of water leakage.
Feed the water discharge hose into a drain pipe, wash basin or floor drain. Be careful not to feed the water discharge hose to deep in the drain. Otherwise the waste water can not flow freely. The vertical distance from the floor to the end of the discharge hose may no more be than 100 cm and no less than 60 cm.
Max. 100 cm Min. 60 cm Max. 100 cm Max. 100 cm Min. 60 cm
floor drain
1. Put the water discharge hose in a floor drain.
2. Connect the water discharge hose to a drain pipe.
EN – 37
CONNECTING THE APPLIANCE TO THE POWER MAINS
WARNING! · Before connecting the appliance to the power mains, wait for at least 2 hours until it reaches room temperature.
· Connect the appliance to a grounded power outlet. After installation, the wall outlet must be freely accesible. The outlet must be fitted with an earth contact (in compliance with the relevant regulations).
· Information on your appliance is indicated on the rating plate. WARNING!
· Using an over-voltage protection to protect the appliance in case of a lighting strike, is recommended.
WARNING! · Do not connect the appliance to the power mains using an extension cord.
i
· Do not connect the appliance to an electrical outlet intended for an electric shaver or hair dryer. · Any repair and maintenance pertaining to safety or performance must be done by trained experts. · A damaged power cord may only be replaced by a person authorized by the manufacturer.
OPERATION
· QUICK START i CAUTION!
· Before washing, please make sure the appliance is properly installed. · Your appliance was thoroughly checked before it left the factory. To remove any residual water and to neutralize potential
odors, it’s recommended to clean your appliance before the first use. To do so, please run the Cotton programme at 90°C without laundry and detergent. See the chapter WASHING.
i CALIBRATING THE APPLIANCE!
It’s recommended to calibrate the appliance before using it, so that it provides the best performance. The appliance is able to detect the amount of laundry that is loaded in the drum. This function will optimize the appliance’s performance by minimizing energy and water consumption, saving you money and time. Therefore it’s recommended to calibrate the appliance for the best use. 1. Remove all accessories from the drum and close the door. 2. Insert the mains plug to the power outlet. 3. Switch on the appliance to any programme and press TPM and START DELAY simultaneously for 3 seconds until [t19]
is displayed. 4. Press to start the appliance. The drum will spin in order to calibrate it. 5. Wait till the drum stops spinning and a [ random number ] is displayed.
EN – 38
BEFORE EACH WASHING
· The ambient temperature of the appliance should be 5-40°C. If used under 0°C, the inlet valve and draining system may be damaged. If the appliance is installed under freezing conditions, it should be transferred to a normal ambient temperature environment to ensure the water supply hose and the water discharge hose can unfreeze before use.
· Before each washing, sort your laundry by reading the wash labels and the detergent use instructions. Use non-foaming or less-foaming detergent suitable for machine washing.
Check the care label
Sort the laundry according to color and textile type
Turn the pockets inside out, making sure there are no items left inside
Tie any ribbons or belts and close buttons and zippers
Put small items and delicate clothing into a special laundry bag
Turn easy-pilling and long-pile fabric inside out
WARNING!
· Do not wash clothes that have been cleaned, washed, soaked in or dabbed with combustible or explosive substances like wax, oil, paint, gasoline, alcohol, kerosene or other flammable materials.
· Washing single items may easily create big eccentricity and cause vibrations and noise due to unbalance. Therefore it is suggested to add one or two more laundry items to the wash so that spinning can be done smoothly.
· WASHING PREPARING BEFORE WASHING
earthed socket
main wash
softener
pre-wash
Plug in
Open the tap
Open the door and load
Close the door
Add detergent
i NOTE!
· Additional detergent needs to be added in compartment I if the pre-wash function is selected.
EN – 39
WASHING
Select a programme Select settings and/or Press Start/Pause to additional functions start the program
AFTER WASHING
When the program is finished and the appliance is ready, a buzzer will sound and on the display [ End ] appears for a few seconds before the display goes out.
DISPENSER TRAY
Pre-wash Main wash Softener
i CAUTION!
· Additional detergent needs to be added in compartment I if the pre-wash function is selected. · It is not necessary to add detergent for all programmes. Check the table below for more information.
Programme
I II
Programme
I II
Off
40° Fine wash
40° Cotton
15 Min. Short 15°
40° Synthetic
40° Intensive
40° Mix
ECO 40-60
20° Delicate
40° Wool
40° Sportswear
40° Bed linen
60° Allergy
Spin only
60° Jeans
Rinse & spin
Means detergent `obligatory’
Means detergent/softener optional
i NOTE!
· Before adding hardened lumps of powder detergent or a thick stringy liquid detergent or additive into the dispenser tray, it can be diluted in some water before pouring it in, as this may clog the piping in the appliance and cause a water overflow.
· Choose a suitable type of detergent, fitting to the selected washing temperature and fabric, to get the maximum washing performance and a minimum of water and energy consumption.
· Add powder or liquid detergents according to the manufacturer’s instructions, considering the washing temperature, washing program, how soiled the laundry is, and water hardness.
EN – 40
CONTROL PANEL
12
11
10 9
8
40° Katoen
Uit
Fijne Was 40°
40° Synthetisch
15 Min. Kort 15°
40° Mix
Intensief 40°
20° Delicaat
Eco 40 – 60
40° Sport 60° Allergie
Wol 40° TPM
Beddengoed 40°
60° Jeans
Centrifugeren & Afpompen Spoelen & Centrifugeren
Temp °C
3 sec.
Startuitstel Functie
Kinderslot 3 sec.
8 kg | 1400
Was toevoegen 3 sec.
1 Nr. Symbol 1.
2.
3.
TPM
Temp °C 4.
3 sec.
5. Startuitstel 6. Functie
7.
Was toevoegen
3 sec.
2
13
4
5
6
7
Button or indicator Description Programmes Available programmes (see the programmes table for more information).
Programme selector knob
Turn the programme selector knob left or right to select the desired programme.
Spinning rate Temperature Start delay
When needed, the spinning rate can be adjusted by pressing the SPEED button. There are 7 settings: 0 – 400 – 600 – 800 – 1000 – 1200 – 1400 [ — – 400 – 600 – 800 – 10- – 12- – 14- ].
When needed, the washing temperature can be adjusted by pressing the temperature button. There are 6 settings: Cold – 20°C – 30°C – 40°C – 60°C – 90°C [ — -20°C-30°C-40°C-60°C-90°C ].
Use this function to start the washing cycle after a certain amount of time has elapsed.
Function
Push this button to select one or more additional functions.
Start/pause button Press the button to start or pause the washing cycle.
Adding wash 3 sec.
Hold the button for 3 seconds to add or remove wash. See the paragraph Adding Laundry for more information.
8.
Hygiene Pro When this indicator is lit, the washing cycle includes Hygien Pro.
9.
10.
11.
12.
Uit
Pre Wash Extra rinse Extra wash Child lock Door lock Start delay
Display
Off
When this indicator light is lit, the pre wash function is added. When this indicator light is lit, the extra rinse function is added. When this indicator light is lit, the extra wash function is added. When this indicator light is lit, the child lock is activated. When this indicator light is lit, the door of the appliance is locked and cannot be opened. When this indicator light is lit, the start delay function is activated. The display shows the settings, estimated time remaining, options and status messages for your appliance. The display will remain on during the cycle. To turn the appliance off, turn the programme selector knob to the OFF position.
EN – 41
TPM
Temp °C
3 sec.
Spinning rate When needed, the spinning rate can be adjusted by pressing the TPM button. There are 7 settings: 0 – 400 – 600 – 800 – 1000 – 1200 – 1400 [ — – 400 – 600 – 800 – 10- – 12- – 14- ].
Temperature When needed, the washing temperature can be adjusted by pressing the temperature button. There are 6 settings: Cold – 20°C – 30°C – 40°C – 60°C – 90°C [ — -20°C-30°C-40°C-60°C-90°C ].
Startuitstel Start delay
Use this function to start the washing cycle after a certain amount of time has elapsed. Proceed as follows: 1. Select a programme 2. Press the START DELAY button to choose the delaying time. Set the hours by repeatedly pressing or holding
the START DELAY button. It can be set from 0 up to 24 hours. 3. Press START /PAUSE button to start the delay.
i NOTE!
· When using the START DELAY, preferably use a washing powder instead of a liquid detergent.
Canceling start delay To cancel the START DELAY function, press the START DELAY button, before the washing programme is started, until the display shows 0 H.
Functie OTHER FUNCTIONS
Child lock This function is a safety feature and prevents children from misusing the control panel. To activate the child lock, proceed as follows: · Press the START DELAY and FUNCTION button simultaneously for 3 seconds until the buzzer beeps. The child lock indicator switches on, the display will alternately show [ CL ] and the remaining time, when the appliance is running a washing programme.
Deactivating the child lock · Press the START DELAY and FUNCTION button simultaneously for 3 seconds until the buzzer beeps. The child lock indicator switches off.
i CAUTION!
When the CHILD LOCK is activated, the display will alternately show [ CL ] and the remaining time, when the appliance is running a washing programme. Pressing any button will cause the CHILD LOCK indicator to flash for 3 seconds. When the programme ends, [ CL ] and [ END ] will alternate on the display for 10 seconds, then the indicator will flash for 3 seconds. The Child lock deactivates the function of all buttons except the on/off knob and the child lock button combination! Only the simultaneous pressing of the two buttons START DELAY and FUNCTION can deactivate the child lock. Please deactivate the child lock before selecting a new programme!
Pre-wash Before the main washing cycle starts, the laundry will be extra washed to increase the washing performance. Particularly suitable for heavily soiled laundry with stubborn superficial stains. Note: Don’t forget to also add detergent to compartment I.
Extra rinse The laundry will undergo an extra rinse after selecting this function.
Extra wash The washing time and intensity are increased for a better cleaning effect of heavily soiled laundry.
EN – 42
Hygiene Pro
Hygiene Pro is not an additional function you can choose. It is automatically added to some programmes and the indicator will light up if one of the programmes is selected which include Hygiene Pro. Hygiene Pro cleans your drum and the glass of the inner door with cold water at the end of the washing cycle. This self-clean function keeps your appliance and laundry clean and will be automatically activated during the washing cycle. Check the chapter SELECTING ADDITIONAL FUNCTIONS to see which programmes include the Hygiene Pro function.
Adding laundry
It is possible to add or remove laundry during a washing cycle. After a certain period of time, the appliance door
Was toevoegen 3 sec.
can
be
opened
if
the
water
level
and
temperature
are
below
a
predefined
threshold.
If the conditions below are met, then the electronic door lock is released and the appliance door can be opened:
· water temperature in the drum has to be suitable;
· water level in the drum has to be below a certain value.
i CAUTION!
When the drum is still rolling and there is a large amount of water with high temperature in the drum, the state is unsafe and the door cannot be opened forcefully. · Don’t use the ADDING LAUNDRY function when the water level is over the edge of the inner drum or when the water
temperature is high.
In order to add or remove laundry from the drum during a washing cycle, proceed as follows: 1. Press the START PAUSE button for 3 seconds. 2. Wait until the drums stops rotating. 3. The door will unlock. 4. Open the door and add or remove the laundry. 5. Close the door and press the START PAUSE button. The washing cycle will resume.
i CAUTION!
· If a considerable amount of laundry is added during the washing cycle, the laundry could be washed less effectively, since the appliance initially sensed a lower weight of the laundry load and added a smaller amount of water. Insufficient amount of water relative to the amount of laundry could also cause damage to the laundry (rubbing of dry laundry), and the washing time can be longer.
· The washing time will resume from the point at which the washing programme was interrupted.
Temp °C Muting the buzzer
The sound of the buzzer can be muted. Proceed as follows to mute the buzzer: 3 sec. 1. Choose any programme.
2. Press the TEMPERATURE button for 3 seconds. The buzzer is mute.
Activating the buzzer 1. Choose any programme. 2. Press the TEMPERATURE button for 3 seconds. The buzzer is activated again.
i CAUTION!
· After muting the buzzer function, be aware that there are no sounds activated anymore.
Display The display shows the settings, estimated time remaining, spinning rate, temperature, start delay, options and status messages for your appliance. The display will remain on during the cycle.
Wash time
Start delay
End
Spinning rate
Temperature
Error
EN – 43
PROGRAMMES
Programme 40° Cotton
40° Synthetic
40° Mix 20° Delicate 40° Sportswear 60° Allergy
60° Jeans 40° Fine wash 15 Min. Short 15° 40° Intensive ECO 40-60 40° Wool 40° Bed linen Spin & drain Rinse & spin
Max. load 8,0 kg
4,0 kg
8,0 kg 4,0 kg 4,0 kg 8,0 kg
8,0 kg 2,0 kg 2,0 kg 8,0 kg 2,0 kg 2,0 kg 8,0 kg 8,0 kg 8,0 kg
Programme description
Washing programme for normally or heavily soiled laundry, white or coloured. The temperature can be set separately; therfore, observe the instructions indicated on the clothing. Spinning rate and temperature can be set to your preference. Washing programme for synthetic clothes, for example: shirts, coats or blending. While washing knitted textiles, reduce the detergent quantity, as it will easily form bubbles due to its loose thread construction. Spinning rate and temperature can be set to your preference. Washing programme for clothing made of mixed fibres or viscose and cotton. Spinning rate and temperature can be set to your preference. 20°C is the default temperature. Cold water is also an option. Can be used for washing silk or garments that require manual washing. Spinning rate can be set to your preference. Washing programme for slightly soiled sportswear made of cotton, microfibres and synthetic fibres, at lower spinning rates. Spinning rate and temperature can be set to your preference. Washing programme used to wash normal to heavily soiled clothes that require special care, such as clothes for people with highly sensitive skin or skin allergies. It is recommended to turn the clothing inside out, as this will thoroughly wash out skin or other residues. Spinning rate and temperature can be set to your preference. Special programme for jeans. Spinning rate and temperature can be set to your preference. Washing programme for delicate clothing made of mixed fibres or viscose and cotton which should be washed with care. Spinning rate and temperature can be set to your preference. Extra short washing programme suitable for a small amount of lightly soiled clothes. Spinning rate can not be changed. To increase the washing effects, the washing time will be increased. Spinning rate and temperature can be set to your preference. Washing programme, which is able to clean normally soiled cotton laundry which can be washed at 40°C or 60°C, according to the care label. Spinning rate and temperature can not be changed. Gentle washing programme for washing wool. Spinning rate and temperature can be set to your preference. Washing programma specially designed for washing duvets. Spinning rate and temperature can be set to your preference. Extra spin cycle with selected spinning rate. Spinning rate can be set to your preference. For an extra rinse cycle and spin. Spinning rate can be set to your preference .
1. The ECO 40-60 programme is able to clean normally soiled cotton laundry declared to be washable at 40°C or 60°C, together in the same cycle. This programme is used to assess the compliance with the regulation (EU) 2019/2023.
2. The most efficient programmes in terms of energy consumption are generally those that perform at lowe temperatures and longer duration.
3. Loading the household washing machine up to the capacity indicated for the respective programmes will contribute to energy and water savings.
4. Noise and remaining moisture content are influenced by the spinning speed: the higher the spinning speed in the spinning phase, the higher the noise and the lower the remaining moisture content.
i CAUTION!
· If there is a power failure in the power supply while the appliance is operating, a special memory stores the selected programme. The appliance will continue the programme when the power supply is re-established.
EN – 44
SELECTING ADDITIONAL FUNCTIONS
An additional function can be added to the main washing programme before pressing the Start button. Select a programme and then press the function button to add one or more desired additional function(s).
Defautlt temperature and programme
Default spinning rate in rpm
Delay
Pre-wash Extra rinse Extra Wash
40° Cotton 40° Synthetic 40° Mix 20° Delicate 40° Sportswear 60° Allergy 60° Jeans 40° Fine wash 15 Min. Short 15° 40° Intensive ECO 40-60 40° Wool 40° Bed linen Spin only Rinse & spin
1400 1200 800 1000 800 800 1000 800 800 800 1400 600 1000 1000 1000
i
· For the maximum spinning rate, programme time, and other details of the ECO 40-60 programme, and other details of the ECO 40-60 programme, please refer to the content on the Product Fiche page.
· The table shows which cycle offers which options for adjustment. · Adding an additional function will prolong the programme time. · Keep pressing the function button to make the desired selection of additional functions.
Manual interruption To stop and cancel a washing programme, press the START PAUSE button and hold it for 3 seconds. Select the programme SPIN & DRAIN and press the START PAUSE button. The appliance will run the programme and at the end of the programme, the appliance pumps the water out of the drum. When the water is pumped out, the door will be unlocked.
PAUSE button The washing programme can always be stopped by pressing the START PAUSE button. The washing programme is temporarily paused when the time remaining until programme completion is flashing on the display unit. If there is no water in the drum and water temperature is not too high, then the door will unlock after a certain period of time, and they can be opened. To resume the washing program, first close the door and then press the START PAUSE button.
ERRORS
In case of an error or fault, the programme will be interrupted. An acoustic signal will warn about such occurrence and the error will be flashing on the display [ E:XX ]. See the TROUBLESHOOTING TABLE for more information.
Power supply failure The washing programme can always be stopped by pressing the START PAUSE button. The washing programme is temporarily paused when the time remaining until programme completion is flashing on the display unit. If there is no water in the drum and water temperature is not too high, then the door will unlock after a certain period of time, and they can be opened. To resume the washing program, first close the door and then press the START PAUSE button.
EN – 45
· PROGRAMME DURATION / TEMPERATURE / SPINNING RATE TABLE
Programme
40° Cotton 40° Synthetic 40° Mix 20° Delicate 40° Sportswear 60° Allergy 60° Jeans 40° Fine wash 15 Min. Short 15° 40° Intensive ECO 40-60 40° Wool 40° Bed linen Spin & drain Rinse & spin
Max. load 8,0 kg 4,0 kg 8,0 kg 4,0 kg 4,0 kg 8,0 kg 8,0 kg 2,0 kg 2,0 kg 8,0 kg 2,0 kg 2,0 kg 8,0 kg 8,0 kg 8,0 kg
Default time 3:49 3:28 1:30 1:11 1:16 1:52 1:56 0:45 0:15 3:48 3:32 1:07 1:48 0:12 0:30
Default temp
40°C 40°C 40°C 20°C 40°C 60°C 60°C 40°C
-40°C 40°C 40°C 40°C
—
Default RPM Temperature options
1400 RPM 1200 RPM 800 RPM 1000 RPM 800 RPM 800 RPM 1000 RPM 800 RPM 800 RPM 800 RPM 1400 RPM 600 RPM 1000 RPM 1000 RPM 1000 RPM
–/20/30/40/60/90°C –/20/30/40/60°C –/20/30/40/60/90°C –/20°C –/20/30/40°C –/20/30/40/60/90°C –/20/30/40/60/90°C –/20/30/40/60°C –/20/30°C 40/60°C default 40°C –/20/30/40°C –/20/30/40/60°C not applicable not applicable
Max. RPM 1400 1200 1400 1200 1400 1200 1200 1400 800 1400 1400 800 1400 1400 1400
i CAUTION!
· Depending on the chosen temperature the washing time will change, shorter or longer.
EN – 46
MAINTENANCE
· CLEANING AND CARE
WARNING! · Always unplug the appliance and close the water tap before cleaning and maintenance.
CLEANING THE EXTERIOR OF THE APPLIANCE Proper maintenance on the appliance can extend its useful life. Clean the appliances exterior and control panel using a soft damp cloth and water. If necessary, a diluted non-abrasive neutral cleaning agent can be used to clean the appliance.
i CAUTION!
· Do not use abrasive or caustic agents, formic acids or its diluted solvents or similar substances, like alcohol or chemical products that could damage the appliance. Please observe the recommendations and warnings provided by the cleaning agent manufacturer.
· If there is any water overflow, use a cloth to wipe it off immediately. · Do not clean the appliance with a jet of water. · Do not use a sharp item to clean the appliance.
CLEANING THE DRUM Any rust stains left inside the drum by metal articles must be removed immediately using chlorine-free detergents. Do not use steel wool for cleaning the drum!
i NOTE!
· Keep laundry not near the appliance while cleaning the drum. · When you often wash at 40°C or lower temperatures, or when you haven’t used the appliance for a longer period of time,
clean the drum. Run the Cotton programme at 90°C without laundry. Preferably use a powder detergent.
CLEANING THE RUBBER DOOR GASKET AND THE GLASS Wipe the glass and rubber door gasket after each wash to remove lint and stains and to extend its useful life. If lint builds up, it can cause leakages. Check the rubber door gasket to remove any coins, buttons or other objects after each wash. Clean the rubber door gasket and the glass once a month to ensure normal operation of the appliance.
CLEANING THE INLET FILTER
i NOTE!
· A diminishing water flow is a sign that the inlet filter needs to be cleaned. · Cleaning the inlet filter every 3 months ensures normal operation of the appliance.
Cleaning the inlet filter in the water tap 1. Close the water tap and remove the water supply hose. 2. Clean the inlet filter with a brush under running water. 3. Reconnect the water supply hose to the water tap.
EN – 47
Cleaning the inlet filter at the back of the appliance 1. Close the water tap. 2. Unscrew the water supply hose from the back of the appliance. 3. Pull out the filter with a long nose plier and clean the filter using a brush
under running water. 4. Reinstall the filter to the water inlet and reconnect the water supply hose. 5. Open the water tap.
CLEANING THE DISPENSER TRAY 1. Open the dispenser tray and press down the release [ ] on the cover of
the softener compartment and pull the dispenser tray out of the recess. 2. Lift the cover of the softener compartment of the dispenser tray. Wash
both items, the cover and the complete dispenser tray under running water. Make sure not to forget to clean the drain hole of the softener compartment and the openings at the bottom of the dispenser tray. 3. Clean the inside of the recess with a brush. 4. Reinstall the cover of the softener compartment and push the dispenser tray back in the recess.
i
· Do not use abrasive or caustic agents to clean plastic parts. · Cleaning the dispenser tray every 3 months ensures normal operation
of the appliance.
CLEANING THE DRAIN PUMP FILTER The pump filter can filter the yarns and small foreign matters from the washing. Especially after washing fleecy, woolly or very old laundry.
WARNING!
· Unplug the appliance to avoid electrical shock before cleaning. · Be careful of hot water! · Allow detergent solution to cool down. · During cleaning, some water may be spilled. It is recommended to place an absorbent cloth on the floor.
Open the pump filter cap.
Turn 90°, pull out the emergy discharge hose and remove the cap.
When there’s no more water coming out, put the emergy discharge hose back.
Open the pump filter by turning Remove any objects and it counter clockwise. Clean the impurities from the filter pump filter under running water. housing.
Place the pump filter back and turn it clockwise to lock it. Close the pump filter cap.
EN – 48
WARNING!
· Never remove the pump filter cap during a washing cycle. Always wait until the appliance has finished the cycle, and is empty.
· When the appliance is in use and depending on the selected programme, there can be hot water in the pump. · When replacing the pump filter cap, ensure it is securely snapped in place.
OPENING THE DOOR MANUALLY IN CASE OF A POWER OUTAGE – IN CASE OF A PROGRAMME PAUSE In case of a power outage during a washing cycle, the programme will resume after the power is restored in most cases. If not, you can manually open the door and remove the laundry.
WARNING!
· If there is still water in the appliance after a power outage, make sure not to open the door before you manually drain the water from the appliance via the pump filter (see the paragraph CLEANING THE DRAIN PUMP FILTER).
1. When the programme is paused or interrupted, open the pump filter cap. 2. The door of the appliance can only be opened by simultaneously pulling the special lever – next to the filter –
and the door handle. 3. Open the door manually by pulling the handle towards you.
· TROUBLE SHOOTING
The appliance will automatically control the operation of particular functions during the washing cycle. If any irregularity occurs, this will be identified by reporting (E:XX) on the display. The appliance will report the error until it is switched off. Disturbances from the environment (e.g. the power grid) may result in various error reports. In such case:
· Switch off the appliance and wait for a few seconds. · Switch the appliance on and repeat the washing programme. · Most errors during operation can be solved by the user. · If the error persists, call the customer care service. · Repairs may only be carried out by an adequately trained person. · Repair or any warranty claim resulting from incorrect connection or use of the appliance shall not be covered by the
warranty. In such cases, the costs of repair shall be charged to the user. · The warranty does not cover the errors of failures resulting from disturbances from the environment (lighting strike,
power grid failures, natural disasters etc. ).
TROUBLE SHOOTING TABLE Description The appliance does not start
The door can’t be opened The appliance does not fill with water.
Water leakage
Detergent residues in the dispenser tray Indicator or display does not work
Possible cause The door is not closed properly. Clothes are stuck. The safety protection is activated. The water tap is not open. A shut-off system in the aquastop is activated. The internal tube or the water supply hose is damaged.
The connections are not tight enough.
The detergent is damp and/or clotted.
What to do?
Close the door properly and restart. Check the laundry.
Disconnect the power and restart.
Open the water tap completely. When the aquastop is acitvated, it cuts the water supply off. The control glass on the aquastop will be red. Replace the water supply hose.
Check and fasten the water supply hose. Check and clean the water discharge hose.
Clean and wipe the dispenser tray dry.
PC board is not connected or harness has connection problems.
EN – 49
Switch off the power and check if the mains plug is connected properly.
Description Abnormal noise
Possible cause The transport bolts are still in place.
The floor is not solid or level
What to do?
Check if the transport bolts have been removed. Make sure the appliance is installed on a solid and level floor.
ERROR CODE TABLE
Description
Possible cause
What to do?
Water injecting problem during the wash cycle Check if the water pressure is high enough. Straighten the water supply hose. Clean the inlet filter.
Water overflow
Restart the appliance.
Overtime water draining
Check the water discharge hose for blockage.
The door is not closed properly
Close the door properly and restart.
Others
Restart the appliance. If the problem persists, please contact the customer service.
· CUSTOMER SERVICE
Spare parts for your appliance are available for a minimum of 10 years. In case of questions, please contact the customer service.
WARNING!
Risk of electric shock · Never try to repair an appliance which is defective or presumed to be defective. You may put your own and future users’
lives in danger. Only authorised specialists are allowed to carry out this repair work. · Improper repair will void the warranty and subsequent damages can’t be recognized!
TRANSPORT IMPORTANT STEPS WHEN MOVING THE APPLIANCE · Unplug the appliance and close the water tap. · Check, if the door and the dispenser tray are closed properly. · Remove the water supply hose and the water discharge hose from the house installations. · Let the water drain completely from the appliance. · IMPORTANT: Re-install the 4 transport bolts in the back of the appliance. · The appliance is heavy. Transport with care. Never hold any protruding part of the appliance when lifting.
The door of the appliance cannot be used as a handle.
· TECHNICAL SPECIFICATIONS
Model
Washing capacity Power supply Rated power MAX. current Standard water pressure Dimension (WxDxH in mm) Nett weight
TWM8001W 8.0 kg 220-240V~, 50Hz 2000 W 10A 0.05 MPa – 1 MPa 595 x 565 x 850 68 kg
595
565
850
EN – 50
· PRODUCT INFORMATION SHEET ACC. REGULATION (EU) 2019/2023
Supplier’s name or trade mark: Tomado
Supplier’s address (b): Postbus 159, 6920 AD, Duiven, The Netherlands
Model identifier: TWM8001W
General product parameters:
Parameter
Value
Parameter
Value
Height
85
Rated capacity (a) (kg)
8.0 kg
Dimensions in cm
Width
60
Depth
57
EEI w
(a)
60.0
Energy efficiency class (a)
B
Washing efficiency index (a)
1.031
Rinse effectiveness (g/kg) (a)
5.0
Energy consumption in kWh
Water consumption in litre
per cycle, based on the eco
per cycle, based on the eco
40-60 programme. Actual energy consumption will depend on
0.545
40-60 programme. Actual water consumption will depend on how
48
how the appliance is used.
the appliance is used and on the
hardness of water.
Rated capacity
34
Maximum temperature inside the treated textile (a) (°C)
Half
29
Weighted remaining moisture content (a) (%)
53.9
Quarter
21
Rated capacity
1400
Spin speed (a) (rpm)
Half
1400
Spin-drying efficiency class (a)
B
Quarter
1400
Programme duration (a) (h:min) Rated capacity
3 : 38
Half
2 : 48 Type
free-standing
Quarter
2 : 48
Airborne acoustical noise
Airborne acoustical noise
emissions in the spinning phase
76
emissions class (a) (spinning phase)
B
(a) (dB(A) re 1 pW)
Off-mode (W)
0.50
Standby mode (W)
N/A
Delay start (W) (if applicable)
4.00
Networked standby (W)
N/A
(if applicable)
Minimum duration of the guarantee offered by the supplier (b): 2 years
This product has been designed to release silver ions during
NO
the washing cycle
Additional information:
Weblink to the supplier’s website, where the information in point 9 of Annex II to Commision Regulation (EU) 2019/2023 (1) (b) is found: https://www.tomado.com/
(a) for the eco 40-60 programme (b) changes to these items shall not be considered relevant for the purposes of paragraph 4 of Article 4 of Regulation (EU) 2017/1369 (C) if the product database automatically generates the definitive content of this cell the supplier shall not enter these data
RECYCLING
This symbol means that this product should not be disposed of with regular household waste (2012/19/EU). Observe the rules that apply in your country for the separated collection of electric and electronic products. Correct disposal of the product prevents negative consequences for the environment and for public health. The packaging material of this product can be recycled 100%, return packaging material separately.
EN – 51
In diesem Dokument verwendete Symbole
i
Informationen, Ratschläge, Tipps oder Empfehlungen
Warnung
Allgemeine Gefahr
Warnung
Stromschlaggefahr
Warnung
Vorsicht, heiße Oberfläche
Warnung
Feuergefahr
Lesen Sie unbedingt alle Anweisungen sorgfältig durch.
DE – 52
SICHERHEITSHINWEISE – DE Lesen Sie diese Anweisungen, bevor Sie das Gerät bedienen und bewahren Sie diese auf, sodass Sie sie später zurate ziehen können. Verwenden Sie die Waschmaschine nicht, bevor Sie die Anweisungen für die erste Verwendung gelesen haben. · Kontrollieren Sie die Verpackung und das Gerät auf Schäden, die während des Transports entstanden sind. Verwenden Sie niemals ein beschädigtes Gerät; nehmen Sie in dem Fall Kontakt mit Ihrem Lieferanten auf. · Nichtbeachten der Gebrauchsanweisungen oder eine unsachgemäße Verwendung des Geräts kann zu Schäden an der Wäsche oder dem Gerät oder sogar zu Verletzungen beim Benutzer führen. Bewahren Sie die Anleitung an einem praktischen Ort in der Nähe des Geräts auf. AUFSTELLUNGSORT UND UMGEBUNGSBEDINGUNGEN · Stellen Sie das Gerät nicht in der Nähe von Wärmequellen und direkter Sonneneinstrahlung auf; andernfalls besteht das Risiko, dass Kunststoff- und Gummiteile angegriffen werden. · Installieren Sie das Gerät nicht in einem Raum, in dem die Temperatur unter 5°C abfallen kann. Wenn Wasser im Gerät gefriert, können Teile des Geräts beschädigt werden. Installieren Sie das Gerät nicht in feuchten Umgebungen oder Räumen, in denen explosive oder giftige Gase vorkommen. Bei auslaufendem Wasser oder Wasserspritzern müssen Sie das Gerät an der Luft trocknen lassen. · Verwenden Sie niemals brennbare Sprays oder andere brennbare Substanzen in der Nähe des Geräts. INSTALLATION · Stellen Sie das Gerät auf ein ebenes, stabiles und festes Fundament (aus Beton). · Passen Sie die verstellbaren Füße des Geräts so an, dass es genau waagerecht ausgerichtet ist und stabil steht. · Vor der ersten Verwendung des Geräts müssen die Transportschrauben entfernt werden; das Einschalten eines
DE – 53
verriegelten Geräts kann zu schweren Schäden führen. Der
Hersteller haftet in solchen Fällen nicht für eventuelle Schäden.
· Warten Sie mindestens 2 Stunden, bevor Sie das Gerät an das Stromnetz anschließen. Dadurch hat das Gerät Zeit,
Raumtemperatur anzunehmen.
· Die Tür lässt sich während des Waschens nicht öffnen. · Bevor zum ersten Mal Wäsche gewaschen wird, muss das Gerät
einmal mit einem kompletten Programm, aber ohne Wäsche
laufen. · Nach dem Waschgang schließen Sie den Wasserhahn und ziehen
Sie den Stecker aus der Steckdose. Ziehen Sie niemals direkt am
Kabel. · Entsorgen Sie das Verpackungsmaterial gemäß den vor Ort
geltenden Vorschriften. Halten Sie das Verpackungsmaterial von
Kindern fern. Es besteht Erstickungsgefahr. · Bevor Sie das Gerät verwenden, muss es kalibriert werden.
Befolgen Sie dazu die Anweisungen in dieser Anleitung.
ELEKTROINSTALLATION
· Schließen Sie das Gerät an eine geerdete Steckdose mit einer
Sicherung an, die den auf dem Typenschild angegebenen Werten entspricht.
· Achten Sie besonders darauf, dass das Gerät nicht auf das
Stromkabel gestellt wird. Kontrollieren Sie dies nach dem Aufstellen noch einmal.
Um Gefahren zu vermeiden, darf ein beschädigtes Stromkabel
nur vom Hersteller, seinem Kundendienstvertreter oder Personen mit vergleichbarer Qualifikation ausgetauscht werden.
Wenn das Gerät beschädigt ist, darf es nicht verwendet werden,
bevor es vom Hersteller, seinem Kundendienstvertreter oder Personen mit vergleichbarer Qualifikation repariert wurde.
· Das Gerät darf nicht mit einem Verlängerungskabel an das
Stromnetz angeschlossen werden. Schließen Sie das Gerät nicht mit einem externen
Schaltgerät (wie einem programmierbaren Zeitschalter) an die
Stromversorgung an und schließen Sie es auch nicht an eine Stromversorgung an, die regelmäßig vom Stromversorger ein- und
ausgeschaltet wird.
DE – 54
· Schließen Sie das Gerät nicht an eine Steckdose an, die ausschließlich für Rasierer oder Haartrockner ausgelegt ist.
· Der Netzstecker muss nach der Installation zugänglich sein. Verwenden Sie niemals ein Verlängerungskabel oder eine
Mehrfachsteckdose, um den Anschluss herzustellen. Ziehen Sie den Stecker nicht aus der Steckdose, wenn
brennbares Gas vorhanden ist. Ziehen Sie den Stecker niemals mit nassen Händen aus der
Steckdose. Wenn das Gerät nicht verwendet wird, müssen Sie immer den
Stecker herausziehen und den Wasserhahn schließen. · Wasser- und Stromanschluss müssen von einem entsprechend
ausgebildeten Techniker oder Spezialisten ausgeführt werden. · Alle sicherheits- oder leistungsbezogenen Reparaturen und
Wartungsarbeiten müssen von ausgebildeten Spezialisten ausgeführt werden. · Bei einem Defekt dürfen nur zugelassene Ersatzteile von autorisierten Herstellern verwendet werden. · Wenn das Gerät falsch angeschlossen oder verwendet wird oder von einer unbefugten Person gewartet wird, haftet Tomado nicht für eventuelle Schäden und diese Schäden werden nicht durch die Gewährleistung abgedeckt. WASSERINSTALLATION · Das Gerät ist mit einem einzigen Einlassventil ausgeführt und darf nur an die Kaltwasserversorgung angeschlossen werden. · Verwenden Sie beim Anschließen des Geräts an die Wasserversorgung den Wasserzulaufschlauch und die Dichtungen, die im Lieferumfang enthalten sind. Der Wasserdruck muss zwischen 0,05 und 1,0 MPa (0,5 – 10 bar) liegen. · Schließen Sie das Gerät immer mit dem im Lieferumfang enthaltenen neuen Wasserzulaufschlauch an die Wasserversorgung an; ein alter Wasserzulaufschlauch darf niemals wiederverwendet werden. · Das Ende des Wasserablaufschlauchs muss in eine Abflussleitung verlegt werden.
DE – 55
· Überprüfen Sie die Anschlüsse des Wasserzulaufschlauchs, des Wasserhahns und des Wasserablaufschlauchs auf mögliche Probleme aufgrund von Änderungen beim Wasserdruck. Wenn sich die Anschlüsse lösen oder wenn diese undicht werden, müssen Sie den Wasserhahn schließen und eine Reparatur ausführen. Verwenden Sie das Gerät nicht, bevor die Rohre und Schläuche ordnungsgemäß von befugten Personen installiert wurden. Bei höheren Waschtemperaturen wird das Glas in der Tür warm. Seien Sie vorsichtig, sodass Sie sich nicht verbrennen. Halten Sie Kinder und Tiere von einer laufenden Waschmaschine fern. Entfernen Sie den Filter der Ablaufpumpe nicht, während sich noch Wasser im Gerät befindet. Andernfalls können große Mengen Wasser auslaufen und wenn das Wasser heiß ist, besteht Verbrühungsgefahr.
WASSERÜBERLAUFSCHUTZ · Wenn der Wasserstand im Gerät über den normalen Pegel
ansteigt, wird der Schutz gegen einen zu hohen Wasserstand (Überlaufschutz) aktiviert. Dieser schließt den Wasserhahn und beginnt mit dem Abpumpen des Wassers. Das Programm wird unterbrochen und es wird ein Fehler gemeldet. BEI KINDERN IM HAUSHALT ZU BEACHTEN · Bevor Sie die Tür des Geräts schließen und das Programm ablaufen lassen, müssen Sie sich vergewissern, dass sich ausschließlich Wäsche in der Trommel befindet (und nicht zum Beispiel ein Kind oder ein Tier in die Trommel geklettert ist). · Bewahren Sie Waschmittel und Weichspüler für Kinder unzugänglich auf. · Lassen Sie Kinder bis einschließlich 3 Jahren nicht in die Nähe des Geräts kommen, es sei denn, diese werden kontinuierlich beaufsichtigt. · Das Gerät darf von Kindern ab 8 Jahren und von Personen mit eingeschränkter körperlicher, sensorischer oder geistiger Leistungsfähigkeit oder einem Mangel an Erfahrung oder Wissen verwendet werden, wenn das Gerät von ihnen unter Aufsicht verwendet wird oder sie über die sichere Verwendung des Geräts instruiert wurden und die sich aus einer unsachgemäßen
DE – 56
Verwendung ergebenden Gefahren verstehen. Kinder dürfen nicht mit dem Gerät spielen. · Das Gerät darf nicht von Kindern gereinigt oder gewartet werden, es sei denn, dies geschieht unter Aufsicht. · Kinder müssen beaufsichtigt werden, sodass sie nicht mit dem Gerät spielen. · Klettern Sie nicht auf das Gerät und setzen Sie sich nicht darauf. · Das Gerät erfüllt alle relevanten Sicherheitsnormen. BETRIEB UND WARTUNG
Verwenden Sie keine Waschmittel, die Lösungsmittel enthalten; andernfalls können giftige Gase freigesetzt werden, Schäden am Gerät verursacht werden und es besteht Feuer- und Explosionsgefahr. · Verwenden Sie das Gerät nur zum Waschen von Wäsche, in Übereinstimmung mit der Beschreibung in der Bedienungsanleitung. Das Gerät ist nicht für chemische Reinigung ausgelegt. · Verwenden Sie nur für Waschmaschinen und die Wäschepflege geeignete Waschmittel. Tomado haftet nicht für Schäden oder Verfärbungen bei Dichtungen und Kunststoffteilen, die durch den falschen Gebrauch von Bleichmitteln oder Farbstoffen verursacht werden. · Bei einem Defekt dürfen nur zugelassene Ersatzteile von autorisierten Herstellern verwendet werden. · Kontrolliere Sie, dass alle Taschen leer sind. Scharfe und harte Teile wie Münzen, Broschen/Nadeln, Nägel, Schrauben, Steine usw. können dieses Gerät schwer beschädigen. · Entfernen Sie alle Gegenstände aus den Taschen (z. B. Feuerzeuge und Streichhölzer), bevor Sie das Gerät verwenden. · Weichspüler oder vergleichbare Produkte müssen konform ihren Anweisungen verwendet werden. · Versuchen Sie niemals, die Tür mit Gewalt zu öffnen. Die Tür wird kurz nach dem Ende eines Waschgangs entriegelt. · Schließen Sie die Tür nicht mit übermäßig viel Kraft. Wenn sich die Tür schwer schließen lässt, müssen Sie kontrollieren, ob die Kleidung richtig in die Trommel gelegt und darin verteilt wurde.
DE – 57
· Wenn das Gerät falsch angeschlossen oder verwendet wird oder von einer unbefugten Person gewartet wird, trägt der Benutzer die Kosten für eventuelle Schäden und die Schäden werden nicht durch die Gewährleistung abgedeckt.
· Verwenden Sie zur Reinigung des Geräts ausschließlich nichtätzende Entkalkungsmittel. Halten Sie die Anweisungen des Herstellers des betreffenden Reinigungsmittels ein. Führen Sie nach dem Entkalken mehrere Spülzyklen aus, sodass alle Säurereste (z. B. Essig usw.) entfernt werden.
· Die Gewährleistung bezieht sich nicht auf Verbrauchsteile, geringfügige Farbabweichungen, erhöhte Lärmpegel, die auf das Alter des Geräts zurückzuführen sind und die Funktion des Geräts nicht beeinträchtigen, sowie ästhetische Mängel bei Komponenten, die die Funktion und Sicherheit des Geräts nicht beeinträchtigen.
TRANSPORT/UMSTELLEN NACH DER INSTALLATION · Wenn Sie das Gerät transportieren/umstellen möchten, nachdem
es installiert wurde, muss es verriegelt werden, indem mindestens eine Transportschraube angebracht wird. Trennen Sie das Gerät vom Stromnetz ab, bevor die Transportschraube eingeschraubt wird. · Angesammeltes Wasser muss aus dem Gerät abgelassen werden. · Das Gerät ist schwer. Transportieren Sie es vorsichtig. Heben Sie das Gerät niemals an einem hervorstehenden Teil an. Die Tür des Geräts darf nicht als Griff verwendet werden. BESTIMMUNGSGEMÄSSE VERWENDUNG · Das Gerät ist nur für den Hausgebrauch ausgelegt. Wenn das Gerät für professionelle oder kommerzielle Zwecke oder für andere Zwecke verwendet wird, die über den normalen Gebrauch in einem Haushalt hinausgehen, oder wenn das Gerät von einer Person verwendet wird, die kein Verbraucher ist, entspricht der Gewährleistungszeitraum dem kürzesten von der geltenden Gesetzgebung vorgeschriebenen Gewährleistungszeitraum. · Dieses Gerät ist für den Gebrauch in Haushalten oder für einen ähnlichen Gebrauch ausgelegt, z. B.: – in Personalküchen, in Geschäften, Büros und anderen
Arbeits-/Unterkunftsbereichen;
DE – 58
– auf bäuerlichen Anwesen; – von Gästen in Hotels, Motels und anderen Unterkunftsbereichen; – in Bed-and-Breakfast-Unterkünften; – in Räumen für die gemeinschaftliche Nutzung in Wohnblocks
oder in Waschsalons. · Das Gerät ist nicht für den Gebrauch durch Personen
(einschließlich Kindern) mit eingeschränkter körperlicher oder mentaler Leistungsfähigkeit oder einem Mangel an Erfahrung oder Wissen ausgelegt. Diese Personen müssen von einer Person, die für ihre Sicherheit verantwortlich ist, in den Gebrauch des Geräts eingewiesen werden. ALTGERÄTE · Bauen Sie die Tür aus oder deaktivieren Sie das Schloss, wenn Sie das Gerät entsorgen. Es ist schon vorgekommen, dass Kinder in Altgeräte geklettert sind und sich dort eingeschlossen haben. Um eine derart gefährliche Situation zu verhindern, müssen Sie das Schloss des Geräts unbrauchbar machen und die Stromkabel abtrennen. Dieses Symbol weist darauf hin, dass dieses Produkt in der gesamten EU nicht mit dem normalen Hausmüll entsorgt werden darf. Um mögliche Umwelt- und Gesundheitsschäden durch unkontrollierte Abfallentsorgung zu vermeiden, müssen Sie es verantwortungsbewusst recyceln, um die nachhaltige Wiederverwendung von Rohstoffen zu fördern. Für die Rückgabe Ihres Altgerätes nutzen Sie bitte die länderspezifischen Rückgabeund Sammelsysteme oder wenden Sie sich an den Händler, bei dem Sie das Produkt gekauft haben. Dieser kann dieses Produkt annehmen und einer umweltfreundlichen Wiederverwertung zuführen.
DE – 59
1. Obere Abdeckung 2. Bedienfeld 3. Stromkabel 4. Trommel 5. Pumpenfilter 6. Wasserablaufschlauch 7. Verstellbare Füße 8. Tür 9. Einspülschale 10. Wasserzulaufschlauch
PRODUKTBESCHREIBUNG
1
10
2 3 9
4
8 5
6
7
4 x Abdeckkappe 1 x Zulaufschlauch für kaltes Wasser
1 x Bedienungsanleitung
DE – 60
INSTALLATION UND ANSCHLUSS
FÜR DIE INSTALLATION BENÖTIGTER PLATZ
WARNUNG!
· Stabilität ist ein wichtiger Faktor, um zu verhindern, dass sich das Produkt durch den Aufstellort bewegt! Stellen Sie sicher, dass Sie das Gerät auf einem stabilen Untergrund aufstellen und in Längs- und Querrichtung präzise ausrichten, indem Sie die verstellbaren Füße drehen.
· Vergewissern Sie sich, dass das Gerät nicht auf dem Stromkabel steht. · Vergewissern Sie sich, dass der minimal benötigte Abstand zu den Wänden eingehalten wird
(siehe die Abbildung).
W 20 mm
i Der Raum, in dem das Gerät aufgestellt wird, muss folgende Anforderungen erfüllen:
1. Er ist trocken und hat ein ebenes und stabiles Fundament. 2. Direktes Sonnenlicht wird vermieden. 3. Eine ausreichende Be-/Entlüftung ist gewährleistet. 4. Die Raumtemperatur liegt über 0 °C. 5. Das Gerät ist weit von Wärmequellen wie Kohle-, Gas- oder Holzbrennern entfernt.
DAS GERÄT AUSPACKEN
WARNUNG!
· Das Gerät muss von mindestens zwei Personen transportiert/umgestellt werden. Tragen Sie dabei Schutzkleidung, zum Beispiel robuste Handschuhe.
· Verpackungsmaterial (z. B. Plastikbeutel/Folien, Styropor) kann für Kinder gefährlich sein. · Es besteht Erstickungsgefahr! Halten Sie die gesamte Verpackung von Kindern fern.
1. Entfernen Sie den Pappkarton und die Styropor-Verpackung.
2. Heben Sie die Waschmaschine an und entfernen Sie die Verpackung von der Unterseite.
Kontrollieren Sie, ob das kleine dreieckige Schaumstoffstück [A] gemeinsam mit der unteren
Verpackung entfernt wurde. Wenn dies nicht so ist, legen Sie das Gerät auf eine Seite und
A
entfernen Sie dieses Stück vorsichtig mit der Hand.
3. Entfernen Sie das Klebeband, mit dem das Stromkabel und der Wasserablaufschlauch befestigt sind.
4. Nehmen Sie den Wasserzulaufschlauch aus der Trommel.
DIE TRANSPORTSCHRAUBEN ENTFERNEN
WARNUNG!
Vor der ersten Verwendung des Geräts müssen die Transportschrauben aus der Rückseite des Geräts entfernt werden. Ein verriegeltes Gerät kann beschädigt werden, wenn es zum ersten Mal eingeschaltet wird. Diese Art von Schäden wird nicht von der Gewährleistung abgedeckt!
Lösen Sie die 4 Transportschrauben mit einem Schraubenschlüssel.
Entfernen Sie die Schrauben, inklusive der Gummiteile, und bewahren Sie diese für eine zukünftige Verwendung auf.
Decken Sie die Öffnungen mit den Abdeckkappen ab.
DE – 61
DAS GERÄT WAAGERECHT AUSRICHTEN
WARNUNG!
· Die Sicherungsmuttern müssen bei allen vier Füßen fest gegen das Gehäuse geschraubt werden; damit wird sichergestellt, dass das Gerät fest und sicher steht.
Richten Sie das Gerät mit einer Wasserwaage und einem Schraubenschlüssel waagerecht aus. 1. Lösen Sie die Sicherungsmutter mit einem Schraubenschlüssel. 2. Drehen Sie den Fuß heraus, bis er den Boden berührt. 3. Richten Sie das Gerät in Längs- und Querrichtung waagerecht aus, indem Sie die
verstellbaren Füße einstellen. 4. Wenn die Füße richtig eingestellt sind, ziehen Sie die Sicherungsmuttern mit einem
Schraubenschlüssel an, bis diese gegen das Gehäuse anliegen.
DEN WASSERZULAUFSCHLAUCH ANSCHLIESSEN
WARNUNG!
Um Undichtigkeiten oder Wasserschäden zu vermeiden, müssen Sie unbedingt die Anweisungen in diesem Kapitel befolgen. · Vergewissern Sie sich, dass der Wasserzulaufschlauch nicht geknickt, zusammengedrückt oder verändert ist.
i Drehen Sie den Wasserzulaufschlauch mit der Hand fest, und zwar fest genug,
um eine gute Dichtung zu gewährleisten. Nach dem Anschließen des Schlauchs muss die Dichtung auf Undichtigkeiten kontrolliert werden. Verwenden Sie zum Anschließen des Wasserzulaufschlauchs niemals eine Zange oder ein ähnliches Werkzeug; andernfalls kann das Gewinde der Mutter beschädigt werden. 1. Schließen Sie den Wasserzulaufschlauch an das Wassereinlassventil auf der
Rückseite des Geräts an. 2. Schließen Sie das andere Ende des Wasserzulaufschlauchs mit dem Aquastop
(dem Überlaufschutz) an den Kaltwasserhahn an.
DEN WASSERABLAUFSCHLAUCH ANSCHLIESSEN
WARNUNG!
· Vergewissern Sie sich, dass Sie den Wasserablaufschlauch nicht knicken oder (stark) in die Länge ziehen. · Schließen Sie den Wasserablaufschlauch korrekt an, andernfalls können Schäden durch auslaufendes Wasser entstehen.
Leiten Sie den Wasserablaufschlauch in ein Abflussrohr, ein Waschbecken oder einen Bodenablauf ein. Seien Sie vorsichtig und achten Sie darauf, dass Sie den Wasserablaufschlauch nicht zu tief in den Ablauf stecken. Andernfalls kann das Abwasser nicht ungehindert ablaufen. Der vertikale Abstand vom Boden zum Ende des Ablaufschlauchs darf nicht größer als 100 cm und nicht kleiner als 60 cm sein.
Max. 100 cm Min. 60 cm Max. 100 cm Max. 100 cm Min. 60 cm
Bodenablauf
1. In einen Bodenablauf gesteckter Wasserablaufschlauch.
2. An ein Abflussrohr angeschlossener Wasserablaufschlauch.
DE – 62
DAS GERÄT AN DAS STROMNETZ ANSCHLIESSEN
WARNUNG! · Warten Sie mindestens 2 Stunden, bevor Sie das Gerät an das Stromnetz anschließen. Dadurch hat das Gerät Zeit,
Raumtemperatur anzunehmen.
· Schließen Sie das Gerät an eine geerdete Steckdose an. Die Steckdose muss nach der Installation gut zugänglich sein. Die Steckdose muss mit einem Schutzkontakt ausgeführt sein (in Übereinstimmung mit den relevanten geltenden Vorschriften).
· Die Angaben zu Ihrem Gerät finden Sie auf dem Typenschild. WARNUNG!
· Es wird empfohlen, einen Überspannungsschutz zu integrieren, um das Gerät vor einem Blitzschlag zu schützen.
WARNUNG! · Schließen Sie das Gerät nicht mit einem Verlängerungskabel an das Stromnetz an.
i
· Schließen Sie das Gerät nicht an eine Steckdose an, die ausschließlich für Rasierer oder Haartrockner ausgelegt ist. · Alle sicherheits- oder leistungsbezogenen Reparaturen und Wartungsarbeiten müssen von ausgebildeten Spezialisten
ausgeführt werden. · Ein beschädigtes Stromkabel darf nur von einer vom Hersteller autorisierten Person ausgetauscht werden.
BEDIENUNG
· SCHNELLSTART i ACHTUNG!
· Vergewissern Sie sich, dass das Gerät ordnungsgemäß installiert ist, bevor Sie einen Waschgang starten. · Ihr Gerät wurde gründlich überprüft, bevor es die Fabrik verlassen hat. Wir empfehlen, das Gerät vor der ersten Verwendung
zu reinigen; damit entfernen Sie eventuell vorhandenes Restwasser und neutralisieren Sie mögliche Gerüche. Lassen Sie dazu das Baumwoll-Programm bei 90 °C ohne Wäsche und Waschmittel laufen. Siehe das Kapitel WASCHEN.
i DAS GERÄT KALIBRIEREN
Es wird empfohlen, das Gerät vor der Verwendung zu kalibrieren. Auf diese Weise wird die beste Leistung erzielt. Das Gerät kann die Menge der in die Trommel geladenen Wäsche selbst erfassen. Diese Funktion optimiert die Leistung des Geräts, indem Strom- und Wasserverbrauch minimiert werden. Dadurch sparen Sie Zeit und Geld. Daher empfehlen wir, das Gerät zu kalibrieren, um eine optimale Nutzung zu gewährleisten. 1. Nehmen Sie das gesamte Zubehör aus der Trommel und schließen Sie die Tür. 2. Stecken Sie den Netzstecker in die Steckdose. 3. Stellen Sie bei dem Gerät ein beliebiges Programm ein und drücken Sie die Tasten TPM [U/MIN] und STARTUITSTEL
[STARTVERZÖGERUNG] gleichzeitig 3 Sekunden lang, bis [t19] angezeigt wird. 4. Drücken Sie , um das Gerät zu starten. Die Trommel dreht sich und das Gerät wird kalibriert. 5. Warten Sie, bis sich die Trommel nicht mehr dreht und eine [ beliebige Zahl] angezeigt wird.
DE – 63
VOR JEDEM WASCHGANG
· Die Umgebungstemperatur bei dem Gerät muss zwischen 5 und 40 °C liegen. Wenn das Gerät bei einer Temperatur unter 0 °C verwendet wird, können das Einlassventil und das Ablaufsystem beschädigt werden. Wenn das Gerät unter Gefrierbedingungen installiert wurde, muss es in eine Umgebung mit einer normalen Raumtemperatur gebracht werden, um sicherzustellen, dass der Wasserzulaufschlauch und der Wasserablaufschlauch vor der Verwendung auftauen können.
· Sortieren Sie die Wäsche vor jedem Waschvorgang anhand der Waschetiketten. Lesen Sie auch die Anweisungen zur Verwendung des Waschmittels. Verwenden Sie nicht schäumendes oder weniger stark schäumendes Waschmittel, das für Maschinenwäsche geeignet ist.
Schauen Sie sich das Pflegeetikett an. Sortieren Sie die Wäsche nach Farbe und Material.
Drehen Sie die Taschen nach außen. Vergewissern Sie sich, dass nichts in den Taschen zurückbleibt.
Binden Sie alle Bänder und Gurte zusammen und schließen Sie Knöpfe und Reißverschlüsse.
Stecken Sie kleine Wäschestücke und empfindliche Kleidungsstücke in einen speziellen Waschbeutel.
Drehen Sie Gewebe, die leicht Knötchen bilden, und Hochflorgewebe auf links.
WARNUNG!
· Waschen Sie keine Kleidungsstücke, die mit brennbaren oder explosiven Stoffen (wie Wachs, Öl, Farbe, Benzin, Alkohol, Kerosin oder anderen entflammbaren Materialien) gereinigt, gewaschen oder abgetupft wurden bzw. damit getränkt sind.
· Wenn einzelne Stücke gewaschen werden, kann schnell eine starke Exzentrizität in der Trommel entstehen; dies führt zu Schwingungen und Lärm durch das Ungleichgewicht. Daher wird empfohlen, ein oder zwei zusätzliche Wäschestücke zur Wäsche zu geben, sodass sich die Trommel gleichmäßiger drehen kann.
· WASCHEN VORBEREITUNG VOR DEM WASCHVORGANG
Geerdete Steckdose
Hauptwäsche
Weichspüler
Vorwäsche
Stecker einstecken
Den Wasserhahn öffnen
Die Tür öffnen und die Trommel beladen
Die Tür schließen
Waschmittel einfüllen
i HINWEIS!
· Wenn die Funktion Vorwäsche ausgewählt wird, muss zusätzliches Waschmittel in Fach I gegeben werden.
DE – 64
WASCHEN
Wählen Sie ein Programm aus.
Wählen Sie Einstellun- Drücken Sie die START/ gen und/oder zusätzli- PAUSE-Taste, um das che Funktionen aus. Programm zu starten.
NACH DEM WASCHEN
Wenn das Programm beendet und das Gerät fertig ist, ertönt ein Summer und auf dem Display wird einige Sekunden lang [ End ] (Ende) angezeigt, bevor das Display erlischt.
EINSPÜLSCHALE
Vorwäsche Hauptwäsche Weichspüler
i ACHTUNG!
· Wenn die Funktion Vorwäsche ausgewählt wird, muss zusätzliches Waschmittel in Fach I gegeben werden. · Nicht bei allen Programmen muss Waschmittel eingefüllt werden. Weitere Informationen finden Sie in der Tabelle unten.
Programm
I II
Programm
I II
Aus
Fijne was 40° [Feinwäsche 40°]
40° Katoen [40° Baumwolle]
15 Min. Kort 15° [15 Min. Kurz 15°]
40° Synthetisch [40° Synthetik]
Intensief 40° [Intensiv 40°]
40° Mix [40° Mischgewebe]
ECO 40-60
20° Delicaat [20° Schonwäsche]
Wol 40° [Wolle 40°]
40° Sport
Beddengoed 40° [Bettwäsche 40°]
60° Allergie
Centrifugeren [Schleudern]
60° Jeans
Spoelen & Centrifugeren [Spülen & Schleudern]
Bedeutet Waschmittel ,,obligatorisch”
Bedeutet Waschmittel/Weichspüler optional
i HINWEIS!
· Bevor Sie harte Klumpen Pulverwaschmittel oder ein zähflüssiges Flüssigwaschmittel in die Einspülschale geben, sollten Sie dieses mit etwas Wasser auflösen; andernfalls kann es die Leitung des Geräts verstopfen und zum Überlaufen von Wasser führen.
· Wählen Sie ein geeignetes Waschmittel aus, das auf die ausgewählte Waschtemperatur und das Material abgestimmt ist. Dadurch erzielen Sie die beste Waschleistung und minimieren Sie den Wasser- und Stromverbrauch.
· Dosieren Sie Pulver- oder Flüssigwaschmittel gemäß den Angaben des Herstellers; berücksichtigen Sie dabei die Waschtemperatur, das Waschprogramm, den Verschmutzungsgrad der Wäsche und die Wasserhärte.
DE – 65
BEDIENFELD
12
11
10 9
8
40° Katoen
Uit
Fijne Was 40°
40° Synthetisch
15 Min. Kort 15°
40° Mix
Intensief 40°
20° Delicaat
Eco 40 – 60
40° Sport 60° Allergie
Wol 40° TPM
Beddengoed 40°
60° Jeans
Centrifugeren & Afpompen Spoelen & Centrifugeren
Temp °C
3 sec.
Startuitstel Functie
Kinderslot 3 sec.
8 kg | 1400
Was toevoegen 3 sec.
1 Nr. Symbol 1.
2.
3.
TPM
Temp °C 4.
3 sec.
5. Startuitstel 6. Functie
7.
Was toevoegen
3 sec.
2
13
4
5
6
7
Taste oder Anzeige Beschreibung
Programme
Verfügbare Programme (weitere Informationen finden Sie in der Tabelle zu den Programmen).
Programmwahl- Drehen Sie den Programmwahl-Drehknopf nach links oder rechts und wählen Sie
Drehknopf
damit das gewünschte Programm aus.
Schleuderdrehzahl
Temp °C [Temperatur] Startuitstel [Startverzögerung] Functie [Funktion]
Die Schleuderdrehzahl kann gegebenenfalls angepasst werden, indem die Taste TPM [U/MIN] gedrückt wird. Die folgenden 7 Einstellungen sind möglich: 0 – 400 – 600 – 800 – 1000 – 1200 1400 [ — – 400 – 600 – 800 – 10- – 12- – 14- ]. Die Waschtemperatur kann gegebenenfalls angepasst werden, indem die Taste Temp °C gedrückt wird. Die folgenden 6 Einstellungen sind möglich: Kalt – 20°C 30°C – 40°C – 60°C – 90°C [ — -20°C-30°C-40°C-60°C-90°C ]. Mithilfe dieser Funktion können Sie den Start des Waschgangs nach Ablauf einer eingestellten Zeit starten. Drücken Sie diese Taste, um eine oder mehrere der zusätzlichen Funktionen auszuwählen.
Start/Pause-Taste Drücken Sie diese Taste, um den Waschgang zu starten oder zu unterbrechen.
Was toevoegen 3 sec [Wäsche nachlegen
3 Sek.]
Drücken Sie die Taste 3 Sekunde lang, um Wäsche in die Trommel zu legen oder herauszunehmen. Weitere Informationen finden Sie im Abschnitt Wäsche nachlegen.
8.
Hygiene Pro Wenn diese Anzeige leuchtet, umfasst der Waschgang die Option Hygiene Pro.
9.
10.
11.
12.
Uit
Vorwäsche Extra Spülen Extra Waschen Kindersicherung Türverriegelung Startverzögerung
Display
Aus
Wenn diese Anzeige leuchtet, wurde die Vorwaschfunktion aktiviert. Wenn diese Anzeige leuchtet, wurde die Funktion Extra Spülen aktiviert. Wenn diese Anzeige leuchtet, wurde die Funktion Extra Waschen aktiviert.
Wenn diese Anzeige leuchtet, ist die Kindersicherung aktiviert. Wenn diese Anzeige leuchtet, ist die Tür des Geräts verriegelt; sie kann dann nicht geöffnet werden. Wenn diese Anzeige leuchtet, ist die Funktion Startverzögerung aktiviert. Auf dem Display werden die Einstellungen, die geschätzte Restzeit, Optionen und Statusmeldungen für Ihr Gerät angezeigt. Das Display bleibt während des Waschgangs eingeschaltet. Wenn Sie das Gerät ausschalten möchten, drehen Sie den ProgrammwahlDrehknopf auf die Position UIT [AUS].
DE – 66
TPM
Temp °C
3 sec.
Schleuderdrehzahl Die Schleuderdrehzahl kann gegebenenfalls angepasst werden, indem die Taste TPM [U/MIN] gedrückt wird. Die folgenden 7 Einstellungen sind möglich: 0 – 400 – 600 – 800 – 1000 – 1200 – 1400 [ — – 400 – 600 – 800 – 10- – 12- – 14- ].
Temperatur Die Waschtemperatur kann gegebenenfalls angepasst werden, indem die Taste Temperatur gedrückt wird. Die folgenden 6 Einstellungen sind möglich: Kalt – 20°C – 30°C – 40°C – 60°C – 90°C [ — -20°C-30°C-40°C-60°C-90°C ].
Startuitstel Startverzögerung
Mithilfe dieser Funktion können Sie den Start des Waschgangs nach Ablauf einer eingestellten Zeit starten. Gehen Sie dazu wie folgt vor: 1. Wählen Sie ein Programm aus. 2. Drücken Sie die Taste STARTUITSTEL [STARTVERZÖGERUNG] und wählen Sie die Verzögerungszeit aus.
Stellen Sie die Stunden ein, indem Sie die Taste STARTUITSTEL [STARTVERZÖGERUNG] mehrere Male drücken. Eine Einstellung zwischen 0 und 24 Stunden ist möglich. 3. Drücken Sie die START/PAUSE-Taste, um die Verzögerungszeit zu starten.
i HINWEIS!
· In Kombination mit Funktion STARTUITSTEL [STARTVERZÖGERUNG] sollten Sie vorzugsweise Pulverwaschmittel verwenden und kein Flüssigwaschmittel.
Abbrechen der Startverzögerung Wenn Sie die Funktion STARTVERZÖGERUNG abbrechen möchten, bevor das Waschprogramm gestartet wurde, drücken Sie die Taste STARTUITSTEL [STARTVERZÖGERUNG] erneut, bis auf dem Display 0 H angezeigt wird.
Functie WEITERE FUNKTIONEN
Kindersicherung Dies ist eine Sicherheitsfunktion, die Kinder daran hindert, das Bedienfeld zu verwenden. Gehen Sie wie folgt vor, um die Kindersicherung zu aktivieren: · Drücken Sie gleichzeitig die Tasten STARTUITSTEL [STARTVERZÖGERUNG] und FUNCTIE [FUNKTION] 3 Sekunden lang, bis der Summer ertönt. Die Anzeige für die Kindersicherung leuchtet auf. Wenn ein Waschprogramm läuft, werden auf dem Display des Geräts abwechselnd [ KS ] und die Restzeit angezeigt.
Die Kindersicherung deaktivieren · Drücken Sie gleichzeitig die Tasten STARTUITSTEL [STARTVERZÖGERUNG] und FUNCTIE [FUNKTION] 3 Sekunden lang, bis der Summer ertönt. Die Anzeige für die Kindersicherung erlischt.
i ACHTUNG!
Wenn das KINDERSLOT [die KINDERSICHERUNG] aktiviert ist und ein Waschprogramm läuft, werden auf dem Display des Geräts abwechselnd [ KS ] und die Restzeit angezeigt. Wenn eine beliebige Taste gedrückt wird, blinkt die Anzeige für die KINDERSICHERUNG 3 Sekunden lang. Wenn das Programm beendet ist, werden [ KS ] und [ END ] 10 Sekunden lang abwechselnd auf dem Display angezeigt; anschließend blinkt die Anzeige 3 Sekunden lang. Mit der Kindersicherung werden die Funktionen aller Tasten deaktiviert, außer der Ein-/Aus-Taste und der Kombination für die Kindersicherung! Die Kindersicherung kann nur durch das gleichzeitige Drücken der zwei Tasten STARTUITSTEL [STARTVERZÖGERUNG] und FUNCTIE [FUNKTION] deaktiviert werden. Bitte deaktivieren Sie die Kindersicherung, bevor Sie ein neues Programm auswählen!
Vorwäsche Bevor der Hauptwaschgang gestartet wird, wird die Wäsche vorgewaschen, um die Waschleistung zu verbessern. Diese Funktion ist insbesondere für stark verschmutzte Wäsche mit hartnäckigen oberflächlichen Flecken geeignet. Hinweis: Vergessen Sie nicht, auch Waschmittel in Fach I zu füllen.
Extra Spülen Wenn diese Funktion ausgewählt wird, wird ein zusätzlicher Spülgang hinzugefügt.
Extra Waschen Waschzeit und Intensität werden erhöht, sodass bei stark verschmutzter Wäsche ein besseres Ergebnis erzielt wird.
DE – 67
Hygiene Pro
Hygiene Pro ist keine Funktion, die Sie zusätzlich auswählen können. Diese Funktion wird automatisch zu einigen Programmen hinzugefügt. Die Anzeige leuchtet auf, wenn eines der Programme ausgewählt wird, das Hygiene Pro enthält. Hygiene Pro reinigt am Ende des Waschgangs die Trommel und das Glas an der Innenseite der Tür mit kaltem Wasser. Durch diese selbstreinigende Funktion bleiben Ihr Gerät und Ihre Wäsche sauber; sie wird während des Waschgangs automatisch aktiviert. Im Kapitel ZUSÄTZLICHE FUNKTIONEN AUSWÄHLEN ist angegeben, welche Programme die Funktion Hygiene Pro enthalten.
Wäsche nachlegen
Während eines Waschgangs kann Wäsche nachgelegt oder herausgenommen werden. Nach einer gewissen Zeit
Was toevoegen 3 sec.
kann
die
Tür
des Geräts
geöffnet
werden,
wenn
Wasserstand und
-temperatur
unter
einem
voreingestellten
Grenzwert liegen.
Wenn folgende Bedingungen erfüllt sind, wird das elektronische Türschloss freigegeben und die Tür des Geräts
kann geöffnet werden:
· Die Wassertemperatur in der Trommel muss geeignet sein;
· Der Wasserstand in der Trommel muss unter einem bestimmten Niveau liegen.
i ACHTUNG!
Wenn sich die Trommel noch dreht und sich eine große Menge Wasser mit hoher Temperatur in der Trommel befindet, ist der Zustand nicht sicher und die Tür kann nicht mit Gewalt geöffnet werden. · Verwenden Sie die Funktion WAS TOEVOEGEN [WÄSCHE NACHLEGEN] nicht, wenn sich der Wasserstand über der Kante der
inneren Trommel befindet oder wenn die Wassertemperatur hoch ist.
Gehen Sie wie folgt vor, um während eines Waschgangs Wäsche in die Trommel nachzulegen oder aus der Trommel zu nehmen: 1. Drücken Sie die START/PAUSE-Taste 3 Sekunden lang. 2. Warten Sie, bis sich die Trommel nicht mehr dreht. 3. Die Tür wird entriegelt. 4. Öffnen Sie die Tür und legen Sie Wäsche nach oder nehmen Sie Wäsche heraus. 5. Schließen Sie die Tür und drücken Sie die START/PAUSE-Taste. Der Waschgang wird fortgesetzt.
i ACHTUNG!
· Wenn während des Waschgangs eine größere Menge an Wäsche nachgelegt wird, ist das Waschergebnis möglicherweise schlechter, da das Gerät zu Beginn des Waschgangs ein geringeres Gewicht bei der Wäsche


