ottobock 8K5=* Physo Passive Hands
 Intended use
 Intended use
Last update: 2021-06-14
- Please read this document carefully before using the product and observe the safety notices.
- Instruct the user in the safe use of the product.
- Please contact the manufacturer if you have questions about the product or in case of problems.
- Report each serious incident in connection with the product, in particular a worsening of the state of health, to the manufacturer and to the relevant authority in your country.
- Please keep this document for your records.
- Medical purpose
The 8K5=* Physolino Babyhand is to be used solely for the prosthetic fitting of the upper limbs. - Indications for use
The 8K5=* Physolino Babyhand can be used for children with uni- or bilateral above or below el-bow amputation or dysmelia. The Physolino Babyhand is to be used solely for babies and infants. - Application conditions
The 8K5=* Physolino Babyhand can be used indoors and outdoors. - Qualified prosthetists
Fitting of a patient with the 8K5=* Physolino Babyhand must solely be carried out by orthopedic technicians.
Safety instruction
CAUTION
Contact with cold, heat, embers or fire
Injuries (e.g. burns) and damage to the product
- Keep the product away from open flame, embers and other sources of heat.
- Do not expose the product to unallowable environmental conditions (see section „Environ-mental Conditions“).
- Inform the patient.
NOTICE
- Non-observance of cleaning instructions
Damage to product and permanent soiling due to use of improper cleaning agents- Only clean the product according to the cleaning instructions provided in the instructions for use.
- Inform the patient.
- Non-observance of allowable environmental conditions
Schäden und Verschmutzungen am Produkt durch unzulässige Umgebungsbedingungen- Do not expose the product to unallowable environmental conditions (see the section „Envi-ronmental conditions“).
- If the product has been exposed to unallowable environmental conditions, check it for soiling and damage.
- Clean the product immediately if it gets dirty, following the instructions in the section „Patient information“, in order to prevent permanent soiling.
- If damage is apparent or in case of doubt, do not continue using the product.
- Inform the patient.
- Careless use of the product
Damage to the product due to contact with pointed or sharp-edged objects- Do not allow the product to come into contact with the above mentioned objects.
- Inform the patient.
- Contact with salves, lotions or other products that contain oils or acids
Insufficient stabilisation due to loss of material functionality- Do not expose the product to salves, lotions or other products that contain oils or acids.
- Inform the patient.
- In the case of a disassembled Physolino Babyhand, please pay attention to the threaded stud in order to avoid injuries.
Environmental conditions
- Allowable environmental conditions
Cleaning agents: warm water and soap - Unallowable environmental conditions
Mechanical vibrations or impacts, touching of sharp-edged or pointed objects Contact with acids, unallowable cleaning agents, abrasive media (e.g. sand), damp soil, dust, dirt, highly staining materials (e.g. printing ink, new textiles), solvents (e.g. thinner, acetone, petrol), fire, embers and unallowable heat (> +60 °C / > +140 °F)
Patient information
- The Physolino Babyhand must be cleaned with soap and water only.
- The Physolino Babyhand must not come into contact with chemicals or solvents, since chemical processes can result in undesirable material changes.
Scope of delivery
- 1 pc. Physolino Babyhand 8K5=*
- 1 pc. Lamination Ring 11D31
- 1 pc. Instructions for use
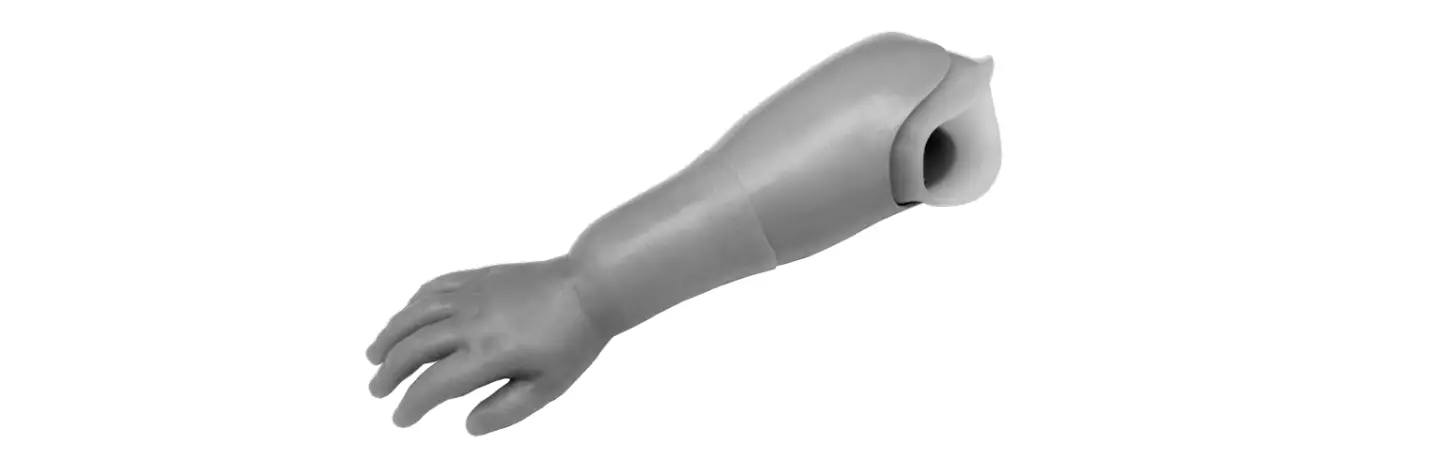
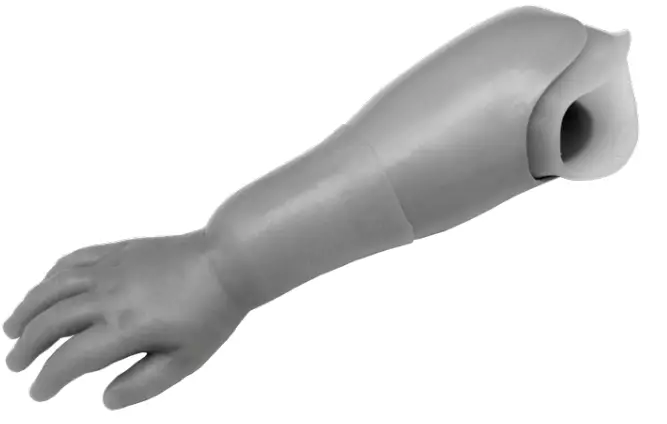
Description and function
The Ottobock Physolino Babyhand helps create a more natural outer appearance.The shape, color and surface structure resemble every detail of a natural hand. Left- and right-hand sides are available.The Physolino Babyhand is made of medical grade silicone, making it highly resistant to biting and chewing. Medical grade silicone is also highly elastic, water resistant, and does not break down under UV rays.
Lamination and assembly information
Accessories
To manufacture a laminated socket for the Physolino Babyhand the following accessories are required:
- 1 pc. Socket attachment piece: 11S12
- 1 pc. Alignment rod: 743Y41
- 1 pc. Lamination form: 743Y42=24
The accessories can be ordered from Ottobock.
Processing variants
The 11D31 Lamination Ring can be glued in place or laminated directly into the socket. If the lamination ring is laminated directly in when manufacturing the prosthetic socket, the surround-ing groove can be used for tying off. Furthermore, attention must be paid that the distal end of the 11D31 Lamination Ring as well as the thread are covered
Fabricating the foam positive
- Vacuum form the interim socket of 616T53=8 ThermoLyn soft over the modelled plaster positive
- Put the 743Y42=24 Foam Insert onto the 743Y41 Alignment Rod. Screw the Alignment Rod into the 11S12 Socket Attachment Piece. Position the 11S12 Socket Attachment Piece onto the interim socket and fix with 636K17=* Ottobock Light Putty. Position the bolt of the 743Y42=24 Foam Insert congruent with the Alignment Rod (Fig. 1, arrows).
- Determine the position of the 743Y42=24 Foam Insert on the 743Y41 Alignment Rod. For this purpose move the foam insert on the alignment rod until the upper edge reaches approx. 5 mm beyond the nominal size of the lower arm length that must be conserved (Fig. 2). Fix the foam insert
- Pull the 99B71=60×11×4 PVC-Bag over the Inner Socket and the 11S12 Socket Attachment Piece. Tie off the bag above the 11S12 Socket Attachment Piece and at the vacuum tube. Switch on the vacuum pressure. Paste on the 627B5=19 Neoprene Cellular Rubber Band (as marked in Fig. 2/(Fig.3)
- Wrap 616T3=1 Trolen Sheeting conically around the definitive socket. Mix 617H12 Pedilen Rigid Foam and 617P21 Pedilen Hardener thoroughly as described in the enclosed processing instruc-tions, and pour it into the gap between Trolen wrapper and model (Fig. 4).
- Remove Trolen wrapper once the curing time has elapsed. Cut into the Pedilen Rigid Foam to expose the 743Y42=24 Foam Insert bolt (Fig. 5).
- Loosen the bolt and remove it from the 743Y41 Alignment Rod
- Take off the foam insert (Fig. 6).


Fabricating the outer socket
- Sand the removed foam part until the 743Y42=24 Lamination Form has been exposed.
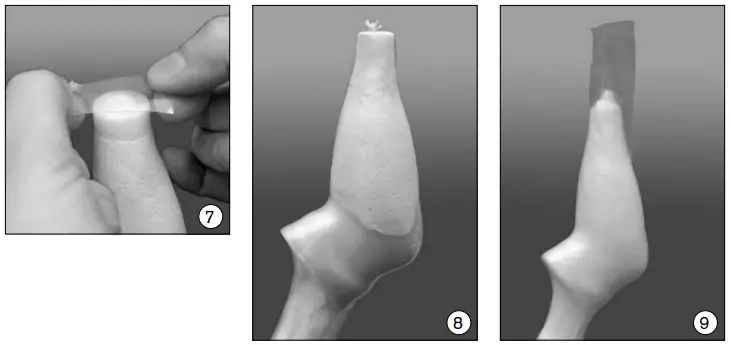
- Cover the bore hole and bolt of the 743Y42=24 Foam insert using the 636K6 Plastilin Clay and mask with adhesive tape (Fig. 7).
- Pull a soaked 99B81PVA Bag tightly over the positive model without wrinkles and tie off proxi-mally. Switch on the vacuum pressure (Fig. 8).
- Pull 4 layers of white 623T3=* Perlon-Stockinette over the positive model. Pull a soaked 99B81 PVA Bag tightly over the positive model (Fig. 9).
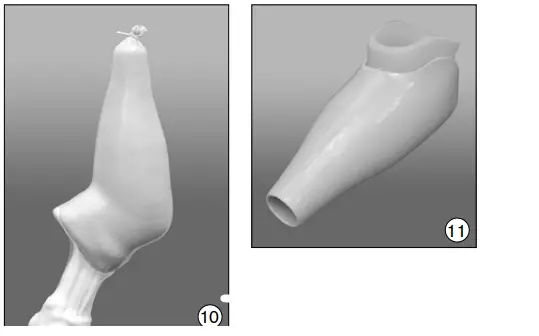
- Mix 617H19 Orthocryl Laminating Resin and 617P37 Hardener as per manufacturer instruc-tions. Add 617Z2=* Color Paste as required. Pour the laminating resin into the foil bag. Tie off the PVA bag above resin level and work the resin into the reinforcement layer. Spread laminating resin using a length of cord in order to keep the wall thickness as thin as possible. In order to create a high quality socket, there must be no air bubbles inside the laminating resin during application (Fig10).
- Proximally uncover the socket. Remove the plaster from inside the socket. Expose the socket at the distal end until the 743Y42=24 foam insert becomes visible. Remove the 743Y42=24 Foam Insert.
- Finished inner socket with outer socket (Fig. 11).


Pasting in the 11D31 lamination ring
After having cut the socket to length the 11D31 Lamination Ring must be glued in. Before glueing it in, please read these instructions very carefully and proceed exactly in the described order.
INFORMATION
Before processing the 636K18 Orthoctryl Sealing Resin Compact Glue and the hardening paste, first read the corresponding safety data sheet
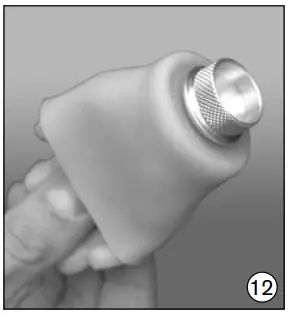
- Reflect the cuff of the Babyhand just enough to expose the lamination nut of the Babyhand. Screw the 11D31 Lamination Ring to the lamination nut up to the stop (Fig. 12).
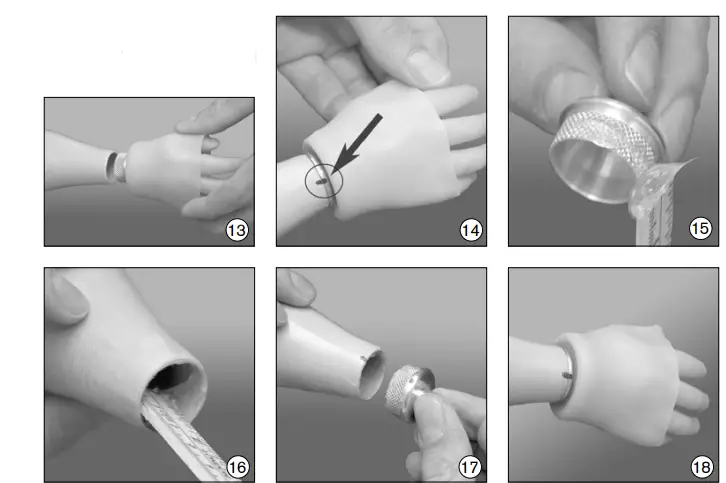
- Slide the Babyhand with lamination ring into the socket (Fig. 13).
Attention: Do not paste in the lamination ring. - Turn the Babyhand into the desired position and using a marker pen transfer the position to the socket and lamination ring (Fig. 14, arrow).
Attention: Make sure that the lamination ring does not twist out of place during this process! - Unscrew the lamination ring from the Babyhand. Mix 636K18 Orthocryl Sealing Resin Compact Glue and 617P14=* Hardening Paste according to the manufacturer‘s specifications. Apply Seal-ing Resin Compact Glue to the knurled edge of the lamination ring (Fig. 15).
- Roughen the inner surface of the socket and apply sealing resin compact glue (Fig. 16).
- Insert the lamination ring into the socket. Take care that the markings line up facing one another. Remove excessive sealing resin compact glue. Let the bonding dry (Fig. 17).
- Coat the threads of the lamination ring with 636K13 Loctite and turn the Silicone Baby Hand handtight up to the stop. (Fig. 18)
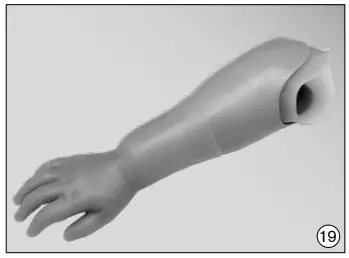
- The finished prosthesis (Fig. 19)


Disposal
In some jurisdictions it is not permissible to dispose of the product with unsorted household waste. Improper disposal can be harmful to health and the environment. Observe the information provided by the responsible authorities in your country regarding return, collection and disposal procedures.
Legal information
All legal conditions are subject to the respective national laws of the country of use and may vary accordingly.
Liability
The manufacturer will only assume liability if the product is used in accordance with the descrip-tions and instructions provided in this document. The manufacturer will not assume liability for damage caused by disregard of this document, particularly due to improper use or unauthorised modification of the product.
CE conformity
The product meets the requirements of Regulation (EU) 2017/745on medical devices. The CE declaration of conformity can be downloaded from the manufacturer’s website


