![]()
Nintendo DS Lite Wi-Fi Antenna Replacement
Replacement of the Nintendo DS Lite Wi-Fi antenna.
Written By: Matthew Newsom
This document was generated on 2022-05-04 02:13:25 AM (MST).
INTRODUCTION
Replace the Wi-Fi antenna in your Nintendo DS Lite.
![]() TOOLS:
TOOLS:
- Phillips #00 Screwdriver (1)
- Push Pin (1)
- Spudger (1)
- Tri-point Y1 Screwdriver (1)
Step 1 — Battery
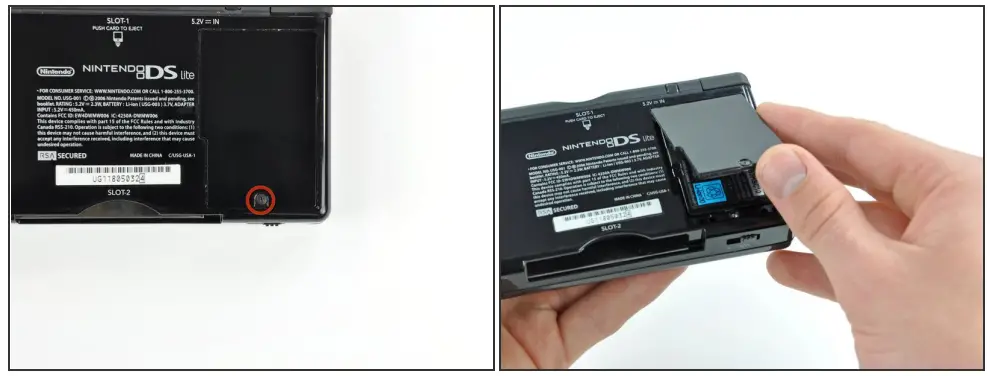
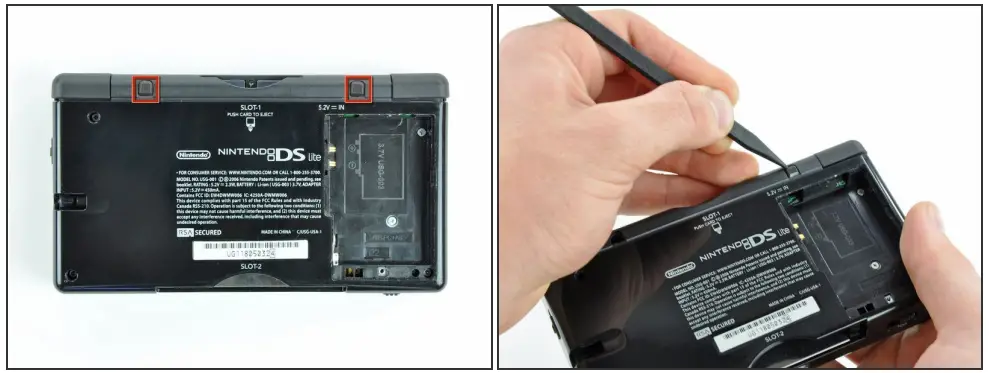
![]() Unscrew the Phillips screw securing the battery cover to the lower case.
Unscrew the Phillips screw securing the battery cover to the lower case.![]() The screw remains captive to the battery cover.
The screw remains captive to the battery cover.![]() Pry the battery cover upward with a spudger or fingernail, and lift out of the lower case.
Pry the battery cover upward with a spudger or fingernail, and lift out of the lower case.
Step 2
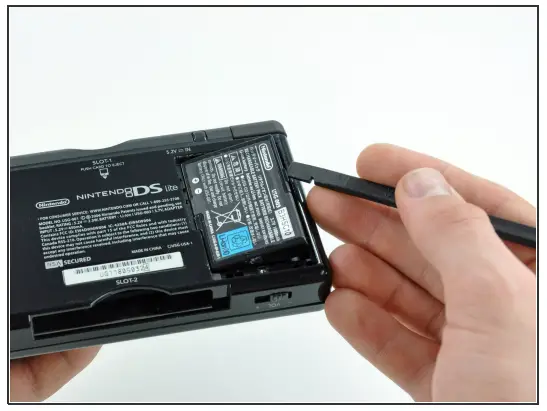
![]() Wedge the edge of a spudger in between the side of the battery and the lowercase housing and pry upward to dislodge the battery.
Wedge the edge of a spudger in between the side of the battery and the lowercase housing and pry upward to dislodge the battery.![]() Remove the battery from the DS Lite.
Remove the battery from the DS Lite.
Step 3 — Lower Case
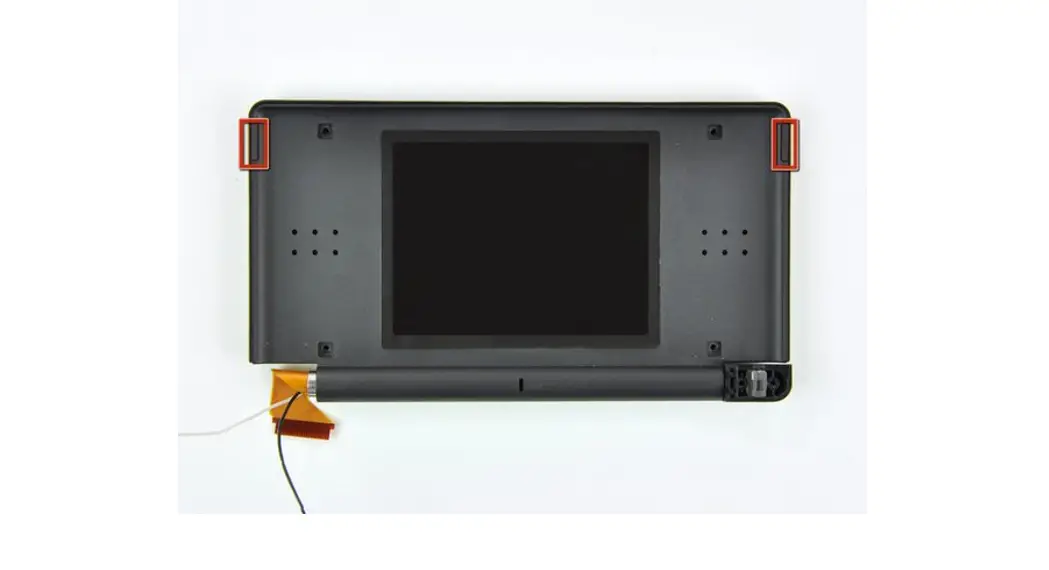
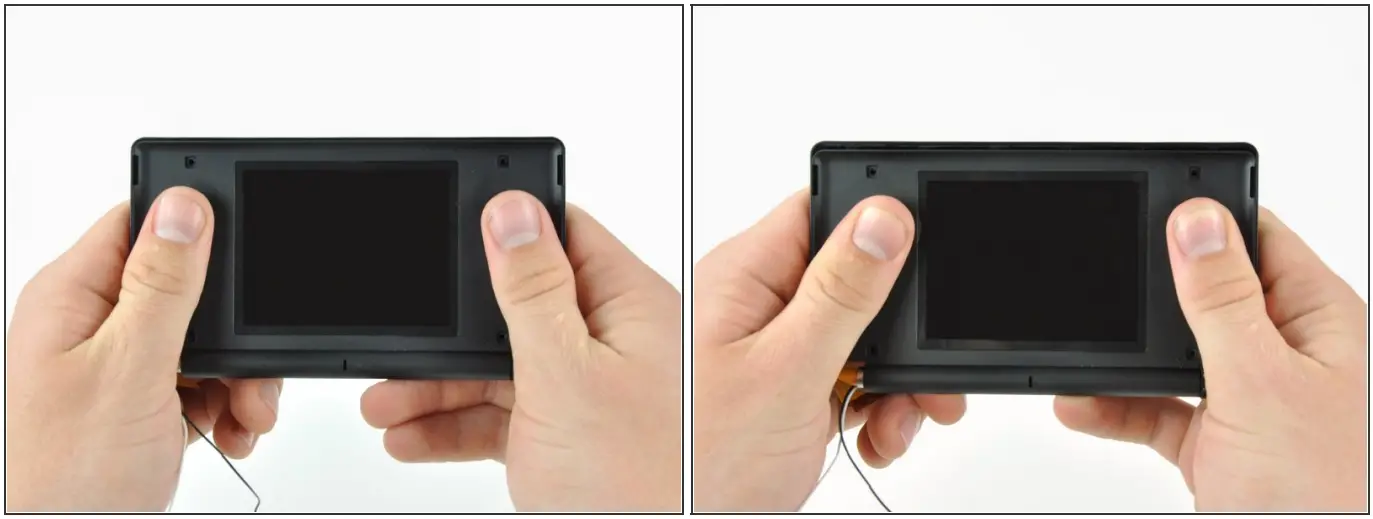
![]() Use the tip of a spudger to pry both rubber feet off the DS Lite.
Use the tip of a spudger to pry both rubber feet off the DS Lite.
![]() Remove the following screws securing the lower case to the body of the DS Lite:
Remove the following screws securing the lower case to the body of the DS Lite:![]() Two 4.3 mm gold Phillips screws
Two 4.3 mm gold Phillips screws![]() One 3.9 mm black Tri-Wing screw
One 3.9 mm black Tri-Wing screw![]() One 3.3 mm silver Phillips screw
One 3.3 mm silver Phillips screw![]() Three 5.5 mm silver Tri-Wing screws
Three 5.5 mm silver Tri-Wing screws
Step 5
![]() Remove the cover from the Game Pak slot before continuing.
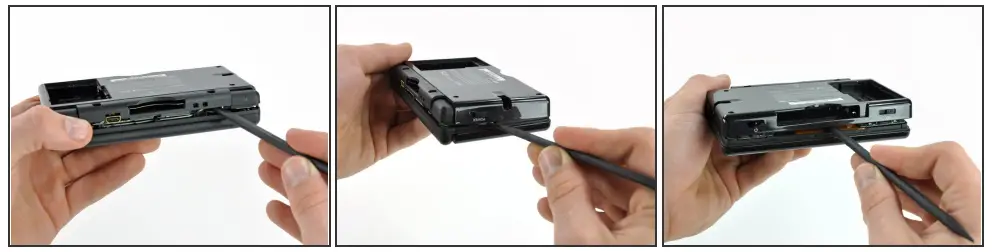
Remove the cover from the Game Pak slot before continuing.![]() Insert the edge of a spudger in between the lower and upper case near the top right corner of the DS Lite.
Insert the edge of a spudger in between the lower and upper case near the top right corner of the DS Lite.![]() Carefully run the spudger along the right edge of the DS Lite, creating an opening in the process.
Carefully run the spudger along the right edge of the DS Lite, creating an opening in the process.![]() Continue running the spudger along the backside of the DS Lite until the majority of the lower case has been separated from the upper case.
Continue running the spudger along the backside of the DS Lite until the majority of the lower case has been separated from the upper case.
Step 6
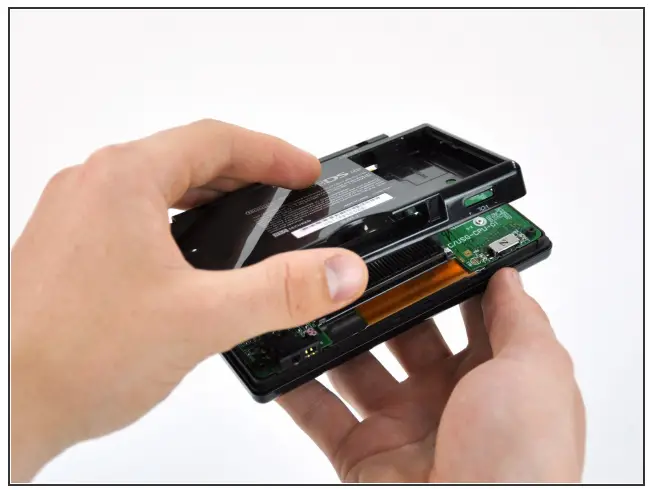
![]() Lift the lowercase away from the rest of the DS Lite.
Lift the lowercase away from the rest of the DS Lite.![]() Pull carefully. Some units are sealed with adhesive, and pulling too hard can damage the power switch.
Pull carefully. Some units are sealed with adhesive, and pulling too hard can damage the power switch.![]() When reassembling, make sure that the power switch and volume sliders are properly aligned with the switches on the motherboard.
When reassembling, make sure that the power switch and volume sliders are properly aligned with the switches on the motherboard.
![]() Lift both trigger buttons out of the DS Lite.
Lift both trigger buttons out of the DS Lite.![]() The trigger buttons are held in very loosely by small metal pegs and springs. Don’t lose track of these pieces.
The trigger buttons are held in very loosely by small metal pegs and springs. Don’t lose track of these pieces.![]() The second picture shows the correct configuration of the trigger assembly for reassembly purposes.
The second picture shows the correct configuration of the trigger assembly for reassembly purposes.
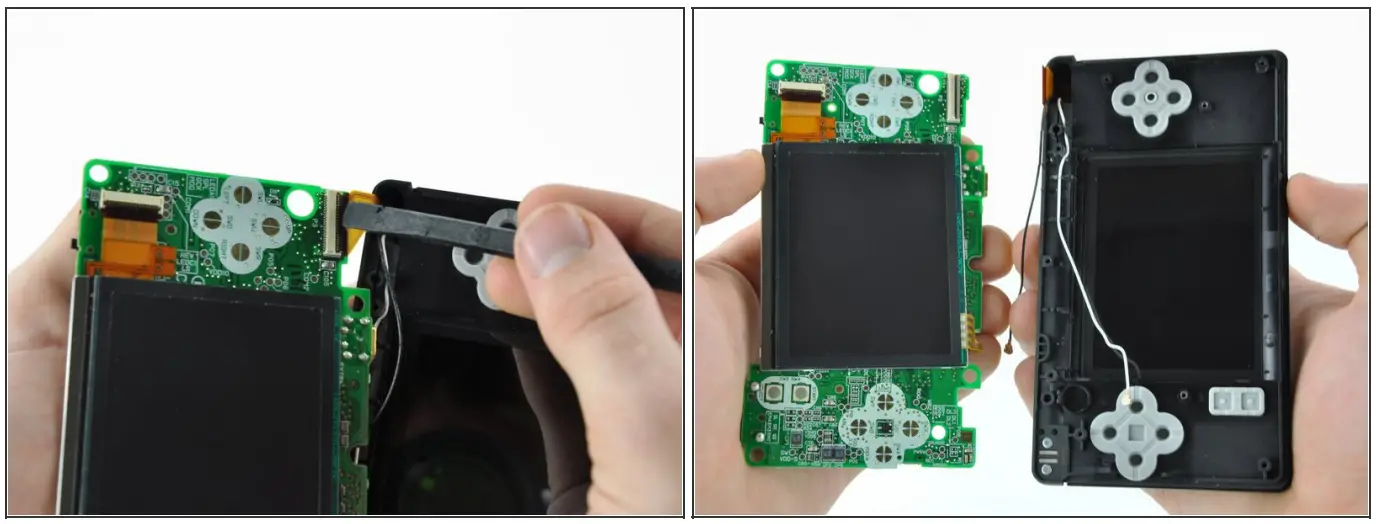
Step 8 — Wi-Fi Board
![]() Use the flat edge of a spudger to pry the Wi-Fi antenna connector straight up from its socket on the Wi-Fi board.
Use the flat edge of a spudger to pry the Wi-Fi antenna connector straight up from its socket on the Wi-Fi board.
Step 9
![]() Use the flat edge of a spudger to pry the Wi-Fi board connector straight up from its socket on the motherboard.
Use the flat edge of a spudger to pry the Wi-Fi board connector straight up from its socket on the motherboard.
Step 10
![]() Use the flat edge of a spudger to separate the right edge of the Wi-Fi board from the motherboard.
Use the flat edge of a spudger to separate the right edge of the Wi-Fi board from the motherboard.![]() The Wi-Fi board is secured to the motherboard with a layer of adhesive.
The Wi-Fi board is secured to the motherboard with a layer of adhesive.![]() Remove the Wi-Fi board from the DS Lite.
Remove the Wi-Fi board from the DS Lite.
Step 11 — Motherboard
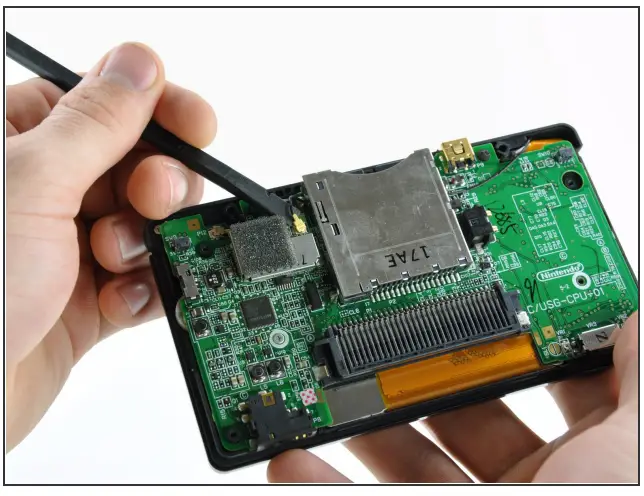
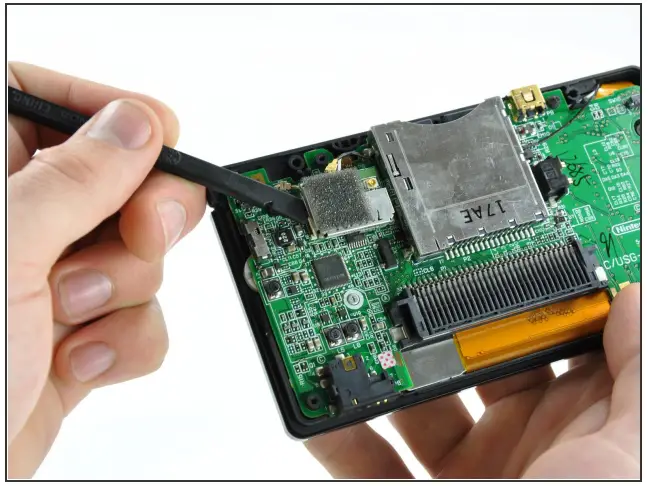
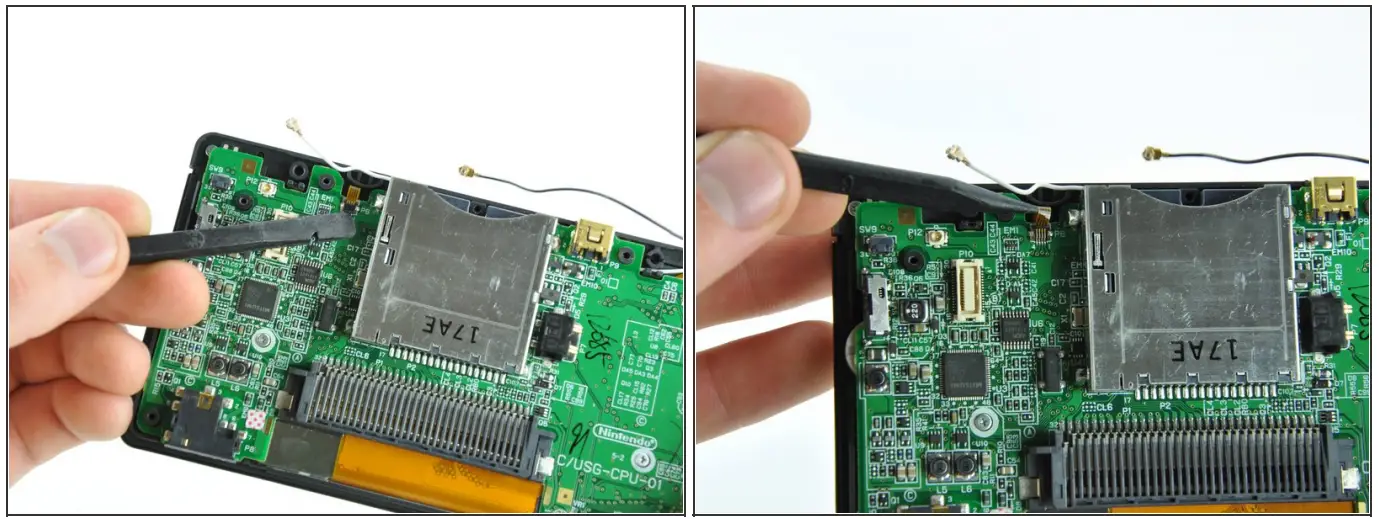
![]() Use the flat edge of a spudger to pry the microphone connector straight up from its socket on the motherboard.
Use the flat edge of a spudger to pry the microphone connector straight up from its socket on the motherboard.
Step 12
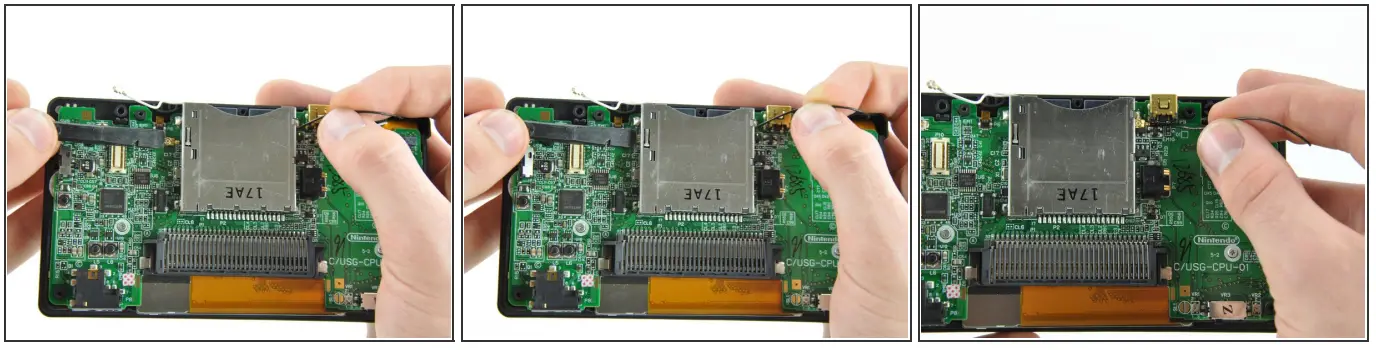
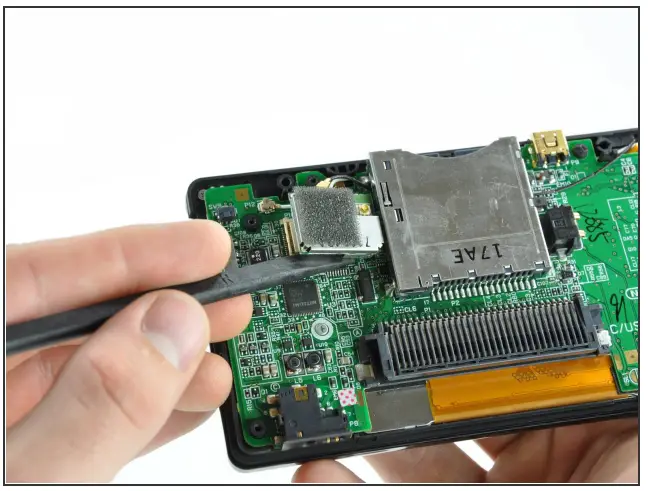
![]() In the following steps, you must pull the antenna cable between the DS Lite game cartridge reader and the motherboard. Pull slowly and stop when you feel resistance to avoid damaging the cable or motherboard.
In the following steps, you must pull the antenna cable between the DS Lite game cartridge reader and the motherboard. Pull slowly and stop when you feel resistance to avoid damaging the cable or motherboard.![]() Position the antenna cable with its connector facing up and away from the motherboard using a spudger to hold it down lightly in the gap between chips on the motherboard.
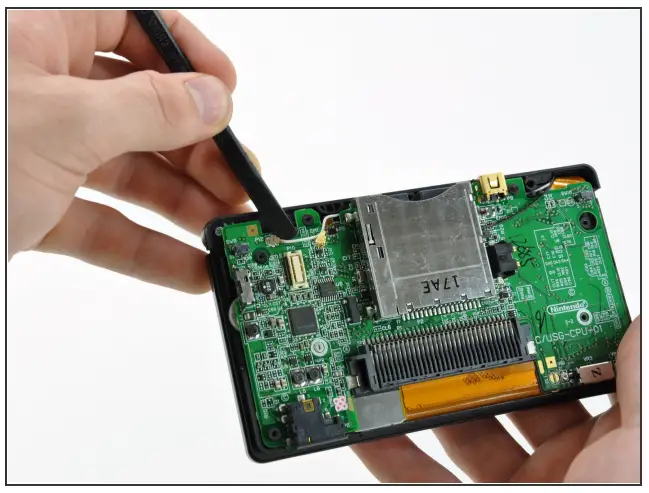
Position the antenna cable with its connector facing up and away from the motherboard using a spudger to hold it down lightly in the gap between chips on the motherboard.![]() Slowly and carefully pull the antenna cable until the cable connector is under the DS Lite game cartridge reader.
Slowly and carefully pull the antenna cable until the cable connector is under the DS Lite game cartridge reader.![]() Continue pulling the cable until the cable connector comes out from under the game cartridge reader on the right side.
Continue pulling the cable until the cable connector comes out from under the game cartridge reader on the right side.![]() When reassembling and attempting to feed the antenna cable back under the game cartridge reader, the cable may kink or become difficult to feed through. If so, try feeding a piece of thread through first; then, tie the thread to one end of the cable connector and pull it through, guiding it past any obstructions.
When reassembling and attempting to feed the antenna cable back under the game cartridge reader, the cable may kink or become difficult to feed through. If so, try feeding a piece of thread through first; then, tie the thread to one end of the cable connector and pull it through, guiding it past any obstructions.
Step 13
![]() Use your fingernail or the edge of a spudger to carefully flip up the touchscreen ribbon cable retaining flap.
Use your fingernail or the edge of a spudger to carefully flip up the touchscreen ribbon cable retaining flap.![]() Make sure you are flipping up the retaining flap, not the socket itself.
Make sure you are flipping up the retaining flap, not the socket itself.![]() Use the tip of a spudger to pull the touchscreen ribbon cable straight out of its socket.
Use the tip of a spudger to pull the touchscreen ribbon cable straight out of its socket.
Step 14
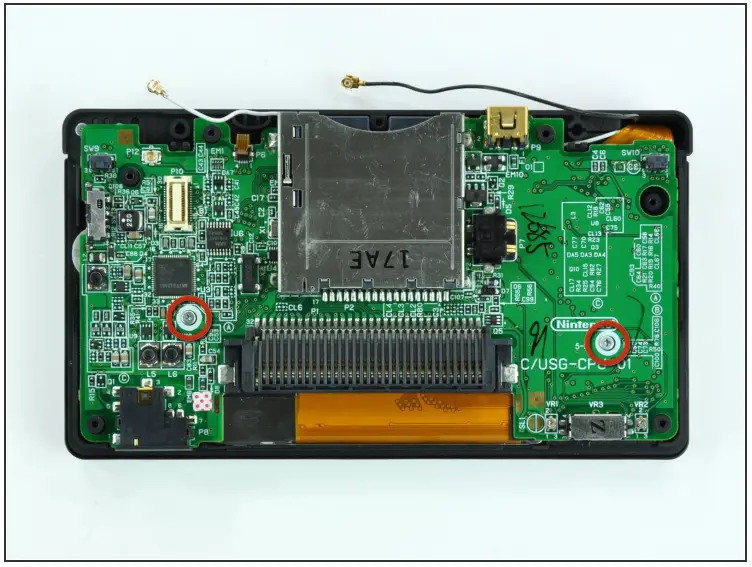
![]() Remove the two 3.4 mm Phillips screws securing the motherboard to the upper case.
Remove the two 3.4 mm Phillips screws securing the motherboard to the upper case.
Step 15
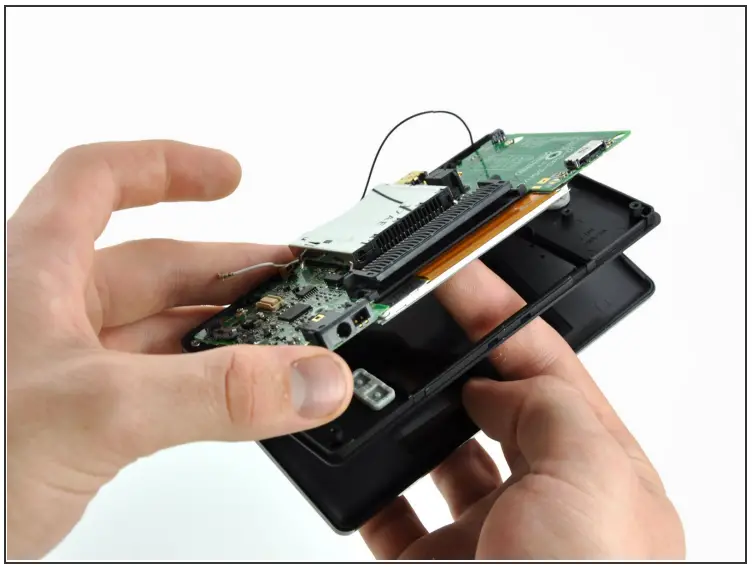
![]() Open the display enough to use your finger to push the front edge of the motherboard up and away from the upper case.
Open the display enough to use your finger to push the front edge of the motherboard up and away from the upper case.![]() Do not try to remove the motherboard, as it is still connected to the upper display via the upper LCD ribbon cable.
Do not try to remove the motherboard, as it is still connected to the upper display via the upper LCD ribbon cable.
Step 16
![]() Use your fingernail or the flat edge of a spudger to carefully flip up the upper LCD ribbon cable retaining flap.
Use your fingernail or the flat edge of a spudger to carefully flip up the upper LCD ribbon cable retaining flap.![]() Make sure you are flipping up the retaining flap, not the socket itself.
Make sure you are flipping up the retaining flap, not the socket itself.![]() Pull the motherboard away from the DS Lite to separate the upper LCD ribbon cable from the socket on the motherboard.
Pull the motherboard away from the DS Lite to separate the upper LCD ribbon cable from the socket on the motherboard.![]() Remove the motherboard from the DS Lite.
Remove the motherboard from the DS Lite.![]() Now you may open the retaining flap for the lower LCD screen in the same way and separate the lower LCD screen from the motherboard.
Now you may open the retaining flap for the lower LCD screen in the same way and separate the lower LCD screen from the motherboard.
Step 17 — Upper Case
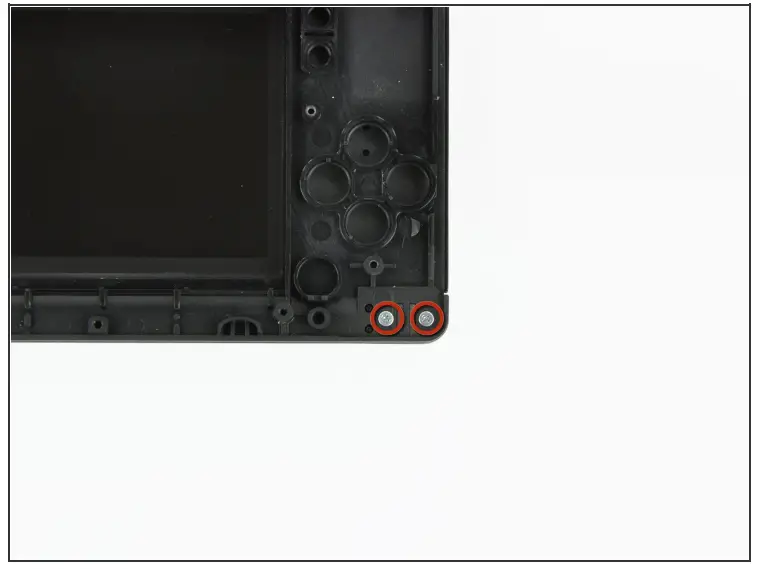
![]() Remove the two 8.3 mm Phillips screws securing the upper case to the display assembly.
Remove the two 8.3 mm Phillips screws securing the upper case to the display assembly.
Step 18
![]() Pull the upper LCD ribbon cable to the right, through the slit in the case.
Pull the upper LCD ribbon cable to the right, through the slit in the case.![]() Push the ribbon cable down through the slit.
Push the ribbon cable down through the slit.
Step 19
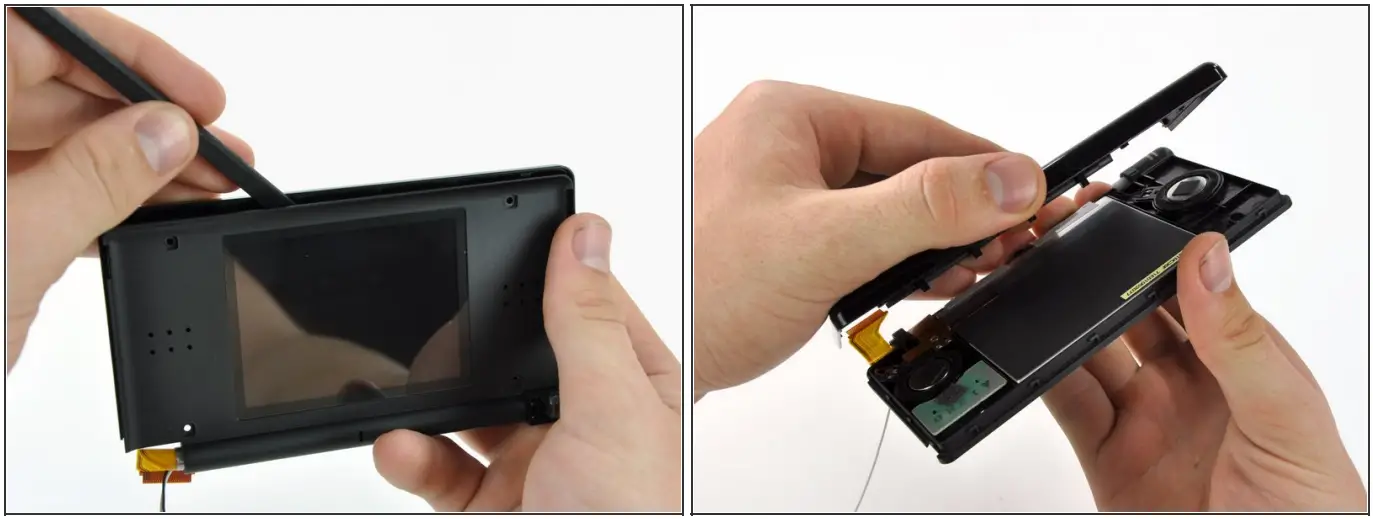
![]() Slowly lift the upper case away from the display, making sure the ribbon cable does not get caught.
Slowly lift the upper case away from the display, making sure the ribbon cable does not get caught.
Step 20
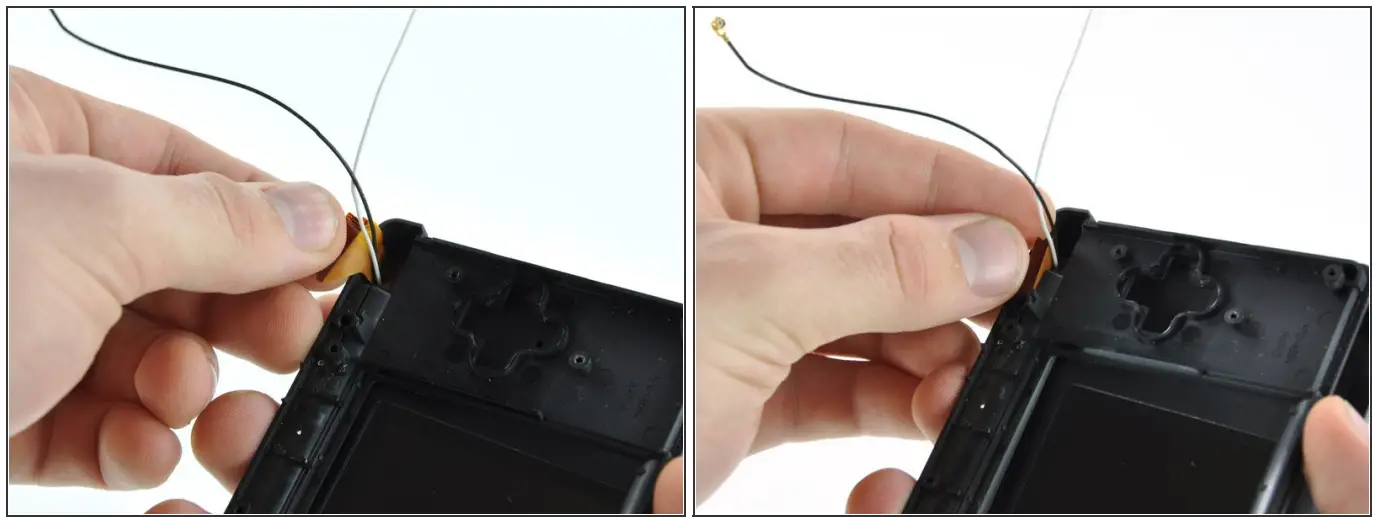
![]() Once the ribbon cable is free from the upper case, pull the antenna and Wi-Fi cables through the hole in the upper case.
Once the ribbon cable is free from the upper case, pull the antenna and Wi-Fi cables through the hole in the upper case.![]() Remove the upper case from the DS Lite.
Remove the upper case from the DS Lite.
Step 21 — Rear Display Bezel
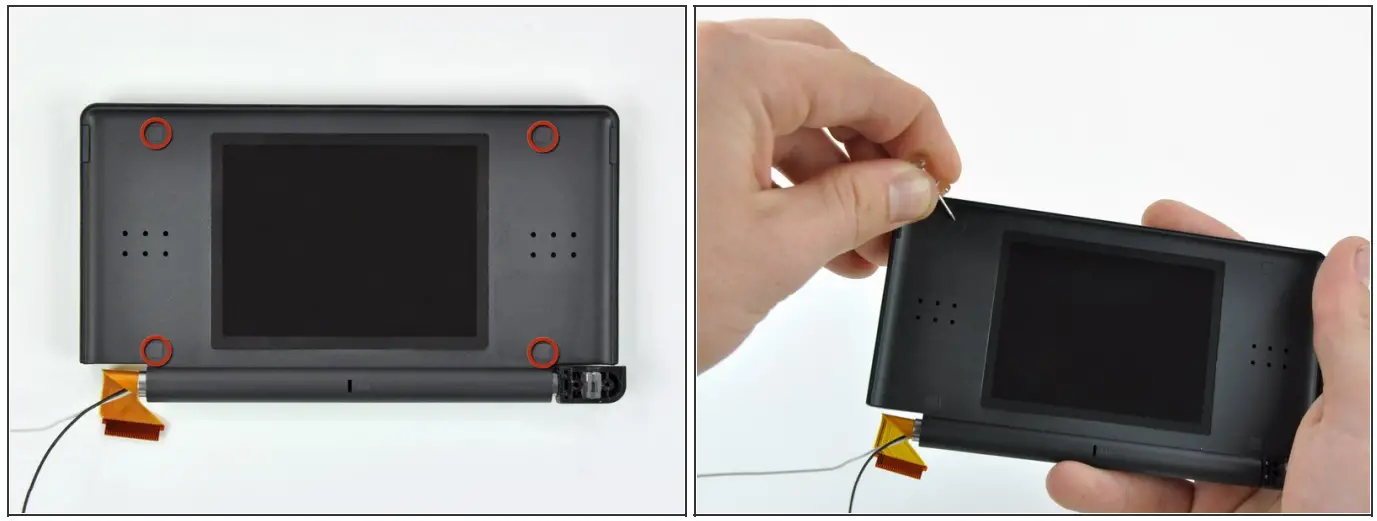
![]() Use a push pin to remove the four plastic screw covers on the front bezel.
Use a push pin to remove the four plastic screw covers on the front bezel.
Step 22
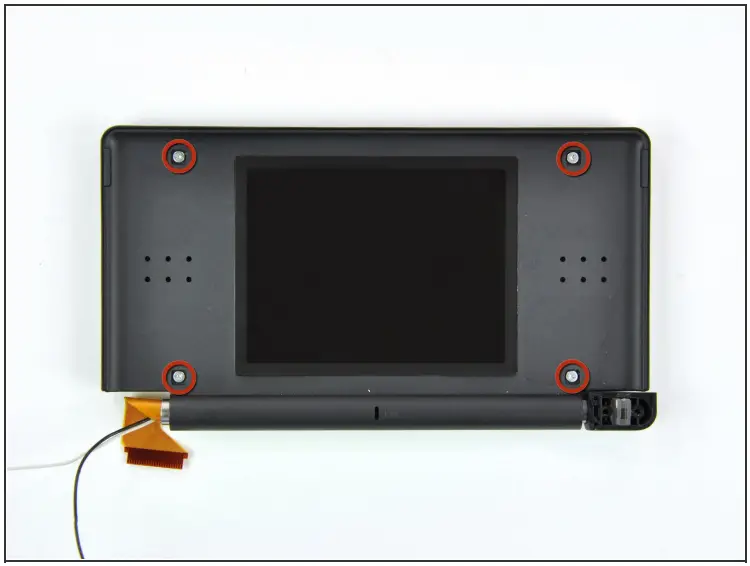
![]() Remove the four 3.4 mm Phillips screws securing the rear display bezel to the front display bezel
Remove the four 3.4 mm Phillips screws securing the rear display bezel to the front display bezel
Step 23
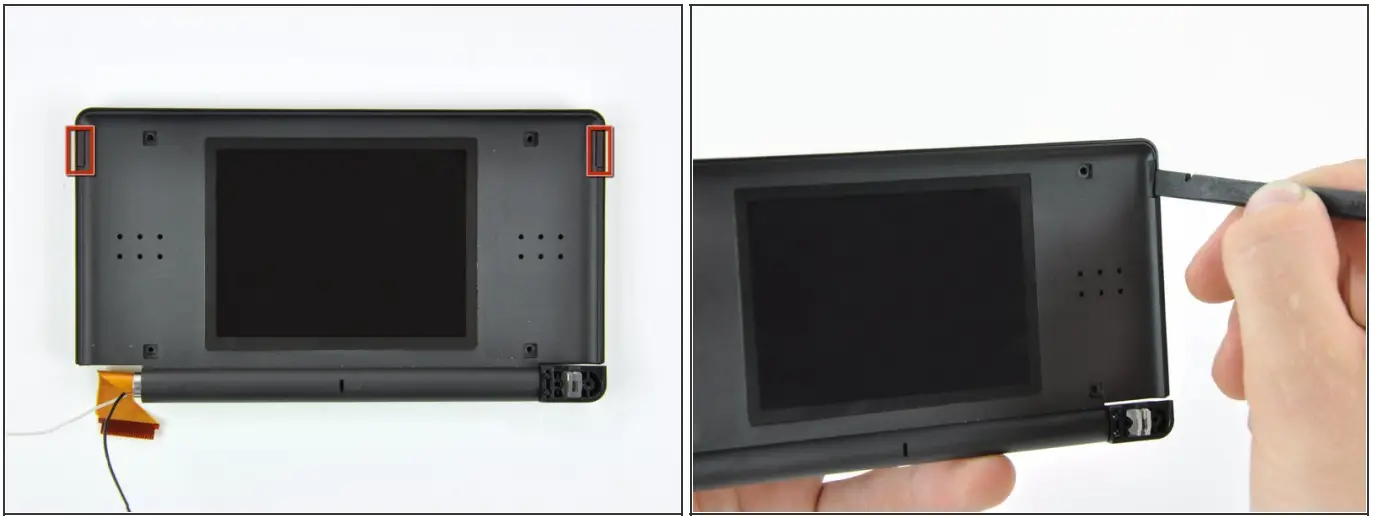
![]() Use the edge of a spudger to pry both rubber pads out of the front display bezel.
Use the edge of a spudger to pry both rubber pads out of the front display bezel.
Step 24
![]() Using two hands, gently slide the rear bezel upwards.
Using two hands, gently slide the rear bezel upwards.![]() The rear bezel will move only about 2 mm.
The rear bezel will move only about 2 mm.
Step 25
![]() Insert a spudger in the gap between the front and rear display bezels and pry the front bezel away from the rear bezel.
Insert a spudger in the gap between the front and rear display bezels and pry the front bezel away from the rear bezel.![]() Lift the rear display bezel away from the display assembly.
Lift the rear display bezel away from the display assembly.
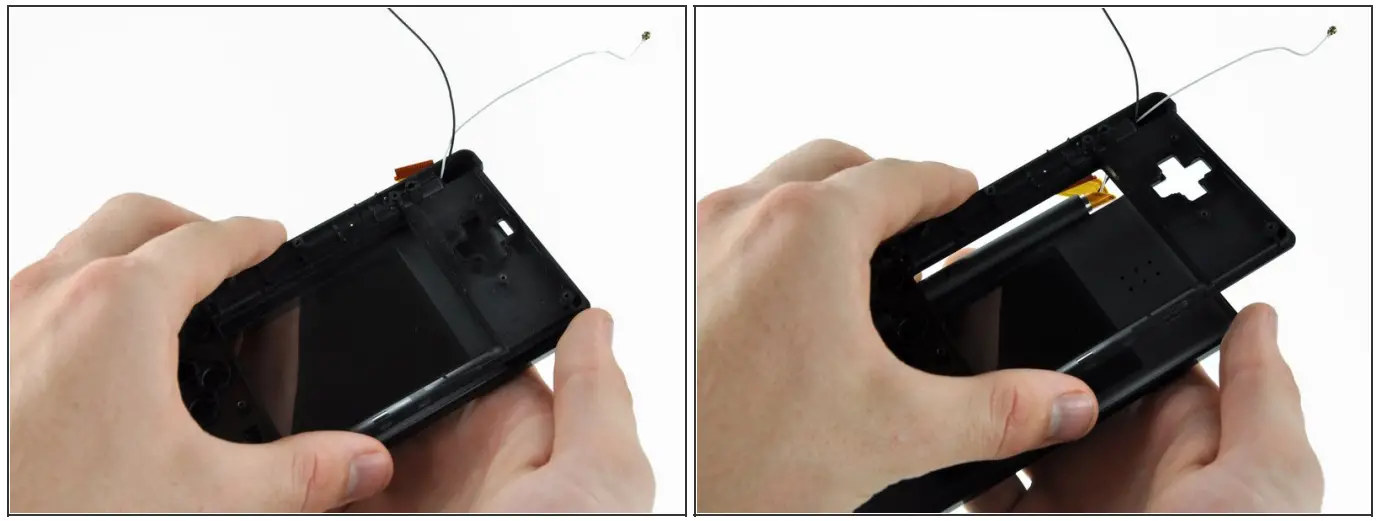
Step 26 — Wi-Fi Antenna
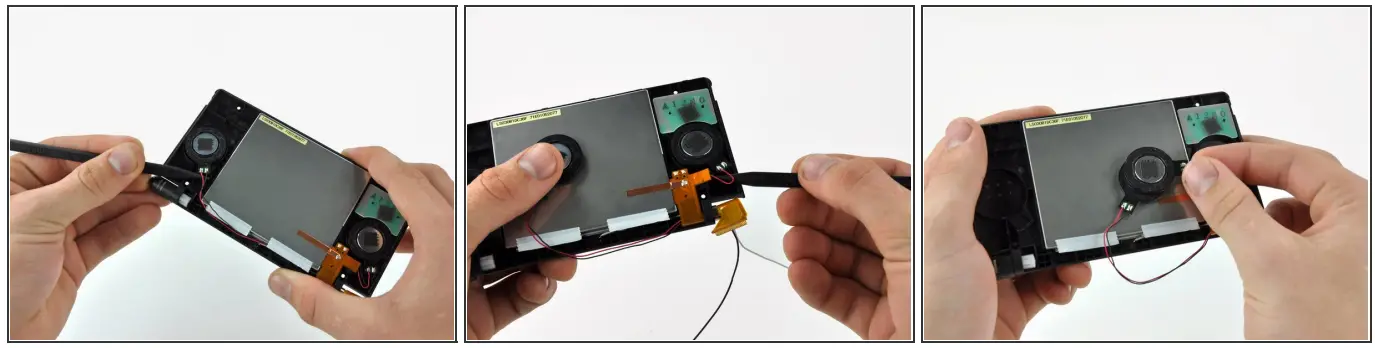
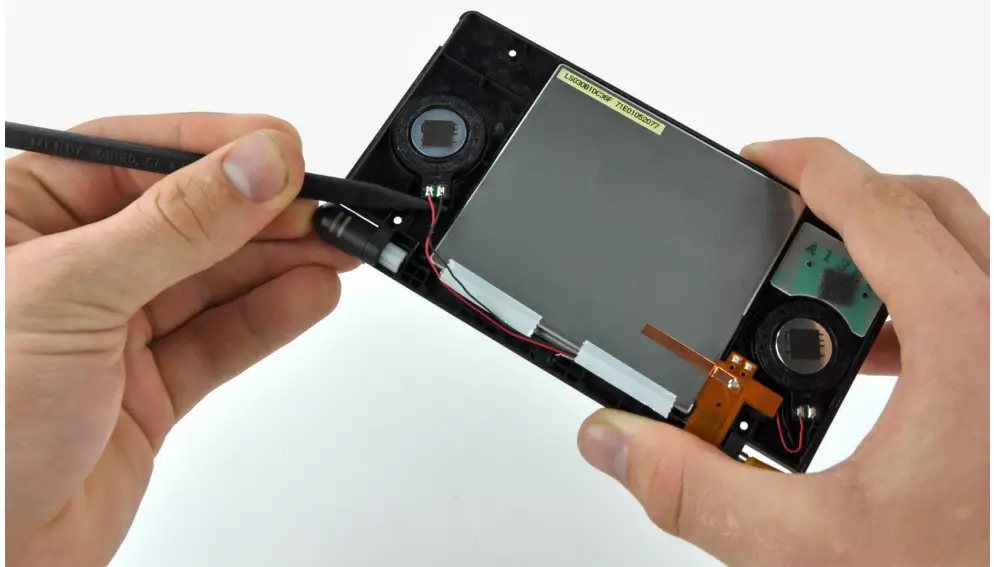
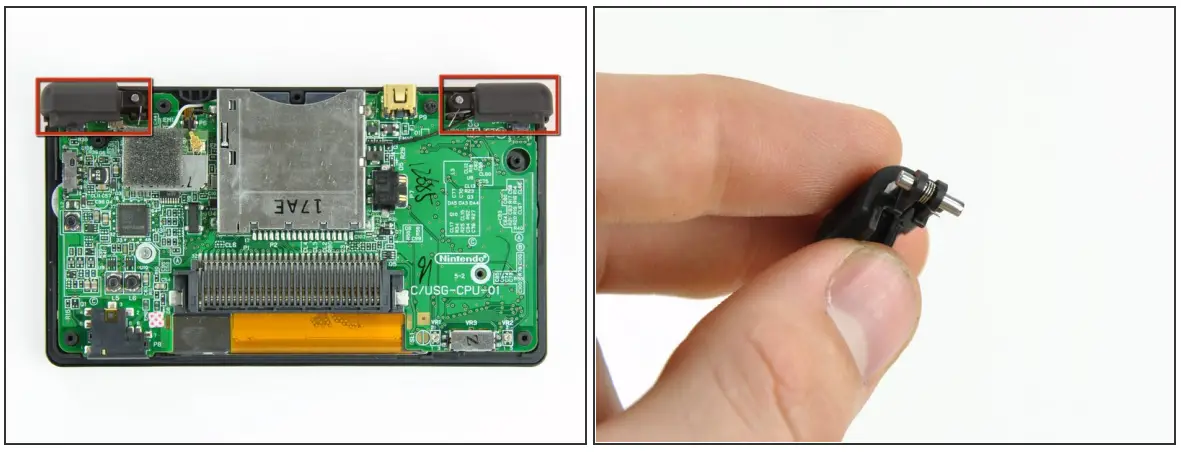
![]() Use the tip of a spudger to pry both speakers up from their housing and place them on the back of the LCD.
Use the tip of a spudger to pry both speakers up from their housing and place them on the back of the LCD.![]() The speakers have magnets that will hold them together, helping to keep them out of the way for later steps.
The speakers have magnets that will hold them together, helping to keep them out of the way for later steps.
Step 27

![]() Starting in the top right corner, use both hands to slowly separate the LCD from the front display bezel.
Starting in the top right corner, use both hands to slowly separate the LCD from the front display bezel.![]() Continue separating along the top and left edges of the LCD.
Continue separating along the top and left edges of the LCD.![]() Finally, push the LCD up and away from the front display bezel.
Finally, push the LCD up and away from the front display bezel.![]() Do not try to remove the LCD yet, as it is still connected to the front display bezel via the LCD ribbon cable.
Do not try to remove the LCD yet, as it is still connected to the front display bezel via the LCD ribbon cable.
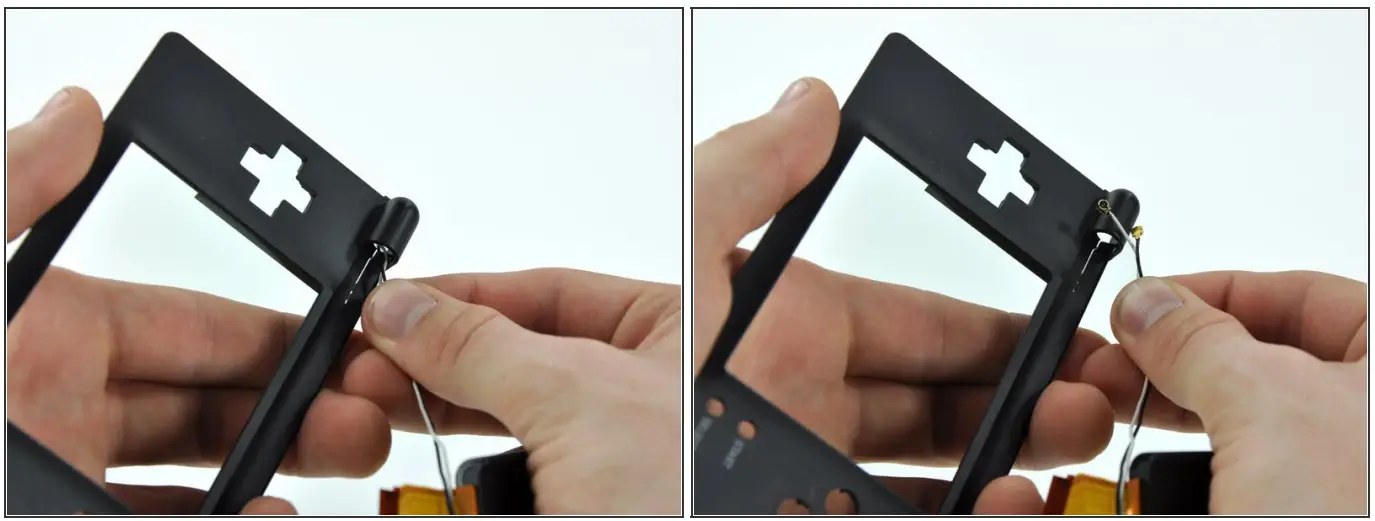
Step 28
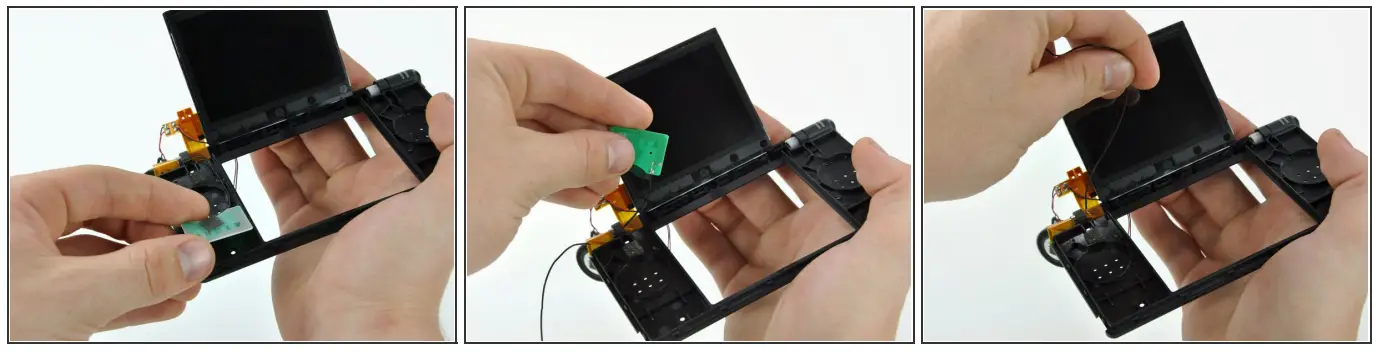
![]() Lift the Wi-Fi antenna up, and pull its cable through the hole in the front display bezel.
Lift the Wi-Fi antenna up, and pull its cable through the hole in the front display bezel.![]() Remove the Wi-Fi antenna from the display assembly.
Remove the Wi-Fi antenna from the display assembly.
© iFixit — CC BY-NC-SA
www.iFixit.com
Nintendo DS Lite Wi-Fi Antenna Replacem…


