Tefal RG7455WH X-plorer Serie 60 Robot Vacuum Cleaner
Please read carefully the “Safety and use instructions” booklet before first use
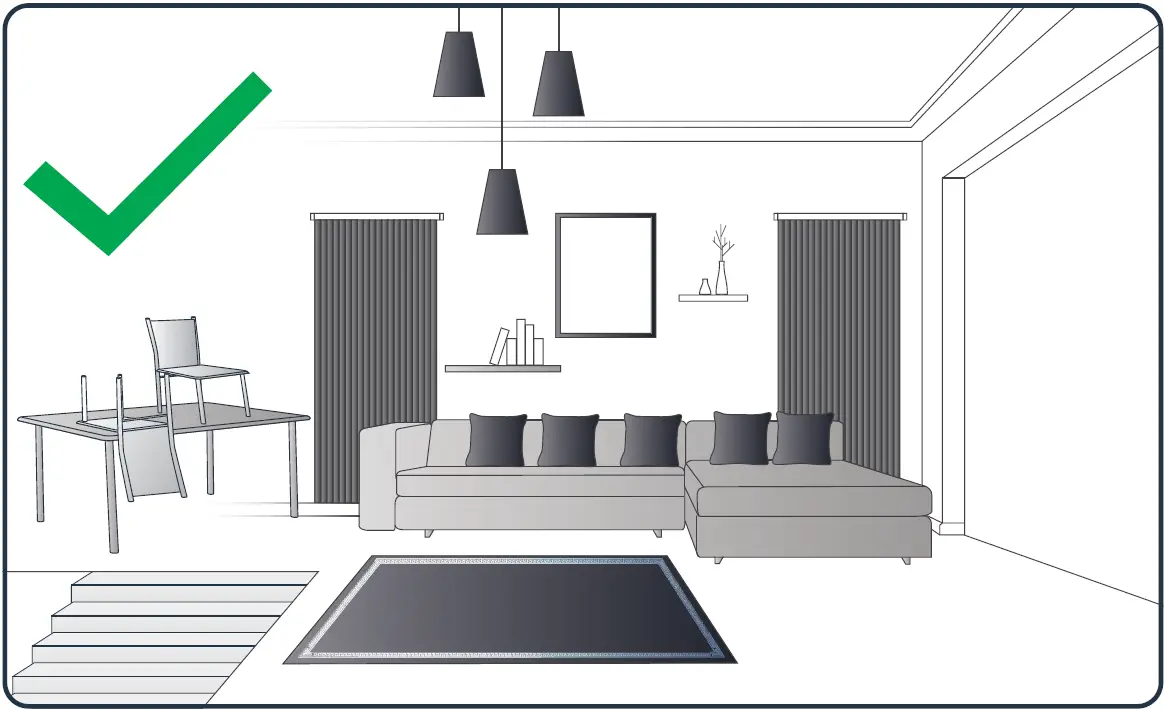
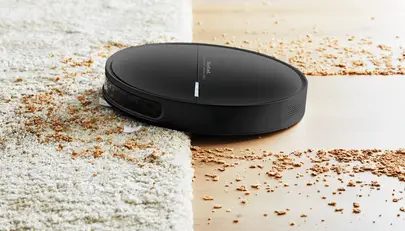
Your robot may encounter some difficulties on carpets: with fringes, too thick, with long piles, too light (ex: bathroom carpet)
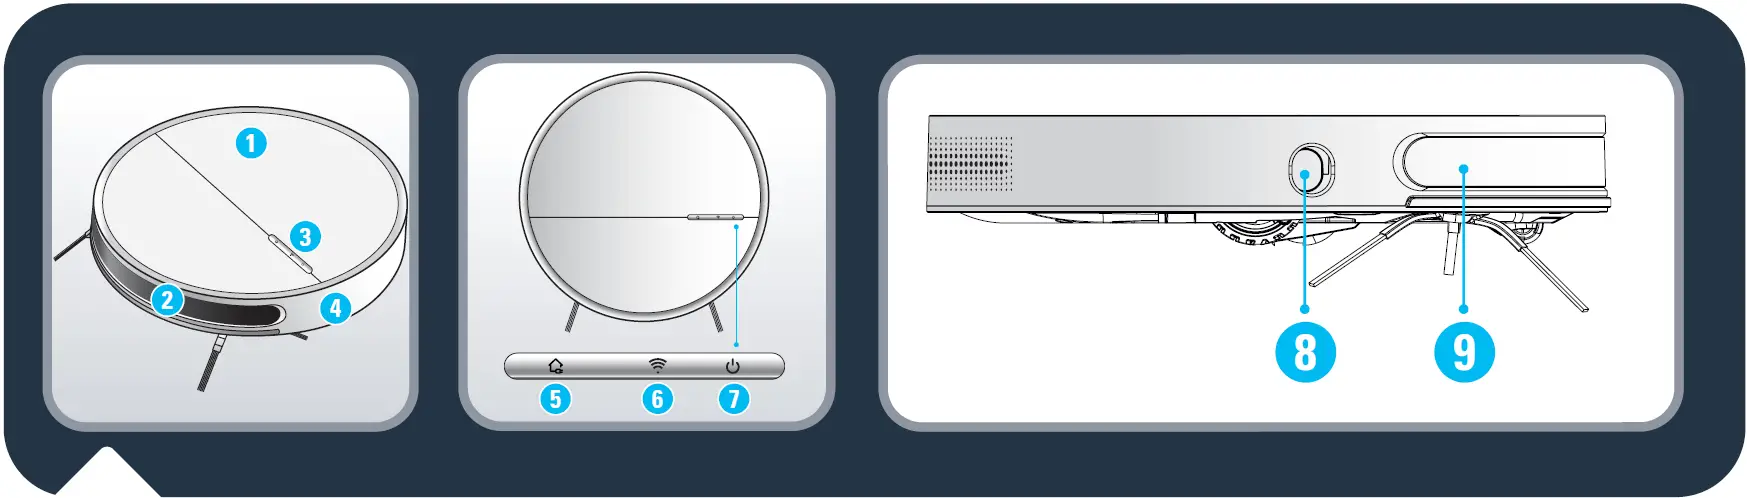
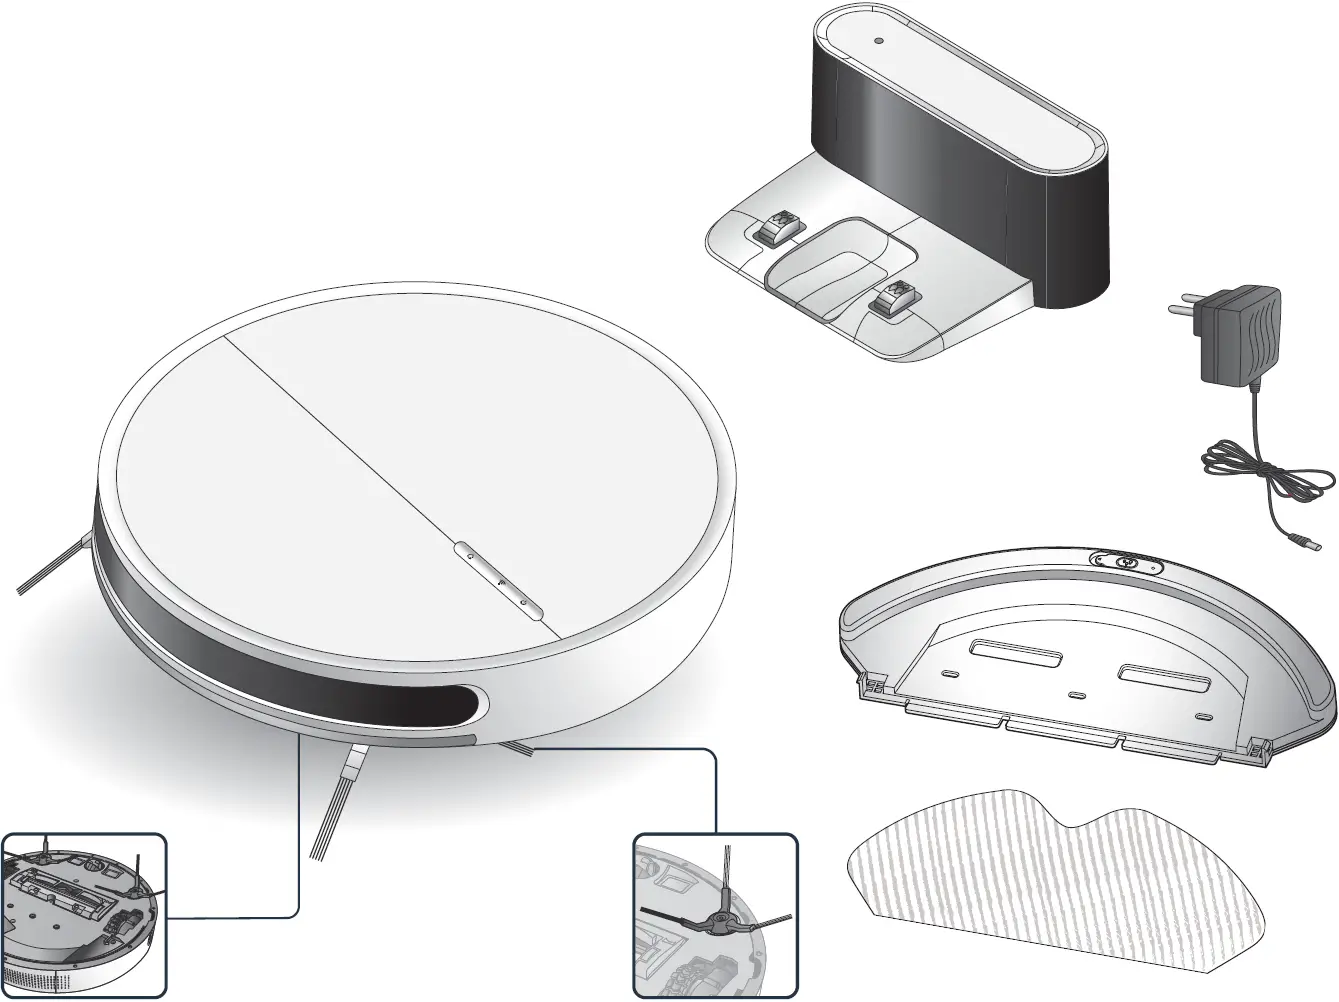
- Flip cover
- Transparent window
- Control button
- Front bumper
- Recharge button
- WIFI indicator light
- Start / Pause button
- TOF wall sensor
- Infrared sensor & recharge sensor
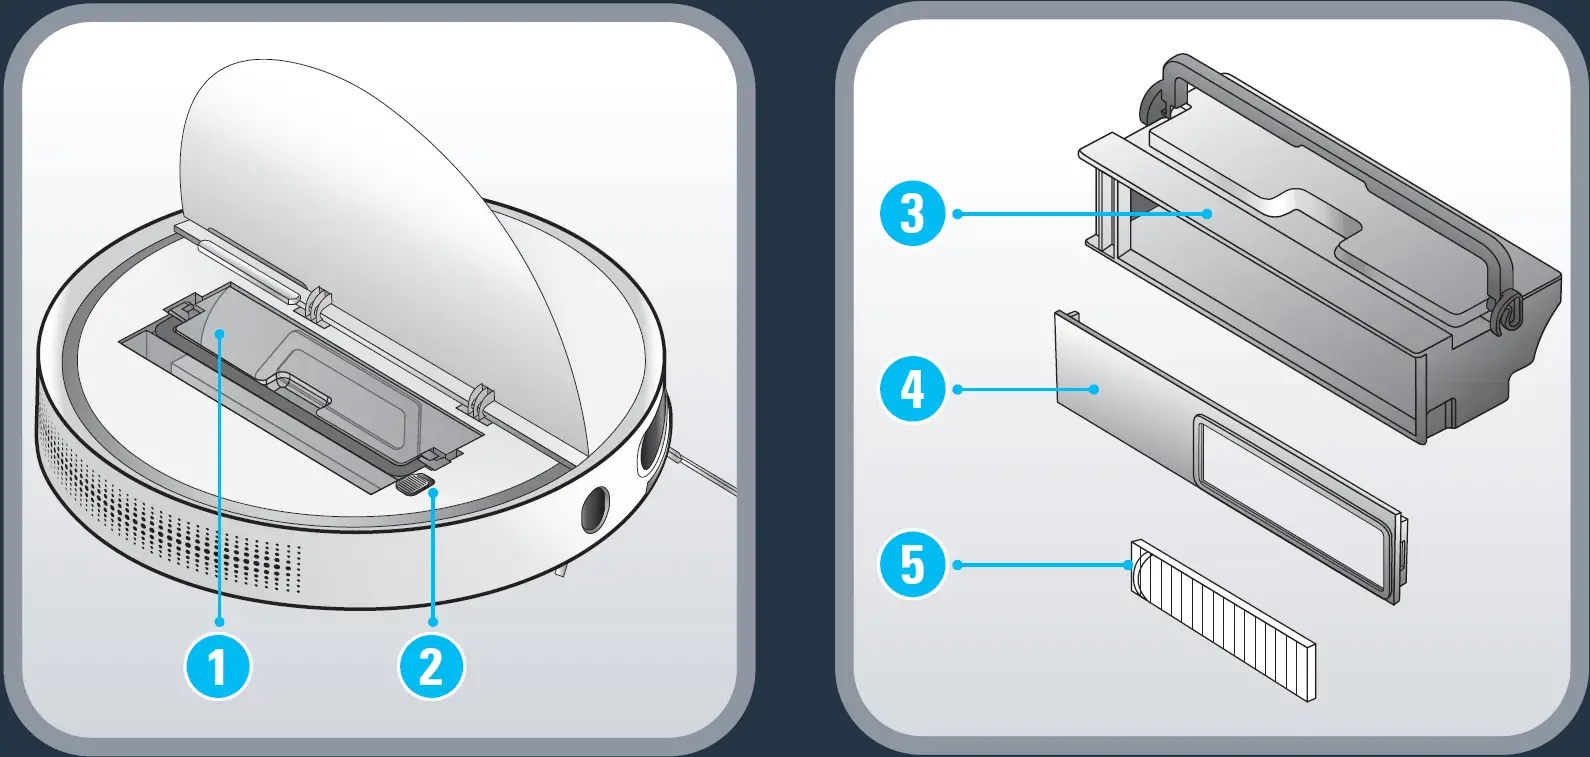
- Dust box
- ON OFF button
- Dust bin
- Dust box cover
- Filter screen
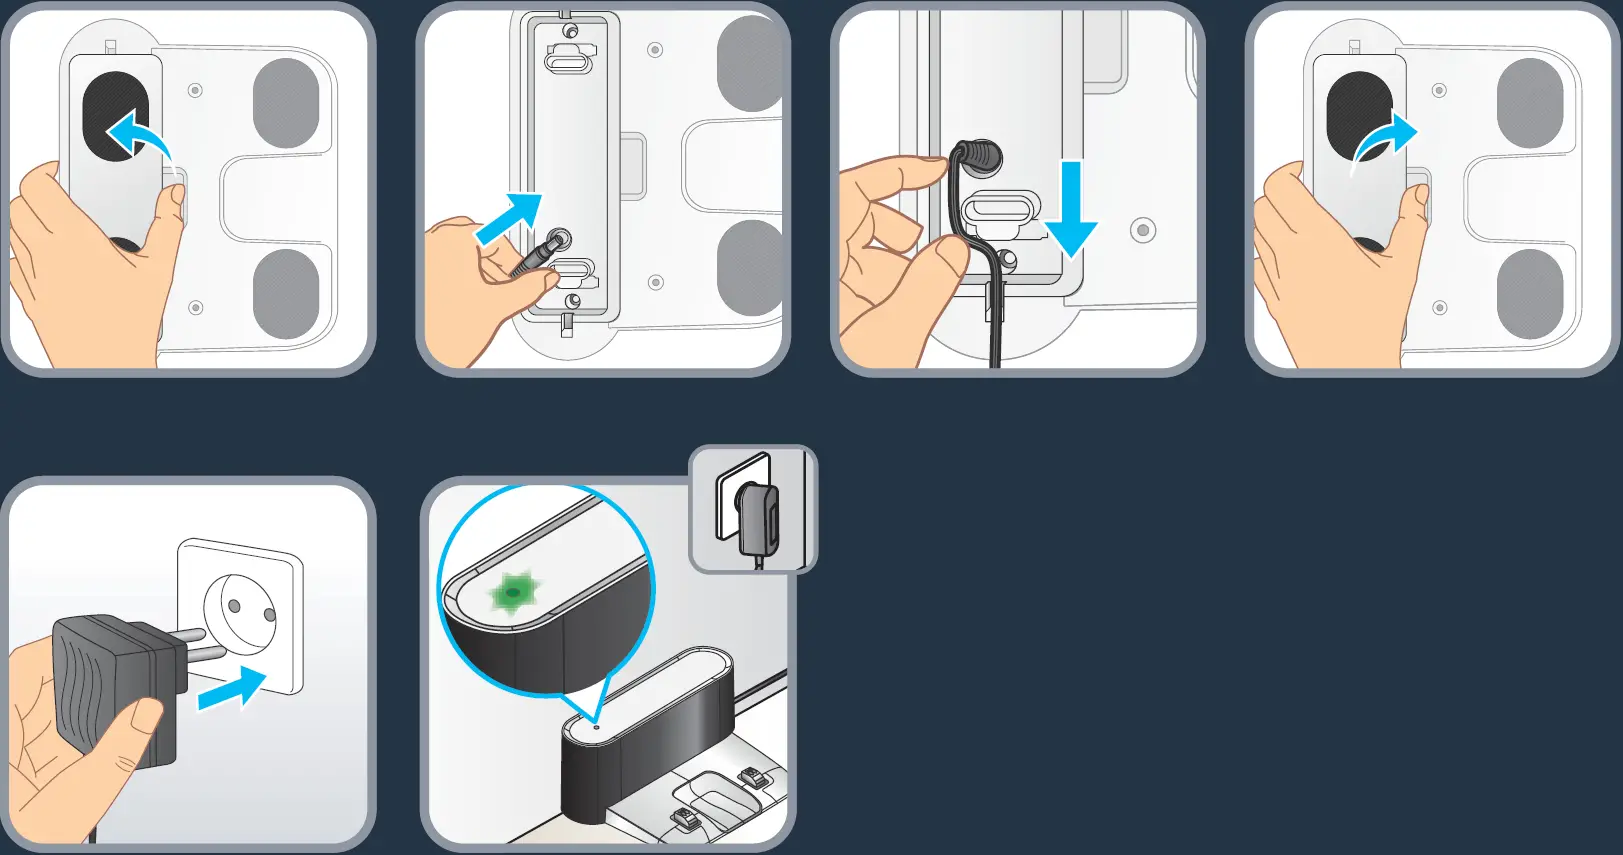
Connect the power adapter to the charging dock and power supply. Be sure to arrange the adapter cable, so that the vacuum cleaner will not be entangled during operation.
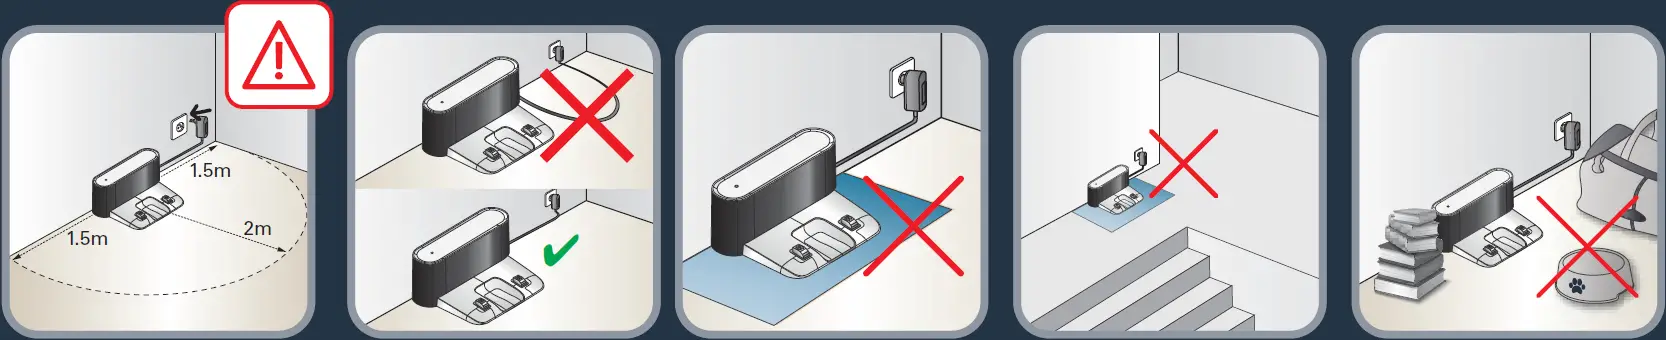
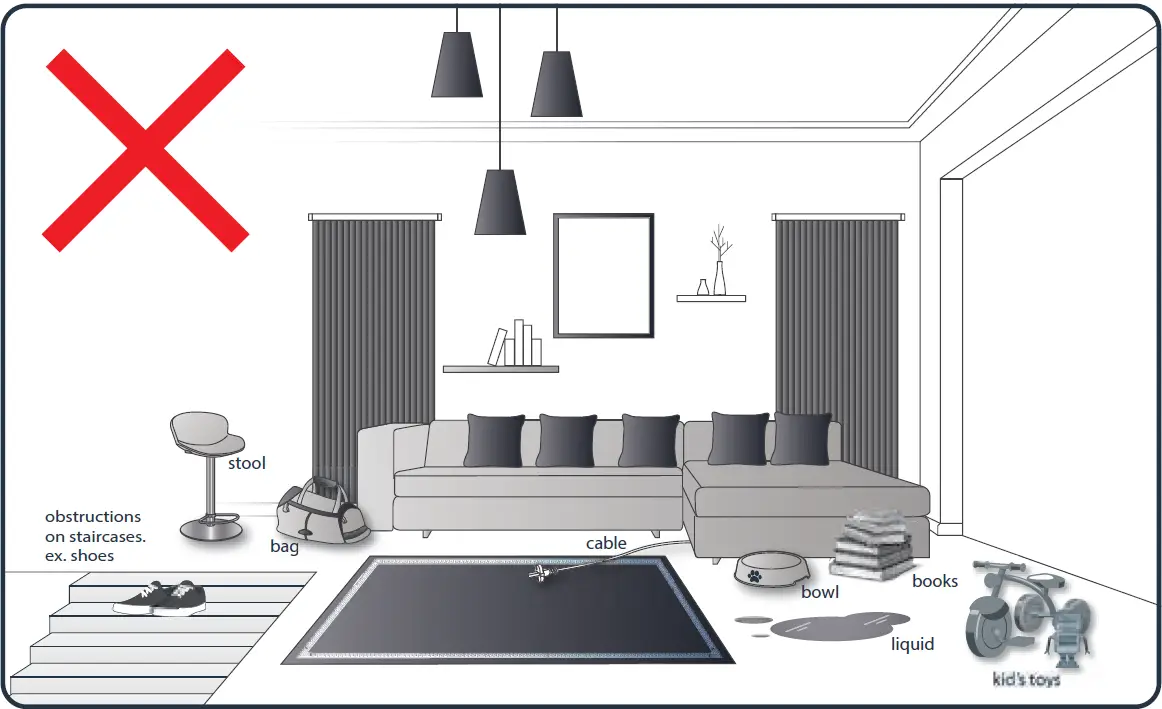
To place the docking station, make sure there is an empty area of 1.5m on each side and 2m in front of the docking station. Do not install the docking station near stairs. The cable must be tight. Always place the docking station on hard floor. Do not place the docking station on carpet.
When not using the vacuum cleaner for a long time, please fully charge the battery, then remove it and store it in a cool dry place. When the product is working, removal of the docking station will affect the recharging of the machine.
To charge the robot, place the robot on the docking station: the charging plates on the robot must touch those of the docking station. When the robot is being charged, the machine’s recharge light flashes in blue; when the robot is fully charged, it will fully set in blue.
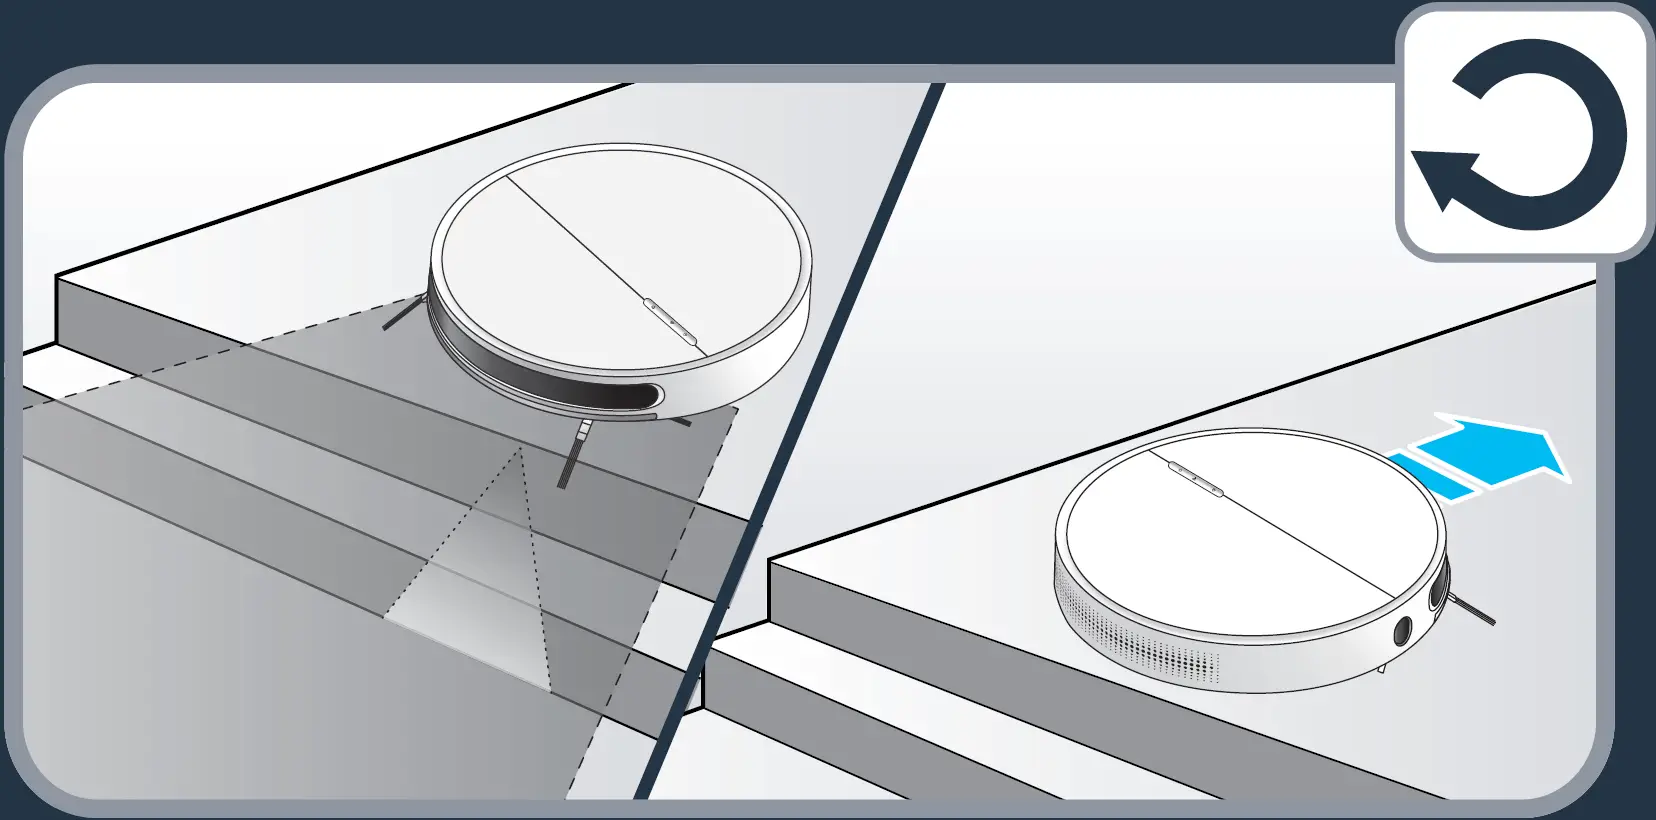
The robot has drop sensors to detect stairs and gaps. The robot will change direction when detecting them. In order to correctly detect the floor level difference, make sure there are no objects (bags, shoes…) on the floor next to gaps, stairs or on the stairs’ steps.

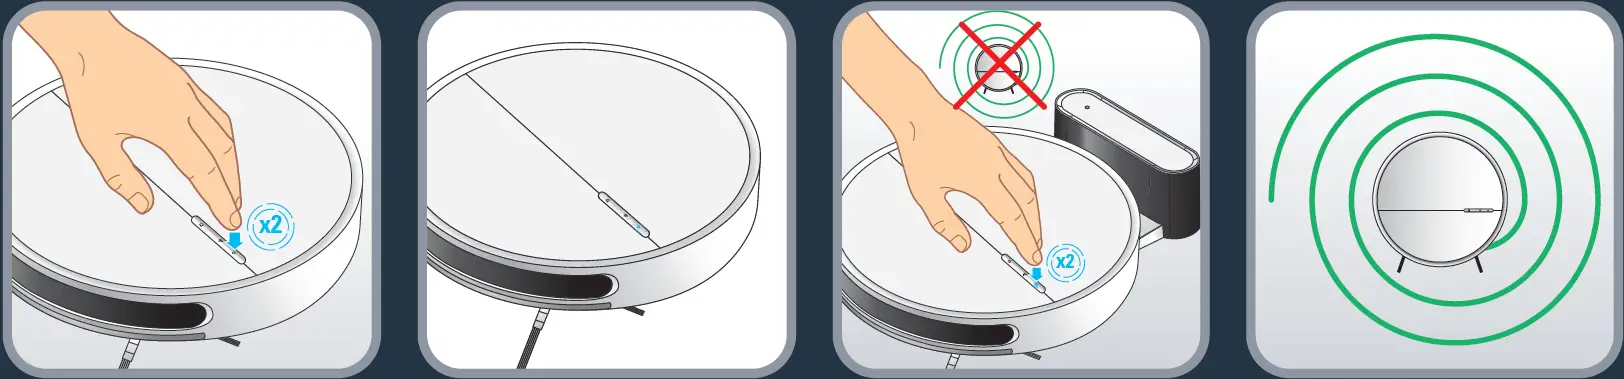
To clean all the accessible areas of your home, use the « Spot » mode. Press once the Power button, the robot will start cleaning and the Power button will be fully set in blue.
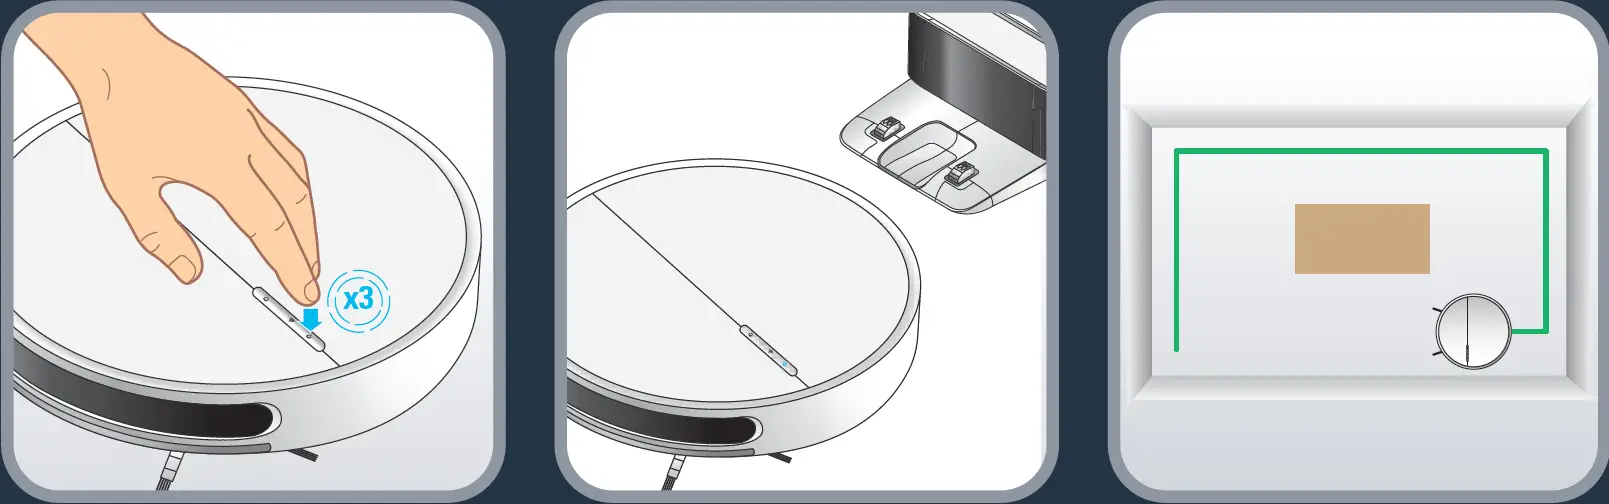
To clean along the walls and in the corners, use the « Wall follow » mode. Press three times the Power button, the robot will start cleaning and the Power button will be fully set in blue.
To pause the robot when it is cleaning, press the Power button; the robot will pause EN and the Power button will flash in blue

To ask the robot to go back to its docking station and charge, press the Recharge button; the robot will go to charge while the Recharge button will be fully set in red.

To fully benefit all the possibilities brought by your robot, download the free app « Tefal Robots » (you can use the QR code above to find it on app store or Google play) on your smartphone. Just let you guided by the instructions in the app to enjoy the robot!

The WIFI indicator LED points out your connection status: when fully set in blue, the robot is connected; when flashing blue, the robot is trying to connect; when off the robot is not connected.

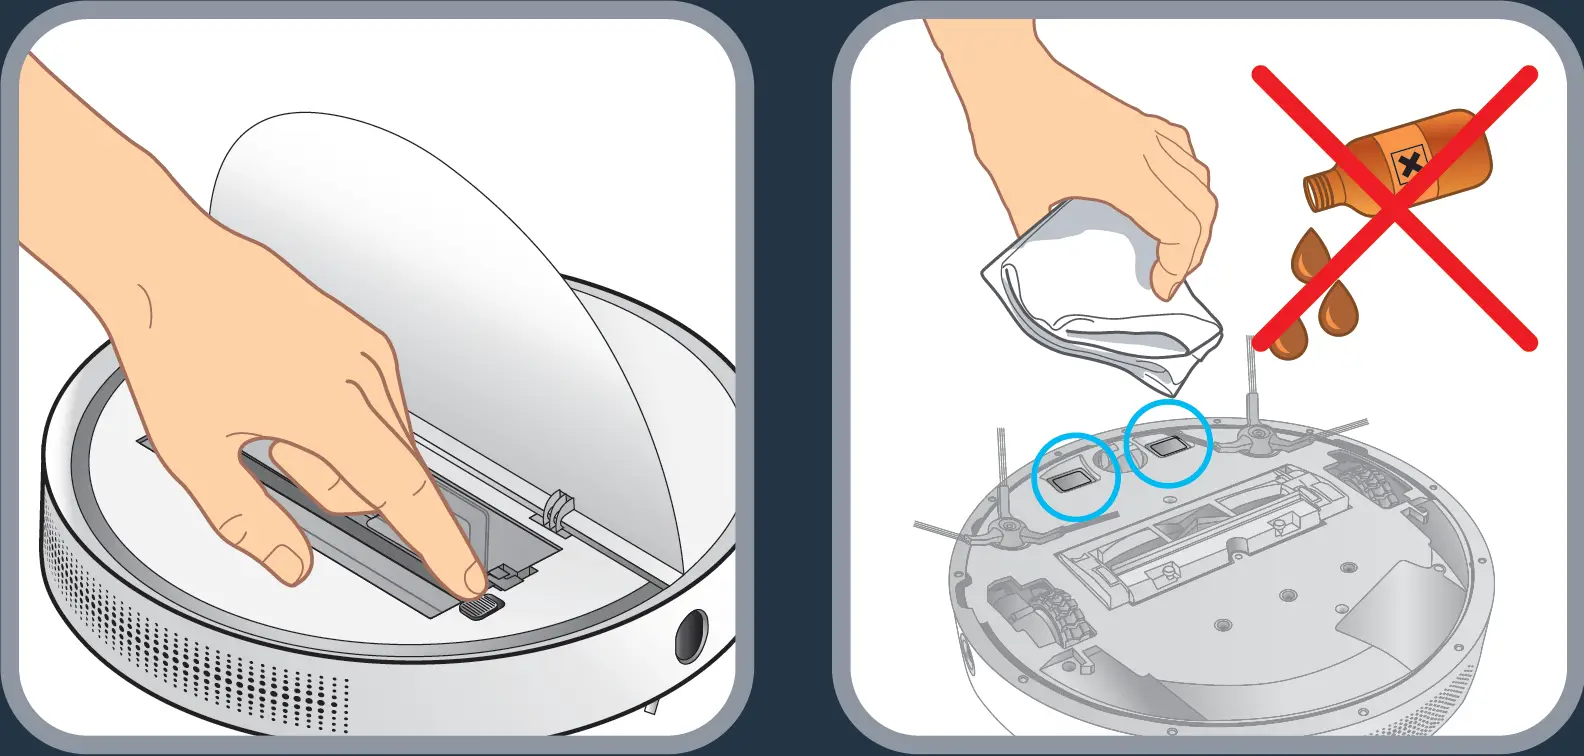
To clean the charging contact, open the flip cover and turn off the power switch (or unplug the power cord) first. Then use a dry cloth to wipe them. Do not scrub with oil. Clean the charging contact once a month.
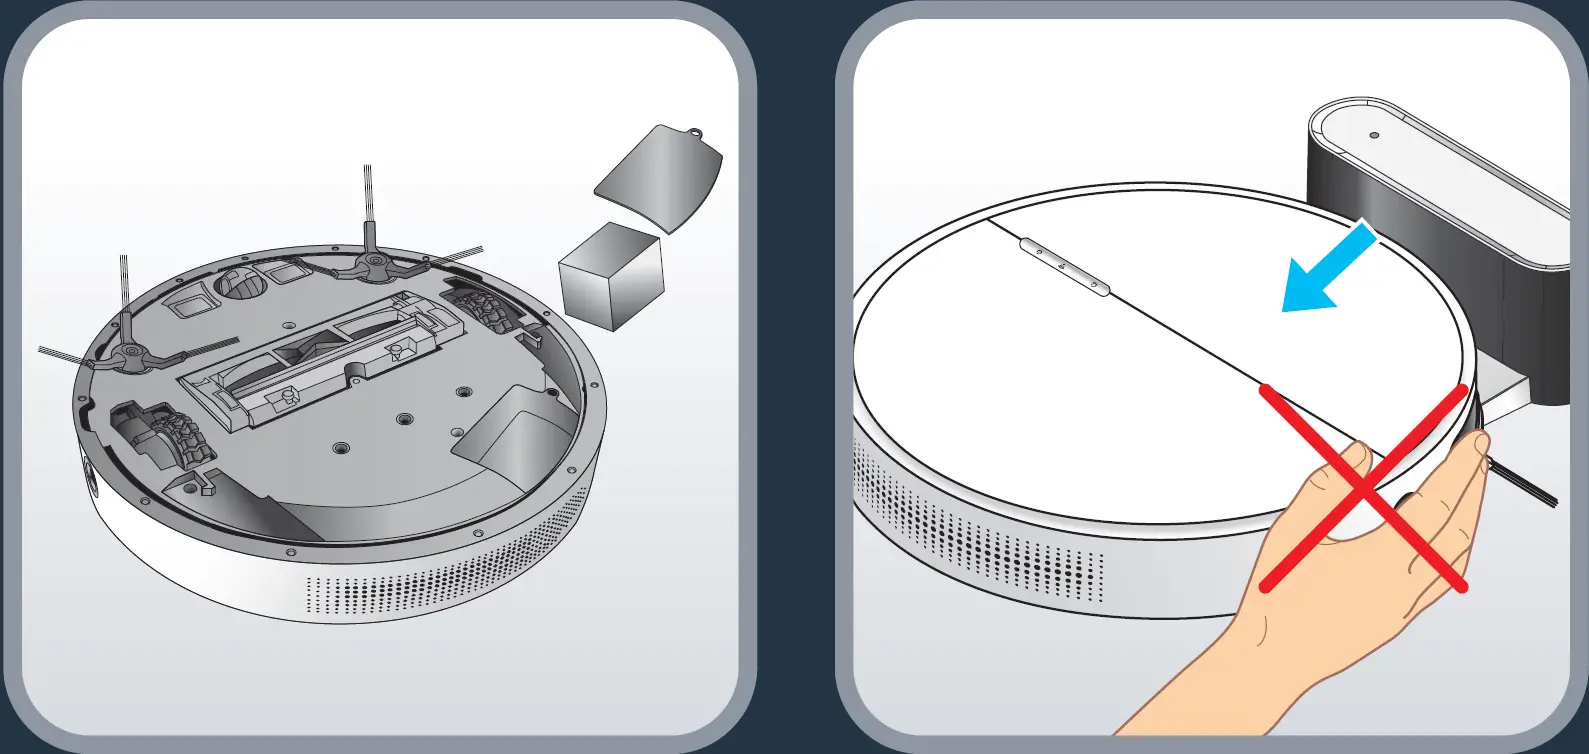
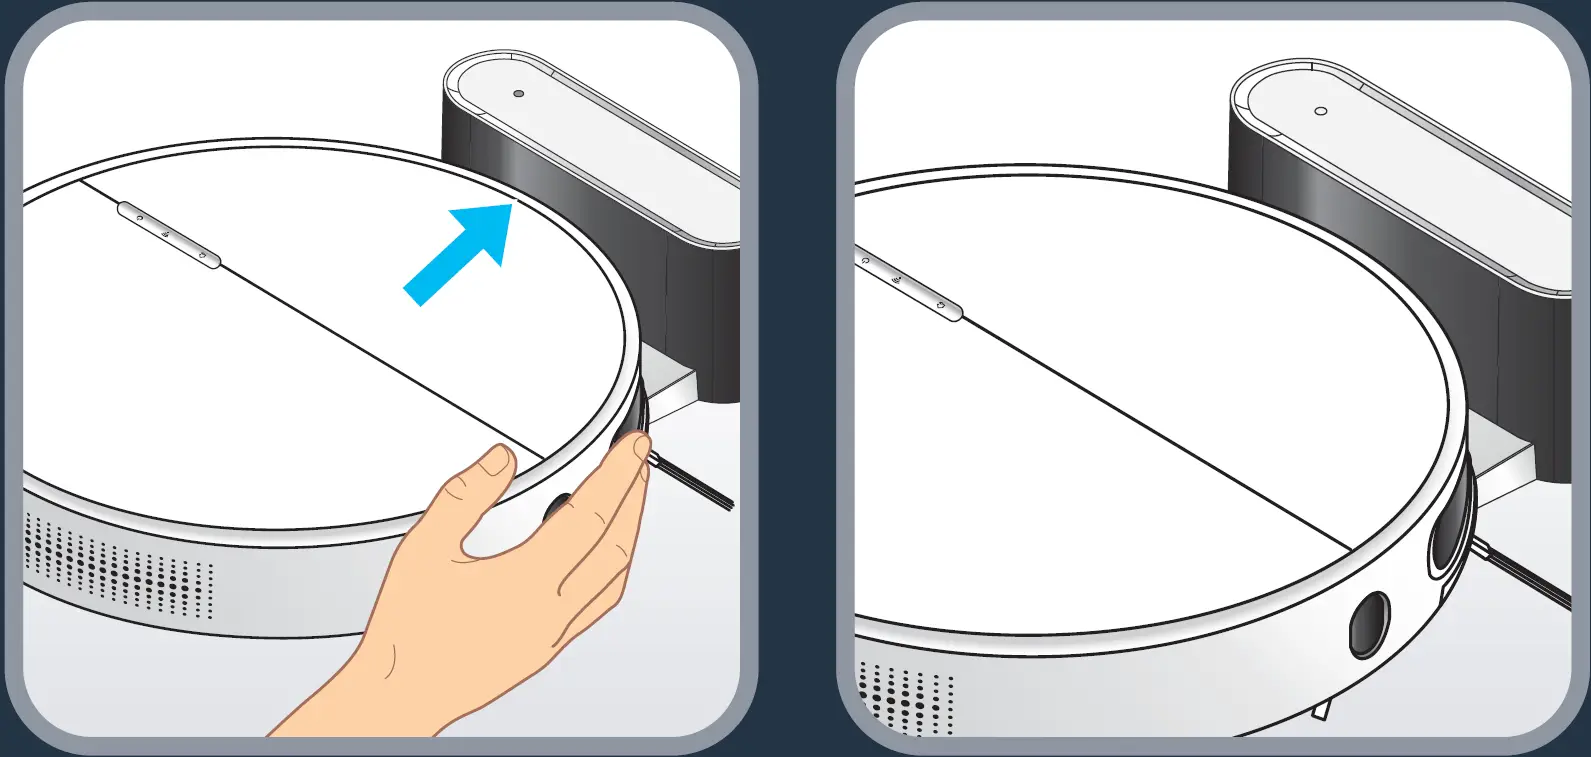
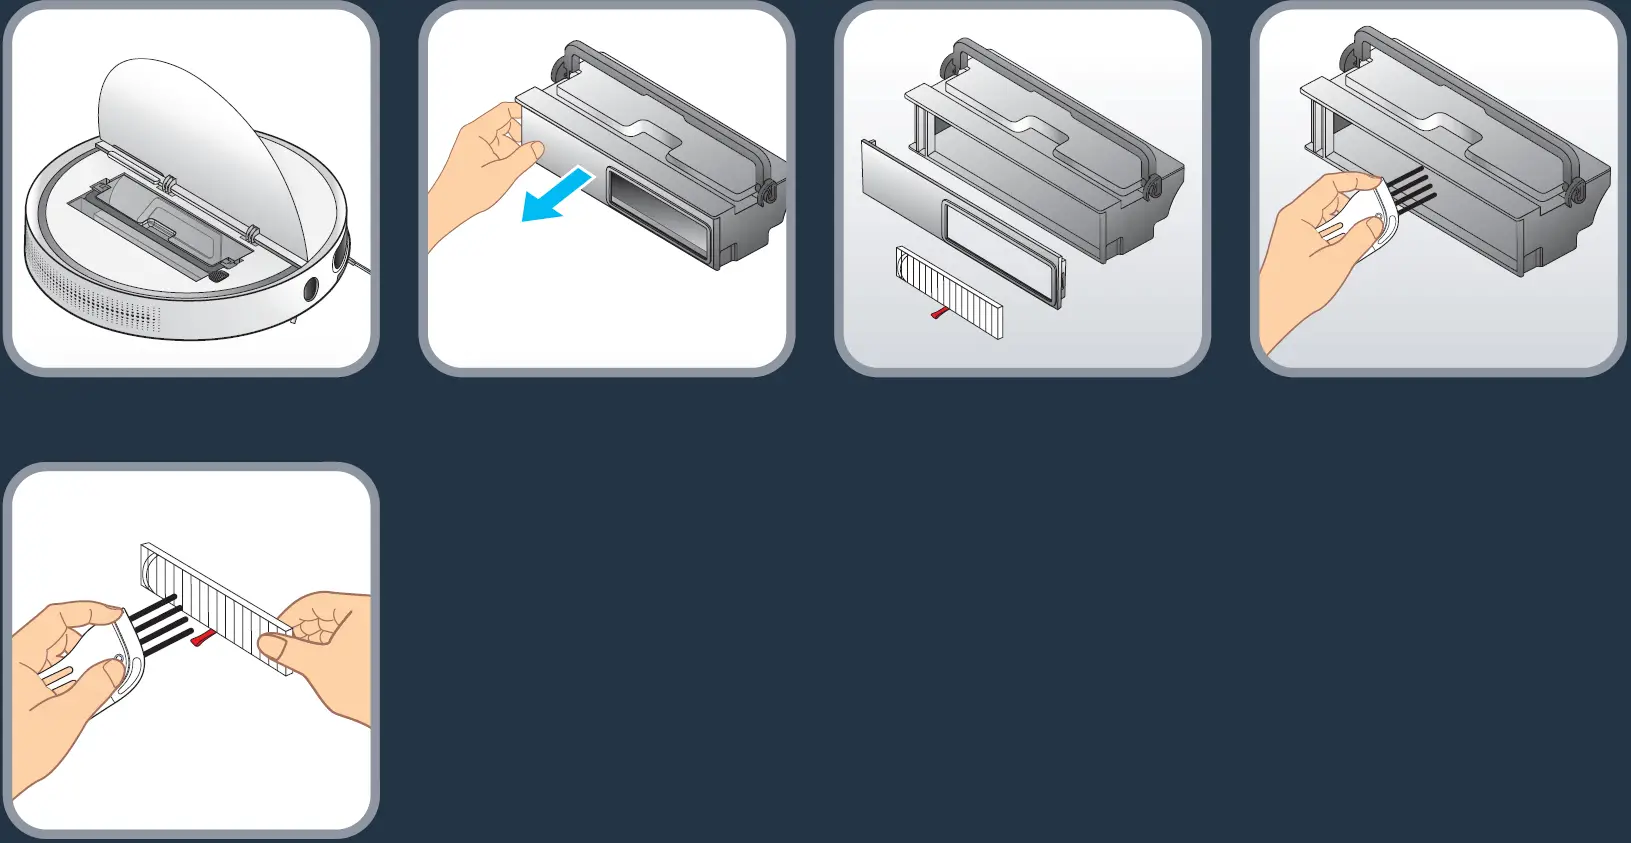
To clean the dust box, open the flip cover, lift the dust box handle and take out the dust box. Remove the dust cover from the left side of the box, lift the filter screen belt and take out the filter screen. Pour out the dust from the dust bin, use a cleaning brush to clean the dust bin, and rinse the inside under running water. Use a cleaning brush to clean the filter. Clean the dust box once a week.
To clean the middle sweeper, push the lock lever to the middle and lift it up to remove the middle sweeping scraper. Grab the middle sweeping brush and lift it up to remove the middle sweeper. Use a cleaning brush to clean to clean the elements, and clean the hair and other entanglements on the sweeping brush regularly.

To clean the side brush, remove it and use a cleaning brush to clean the side brush and the entanglements in the slot of the side brush. Replace lateral brushes every 6 months.
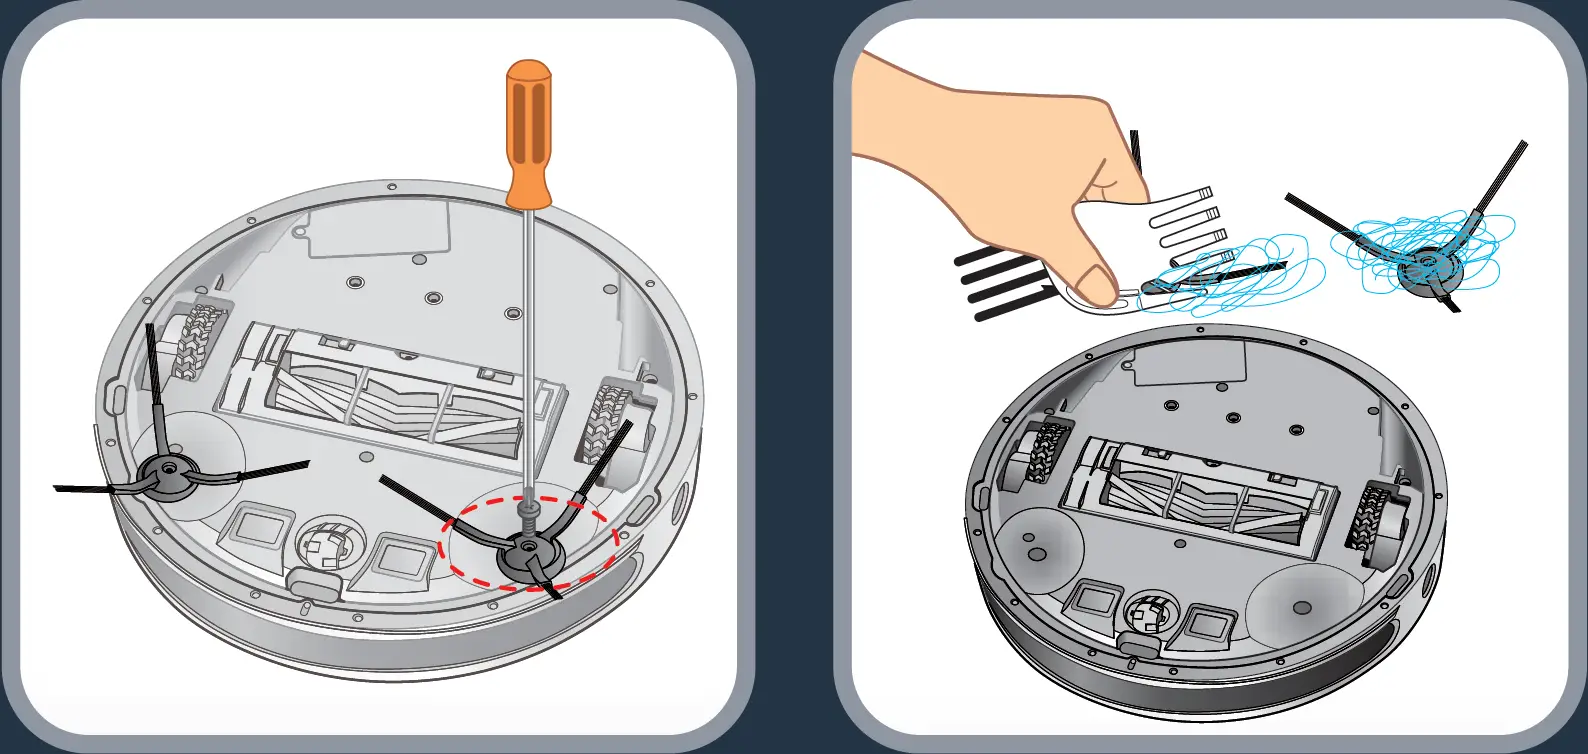
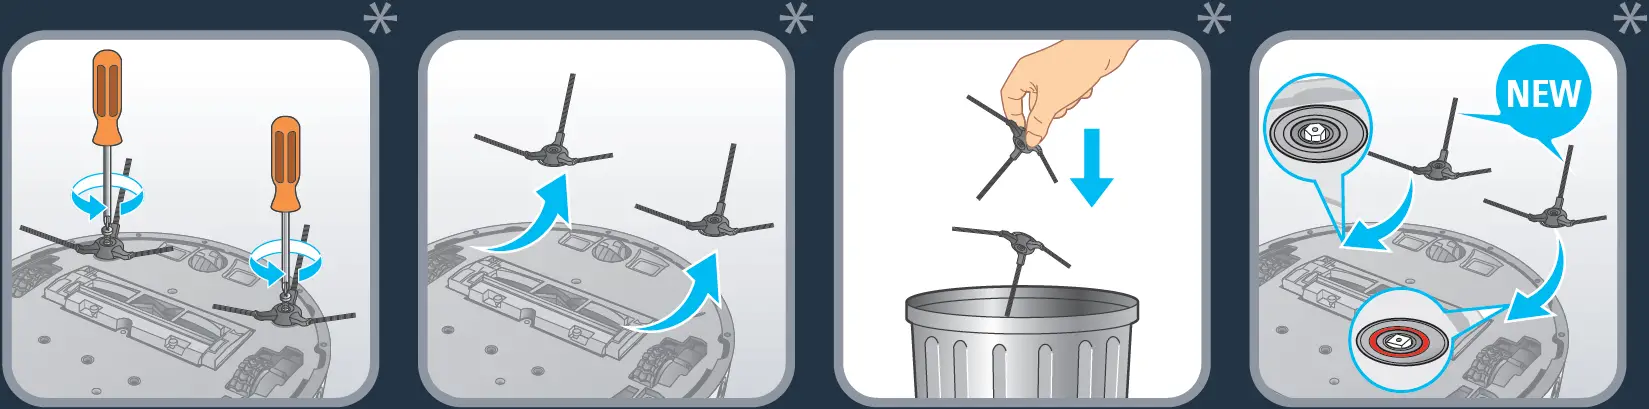
Replace lateral brushes every 6 months.
Throw away the old brushes and replace them with new ones. Screw the new brushes on the robot.
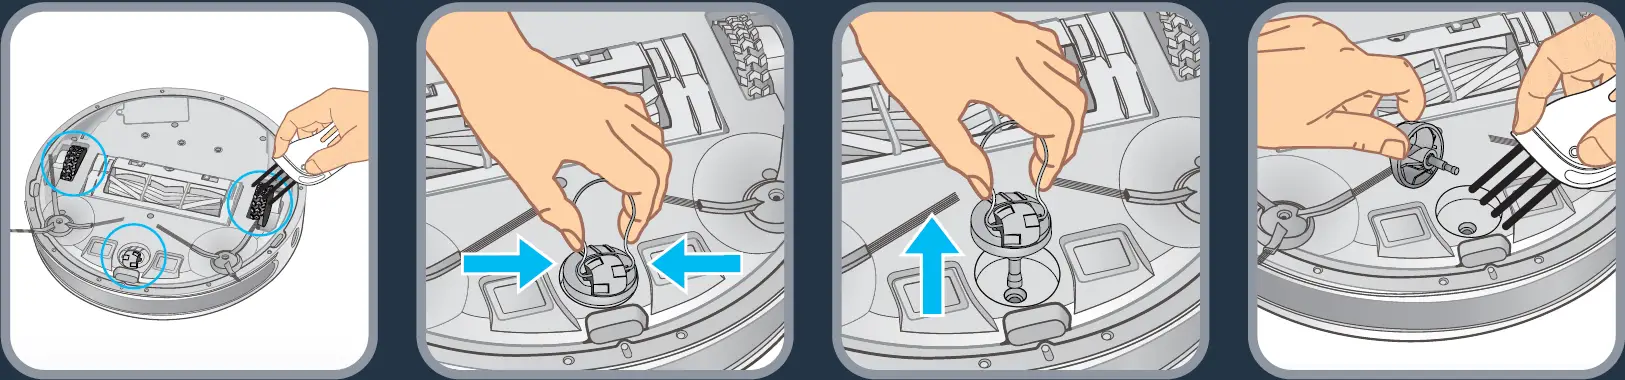
Clean the robot’s wheels once a week to remove entangled hair and fibers. To extract the front wheel, use the tool in the kit.
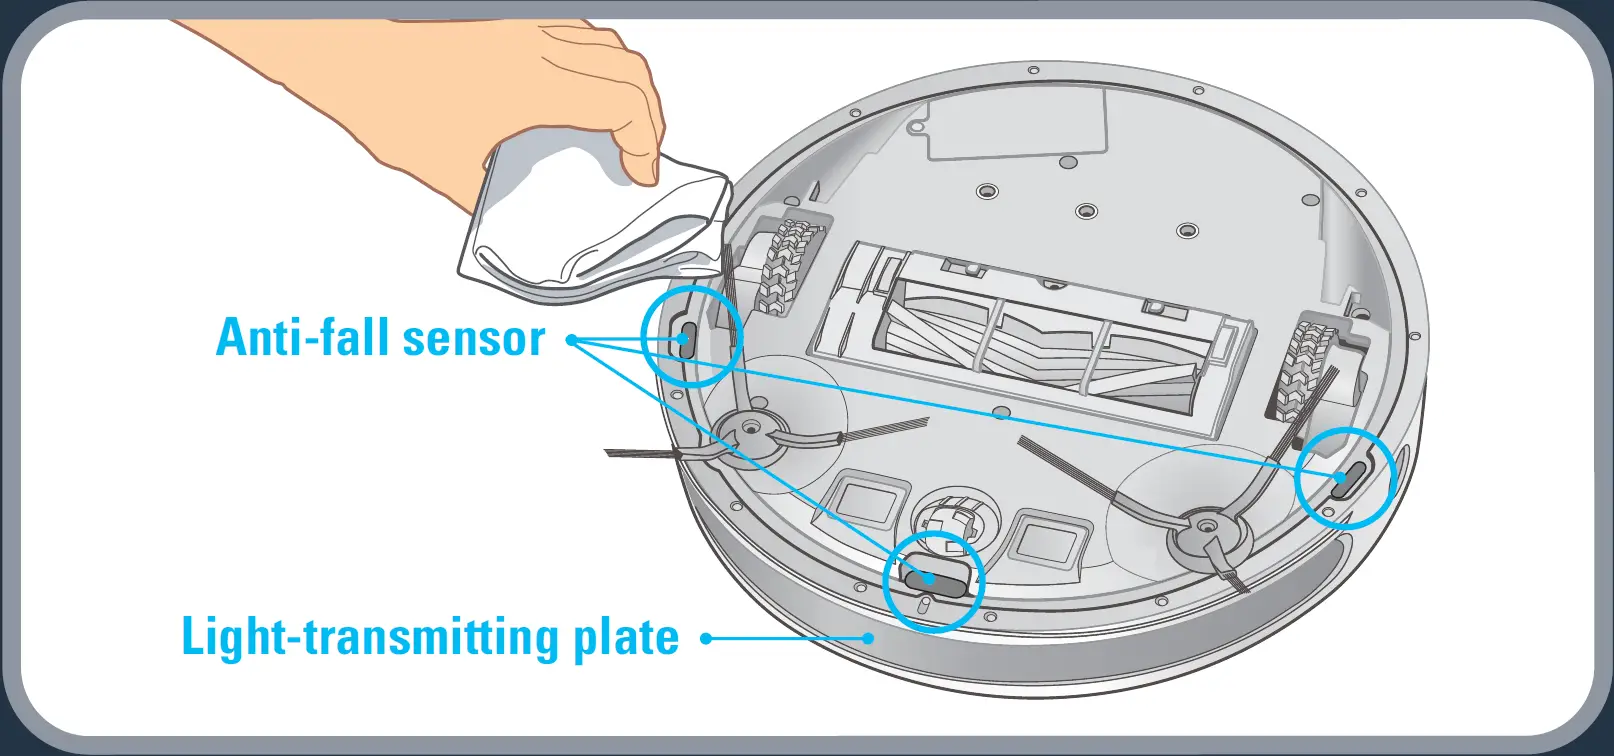
It is recommended that after the cleaning work is completed each time, a dry cotton cloth should be used to carefully wipe its light-transmitting plate and sensor to prevent dust accumulation, which will affect the performance of the product.
Component | Cleaning the component | Replacing the component |
Dust collector | After each use | Not applicable |
| Filter | Once a week | Twice per year |
Brush | Once a week | If required |
| Charging base | Once a week | Not applicable |
Fall sensors | Once a week | Not applicable |
| Front wheel | Once a week | Not applicable |
Brush heads | Once a month | Twice per year |
Every 6 months replace the fine dust filter with new one to maintain optimal performance.

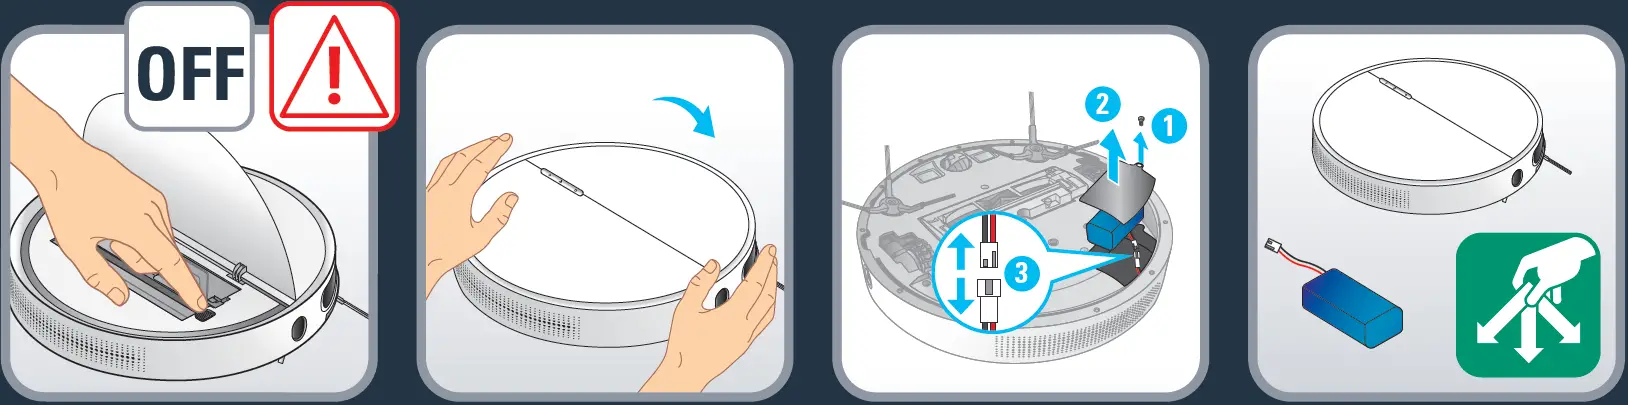
Do not throw the robot in the bin. Always wear gloves and protection.
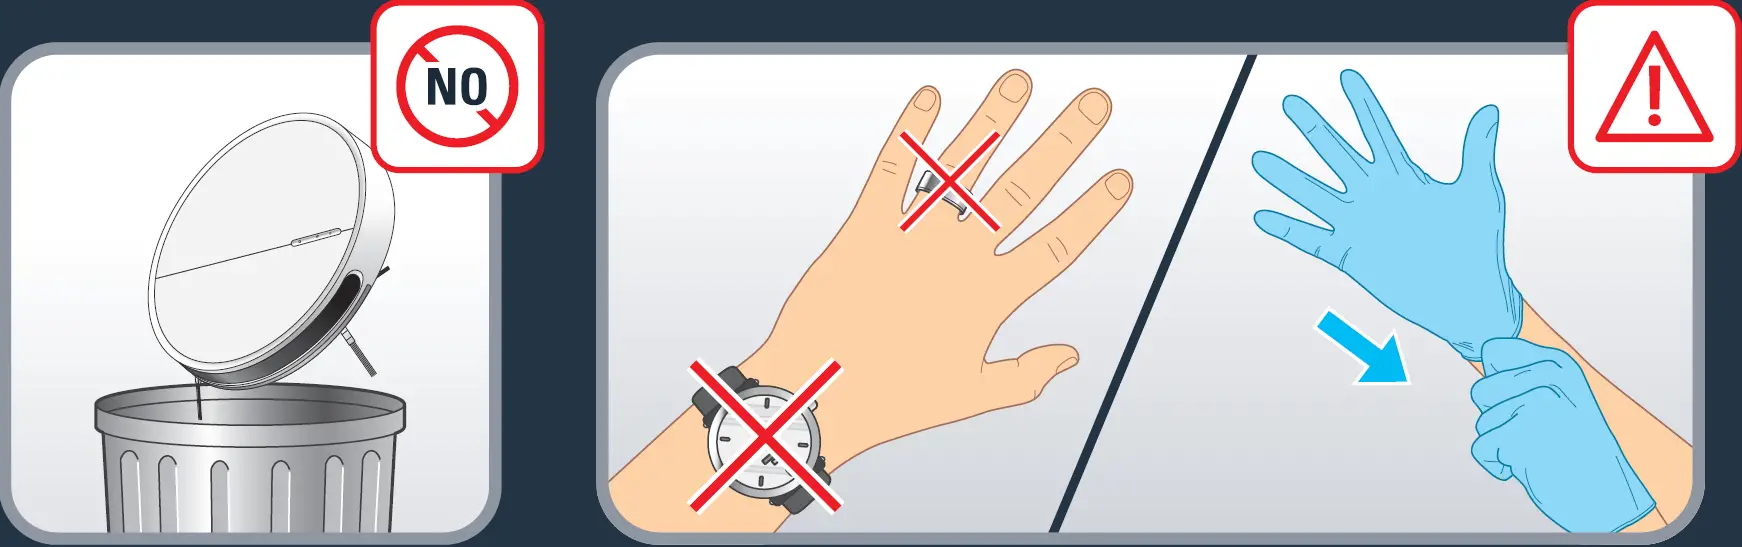
Attention: Before removing the battery turn off the robot. Turn the robot upside down to get access to the battery slot. Remove the battery by pressing snap latches of the battery slot and pull the battery up. Disconnect the battery from the robot. Recycle the battery and robot.

In order to extend the battery lifespan, always keep the robot charging on the docking station while not using it.
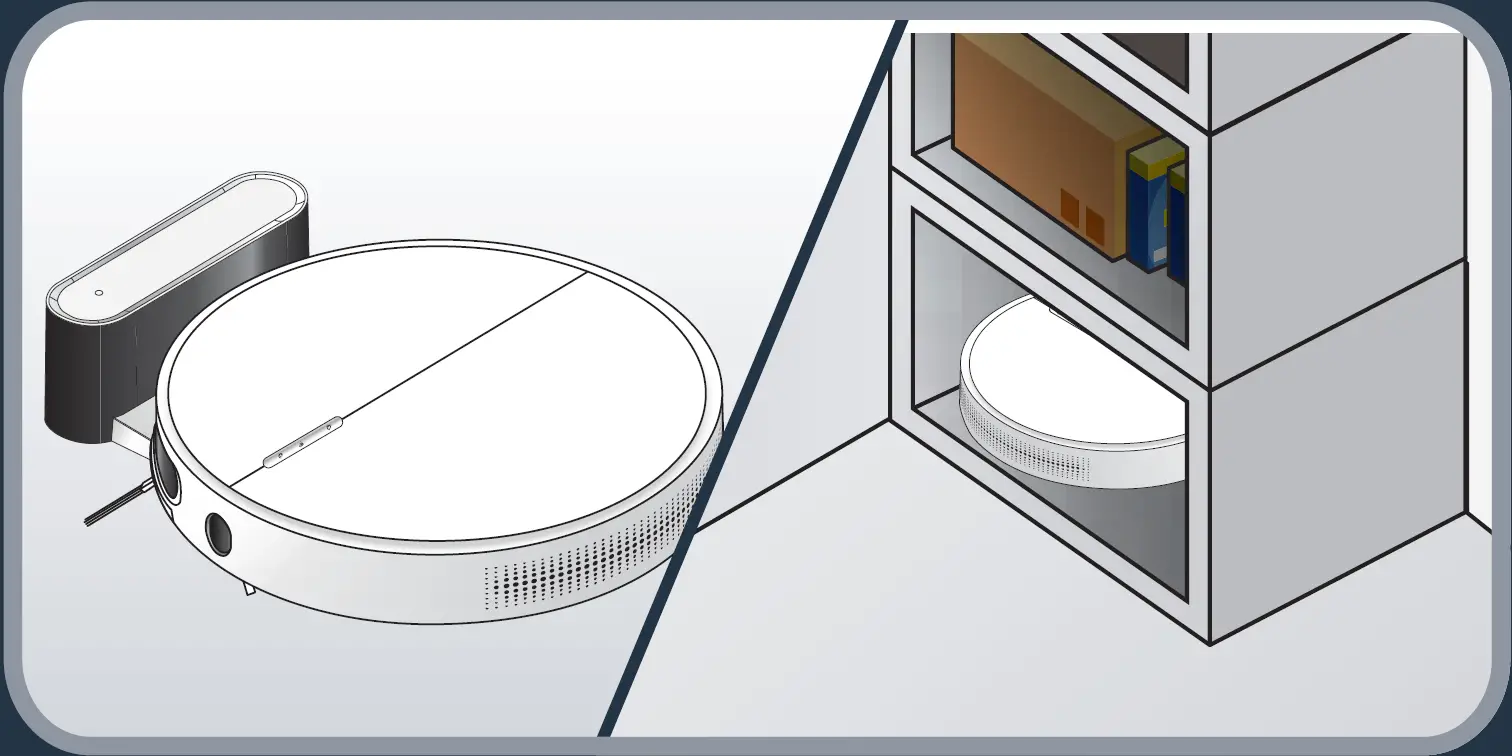
If the robot is stored off/out of the docking station, make sure the robot is OFF and the battery is fully charged. Store the robot in a fresh and dry place. Please charge the robot every 3 months when you are not using it.
IS THERE A PROBLEM WITH YOUR APPLIANCE?
According to model:
- The charger is getting hot:
- This is perfectly normal. The vacuum cleaner can remain permanently connected to the charger without any risk.
- The charger is connected but your appliance is not charging:
- The charger is incorrectly attached to the appliance or is faulty.
- Check that the charger is properly connected or contact an Approved Services Centre to change the charger.
- The charger is incorrectly attached to the appliance or is faulty.
- Your appliance stops during use:
- Your appliance may be overheating.
- Stop the appliance and leave cool for at least 1 hour.
- If it overheats on repeated occasions, contact the Approved Services Centre.
- Your appliance may be overheating.
- The appliance stopped after the charge light was flashing:
- The appliance has run out of battery charge.
- Recharge the vacuum cleaner.
- The appliance has run out of battery charge.
- The power-brush is not working properly or makes a noise:
- The rotating brush or hose are obstructed.
- Stop the vacuum cleaner and clean them.
- The brush is worn.
- Contact an Approved Service Centre to change the brush.
- The belt is worn.
- Contact an Approved Service Centre to change the belt.
- The rotating brush or hose are obstructed.
- The power-brush stops during vacuuming:
- The safety function has been triggered.
- Stop the vacuum cleaner. Check that nothing is obstructing the rotation of the brush; if there is an obstruction, remove it and clean the power-brush, then turn on the vacuum cleaner.
- The safety function has been triggered.
- Your vacuum cleaner is not vacuuming as well, is making noise, whistling:
- The intake channel is partially blocked.
- Unblock it
- The dust collector is full.
Empty it and clean it. - The dust collector is not properly fitted.
- Re-position it correctly.
- The intake head is clogged.
- Remove the power-brush and clean it.
- The protective foam filter is saturated.
- Clean it.
- The intake channel is partially blocked.
RG74XX | ||
| Serial No. | Error | Error description |
1 | Left wheel error | Left wheel is not working, overload in left wheel. Indicator POWER flashes twice and beeps once. |
2 | Right wheel error | Right wheel is not working, overload in left wheel. Indicator POWER flashes 3 times and beeps once. |
3 | robot lifted error | The robot is lifted over 1 second. Indicator POWER flashes 4 times and beeps once. |
4 | Front wheel error | Front wheel is not working, is stucked. Indicator POWER flashes 5 times and beeps once. |
5 | Cliff sensors error | Cliff sensors are not working. Indicator POWER flashes 6 times and beeps once. |
6 | Low battery error | POWER is going to be dead. Indicator POWER flashes 7 times and beeps once. |
7 | Front bumper error | Switch on the left or right side of bumper is not restored. Indicator POWER flashes 8 times and beeps once. |
8 | Middle brush error | Main brush is not working, overload. Indicator DOCKING flashes 2 times and beeps once. |
9 | Side brush error | Side brush is not working, overload. Indicator DOCKING flashes 3 times and beeps once. |
10 | Wall sensor error | Wall sensor error. Indicator DOCKING flashes 4 times and beep once. |
11 | Fan motor error | Fan motor is not working, overload. Indicator DOCKING flashes 5 times and beeps once. |
12 | No dustbin error | No dustbin. Indicator DOCKING flashes 6 times and beeps once. |
13 | Charging error | Robot is not well connected to the docking station. Indicator DOCKING flashes 7 times and beeps once. |


 X-plorer Smart Robot Vacuum Cleaner User Guide")
 X-plorer Smart Robot Vacuum Cleaner User Guide")


