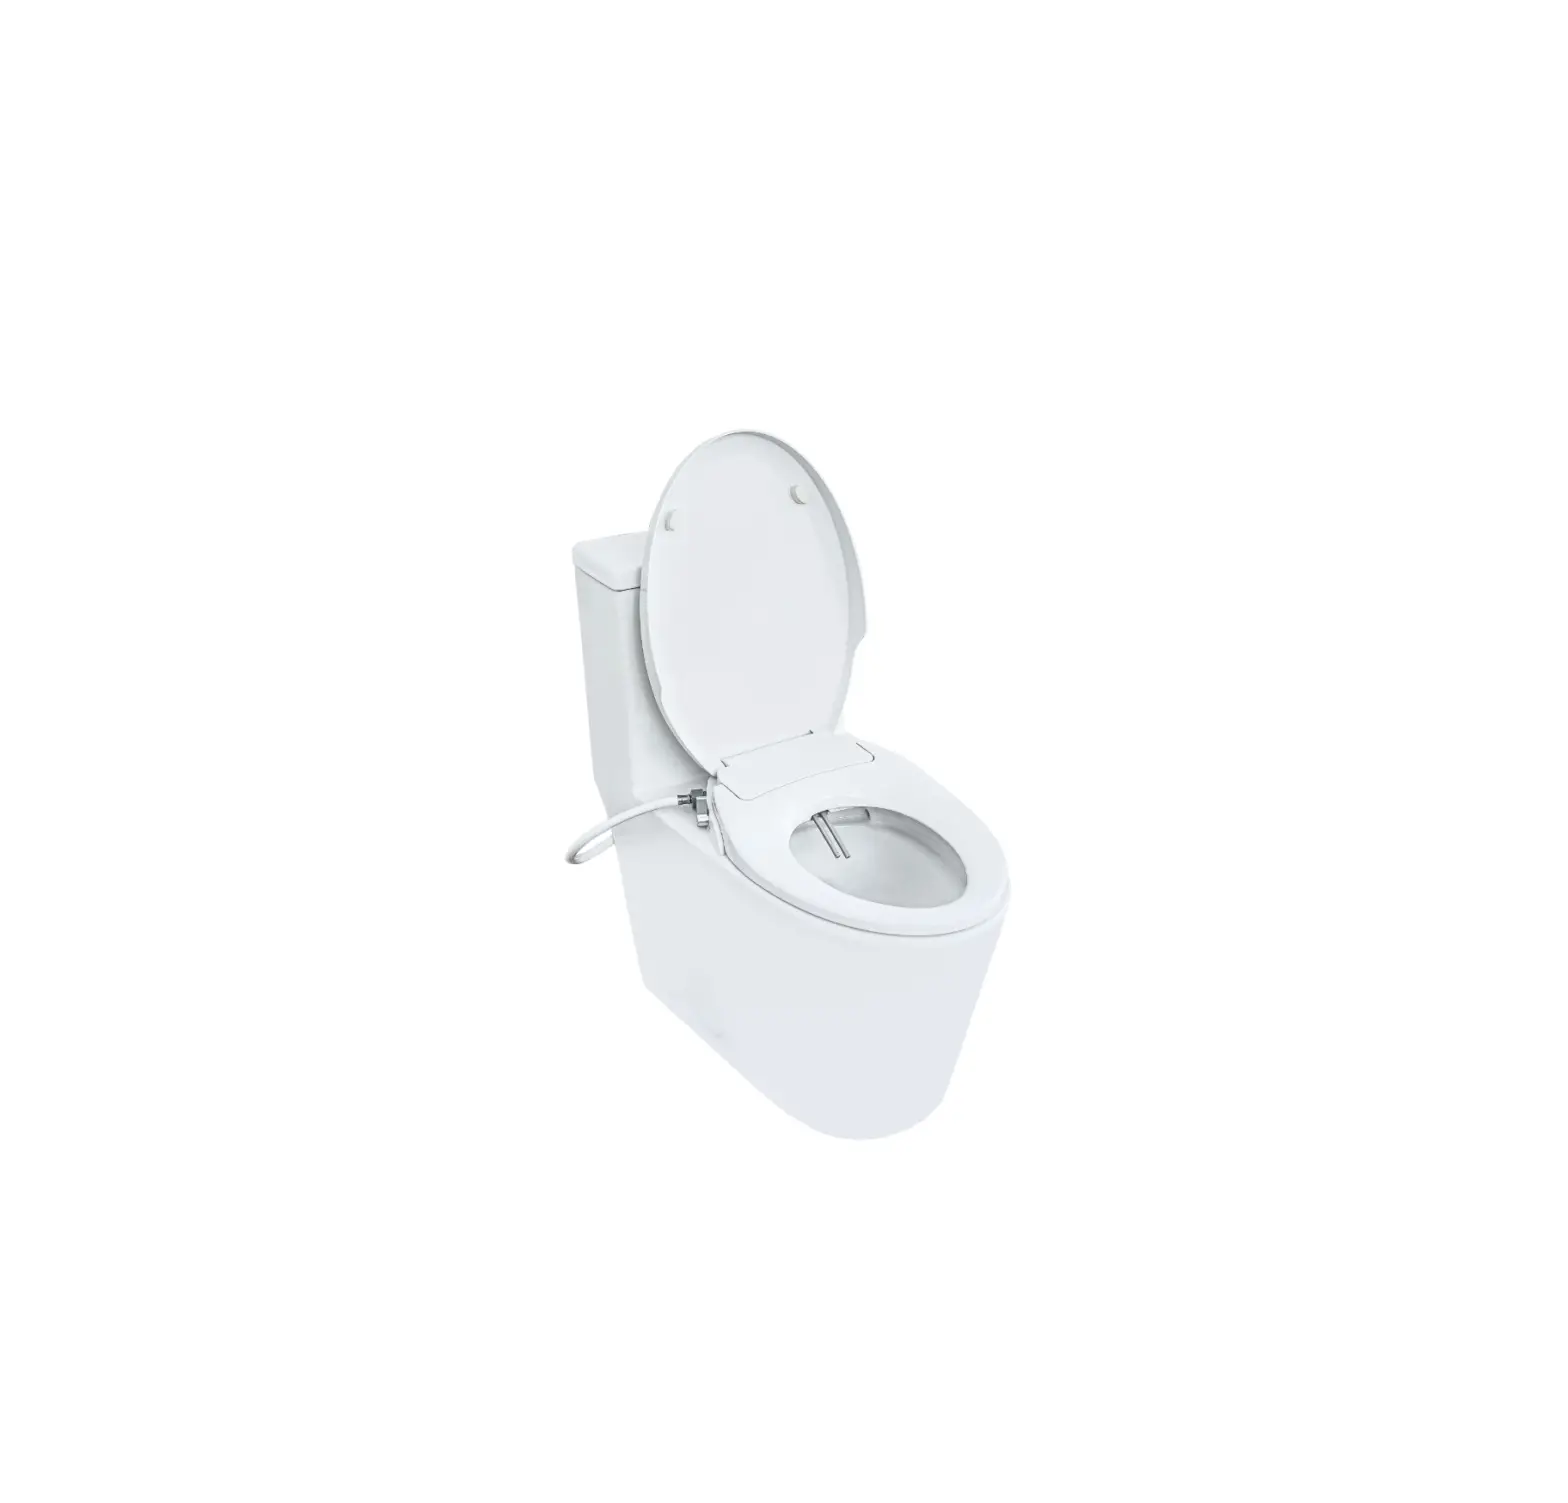
Casta Diva CD-BT01 Electric Smart Bidet Seat for Elongated Toilets
SAFETY PRECAUTIONS
IMPORTANT SAFEGUARDS
When using electrical products, especially when children are present, basic safety precautions should always be followed, including the following: READ ALL INSTRUCTIONS BEFORE USING.
DANGER- To reduce the risk of electrocution:
- Do not use while bathing.
- Do not place or store product where it can fall or be pulled into a tub or sink.
- Do not place in or drop into water or other liquid.
- Do not reach for a product that has fallen into water. Unplug immediately.
WARNING-To reduce the risk of burns, electrocution, fire, or injury to persons.
- Close supervision is necessary when this product is used by, on, or near children or invalids.
- Use this product only for its intended use as described in this manual. Do not use attachments not recommended by the manufacturer.
- Never operate this product if it has a damaged cord or plug, if it is not working properly, if it has been dropped or damaged, or dropped into water. Return the product to a service center for examination and repair.
- Keep the cord away from heated surfaces.
- Never block the air openings of the product or place it on a soft surface, such as a bed or couch, where the air openings may be blocked. Keep the air openings free of lint, hair, and the like.
- Never use while sleeping or drowsy.
- Never drop or insert any object into any opening or hose.
- Do not use outdoors or operate where aerosol (spray) products are being used or where oxygen is being administered.
- Connect this product to a properly grounded outlet only. See Grounding Instructions.
- Do not use while bathing.
- Risk of Electric Shock. Connect Only to a Grounding Type Receptacle Protected by a Ground-Fault Circuit-Interrupter (GFCI).
- Risque de choc electrique. Connecter uniquement a un receptacle du Type demise a la terre protege par un circuit de failles au sol (GFCn.
- CAUTION – Risk of electric shock, do not remove cover (or back). Refer servicing to qualified service personnel.
- Attention – risque de choc electrique, n’enlevez pas le couvercle (ou le dos). Referer le service a un service qualifie Personnel.
SAVE THESE INSTRUCTIONS
GROUNDING INSTRUCTIONS
This product should be grounded. In the event of an electrical short circuit, grounding reduces the risk of electric shock by providing an escape wire for the electric current. This product is equipped with a cord having a grounding wire with a grounding plug. The plug must be plugged into an outlet that is properly installed and grounded.
DANGER- Improper use of the grounding plug can result in a risk of electric shock. If repair or replacement of the cord or plug is necessary, do not connect the grounding wire to either flat blade terminal. The wire with insulation having an outer surface that is green with or without yellow stripes is the grounding wire. Check with a qualified electrician or serviceman if the grounding instructons are not completely understood, or if in doubt as to whether the product is properly grounded.
IMPORTANT! READ ALL INSTRUCTIONS BEFORE USING
Please carefully read this manual before use and keep for future reference.
The following icons are used in this manual to indicate varying severities of hazards. Please abide by these precautions, otherwise serious consequences may occur
NOTATION
WARNING . . . . Please pay close attention to avoid serious harm or accidents.
ATTENTION . . . . If not attentive, body or property damage may result.![]() . . . . Caution! Comply with guidelines.
. . . . Caution! Comply with guidelines.![]() . . . . Prohibited action!
. . . . Prohibited action!![]() . . . . Do not dismantle!
. . . . Do not dismantle!![]() . . . . Keep away from direct contact with water or any liquid.
. . . . Keep away from direct contact with water or any liquid. . . . . Do not touch this area!
 . . . . Do not touch this area with wet hands!
 . . . . Keep away from fire!
![]() . . . . Operate as instructed.
. . . . Operate as instructed. . . . . Please unplug!
![]() . . . . Please confirm it is grounded!
. . . . Please confirm it is grounded!
 WARNING
 Make sure the power supply is grounded.
- Otherwise, electric shock may occur.
- Please consult qualified electrician or serviceman if the power supply is not grounded.
Do not touch or plug in the cord with wet hands.
- Otherwise, electric shock may occur.
![]() Do not connect power cord if the cord is damaged or broken.
Do not connect power cord if the cord is damaged or broken.
- Otherwise, electric shock or fire may occur.

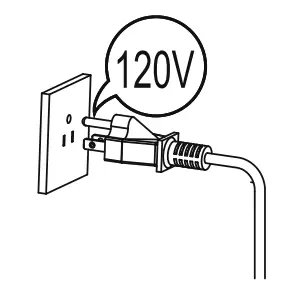
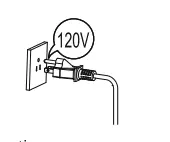
![]() The product must be connected to standard voltage power source (AC120V±10%,Max Current 15A).
The product must be connected to standard voltage power source (AC120V±10%,Max Current 15A).
- Otherwise, electric shock or fire may occur.

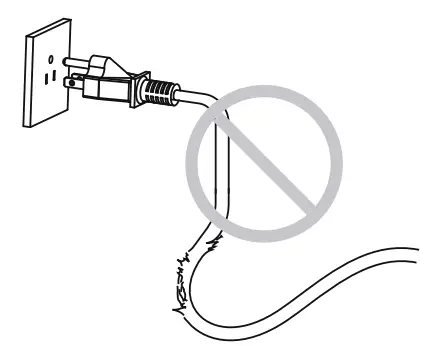
![]() Do not forcefully pull, break, bend, strip, twist, or over squeeze the power cord and cable.
Do not forcefully pull, break, bend, strip, twist, or over squeeze the power cord and cable.
- Otherwise, electric shock or fire may occur.
![]() The cord must be replaced by authorized personnel.
The cord must be replaced by authorized personnel.
- Otherwise, electric shock or fire may occur.
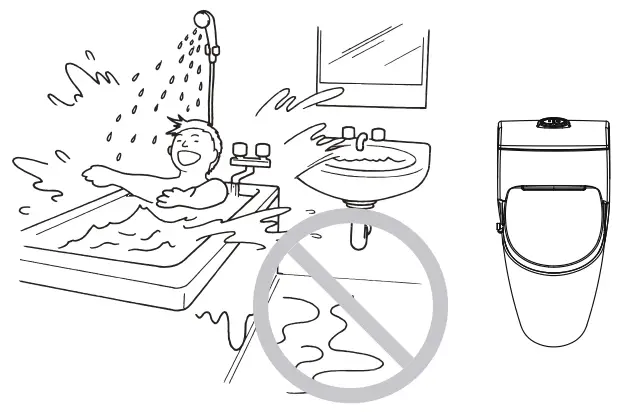
Please avoid installing the product while bathroom is wet. Do not splash water on the product.
- Otherwise, electric shock, fire, damage may occur.

Do not place lit cigarettes or other ignited items on the product.
- Otherwise, fire may occur.
![]() Do not place lit cigarettes or other ignited items on the product.
Do not place lit cigarettes or other ignited items on the product.
- Otherwise, the device may be damaged or malfunction.

When the seat or lid is broken, please unplug the power and shut down the water supply.
- Otherwise, electric shock or fire may occur.
![]() Unplug and clean the dust on the power cord with a dry cloth regularly.
Unplug and clean the dust on the power cord with a dry cloth regularly.
- Otherwise, fire may occur due to bad insulation.
![]() Individuals who are handicapped (physically, mentally, or emotionally) must be accompanied during use.
Individuals who are handicapped (physically, mentally, or emotionally) must be accompanied during use.
- Otherwise, long-term use may cause low-grade burns.
![]() Children should not play with this product.
Children should not play with this product.
- Otherwise, injury may occur.
![]() Do not dismantle this product to repair or remodel. Only Authorized personnel such as a qualified electrician should service the product.
Do not dismantle this product to repair or remodel. Only Authorized personnel such as a qualified electrician should service the product.
- Otherwise, malfunctions may cause electric shock, fire, or injury.
![]() Do not urinate on the product.
Do not urinate on the product.
- Otherwise, electric shock may occur.
![]() Do not use polluted water supply.
Do not use polluted water supply.
- Otherwise, the water may damage the device or harm the user.
ATTENTION
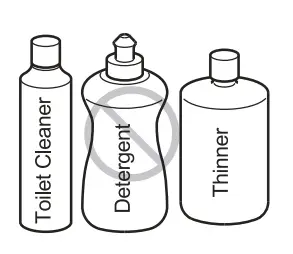
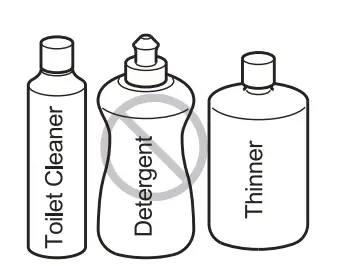
![]() If using any chemical toilet bowl cleaner, be sure to wipe up any spills that spash onto the plastic areas of the product. Do not use any acidic chemical detergent. Only neutral detergents are permitted.
If using any chemical toilet bowl cleaner, be sure to wipe up any spills that spash onto the plastic areas of the product. Do not use any acidic chemical detergent. Only neutral detergents are permitted.
- Otherwise, the plastic may break and cause body damage, electric shock, or fire.

![]() Please do not let water or detergent wet the bidet toilet seat or power plug.
Please do not let water or detergent wet the bidet toilet seat or power plug.
- Otherwise, there may be a risk of electric shock or fire.
![]() Do not stand, sit, or lean forcefully on the lid of the bidet toilet seat. Do not open or close the lid/seat ring forcefully to avoid damage.
Do not stand, sit, or lean forcefully on the lid of the bidet toilet seat. Do not open or close the lid/seat ring forcefully to avoid damage.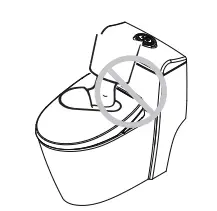
![]() Do not block the dryer door with hands or other objects. Do not cover the door during use.
Do not block the dryer door with hands or other objects. Do not cover the door during use.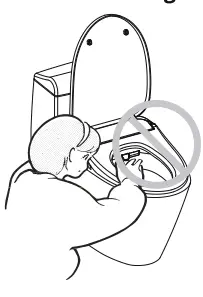
WARNING
![]() Do not use warm or heated temperature settings for extended periods of time.
Do not use warm or heated temperature settings for extended periods of time.
![]() Please make sure the user is fully seated (see image below). Otherwise, the cleaning or dryingfunction will stop. may cause danger.
Please make sure the user is fully seated (see image below). Otherwise, the cleaning or dryingfunction will stop. may cause danger.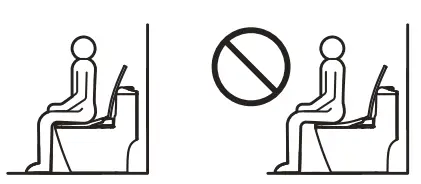
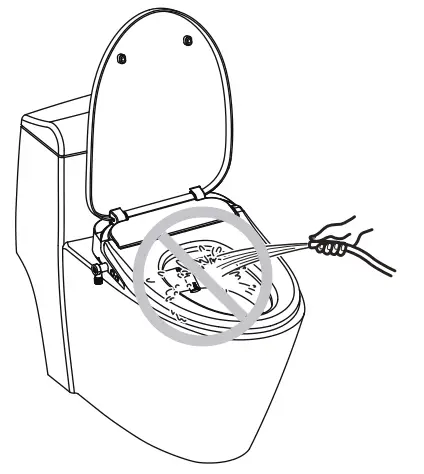
![]() Do not urinate on the nozzle.
Do not urinate on the nozzle.
- Otherwise, the nozzle may become obstructed.
![]() Please use provided accessories to install the device. Do not use old parts.
Please use provided accessories to install the device. Do not use old parts.
- Otherwise, leakage may occur.
![]() During power failure, unplug the device and close the water supply valve to prevent leaking.
During power failure, unplug the device and close the water supply valve to prevent leaking.
![]() Do not expose to direct sunlight or heating device.
Do not expose to direct sunlight or heating device.
![]() Do not use a timer power source or external switch to turn the device on/off. The thermal cutoff device may cause danger.
Do not use a timer power source or external switch to turn the device on/off. The thermal cutoff device may cause danger.
![]() Please turn off the water supply before replacing the filter. Firmly attach the filter before opening the water supply.
Please turn off the water supply before replacing the filter. Firmly attach the filter before opening the water supply.
- Otherwise, leakage may occur.
![]() Please unplug and close water sources to the device when away for extended periods of time.
Please unplug and close water sources to the device when away for extended periods of time.
- Otherwise, leakage or fire may occur.
![]() In very low temperatures, the water within the device may freeze after long periods of disuse. To avoid damage, please warm the unit to melt the ice.
In very low temperatures, the water within the device may freeze after long periods of disuse. To avoid damage, please warm the unit to melt the ice.
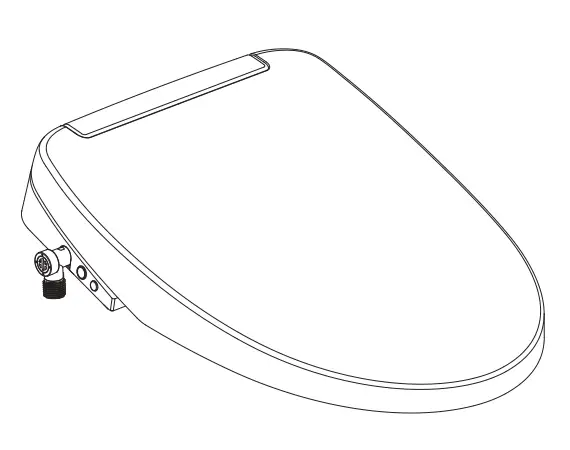
PARTS DIAGRAM
PRODUCT OVERVIEW

VIEW FROM THE RIGHT
VIEW FROM THE LEFT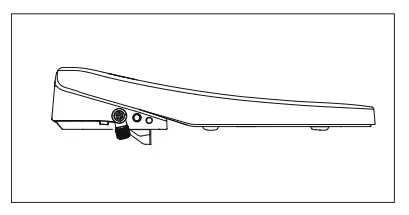
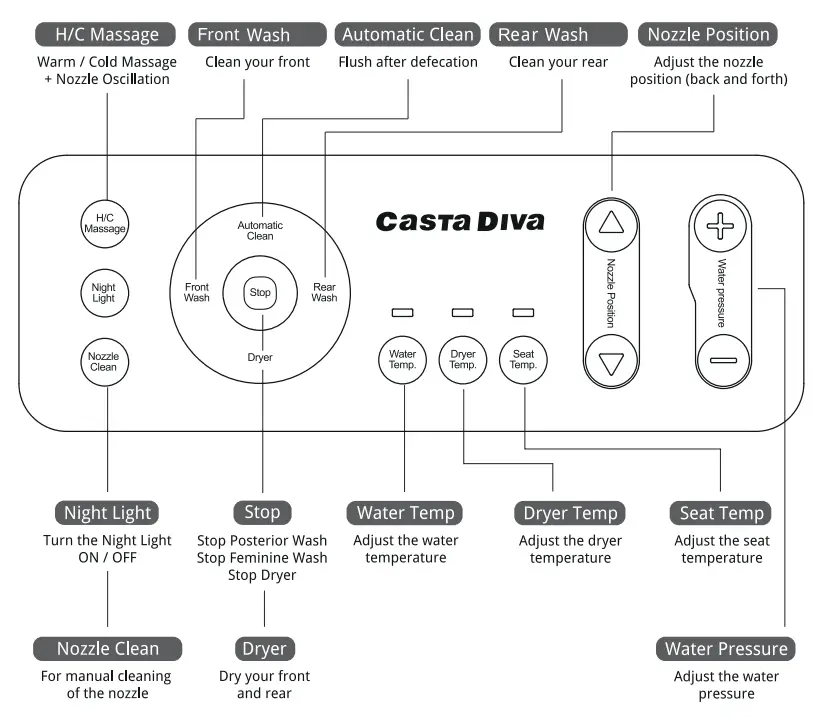
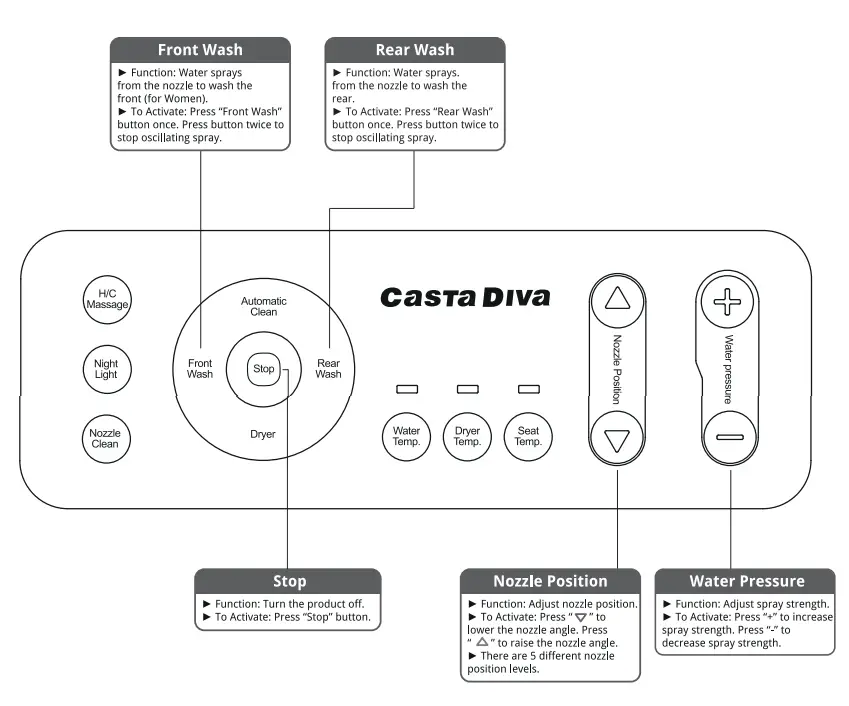
CONTROL PANEL
PRODUCT INSTALLATION
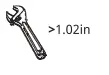
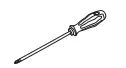
TOOLS NEEDED
- Adjustable Wrench (1.02in+ width) OR

- Open End Wrench (0.91-1.02in)

- Phillips EE> Screw Driver


PARTS INCLUDED
- Smart Bidet (1 set)

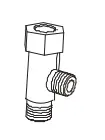
- T-valve (1 pc)

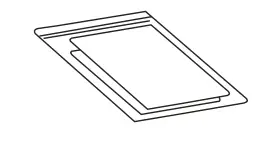
- Fixed Card (1 pc)

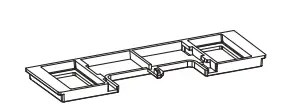
- Catch Plate (1 pc)

- hose (1 pc)

- Owner’s Manual (1 pc)

- Screw components (1 sets)

- A Remote Control

- Two AAA Battery

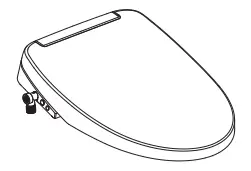


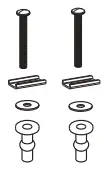
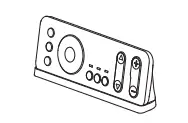
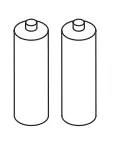
After opening the package, please confirm that you have received all parts listed above. If you are missing any parts, please contact us.
BEFORE INSTALLATION
IMPORTANT! Before installing the product, please make sure that you meet all the requirements listed below.
Power Requirements
- The power rating should be within the required range (AC 120V ± 10%, Max current 1 SA above)
- The power outlet should be close enough to reach the power cord (47.24in) but far from where water can hit it.
- This product must be grounded.
- The wiring should be installed by a professionally licensed electrician.
- Please do not plug in the product before installation is complete to prevent malfunction.
Water Requirements
- The minimum dynamic water pressure required is 11.6psi.
- The maximum static water pressure required is 101.5psi.
- Water pressure below the min and max range above will affect the performance of the product.
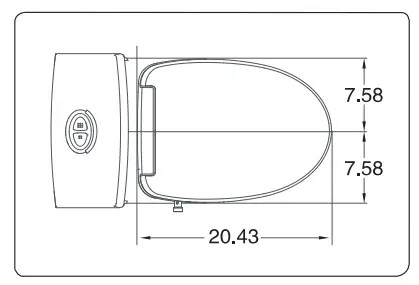
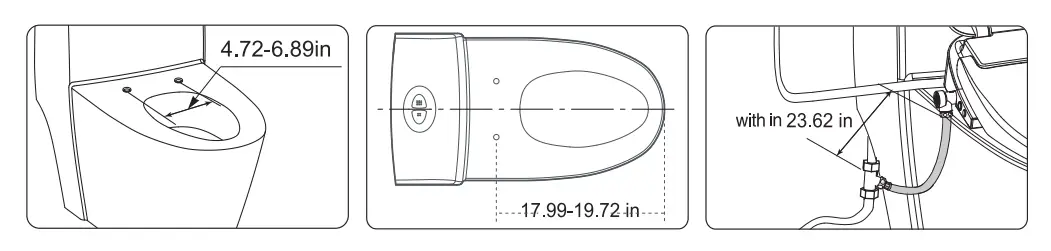
Sizing Requirements
- Please measure your toilet to make sure that there is enough space for the bidet (20.43 in long).

- The distance between the 2 mounting holes must be within 4.72-6.89in.
- The distance from the filter to the bidet inlet should be 23.62 in or less.
- The distance between the mounting holes and the edge of the toilet bowl must be within 17.99-19.72 in.

The product has no Ground Fault Circuit Interrupter, It should be installed in the line with Ground Fault Circuit Interrupter, Otherwise, the accidental failure of this product may result in the loss of life or property.
INSTALLATION STEPS
- Install the electronic bidet seat
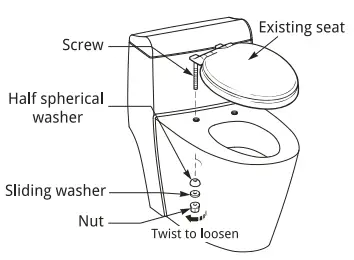
- Remove the existing toilet seat.
(a) Remove the toilet seat mounting bolts.
(b) Remove the existing toilet seat from the toilet
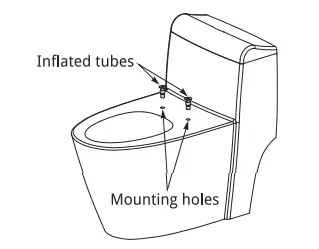
- Insert the inflated rubber tube set into the mounting holes on the toilet bowl.

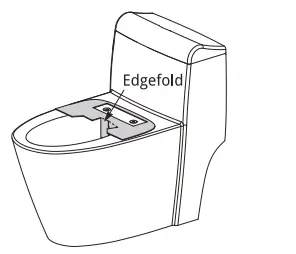
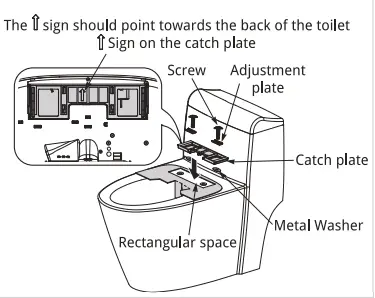
- Place the Fixed Card on the toilet bowl where the mounting holes are. Make sure that the wash I dry gates are close to the rim and pointed down.

- Install the Catch Plate
(a).Cover with a metal washer.
(b). Place the ceramic fixing plate in a rectangular box vertically centered on the mounting paper card.
(c).Cover with metal adjusting sheet.
(d).Tighten the screws using the large screws.
- Install the electronic toilet seat
(a) Remove Fixed Card.
(b) Press the push rod button and slide the seat into the Catch Plate.
(c) Adjust the position of the seat and loosen the screws to adjust position, if necessary.
- Remove the existing toilet seat.
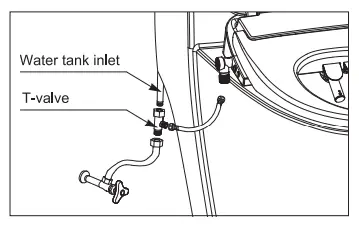
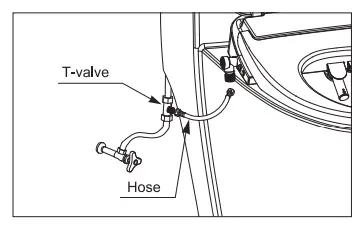
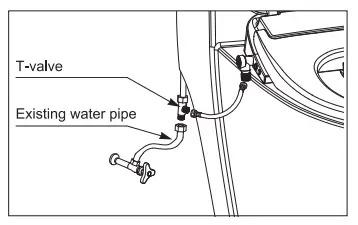
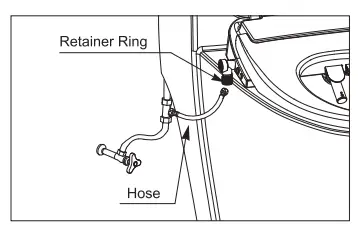
- Install the filter and hoses
- Connect T-valve to tank.

- Existing water pipe connect T-valve.

- Connect the hose to T-valve.

- Connect the hose to bidet .

- Connect T-valve to tank.
- Turn on the water
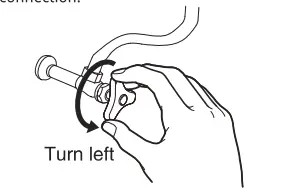
- Turn the water back on by turning the knob on the supply angle valve counter-clockwise until the valve is fully open.
- Check all connections carefully and make sure that there is no water leakage from any connection.
(a) If there is leaking from a connection, retighten the connection.
- Link the power
- Insert the bidet plug into the outlet (120V).

- Confirm the power connection.
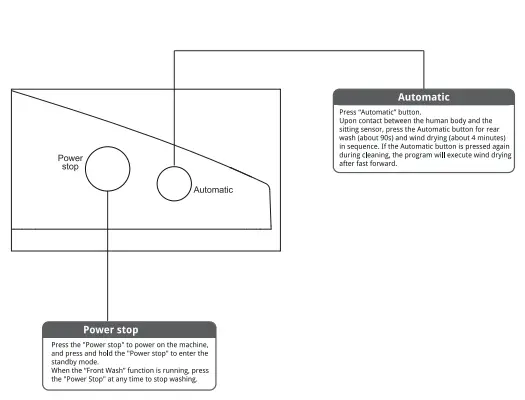
(a) Press and hold down the power button for 0.5 seconds to turn on the bidet seat.
- Insert the bidet plug into the outlet (120V).

PRODUCT OPERATION
BASIC FUNCTIONS
- Functions will only work when user is seated on the bidet seat.
- Dryer will automatically stop after 4 minutes.


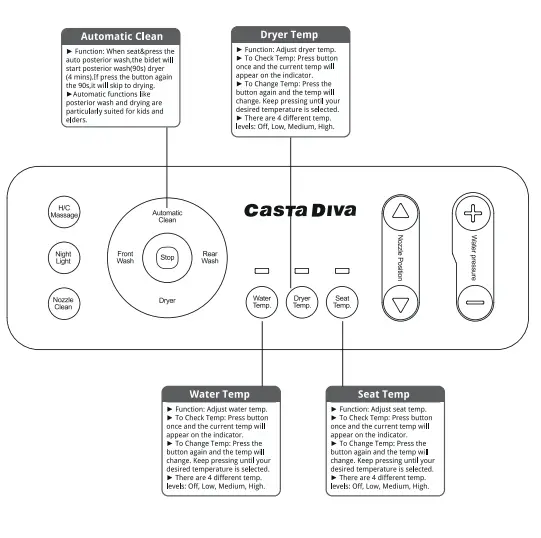
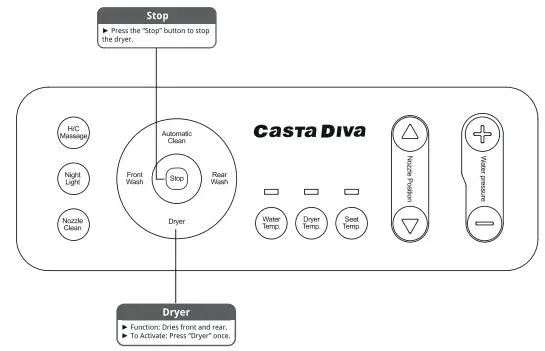
DRYER
- Dryer will automatically stop after 4 minutes.

OTHER FUNCTIONS
SIDE BUTTIONS
RESTORING FACTORY SETTINGS
- To restore the product to the original factory settings, pull the plug from the wall, wait 1 minute, then reconnect the plug. The Water Temp, Seat Temp, Dryer Temp, Spray Strength, and Nozzle Position will restore to the original Middle level settings.
UV STERILIZATION
- The UV light will automatically turn on 10 seconds after the user rises from the seat and will remain active for 3 minutes. The UV sterilization indicator will turn red when UV sterilization is in progress and will turn off when complete.
SELF CLEANING NOZZLE
- The washer can automatically clean, keeping bacteria and stains away.
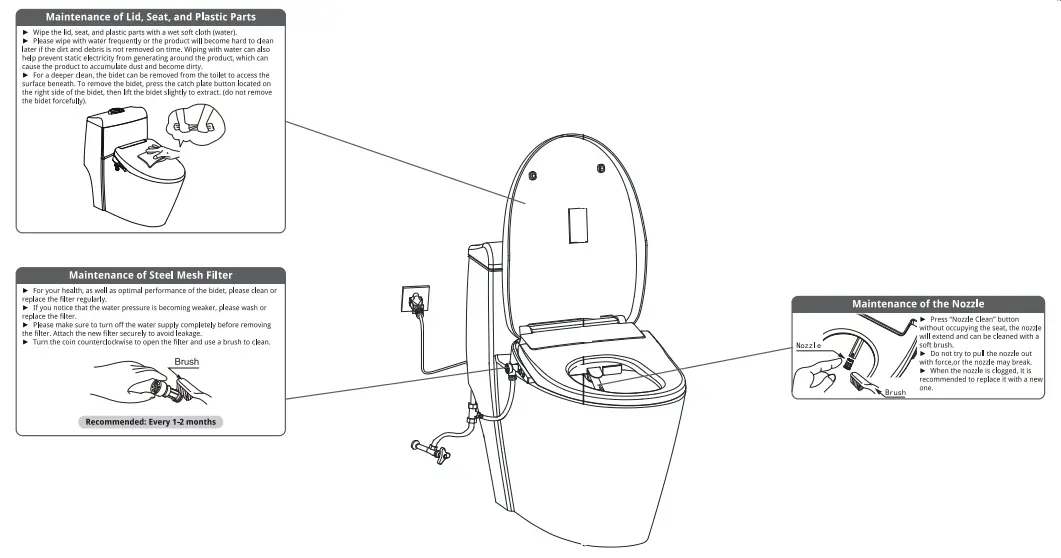
MAINTENANCE
- Before maintenance, please unplug the power source and shut off the water supply.
- Regular maintenance is required to ensure that the product operates at optimum efficiency.

![]() ATTENTION
ATTENTION
Do not spray water or detergent on the bidet, remote control, or power cord.
- Otherwise, electric shock or fire may occur.

![]() WARNING
WARNING
While cleaning the plastic parts, do not use strong, acidic chemical cleaners (concentrated sulfuric acid, nitric acid, glacial acetic acid, carbon tetrachloride, chloroform, acetone, butyl ketone, benzene, toluene, phenol, cresol, methyl ether, methyl formamide, soybean oil, vinegar, 40% nitric acid, hydrochloric acid, 95% alcohol liquor, gasoline, kerosene, brake oil, etc.). Please only use neutral cleaners.
- Otherwise, the plastic may break, and cause body damage, electric shock, or fire.

TROUBLESHOOTING
- If you experience any of the problems below, please follow the suggested solutions. If you continue to experience issues after trying the solutions, please consult with a qualified electrician or serviceman.
Problem | Possible Causes | Possible Solutions |
| Toilet is not working | Blackout or loose socket | Check that power cord is plugged in |
| Power off (Power indication light not on) | Press Power stop button until indication light turns on | |
| Electric leakage | Unplug power cord, re-connect, then power on. If it is still not working, please unplug again and contact us |
Wash functions
Problem | Possible Causes | Possible Solutions |
| Water does not spray | No water in the supply | Wait for the water to restore to its normal levels |
| Water supply is turned off | Turn water supply valve to turn on water | |
| Filter is stuck | Clean or replace filter | |
| Water hose is twisted | Stretch hose until it becomes untwisted | |
| Water pressure is weak | Water level is set to LOW | Turn up water level to higher setting |
| Filter is stuck | Clean or replace filter | |
| Spray is off-center | Operational failure | Unplug device and re-plug in after 1 min |
| Water is not warm | Water temp. is set to LOW | Turn up water temp. level to higher setting |
| Water is leaking | Parts are loose or damaged | Contact us |
| Wash function does not activate | Check if the seat is lifted or sitting on something | Fix seat so it is flush on the bowl and remove any objects underneath |
| Body sensor is broken | Contact us |
Dryer
Problem | Possible Causes | Possible Solutions |
| Dryer is not warm | Dryer temp. is set to OFF | Turn up dryer temp. to higher setting |
| Dryer is broken | Contact us | |
| Dryer stops during use | Dryer will stop every 4 mins | Enable dryer again |
Heated Seat
Problem | Possible Causes | Possible Solutions |
| Seat temp . not warm | Seat temp. is set to OFF | Turn up seat temp. to higher setting |
| Power-saving mode on | Turn off power-saving mode |
PRODUCT INFORMATION
SPECIFICATIONS
| Model Number | CD-BT01 | |
| Rated voltage | 120V- | |
| Frequency | 60Hz | |
| Rated Power | 1050W | |
| Environmental Temp | 39.2 “F -104″F | |
| Water Inlet Environment | 39.2 “F -95 “F | |
| The range of water inlet pressure | Minimum necessary water pressure | 11 .6psi, ensuring a flow of water at least 0.61GPF/1Os |
| Maximum water pressure | 101.Spsi (in a static condition) | |
| Flushing | Way for heating | Transient heating |
| Temp pf warm water | Off/about 93.2 “F- 102 .2 “F | |
| The length of power line | 47.24in | |
| The size of product | 20.43inx15.16inx4.84in | |
MODEL COMPARISON CHART
| Part no. Functions | CD-BT01 |
| Unlimited wash | • |
Rear Wash | • |
| Front Wash | • |
Aerated Wash | • • |
| Automatic Wash | • |
Oscillating Wash | • |
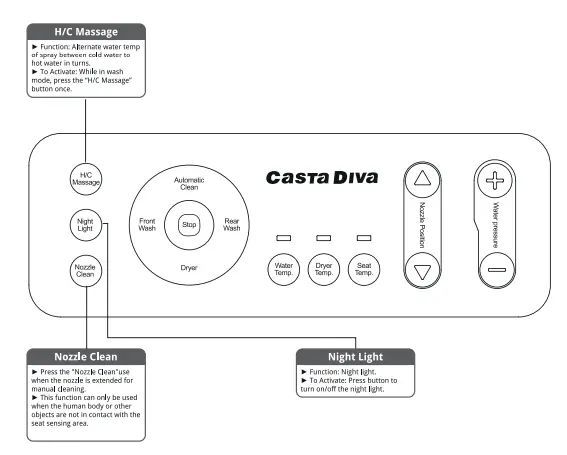
H/C Massage | • |
| Water Pressure Adjustable | • |
Water Temp Adjustable | • |
| Nozzle Position Adjustment | • • |
Detachable Nozzle | • |
| Se lf- cleaning Nozzle | • |
Nozzle Cleaning Mode | • |
| Seat Heating | • |
Air Dryer | • |
| Soft Close | • |
Seat Temp Adjustable | • |
Air Temp Adjustable | • |
| Night Light | • |
Instant Heating | • |
| Seat Sensor | • |
Memory Mode | • |
| Auto Start | • |
Air isolation | • |
| UV sterilization | • |
Eight Safety Protections | • |
| Antibacterial Seat | • |
Notice:• represents that the product have this function.
CONTACT US
If you have any questions or comments, please feel free to reach out to our customer care
at any time and we will be able to assist you further. Thank you for choosing us. E-mail: [email protected]


