User Guide
![]()

In the Box
A. TERRANO Q Main Unit
B. Secondary Speaker
C. Slim Helmet Mount x2
D. Helmet Mount x2
E. Magnetic USBC Charging Cable
F. Spare Microphone Sponge
G. Alcohol Pad
A 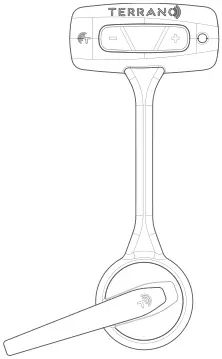 B
B 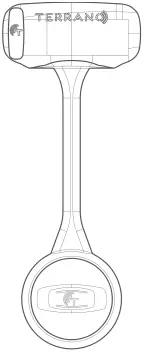 C
C  D
D 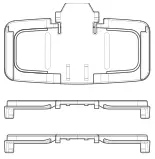 E
E F
F ![]() G
G 
Assembly on Helmet
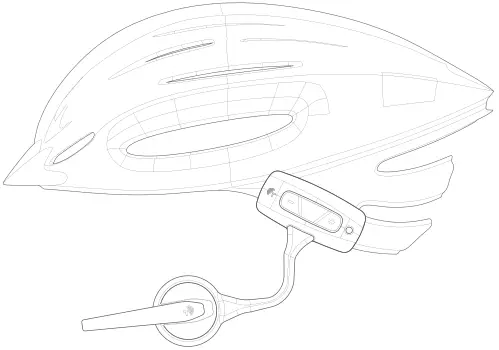
- The unit can be placed on the left or right side of helmet. The microphone can be rotated to support both sides.
- Use the adhesive glue to place the Helmet Mount on relatively flat patch on the lower back side of the helmet. Alternatively you can use the optional Buckle Strap together with the wider Helmet Mount.
- For best results clean the surface, peel of the white tape from the Helmet Mount and place and hold in place for at least 1 minute, wait 10 minutes.
- Slide the TERRANO Q into the Helmet Mount and bend the boom such that the speaker will align with the center of your ear.
- Repeat the process for the secondary speaker if used.
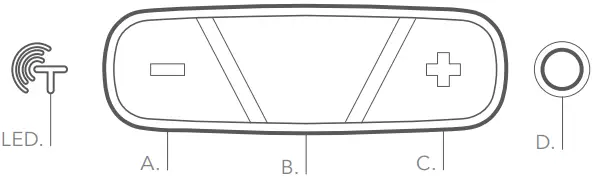
General
A. ![]() B.
B. ![]() C.
C. ![]() D.
D. ![]()
On | Press ![]() for 3 sec. | Three BLUE flahes “Hello”
for 3 sec. | Three BLUE flahes “Hello”
Off | Press ![]() for 3 sec. | Three RED flahes “Goodbye”
for 3 sec. | Three RED flahes “Goodbye”
Mute\Unmute | Press on both ![]() and
and ![]() for 2 sec.
for 2 sec.
Volume | Up – Tap on ![]() once. Down – Tap on
once. Down – Tap on ![]() once.
once.
Pairing Mobile via Bluetooth
- Press
 for at least 5 sec, the TERRANO Q will alternately flash RED and BLUE.
 - Search for Bluetooth devices.
- Confirms pairing successfully.
Phone Calls
Answer a Call | Tap ![]() once or say “hello” to the microphone.
once or say “hello” to the microphone.
Reject a Call | Press ![]() for 2 sec.
for 2 sec.
End a Call | Tap ![]() once.
once.
Make a Call | Dial with phone.
Voice Assistant | Press ![]() for at least 2 sec.
for at least 2 sec.
- Compatible with voice assistants (e.g., Siri).

Music
Play\Pause | Tap ![]() once.
once.
Next Track | Press ![]() for 2 sec.
for 2 sec.
Previous Track | Press ![]() for 2 sec.
for 2 sec.
Pairing Another TERRANO Q Unit
- Press
 on both units for at least 5 sec, TERRANO Q flashes BLUE and GREEN.
 “Intercom pairing”
 - Tap once on one unit, TERRANO Q flashes rapidly TURQUOISE.
- Wait until the units flash BLUE. “Pairing successfuly”
Using Intercom Calls
Start\Stop | Tap on ![]() once
once
- Stay connected and enjoy a variety of applications’ voice instructions, and music during intercom calls.
Charging the Battery
Use the charging cable to charge the unit for at least 1 hour before initial use.
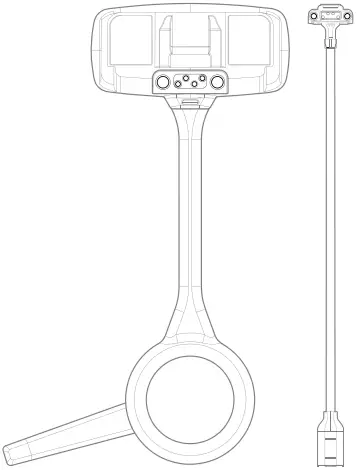
- Connect the charging cable adapter to the back of the unit.
- Connect to a USB-C charging cable.
TERRANO Q flashes -
RED | Charging in progress.
GREEN | Battery fully charged.
![]()
TERRANO LLC, TM
4610 S. Ulster Street, Suite 150 Denver,
CO. 80237 USA.
FCC Information and Copyright
This equipment has been tested and found to comply with the limits for a Class B digital device, pursuant to part 15 of the FCC Rules.
These limits are designed to provide reasonable protection against harmful interference in a residential installation. This equipment generates, uses and can radiate radio frequency energy and, if not installed and used in accordance with the instructions, may cause harmful interference to radio communications. However, there is no guarant ee that interference will not occur in a particular installation. If this equipment does cause harmful interference to radio or television reception, which can be determined by turning the equipment off and on, the user is encouraged to try to correct the interference by one or more of the following measures:
–Reorient or relocate the receiving antenna.
–Increase the separation between the equipment and receiver.
–Connect the equipment into an outlet on a circuit different from that to which the receiver is connected.
–Consult the dealer or an experienced radio/TV technician for help.
This device complies with part 15 of the FCC Rules. Operation is subject to the following two conditions:
(1)This device may not cause harmful interference, and
(2) this device must accept any interference received, including interference that may cause undesired operation.
changes or modifications not expressly approved by the party responsible for compliance could void the user’s authority to operate the equipment.
This equipment complies with FCC radiation exposure limits set forth for an uncontrolled environment .The device has been evaluated to meet general RF exposure requirement. The device can be used in portable exposure condition without restriction.


