![]() Instruction Manual
Instruction Manual
E24FB40A
CAUTION
![]()
- Read Instructions – All the safety and operating instructions should be read before the appliance is operated.
- Retain Instructions – The safety and operating instructions should be retained for future reference.
- Heed Warnings – All warnings on the appliance and in the operating instructions should be adhered to.
- Follow Instructions –All operating instructions should be followed.
- Battery – Batteries shall not be exposed to excessive heat such as sunshine, fire, or the like.
- Earthing Connection – The apparatus shall be connected to a MAINS socket outlet with a protective earthing connection.
- Water and Moisture – The appliance should not be used near water.
- Cart and Stands – The appliance should only be used with a cart or stand that is recommended by the manufacturer.
- Wall or Ceiling Mounting – The appliance should be mounted to a wall or ceiling only as recommended by the manufacturer.
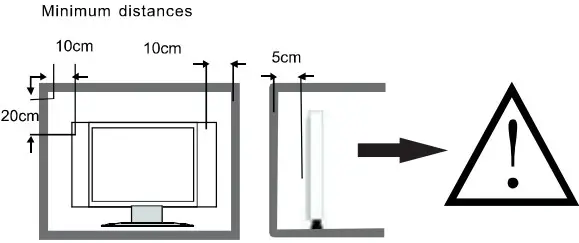
- Ventilation – The appliance should be well situated so that its location or position does not interfere with its proper ventilation.
- Heat – This appliance should be placed away from heat sources such as radiators, heat registers, and stoves.
- Power Sources – The appliance should only be connected to a power supply as described in the operating instructions or as marked on the appliance.
- Grounding or Polarization – Precautions should be taken.
- Power Cord Protection – The power supply cord should be located so that it is not likely to be walked on, or pinched by items placed upon it.
- Cleaning – The appliance should be cleaned only as recommended by the manufacturer.
- Power Lines – An outdoor antenna should be located away from power lines.
- Outdoor Antenna Grounding – If an outside antenna is connected to the receiver, the antenna system must be grounded so as to provide against voltages and built-up static charges.
- Non-use Periods – The power cord of the appliance should be unplugged from the outlet when left unused for a long period of time.
- Objects and Liquids – Care should be taken so that objects do not fall, and liquids are not spilled into the enclosure through openings.
- Conditions Requiring Service – The appliance should be serviced by qualified service personnel when: The power supply cord or the plug has been damaged. Objects have fallen on or liquid has been spilled into the appliance. The appliance has been exposed to rain. The appliance does not appear to operate normally or exhibits a marked change in performance.
- This appliance should not be exposed to water and no objects filled with liquids such as a vase should be placed on the unit. Where the mains plug or an appliance coupler is used as the disconnect device, the disconnect device shall remain readily operable.
 Warning | 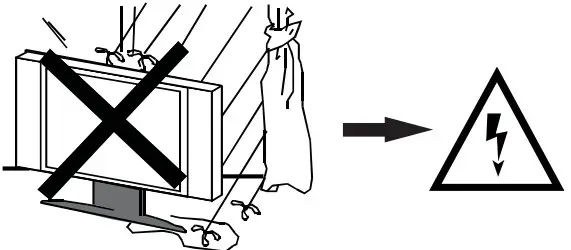 Warning | 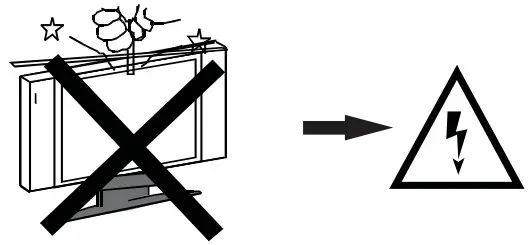 Warning |
 Caution |  Caution
|  Caution |
Exemptions
- SONIQ is not liable for any damage caused by fires, natural disasters (such as thunderstorms, earthquakes, etc.), acts by third parties, accidents, owner’s misuse or use in other improper conditions.
- SONIQ is not liable for incidental damages such as profit loss or interruption in business, modification or erasure of record data, etc.) caused by use or inability to use of the product.
- SONIQ is not liable for any damage caused by neglect of the instructions described in the owner’s manual.
- SONIQ is not liable for any damage caused by misuse or malfunction through simultaneous use of this product and the connected equipment.
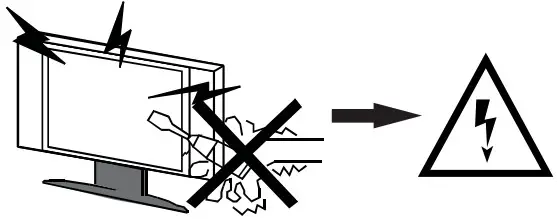
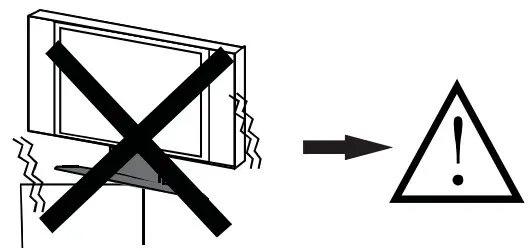
Never place a television set in an unstable location. A television set may fall, causing serious personal injury or death. Many injuries, particularly to children, can be avoided by taking simple precautions such as:
-Using cabinets or stands recommended by the manufacturer of the television set.
-Only using furniture that can safely support the television set
– Ensuring the television set is not overhanging the edge of the supporting furniture
-Not placing the television set on tall furniture (for example, cupboards or bookcases) without anchoring both the furniture and the television set to a suitable support.
-Not placing the television set on cloth or other materials that may be located between the television set and supporting furniture
-Educating children about the dangers of climbing on furniture to reach the television set or its controls. If the existing television set is going to be retained and relocated, the same considerations as above should be applied To prevent injury, this television set must be securely attached to the floor/wall in accordance with the installation instructions. Please use the brackets worn by the manufacturer for installation and fixation or Please purchase a mounting bracket with a mounting hole distance of 200mm for installation and fixation, to avoid the TV may fall over, causing personal injury or death.
Introduction
Thank you for purchasing the unit. Your unit will bring you years of high-quality viewing enjoyment. The television is easy to operate and provides an exceptionally high-quality image. The manual will explain the operation of the unit, including its functions, features, and other important features. Before installing or operating your unit, please take the time to thoroughly read this manual, particularly the sections on safety.
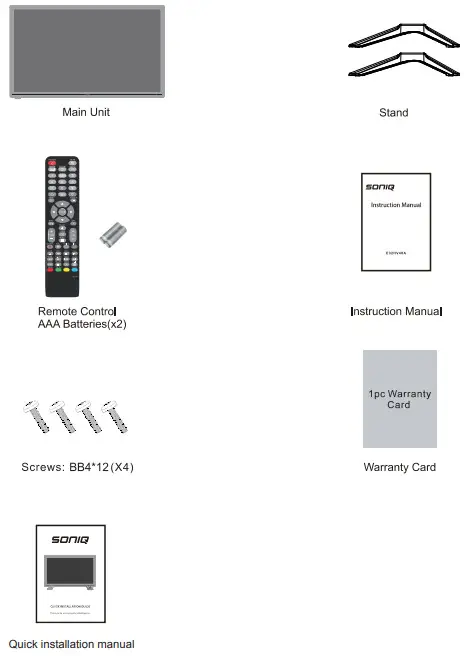
ACCESSORY
Note
There are these accessories in the carton, the style will be different according to the product model.
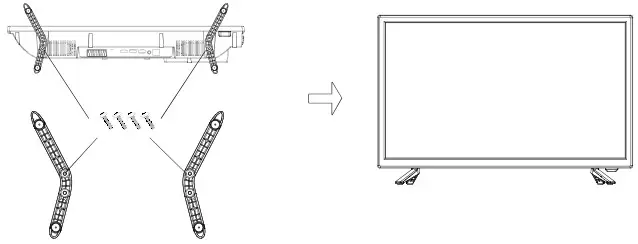
STAND ASSEMBLY
- Please disconnect all the cable connections before installation.
- Lay the TV face down on a flat surface, on a blanket or towel to avoid damaging the screen.
- Please keep the TV in a horizontal position and fix the standing base with screws.
Note:
- Only use matching screws provided by the manufacturer in the accessory bag to install the stand of TV unit, in order to avoid damaging the TV unit.
Wall Mounting Instruction:
This TV is equipped with mounting holes of 100 x 100mm.lf the thickness of the wall mount is 2mm, 4PCS of type M4 x6mm screws are required (the length of the screws fixed in the interior of the TV should not be longer than 10mm)Recommend to use SONIO wall mount and install by professional people (do not operate while the TV is on).
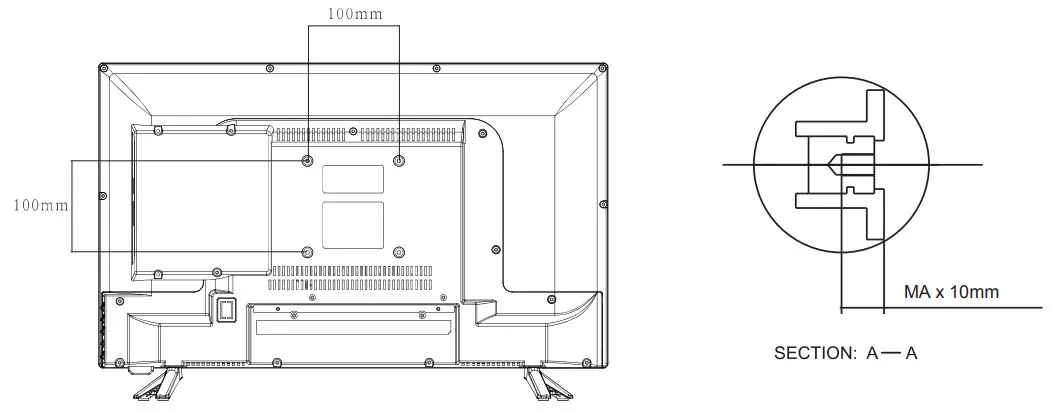
Note:
The following is only a functional schematic, and the actual position and arrangement of different models may be different.
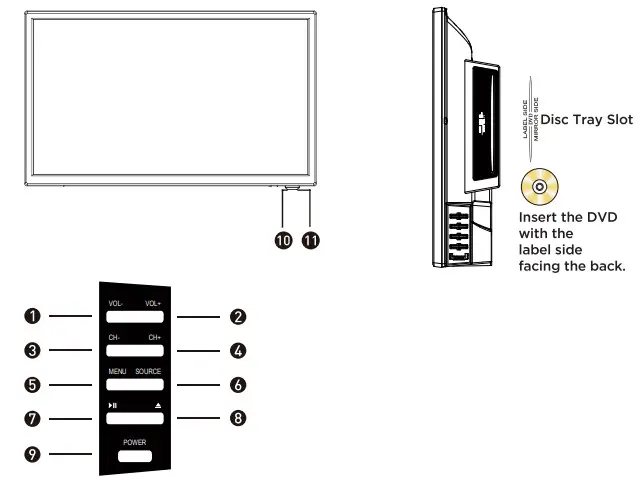
Button Functions
- VOL-: Dec r ease volume
- VOL+: Inc r ease volume
- CH-: Previous channel
- CH+: Next channel
- MENU: Open settings menu
- SOURCE: Audio/ Video input source selection
- Play/Pause: Play/Pause toggle in DVD/media player modes
- Eject: Eject the disc
- POWER: Turn on TV/ Standby
- 1R RECEIVER: Receives infrared signals from the remote control
- INDICATOR LED: Status indicator
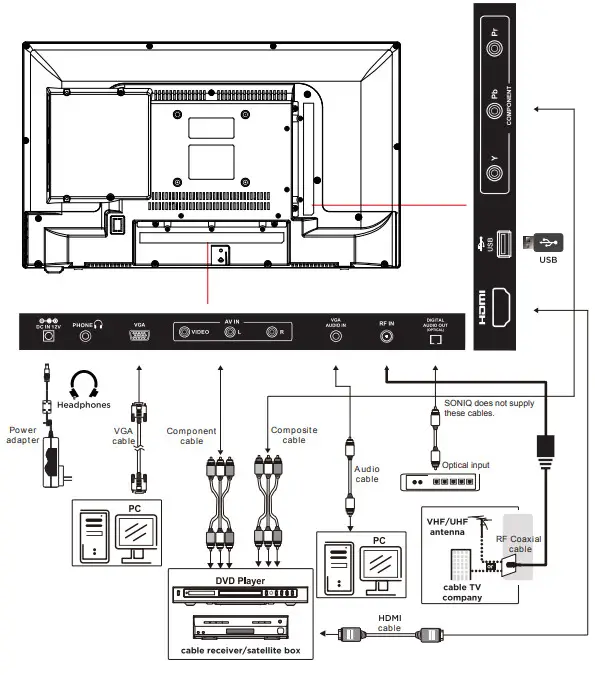
TERMINAL
The LED TV has many multimedia functions. It can be connected to many types of equipment.
The following paragraph shows how to connect to other Audio and Video devices.
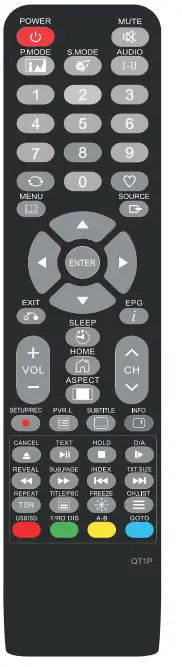
REMOTE CONTROLLER
The remote controller cannot be used unless it is within the receivable range. Before you use the remote control, please make sure there’s no obstacle between the remote control and the receiver.
- Open the battery cover and insert 2 “AAA” batteries.
- Point the remote control at the remote sensor located on the unit.
- When there is a strong ambient light source, the performance of the infrared remote sensor may be degraded, causing unreliable operation.
- The recommended effective distance for remote is about 16 feet (5 meters).
- When the batteries become weak and the operating distance of the remote control is greatly reduced, you will need to replace the batteries.
- If the remote control is not going to be used for a long period of time, remove the batteries to avoid damage caused by battery leakage or corrosion.
- Do not mix old and new batteries or ALKALINE or standard (CARBON-ZINC) or rechargeable (NICKEL-CADMIUM) batteries.
- Always remove batteries as soon as they become weak.
- Weak batteries can leak and severely damage the remote control.
- Do not dispose of batteries in fire, they may explode or leak.
- Batteries should not be exposed to excessive heat such as sunshine, fire or the like.
![]() CAUTION :
CAUTION :
The danger of explosion may occur if the battery is incorrectly replaced.
P MODE Cycle through available video picture modes. S.MODE Cycle through different sound settings. AUDIO Display Audio language for DTV. Nicam function for ATV. 0-9 Use these buttons to enter numbers. In TV mode, press the FAV button to display your favorite programs. MENU Access the Main Menu. SOURCE Display the input source list. ENTER Enter button or display channel list. EXIT Exit the current menu or function. EPG Display Electronic Program Guide menu. SLEEP Controls the automatic turn-off time. VOL+/- Adjust the volume up and down. CH+/- Scan channels up and down. Button not working ASPECT button Press to change the aspect ratio of the TV display. REC button Press to record program to memory storage. PVR.L Press to display the recorded program list. | SUBTITLE With this key, you can switch over subtitles of different languages. INFO button Press to display the information of the current system program. CANCEL button Only available in an interactive application, TEXT menu, and Music source. TEXT Press this button to enter TELETEXT mode. HOLD button Stop refurbish Text current page. D / A button DVD next step function. REVEAL For Teletext Mode. Press this button to see the answers. Press this button again to hide the answers. SUB. PAGE Prompt the user to enter a subcode for the Text page. INDEX For Teletext Mode. T TXT. Size Toggles the text size display between half top page, half bottom page, and normal. TSR Press to delay the process of program broadcasting. Has the function of timeshift under DTV mode. FREEZE freeze the picture. TITLE/PBC Button to enable/disable PBC mode. In PBC mode, you can access the track/scene directly by using the numeric keypad. TITLE button – Press to access the TITLE MENU of a DVD. CH.LIST Display program list. USB/SD Button not working T/R button Button not working A-B button Enables you to repeat a selected section during Media video playback or DVD recording file playback. GOTO button DVD mode, jump to the specified time. |
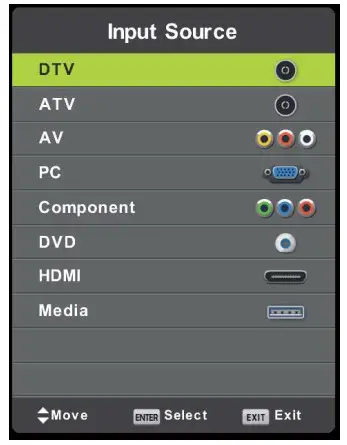
- Press the [SOURCE] button to display the input source list.
- Press
 the button to select the input source you want.
 - Press the OK button to enter the selected source.
Channel Selection
- Press the CH∧ /CH ∨ buttons on the main unit or on the remote control repeatedly to select the channel.
- Press the 0-9 buttons on the remote control to select the channel directly.
- Press the VOL+/- buttons on the main unit or on the remote control to adjust the
- If you wish to switch the sound off, press theta MUTE button again or the VOL+ button to resume the sound.
Before using the TV follow the steps below to learn how to navigate the menu in order to select and adjust different functions. The access step may differ depending on the selected menu.
- Press MENU to display the main menu.
- Press
 to select a menu. The selected menu page displays.
 - Press
 to set your selection.
 - Press to choose an item on the menu page and press ► or OK to confirm.
- Press
 to adjust an item value or choose options.
 - Press MENU to return to the menu, To exit the on-screen menu completely, press EXIT.
CHANNEL
This menu only functions in TV mode.
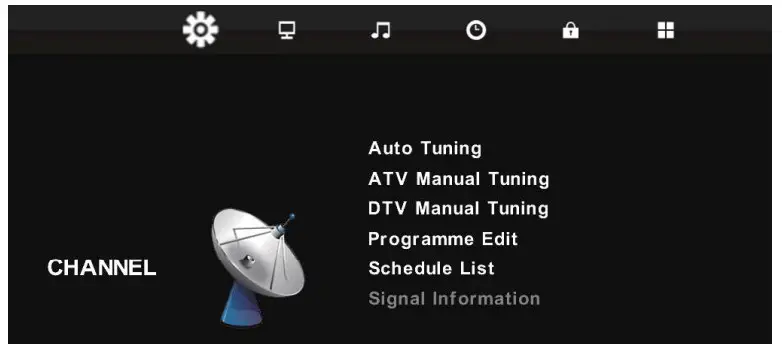
- Auto Tuning: Press the ENTER button to start Auto tuning which automatically scan and store all available programs.
- ATV Manual Tuning: Manual store for AN channels.
- DTV Manual Tuning: Manual store for DTV channels.
- Program Edit: Press ok to enter and edit the channel according to the color suggestion function.
- Schedule List: Record the program list regularly.
- Signal Information: Source
PICTURE
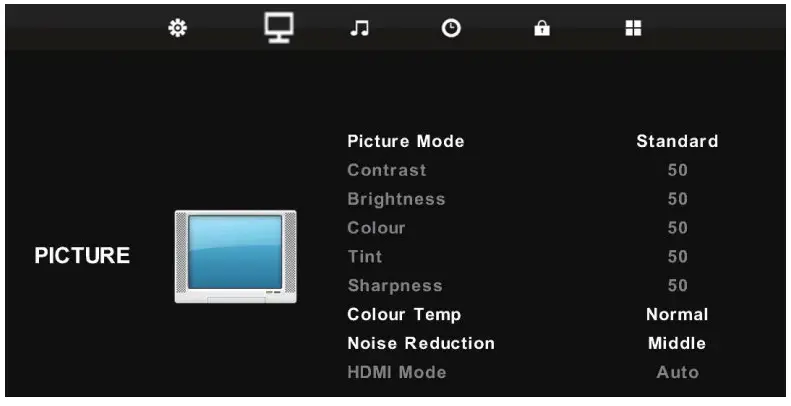
- PICTURE Mode: Choose the picture menu with left and right keys. Then the up and down arrows can be used to select this item. The picture mode can be switched to standard/dynamic/mild/user through the right key.
- Contrast/Brightness/Color/Tint/Sharpness: Everyone looks at the color feeling is different, here can debug, After pressing OK, debug by pressing left and right keys.
- Color Temperature: Select the color temperature that you feel comfortable with.
- Noise Reduction: Reduces the picture noise in a weak broadcast signal.
- HDMI Mode: Available in the HDMI input source.
SOUND

- Sound Mode: You can select a sound mode to suit your personal preferences. The five-stage equalization setting can be adjusted when the sound mode is set to User.
- Treble: Adjust the high-frequency sounds.
- Bass: Adjust the low-frequency sounds.
- Balance: Adjust the level of sound coming from the left and right speakers.
- Auto Volume: Auto Volume automatically remains on the same level of volume, if you change programs. Because each broadcasting station has its own signal conditions, volume adjustment may be needed every time when the channel is changed. This feature allows users to enjoy stable volume levels by making automatic adjustments for each program.
- SPDIF Mode: Select to Off / PCM / Auto the SPDIF Mode.
- ADS WITCH: button to select On WordPressbutton to select ADS VVITCH, then press Off. Amblyopia function for the blind, the tracks will be mixed to describe the current screen.lt need codestream to support.
TIME

- Clock: Edit the time of the TV. Off Time: Timing shutdown. ON Time: Timing boot.
- Sleep Timer: Sleep Timer switches the TV to standby after a defined period of time. To cancel the Sleep Timer, set to “Off “.
- Sleep Timer: Sleep Timer switches the TV to standby after a defined period of To cancel the Sleep Timer, set to “Off “.
- Auto Sleep: Select the time in hours (off, 3H, 4H, 5H) that you want the TV to remain on after your last operation, Cancel by setting it to Off.
- OSD Timer: Select the time in seconds (5s, 10s, the 30s,) that you want the On-Screen Menu to remain display after your last operation.
LOCK
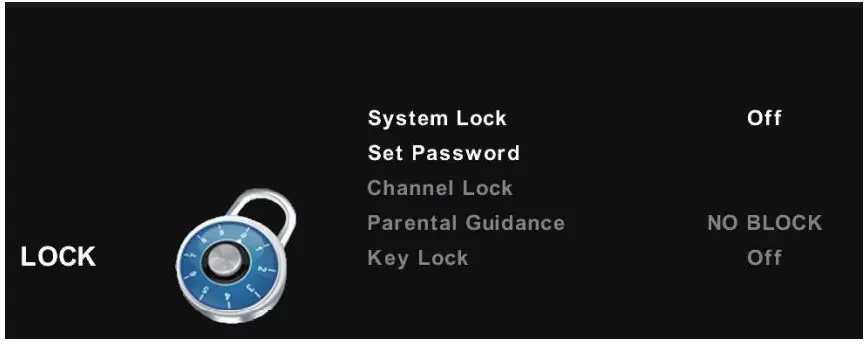
Press the MENU button to display the main menu.
Press ![]() the button to select LOCK in the main menu, it will highlight the first option.
the button to select LOCK in the main menu, it will highlight the first option.
Press the OK button and input password (the default password is 0000 ) to enter the sub-title, and press ![]() to adjust
to adjust
OPTION
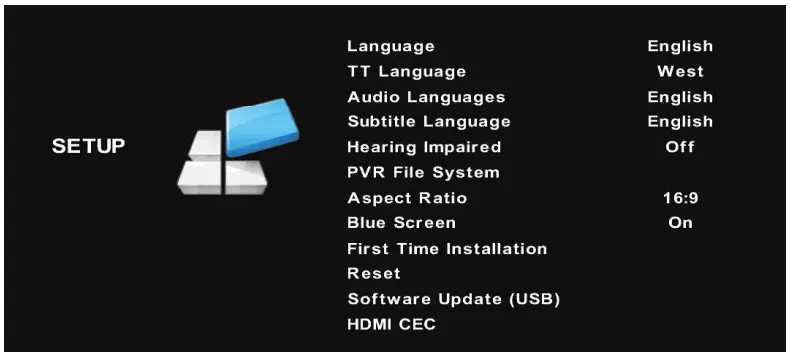
- OSD Language: Select your preferred On Screen Display language.
- TT Language: Press to select TT Languages, then press the OK button to enter the sub-menu.
- Scale: You can select the picture size which best corresponds to your viewing requirements.
- Blue Screen: Select On / Off the Blue Screen.
- Key Lock: Lock or unlock the key panel buttons on the TV.
- Reset: Recall the default setting.
- Software Update(USB): Press the button to Software Update then press the button to select On or Off.
MAIN LAUNCHER
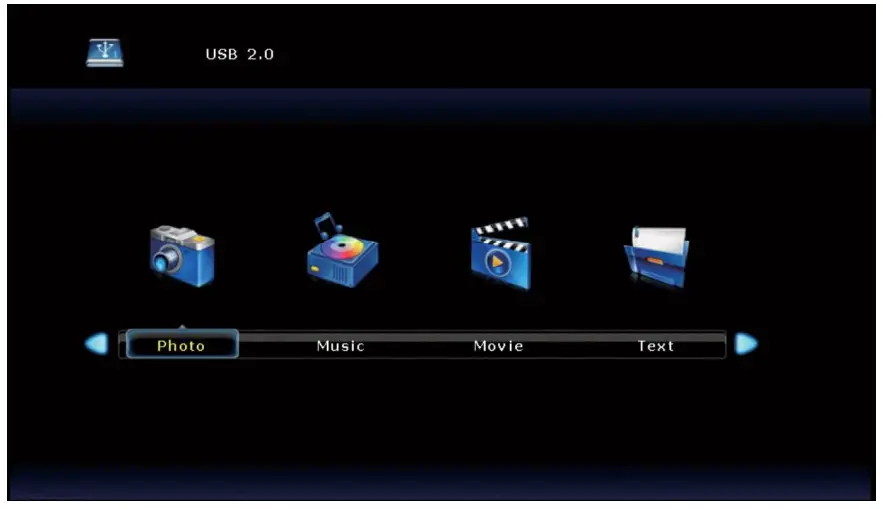
The USB storage devices should be inserted into the terminal. Select the Media(or USB) source and view the multimedia. Select the multimedia and press the I OK ] button to enter. In the play interface, according to the menu display operation (If the menu has disappeared, you can press the [ OK ] button).
SPECIFICATIONS
| Power Source | External Adapter | 12V = 3A |
| Power Consumption | 36w | |
| Video Format Supporting | HDMI | 480i, 480p, 720p, 1080i, 1080p |
| Digital TV | Programme Coverage | VHF (50MHz – 230MHz) UHF (474MHz – 862MHz) |
| Video Decode | 1080i ,720p ,576p,576i ,1080p | |
| Audio | MPEG,AC3 | |
| Panel Spec | Display Area HxV(mm) | 295 (H) x 523(V) |
| Panel Native Resolution | 1920 x 1080 pixels | |
| Brightness | 200 cd/m2 | |
| Contrast Ratio | 2000:1 Typ | |
| Input/Output | RF IN | RF IN x 1 |
| HDMI | HDMI x 1 | |
| AV IN | AV IN x1 | |
| Digital Audio Out (Optical) | Digital Audio Optical Out x1 | |
| USB | USB x 1 | |
| Earphone out | Earphone x 1 | |
| Audio Power | 5W + 5W | |
| Unit Dimension | 557mm(L) X165mm(W) X 368mm | |
![]()
The terms HDMI, HDMI High-Definition Multimedia Interface, and the HDMI Logo are trademarks or registered trademarks of HDMI Licensing Administrator, Inc.
Supported PC Input Signal
Your unit can use as PC monitor, it supports below RGB-PC, HDMI mode INPUT.
| RGB-PC, HDMI mode INPUT SPEC | ||||
| VGA/ HDMI Input | ||||
| INPUT FORMAT | Resolution | Horizontal frequency ( kHz) | Vertical frequency (HZ) | Standard |
| 640×480 | 32.5 | 60 | VGA | |
| 640×480 | 37.86 | 72.809 | VESA | |
| 640×480 | 37.5 | 75 | VESA | |
| 720×400 | 31.5 | 70 | VGA-T | |
| 800×600 | 37.9 | 60 | VESA Guidelines | |
| 800×600 | 48.077 | 72.19 | VESA | |
| 800×600 | 46.9 | 75 | VESA | |
| 832×624 | 49.7 | 75 | Mac | |
| 1024×768 | 48.4 | 60 | VESA Guidelines | |
| 1024×768 | 60 | 75 | VESA | |
| 1152×870 | 68.68 | 75 | Mac | |
| 1280×800 | 47.8 | 59.8 | – | |
| 1280×960 | 60.0 | 60 | VESA | |
| 1360×768 | 47.7 | 60 | VESA | |
| 1366×768 | 47.712 | 59.79 | VESA | |
| 1920×1080 | 49.6 | 60 | VESA | |
SIMPLE TROUBLESHOOTING
If the display fails or the performance dramatically changes, check the display in accordance with the following instructions. Remember to check the peripherals to pinpoint the source of the failure. If the display still fails to perform as expected, contact the dealer for assistance.
| Symptom | DEALING METHOD |
| No Power | Check the power connection. Pull the plug out, wait for 60 seconds, then reconnect the power and turn on the set. |
| No Sound | Increase the volume. Check if the set is in the mute state or not. Check the voice setting condition. Check the voice mode setting condition. |
| Remote not responding | Check the effect of the batteries. If necessary, replace the batteries or clean the remote control sensor window. The distance between the set and the remote control should be less than 6 meters. |
| Abnormal Color | Check the antenna connection. |
| TV set needs to be cleaned | Please pull the plug out when cleaning the screen. Use a soft, clean cloth to wipe it off. If needed to clean further, please use a dry cloth, do not use naphtha or other thinners liquids. |
| System Error (For Smart TV only) |
|
![]()
HOTLINE
- AUSTRALIA: soniq.com/au/contact-us
- NEW ZEALAND: soniq.com/nz/contact-us


