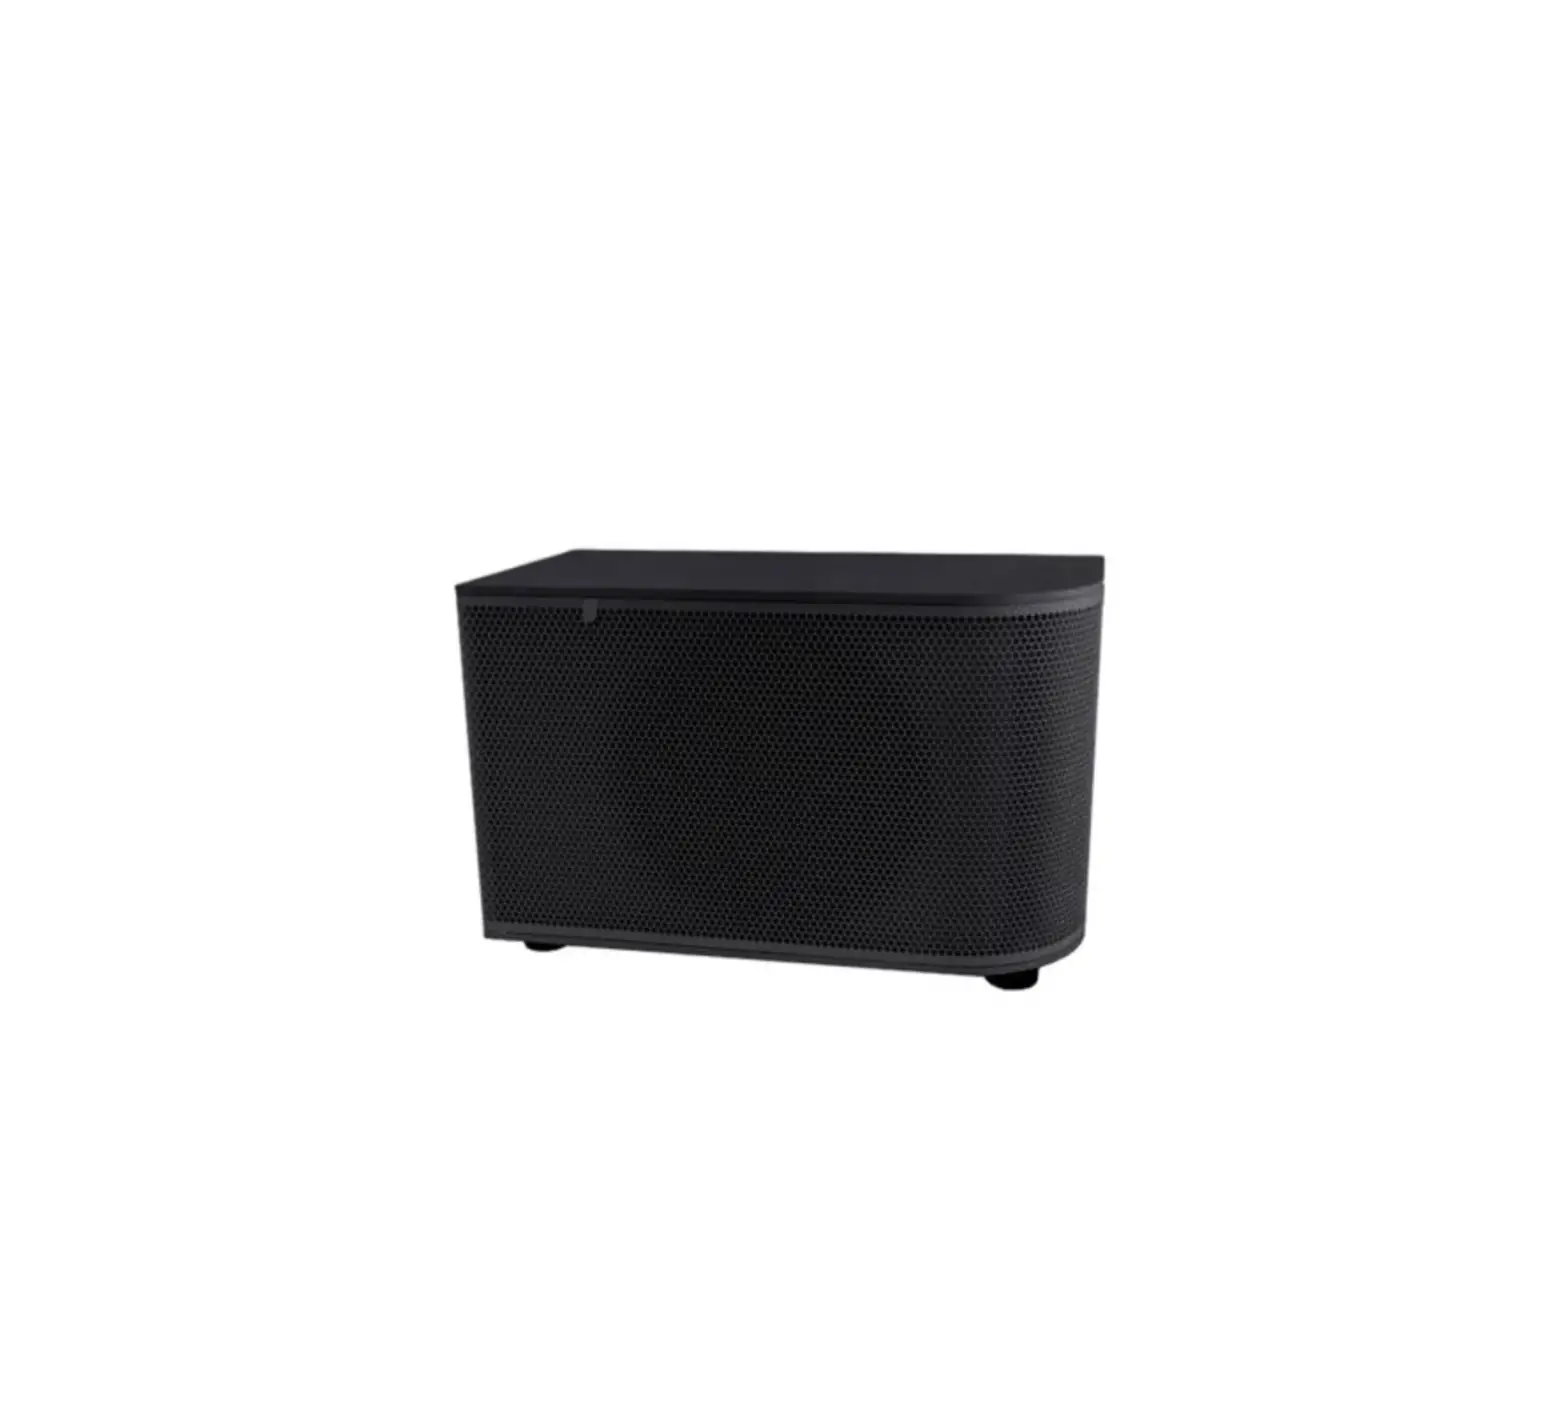
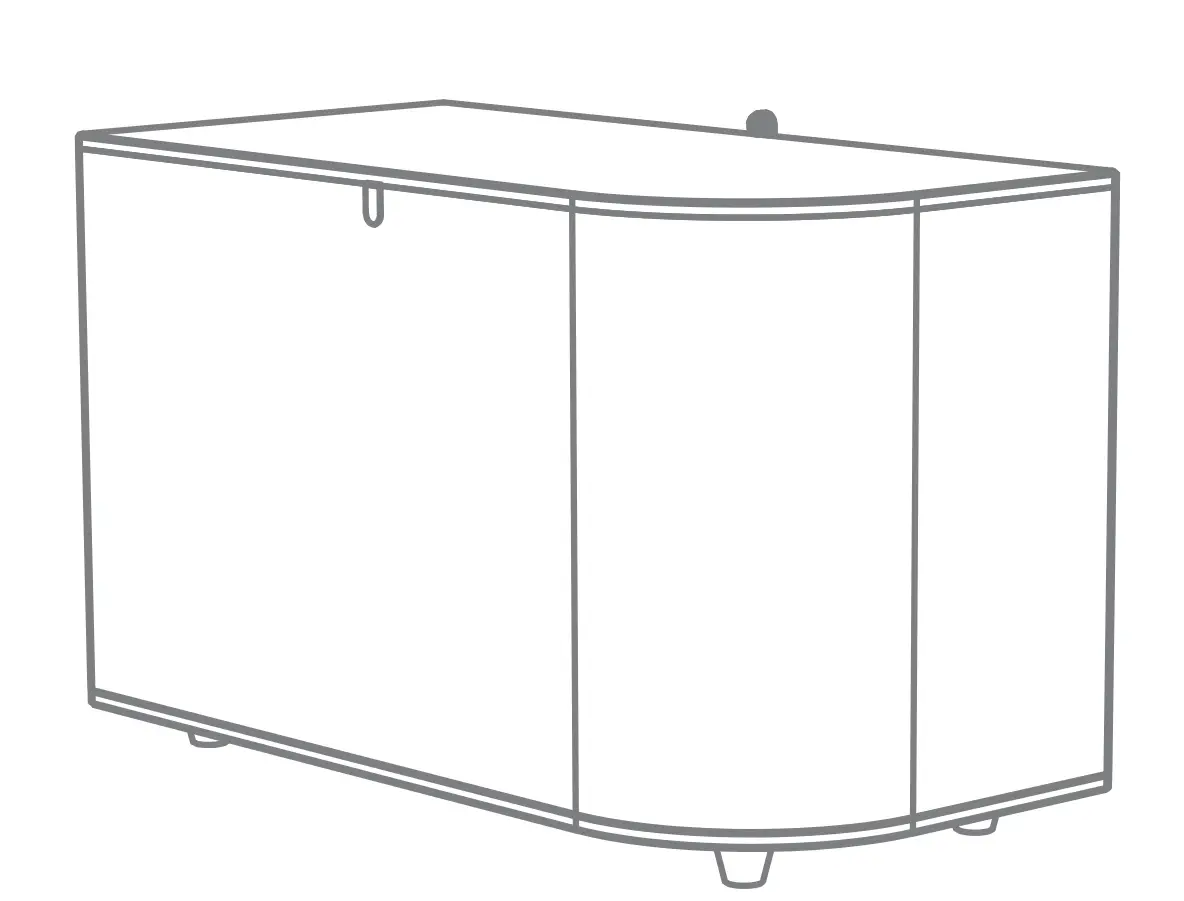
Cloud CS-SUB8 8 Inch Surface Mount Subwoofer
 CAUTION – Installation
Speaker must be installed by qualified speaker technician.
CAUTION – Servicing
Do not perform servicing unless you are qualified to do so. The unit contains no user-serviceable parts.
Refer servicing to qualified personnel.
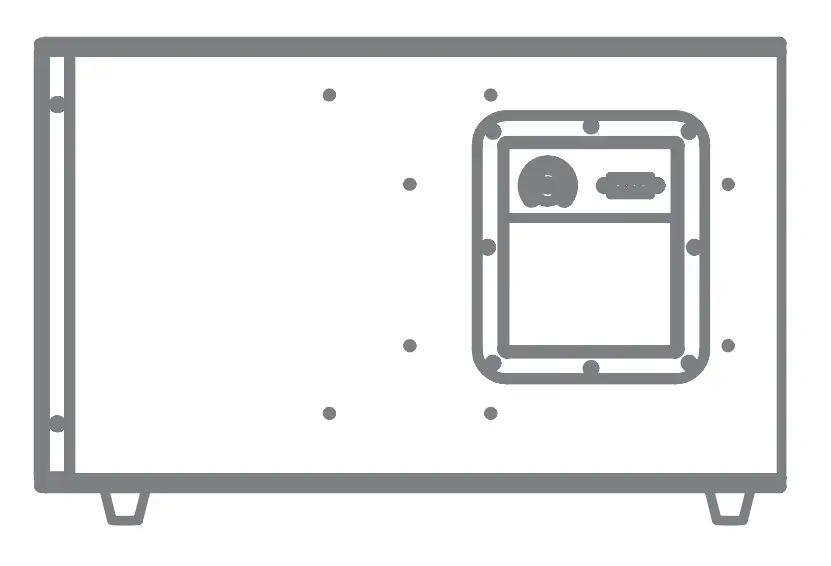
CAUTION – Tap Switch
Before use check and set tap switch under grille to proper setting for your system.
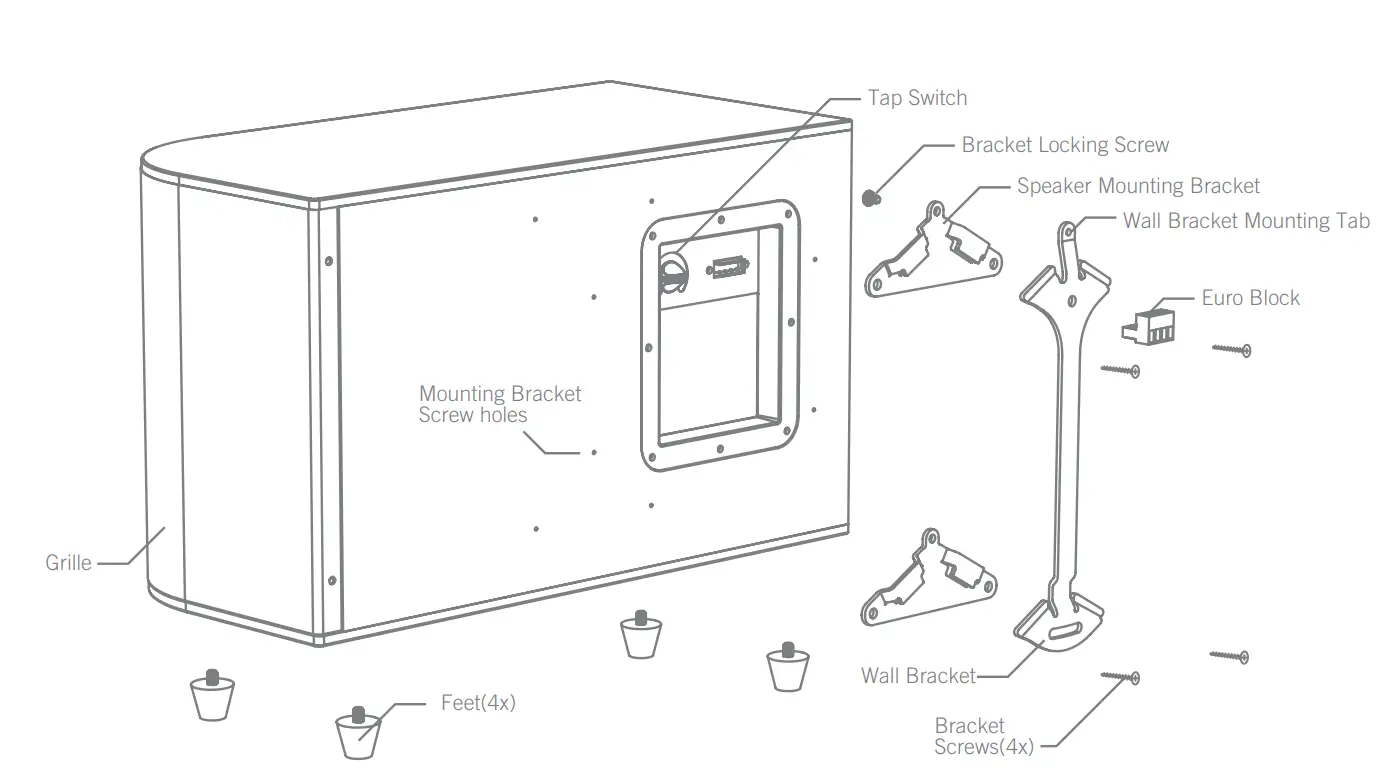
EXPLODED VIEW
TAP SETTINGS
Tap | CS-SUB8 | ||
| 100 V | 70 V | 25 V | |
| 1 | 4 ohm | ||
| 2 | X | 100W | 13W |
3 | 100W | 50W | 7W |
| 4 | 50W | 25W | 3W |
5 | 25W | 13W | 1.5W |
| 6 | 13W | 6W | 0.8W |
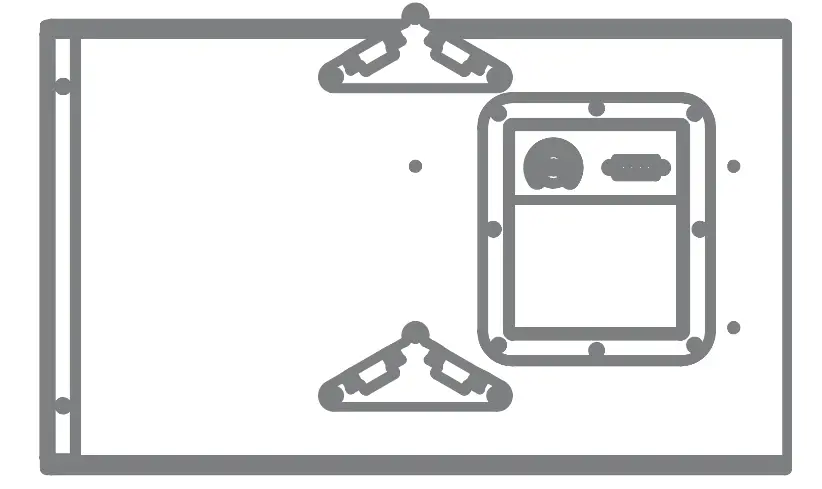
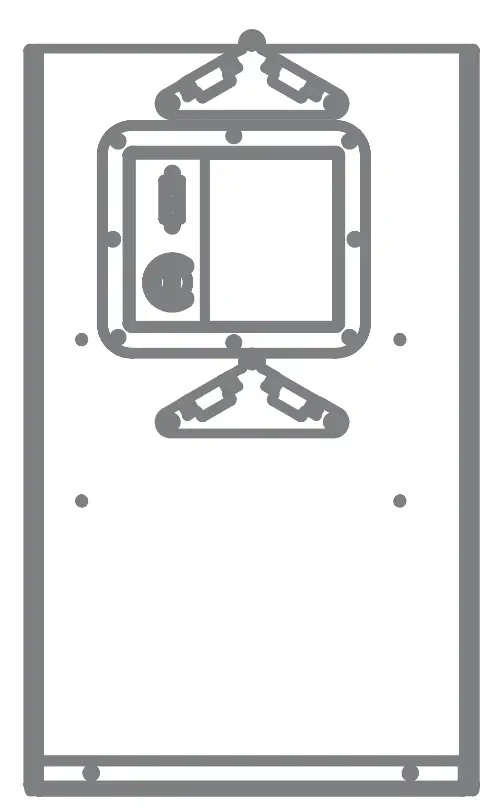
MOUNTING OPTIONS
- Floor or Shelf

- Horizontal Surface mount

- Vertical Surface mount

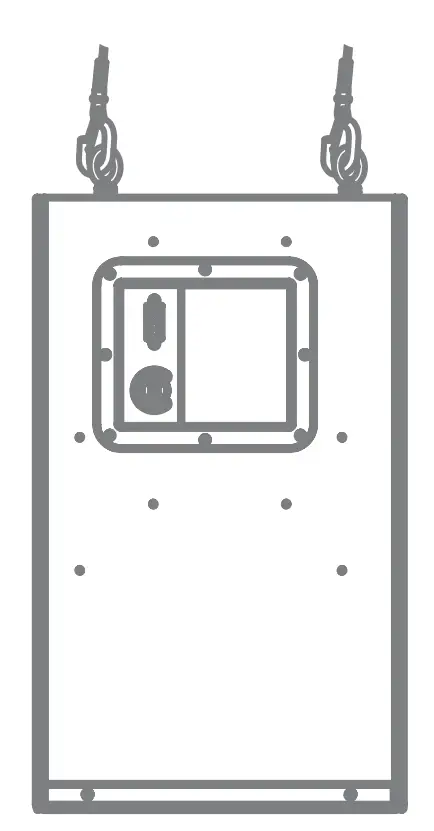
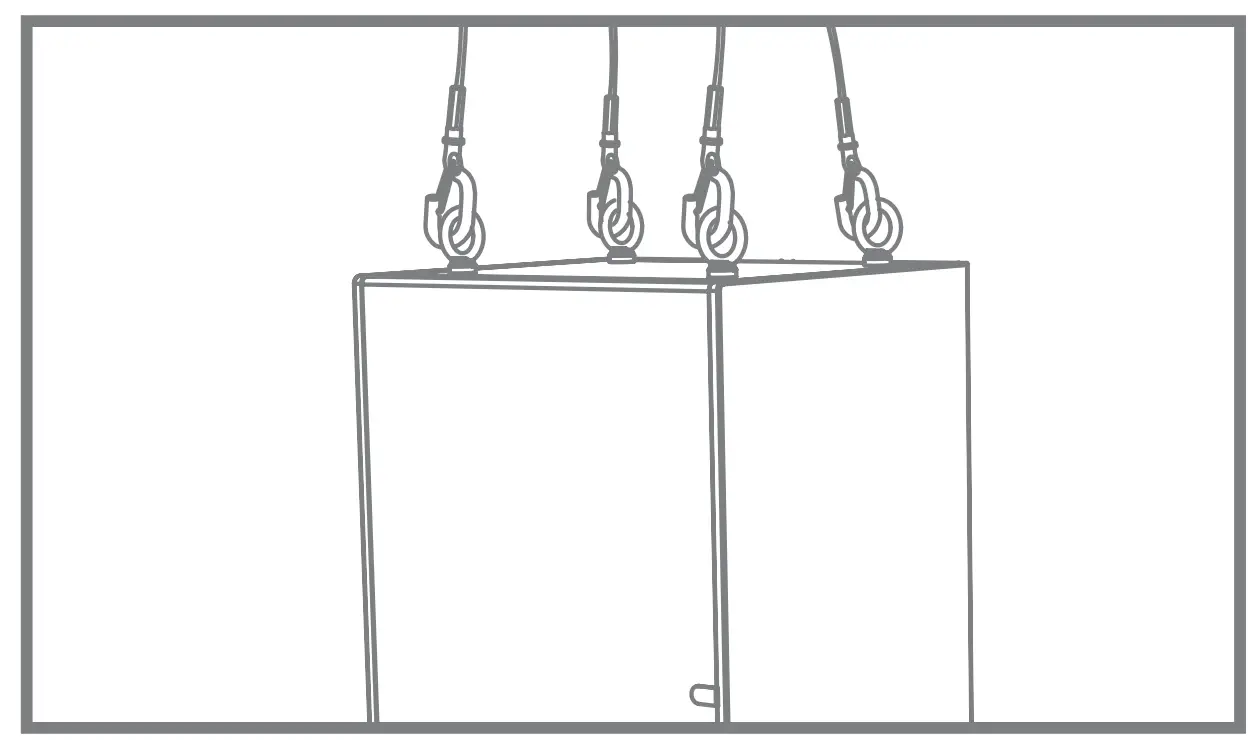
- Fly mount

INSTALLATION
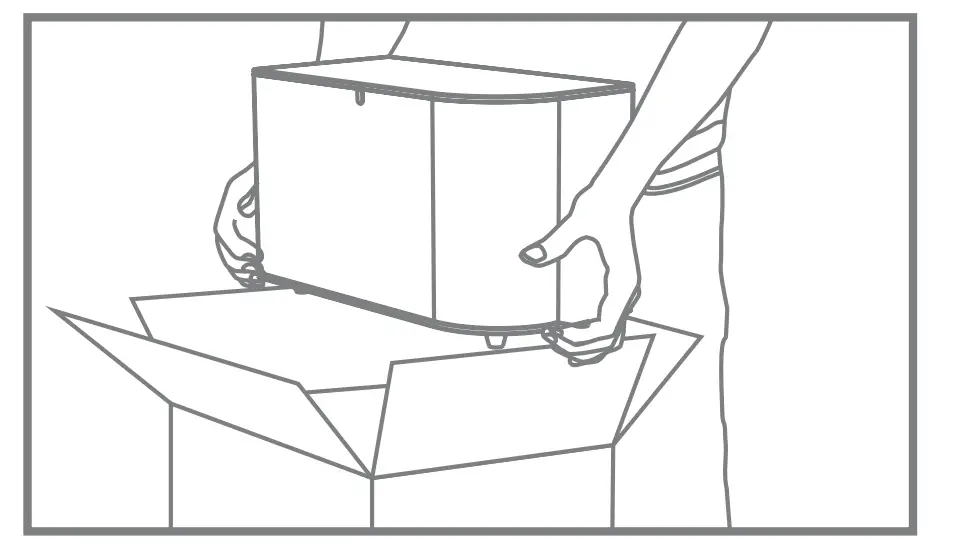
Step 1
Remove speaker from box.
Step 2
Locate euroblock in accessory bag and conne ct signal wire.
For daisy chaining, use “LINK” output to run to next speaker
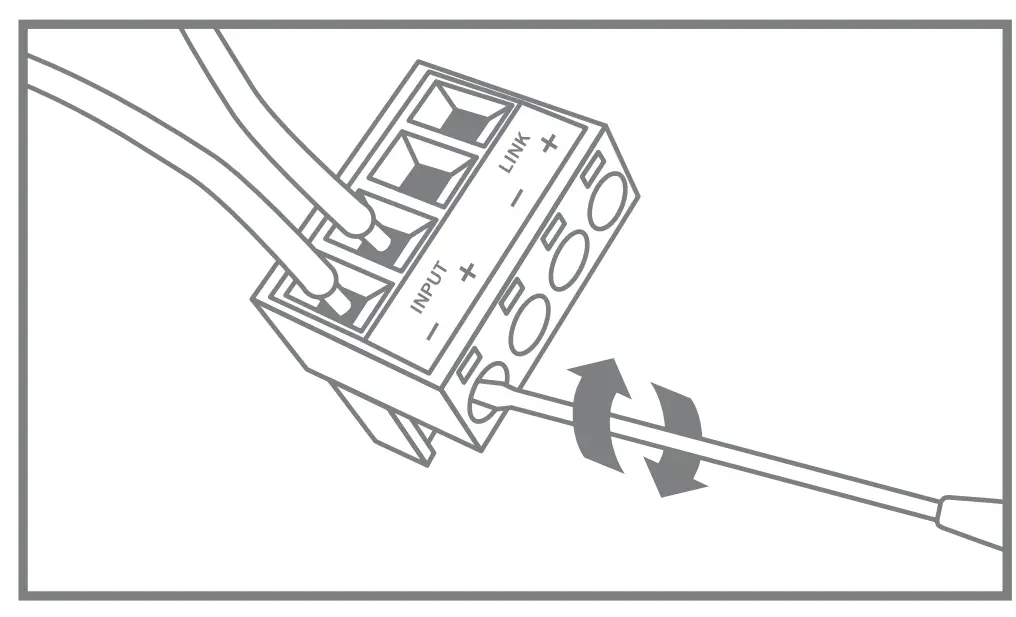
Step 3
Set tap switch to proper setting. Tap switch is preset to highest 100V position.

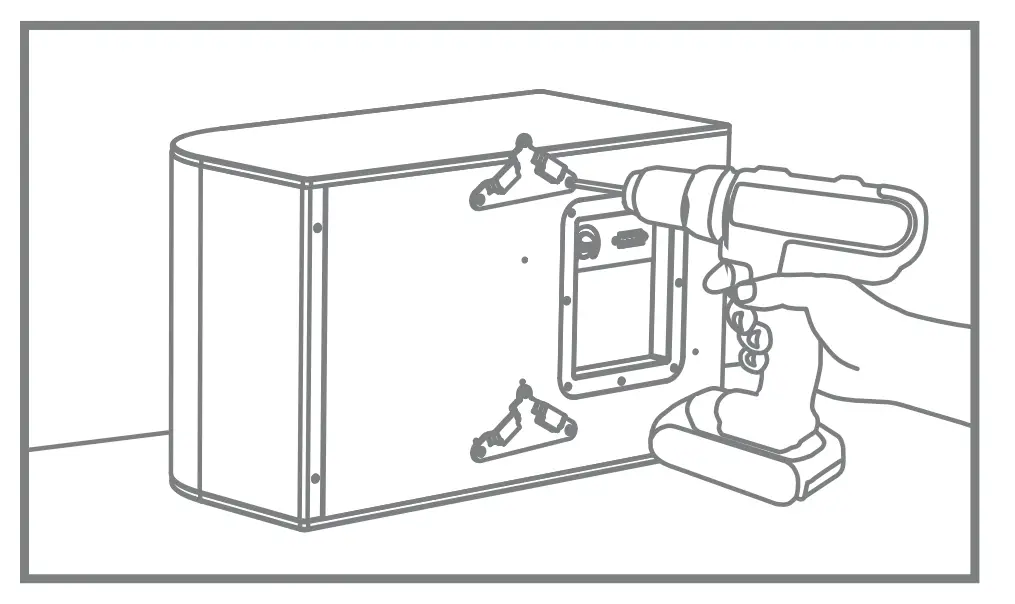
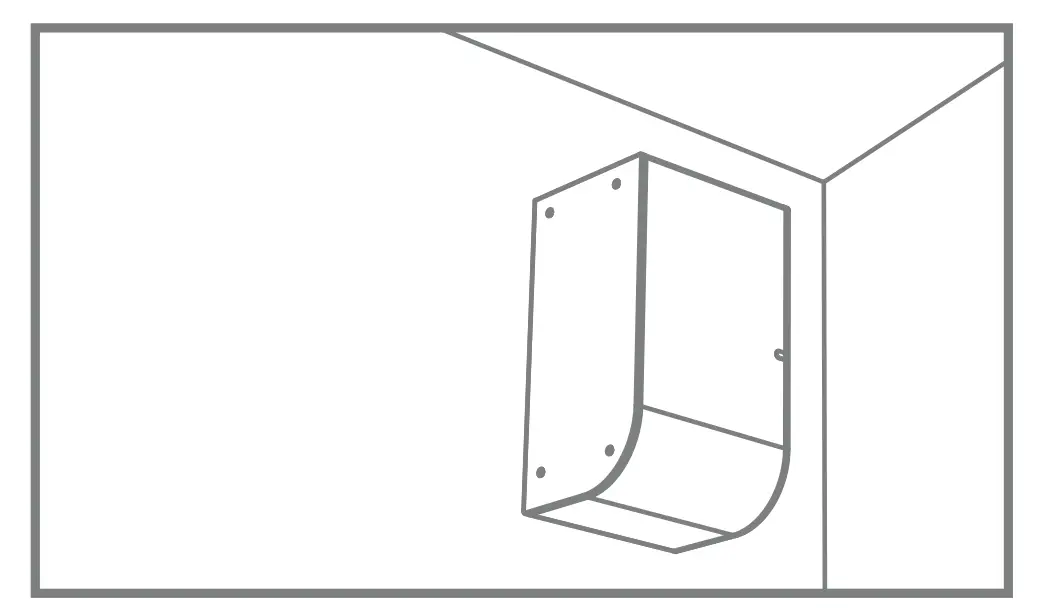
Step 4 – SURFACE MOUNT
Remove rubber feet. Attach speaker mounting bracket to cabinet choosing vertical or horizontal mounting holes with provided screws, DO NOT OVER-TIGHTEN.
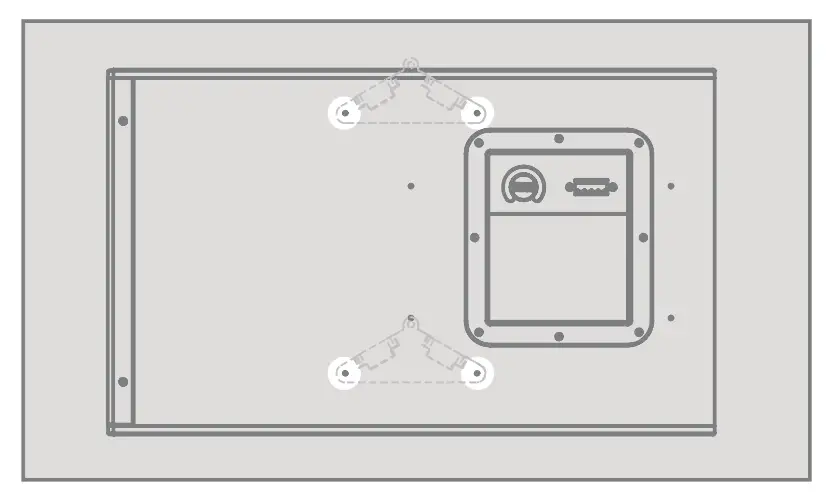
Step 4.1 – Horizontal
Use these hole to attach speaker mounting brackets to cabinet for Horizontal mount.
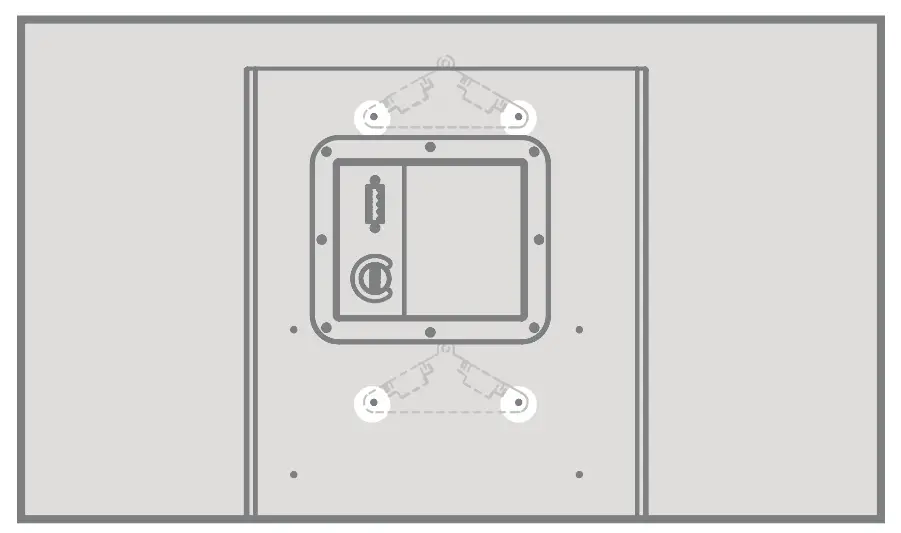
Step 4.1 – Vertical
Use these hole to attach speaker mounting brackets to cabinet for vertical mount.
Step 5
Securely attach wall bracket with wall bracket lock tab facing up.
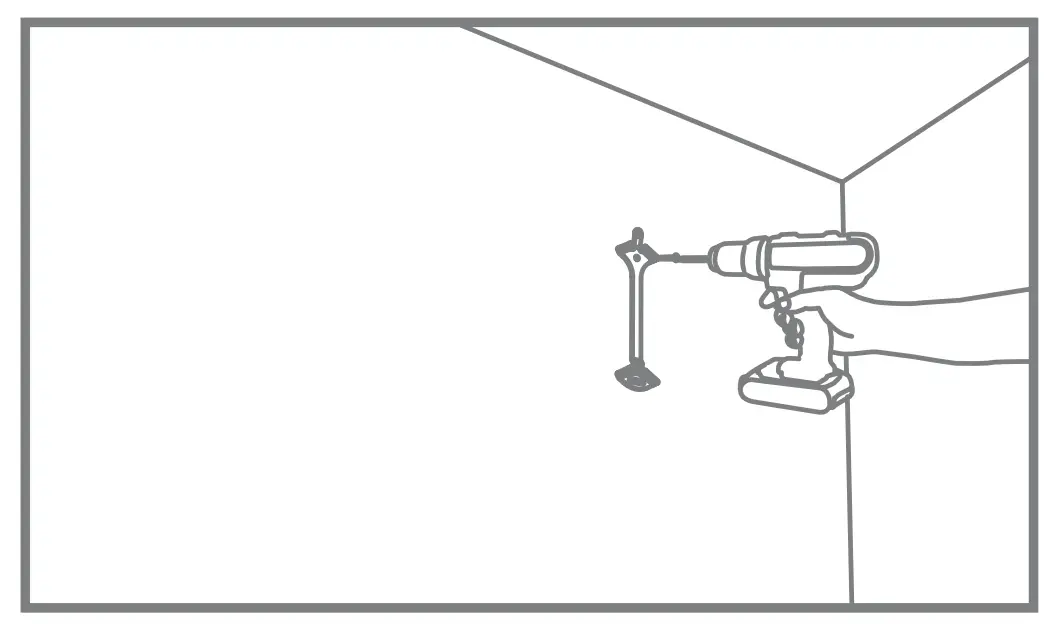
Step 6
Insert euroblock into rear of subwoofer.
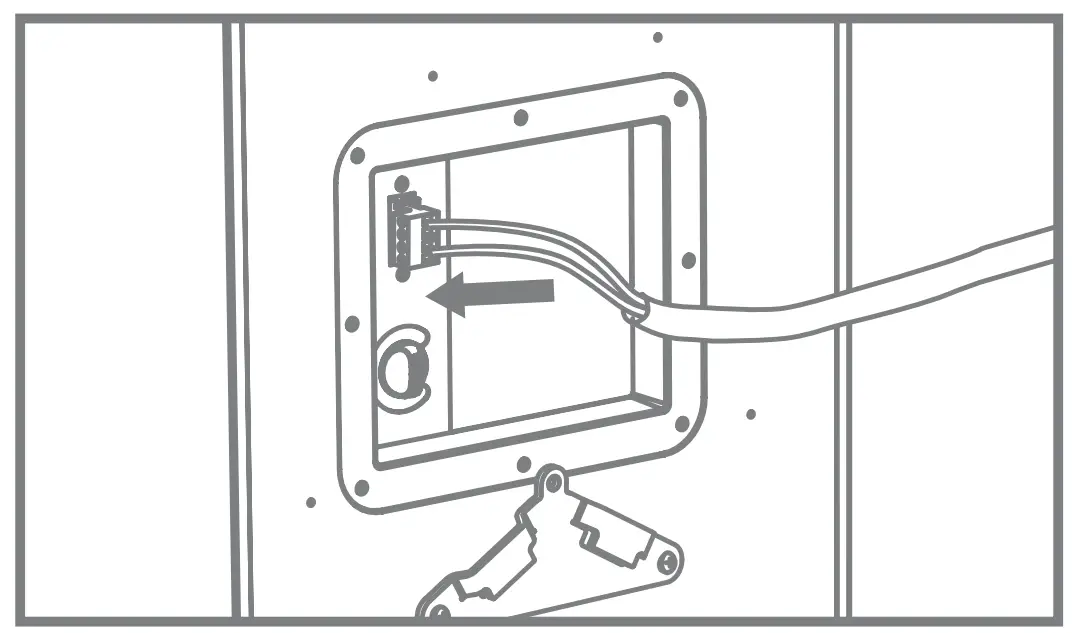
Step 7
Hang subwoofer by inserting tabs of speaker brackets into wall bracket slots.
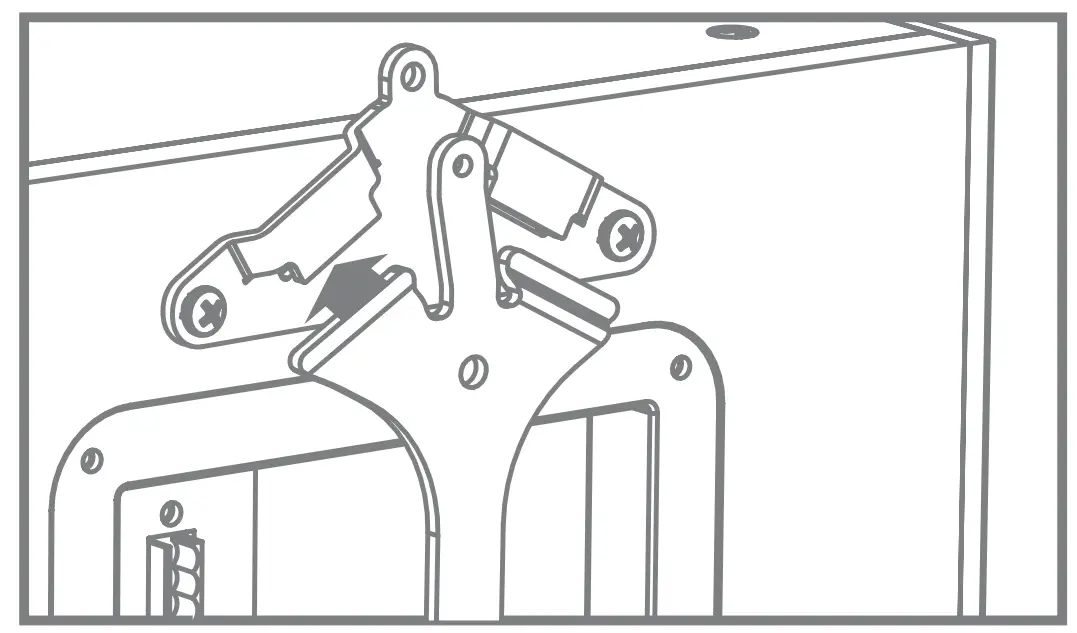
Step 8
Insert bracket locking screw at top of bracket.
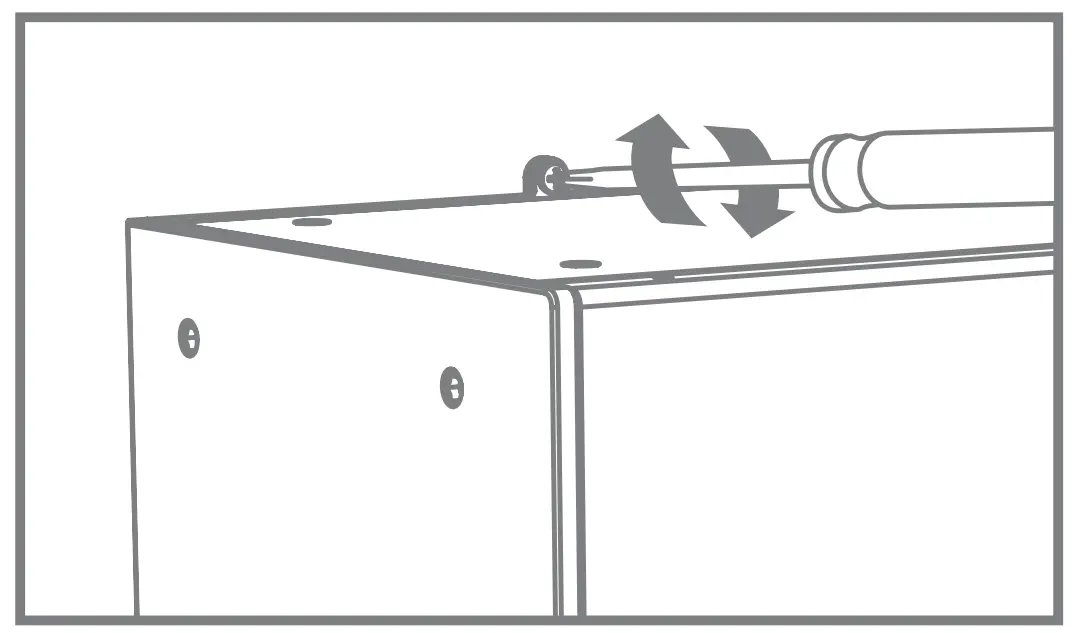
Step 9
Done.
FLOOR OR SHELF MOUNT
Follow steps 1-3. Set subwoofer on floor or shelf.

FLY MOUNT
Insert 4 optional forged eyebolts in M6 inserts on side of speaker cabinet. Use appropriate cables to hang speaker. Follow steps 1-3.
CUSTOMERS SUPPORT
www.cloud.co.uk
www.cloudusa.pro