![]()
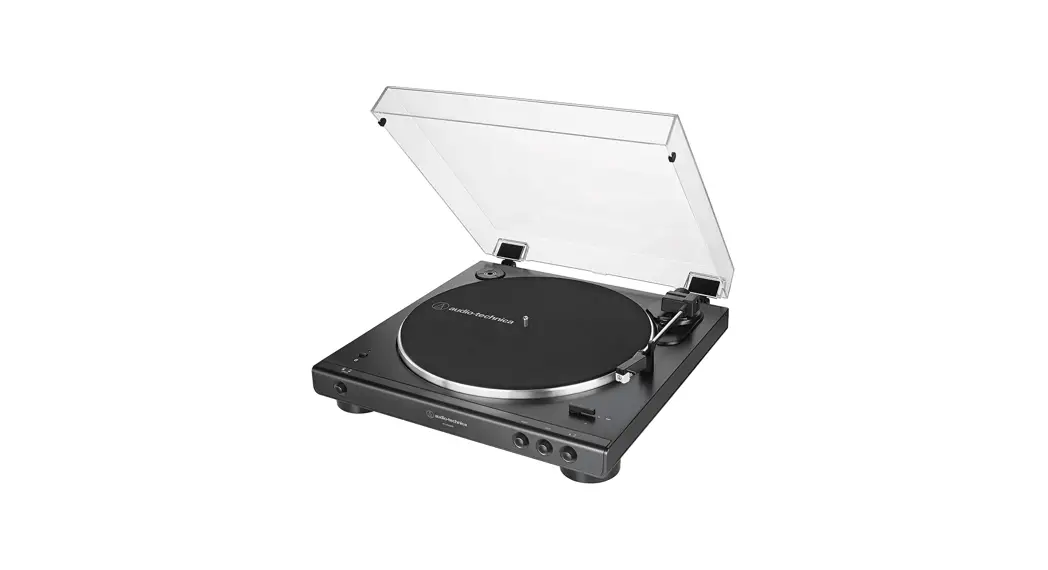
AT-LP3XBT
Quick Start Guide
Automatic Wireless Turntable
Audio-Technica Corporation
2-46-1 Nishi-naruse, Machida, Tokyo 194-8666, Japan
www.audio-technica.com
©2021 Audio-Technica Corporation
Global Support Contact: www.at-globalsupport.com
Contents
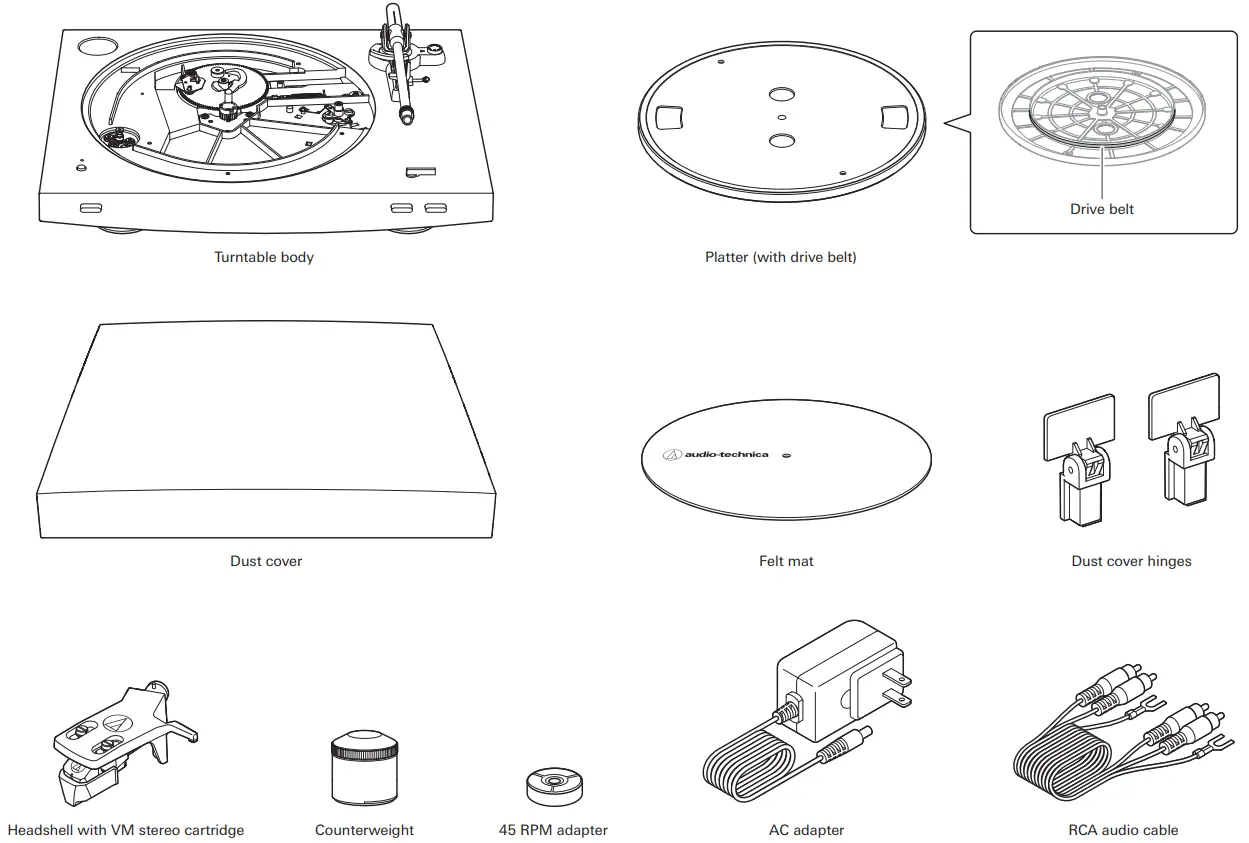
Preparation
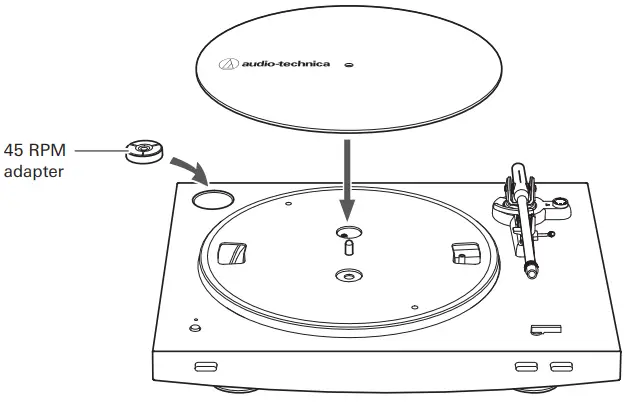
- Set the platter.
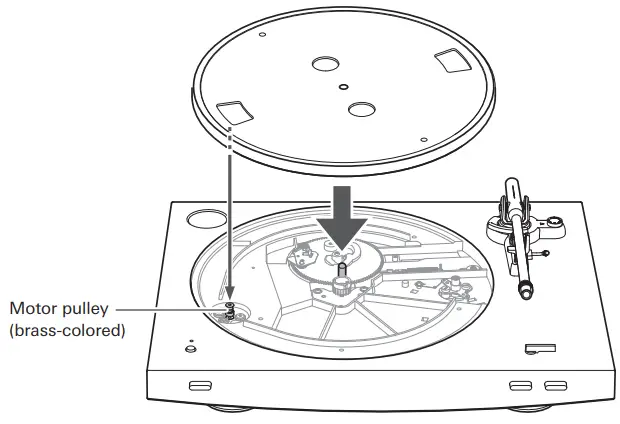
- Attach the drive belt to the motor pulley (brass-colored).
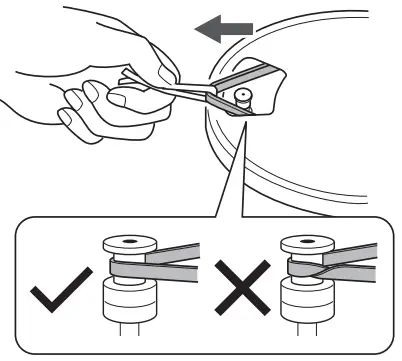
- Remove the red ribbon from the drive belt.
- Set the felt mat.
- Mount the product on a level surface.

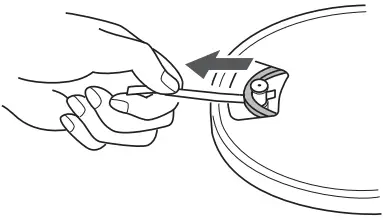
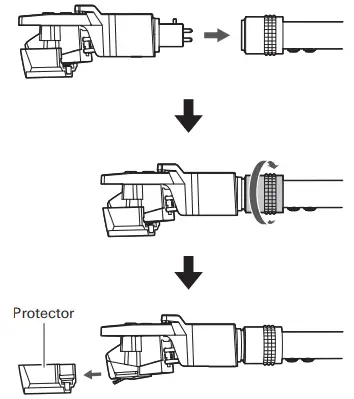
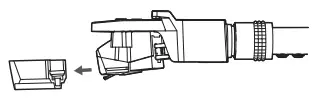
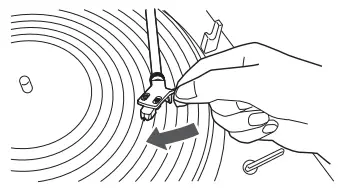
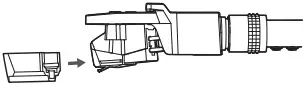
- Insert the headshell into the tonearm, and remove the cartridge’s protector.
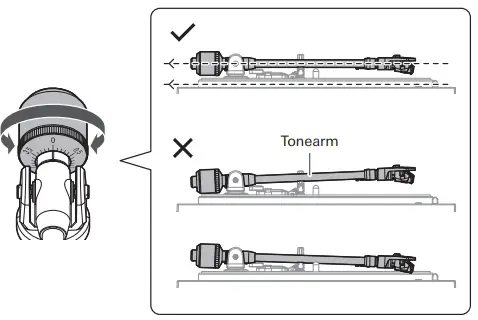
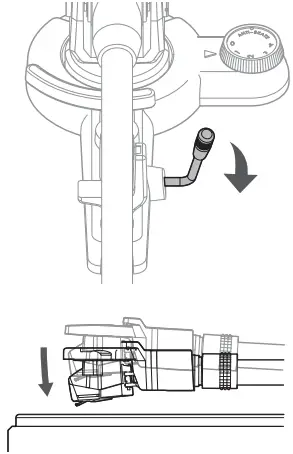
- Attach the counterweight to the back of the tonearm, and slowly turn it counterclockwise (to the left).
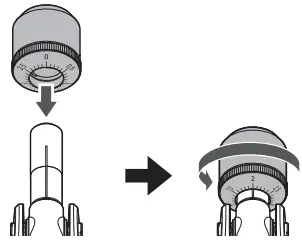
- Turn the counterweight to adjust the tonearm’s balance so that the tonearm is level when you release the headshell.
- Set the tracking force gauge ring to the “0” position.
After that, turn the counterweight and the tracking force gauge ring together counterclockwise (to the left) to the “2” position.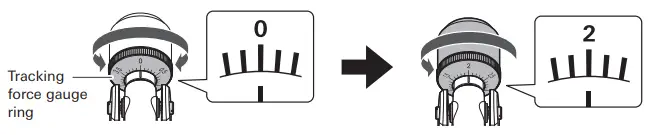
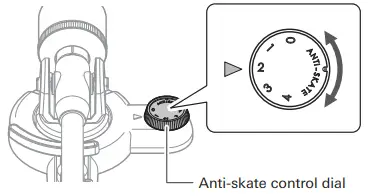
- Set the anti-skate control dial to “2”, the same value as the tracking force value.
Wired Connection
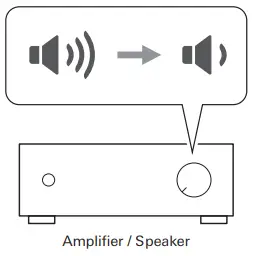
This product has a built-in phono equalizer function. You can use the product, even if you do not have a phono amplifier or connectable equipment with a built-in phono amplifier, by connecting an active speaker, etc. Use the pre-amplifier selector switch to set the output.

Wireless connection
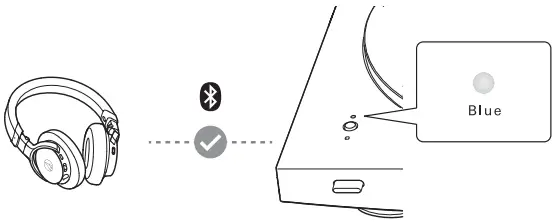
- Set your Bluetooth headphones, speakers, etc. to pairing mode.
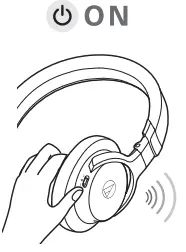
- Press and hold the wireless function button.
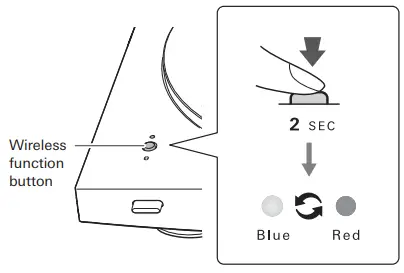
- When pairing is complete, the indicator LED lights in blue.
Play
- Remove the cartridge’s protector.
- Place a record on the felt mat, select the size with the sizeselector, and then select the speed with the platter speed button.

Auto
- Press the START button.

Manual
- Raise the tonearm by lifting the tonearm lift control lever to the UP position.
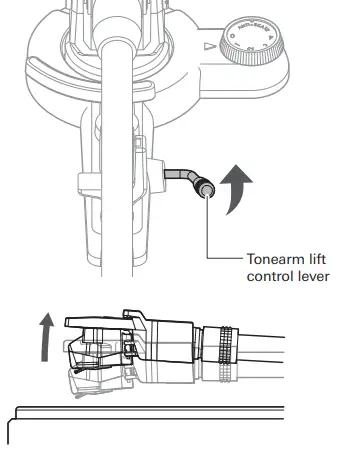
- Position the tonearm over the desired location (groove) on the record.
- Lower the tonearm by moving the tonearm lift control lever to the DOWN position.
Stop
- If the product is connected via a wired connection, lower the volume of the connected device (amplifier, etc.).
- Press the STOP button.
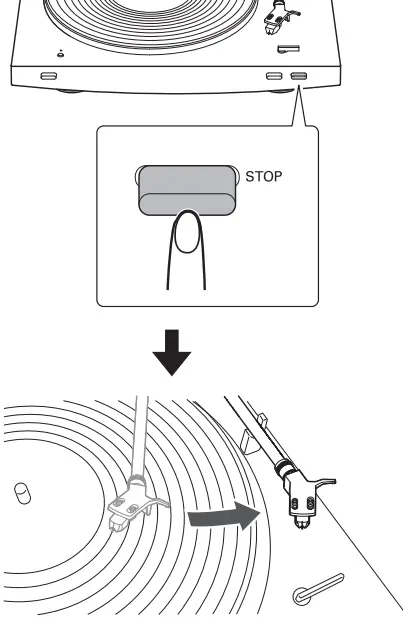
- Attach the cartridge’s protector.
Cleaning
For details about turntable and cartridge care accessories, visit https://www.audio-technica.com.
Stylus
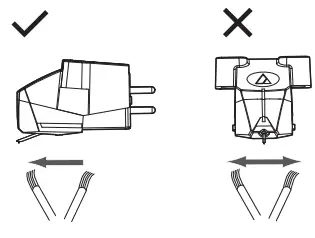
Record

• The Bluetooth® word mark and logos are registered trademarks owned by Bluetooth SIG, Inc. and any use of such marks by Audio-Technica Corporation is under license. Other trademarks and trade names are those of their respective owners.

https://www.audio-technica.com
Support
For more information on how to use this product and troubleshoot any problems, refer to the user manual on the Audio-Technica website.


