
Intelligent IFSGAJ002A-ANON Automatic Faucet with Soap Dispenser


Installation
Dryflow® Bi-Tap Soap & Water Sensor Tap
Read ALL the instructions completely before installation
Specifications
| Model No. | IFSGAJ002A-ANON | |||
| Description | Automatic faucet with soap dispenser | |||
| Power Suplly | DC:6V(4AA alkaline batteries) AC:220V-240V;50/60Hz | |||
| Static Power Consumption | DC:≤0.18-0.33mW | |||
| Sensing for water:25±5CM | ||||
| Sensing Range | (based on white board) Sensing for soap:10±2CM (based on white board) | |||
| Water Pressure | 0.5Bar-8 Bar | |||
| Ambient Temperature | 1℃-55℃ | |||
| Inlet | G1/2” | |||
Troubleshooting
| Symptom | Cause | Treatment |
|
No water out | The battery is exhausted | Change the battery |
| Water supply cut off | Check supply | |
| Dirt in the filter | Clean the filter | |
| Water pressure too low | Raise the pressure | |
|
No soap out | There is still air in the soap tube | Sense the soap sensor repeatedly until soap out |
| Too low ambient temperature, the soap is easy to freeze | Fill in proper amount of warm water (approximate 60℃) | |
| The soap in the bottle is too little | Fill more soap | |
| The check valve is blocked | Replace the check valve | |
| Water or soap will not turn off | Dirt on the sensor window | Clean the sensor |
| Too little water flow | Water supply is turned down | Adjust water supply |
| The filter is too dirty | clean the filter | |
| Water pressure is too low | Raise the pressure | |
| Too much water flow | Water pressure is too high | Adjust pressure |
| Short cycles of battery | Incorrect batteries | Change to 4AA Alkaline batteries |
|
The indicator light is | The light is broken | Change the light or circuit board |
| The circuit board is wet or signal line is wet | Dry out | |
| The battery is exhausted | Change the battery | |
| Poor connection of battery | Check battery connections |
Debugging step for soap dispenser
- Fill the bottle full of liquid s0ap for the first time;
- Press and hold the dispense button on the control box, release till the soap is dispensed.
- Start the system by passing your hand in the sensor range, soap will dispense automatically.
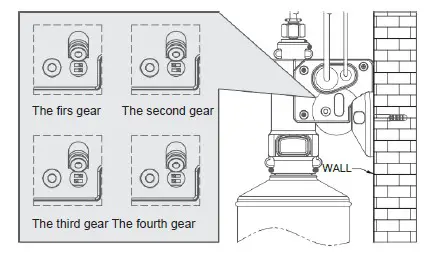
Note: It has four soap dispensing volume adjustments:
- Low volume
- Normal volume
- Medium volume
- High volume
Viscosity of liquid soap:100-3500cp(mpA.s)
| Recommended Usage | |||
| Domestic | Heavy Commercial | ||
| Light Commercial | Health Care | ||
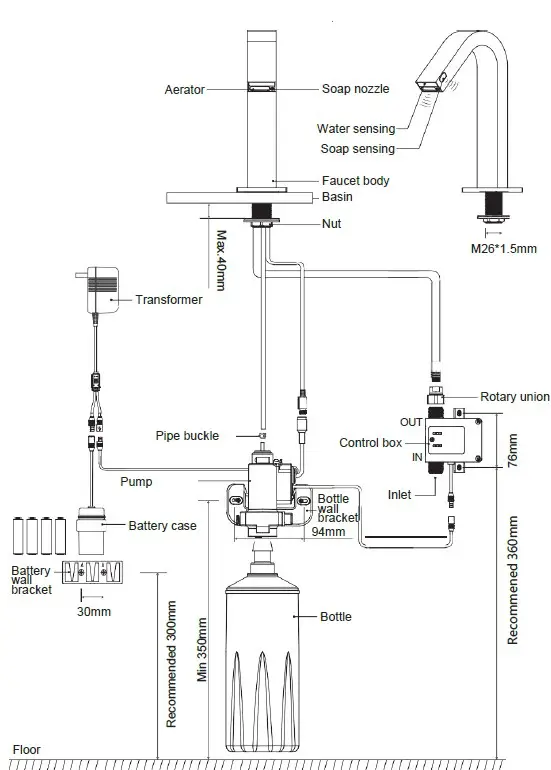
Part name
Installation
Warning: Before installing the new spout it is essential that you thoroughly flush through the pipework in order to remove any remaining swarf, solder, etc. Failure to carry out this procedure could cause problems or damage to the workings of the spout. This product must not be modified in any way as this will invalidate the guarantee.
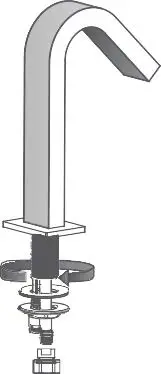
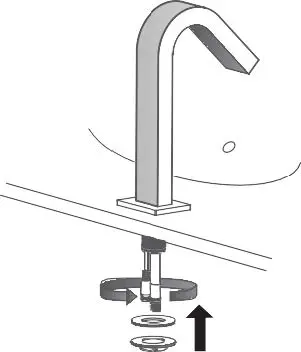
- Screw off the rotary union,nut and gasket from the faucet.

- Fit the spout to the basin ensuring the cables and hose are threaded through the hole in the basin.
- Fit wall bracket Position the brackets onto the wall and mark the position of the fixing holes. Remove the brackets and drill suitable holes for the wall plugs supplied . Fit the wall plugs and brackets.

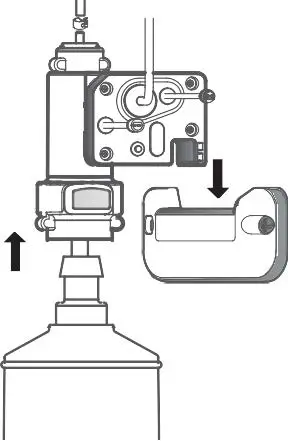
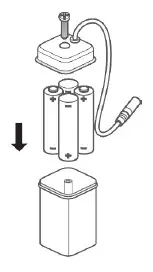
- Attach the pump to bottle Ensure the dispenser tube is located inside the bottle and push the pump the pump down firmly onto the bottle until a loud “click” is heard . Connect the dispensing cable from the spout into the top connection on the pump. Place pump into bracket.

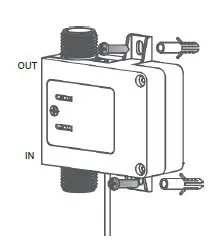
- Position and fix the control box onto the wall surface.

- Connect the hose with the rotary union to the outlet of the control box.

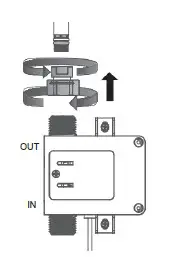
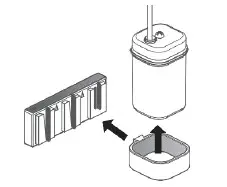
- Insert Batteries. Remove the battery cover and insert the 4AA battery case ensuring they are inserted the correct way . Replace the battery box cover and tighten the screw. Push the holder into the battery case wall bracket.

- Insert the case into the holder. Push the holder into the battery case wall bracket.