Aputure LS 1200 Four-Lights Bracket Instruction Manual
Product Details
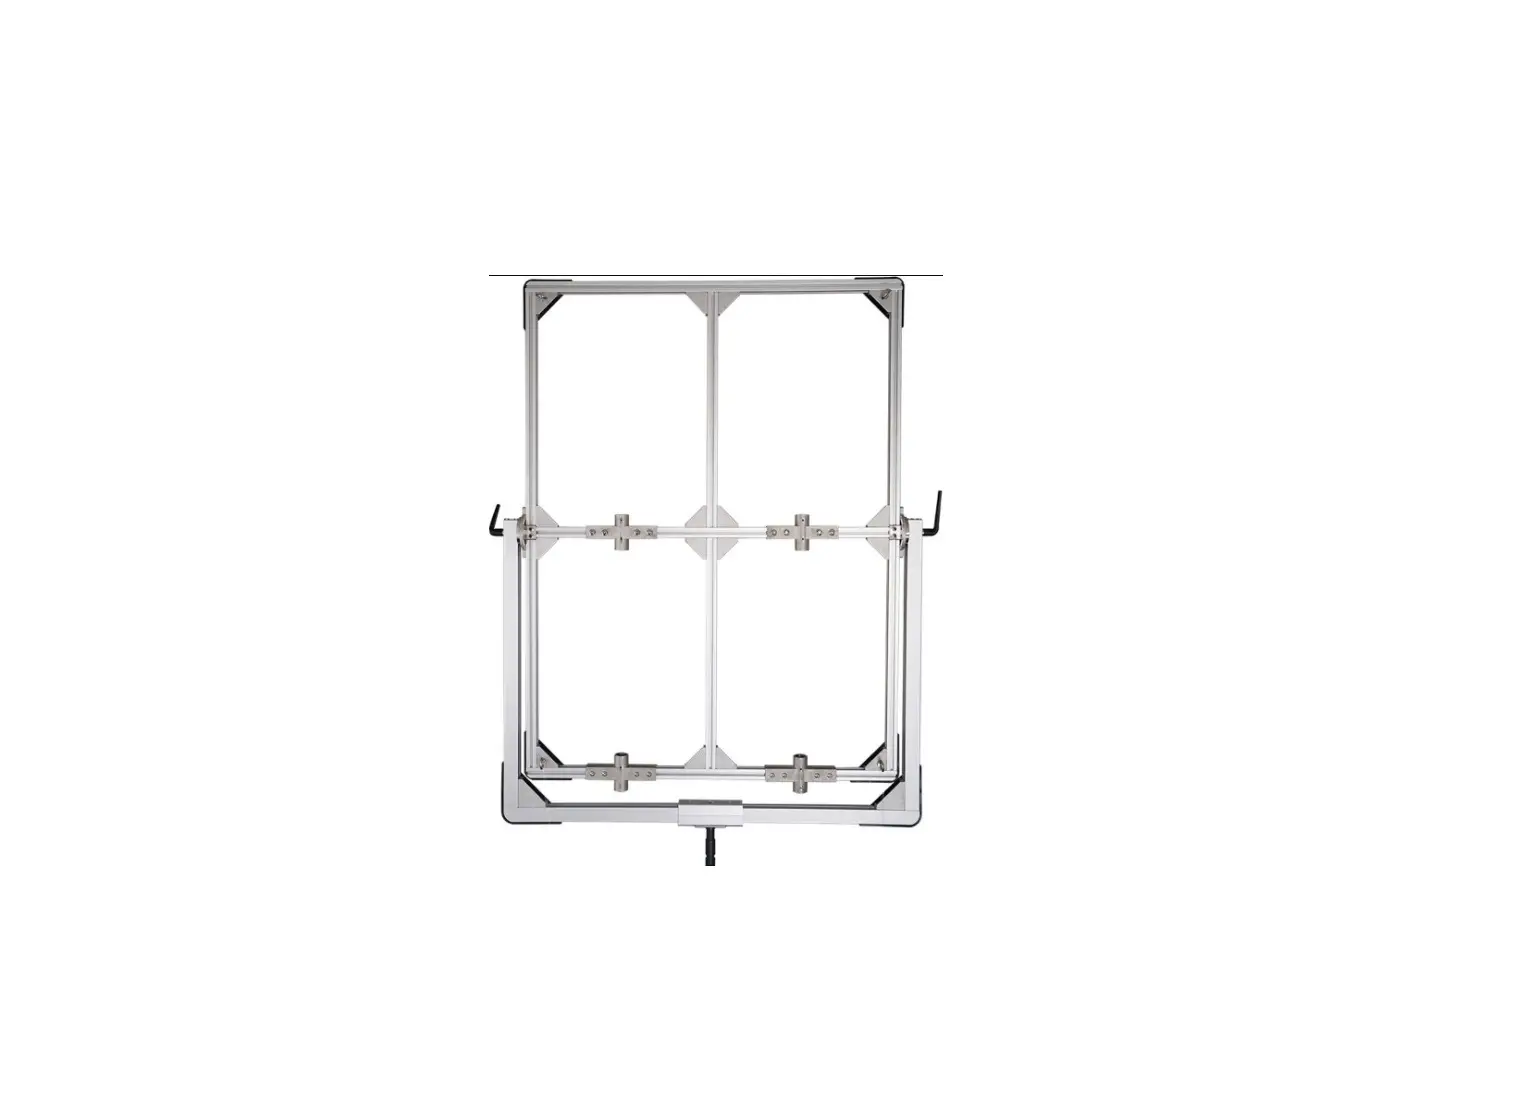
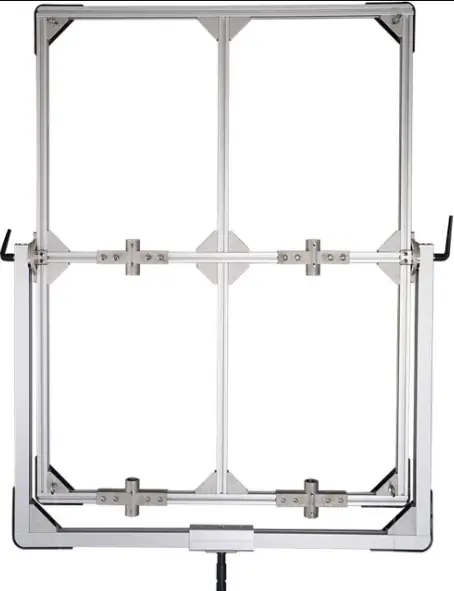
What’s Insided
When you unbox the product, please make sure all the items listed below are included, otherwise, please contact the seller immediately.
Tips:
- Before installation, it is recommended that the components be discharged neatly in the following order to improve installation efficiency.
- The illustrations in the manual are only diagrams for reference. Due to the continuous development of new versions of the product, if there are any differences between the product and the user manual diagrams, please refer to the product itself.


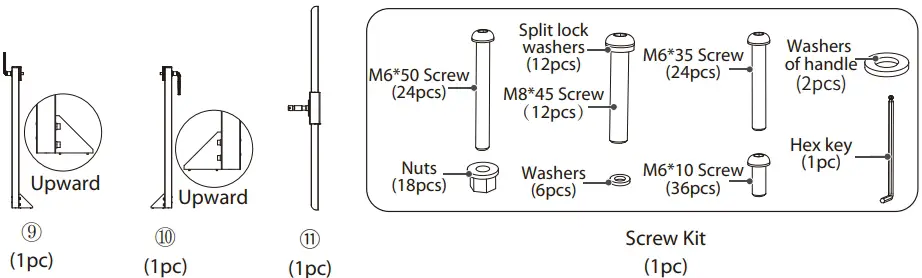
Tips for Using Hex Key
![]()
Getting Started
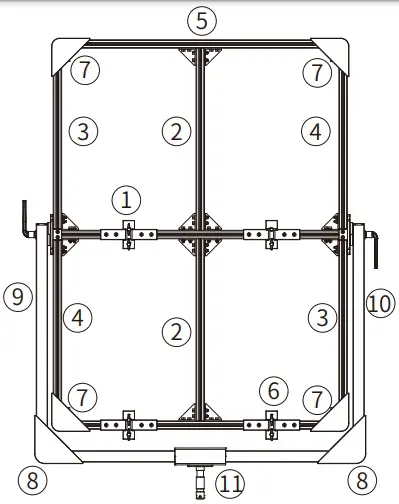
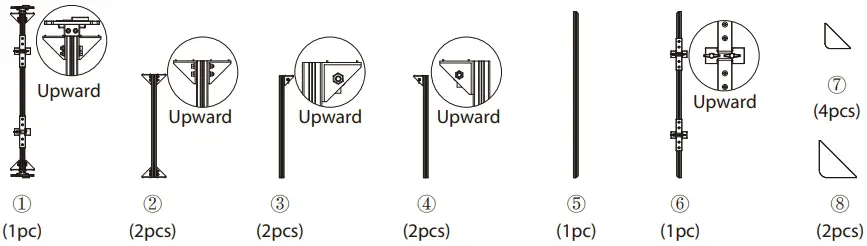
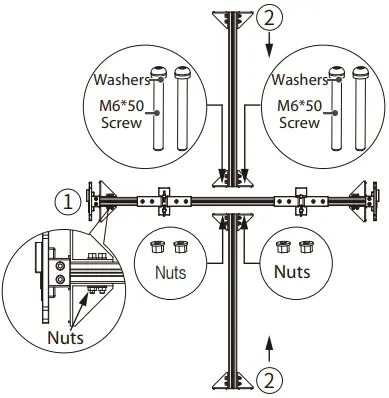
- Install the middle upper and lower of bracket: Place ① and ② as shown, fix them with 4 sets of M6 * 50 screws & washers and nuts.

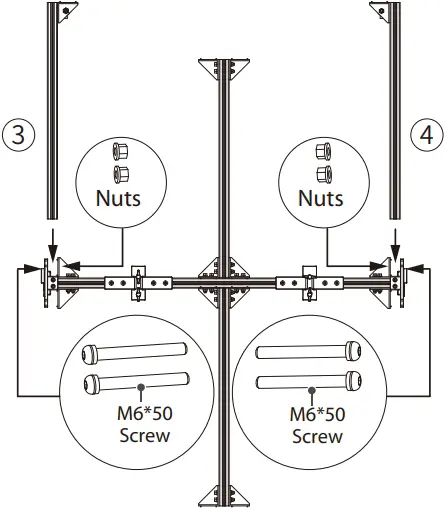
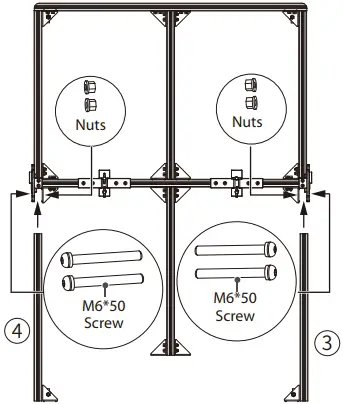
- Install the upper side of bracket: Place ③ and ④ as shown, fix them with 4 sets of M6 * 50 screws and nuts.

- . Install the upper of bracket: Place ⑤ as shown, fix it with 3 sets of M8 * 45 screws & split lock washers and 8 sets of M6 * 35 screws.

- Install the lower side of bracket: Place ③ and ④ as shown, fix them with 4 sets of M6 * 50 screws & nuts.


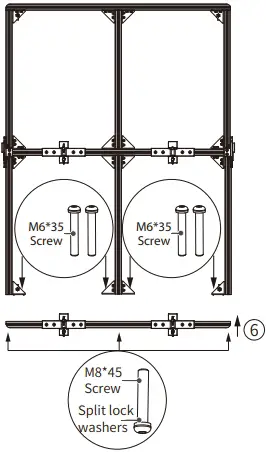
- . Install the lower of bracket: Place ⑥ as shown, fix it with 3 sets of M8 * 45 screws & split lock washers and 8 sets of M6 * 35 screws.

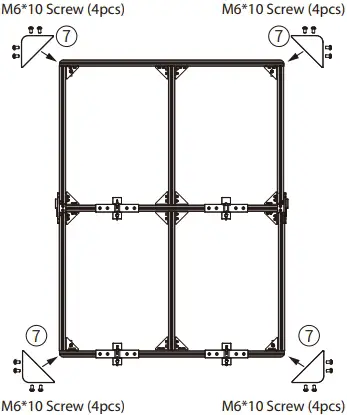
- Install the corner guards of middle bracket: Place ⑦ as shown, fix them with 4 sets of 4 pieces M8 * 45 screws

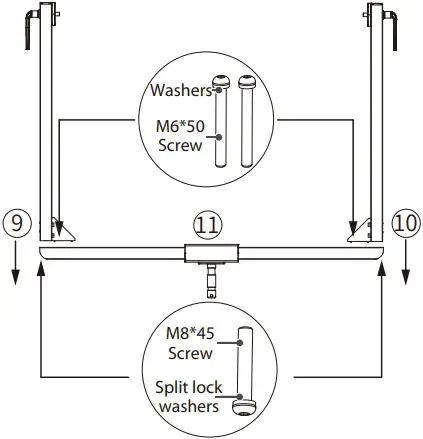
- Install the bottom of bracket: Place ⑨ ⑩ ⑪ as shown, fix them with 4 sets of M6 * 50 screws & washers and 2 sets of M8 * 45 screws & split lock washers.

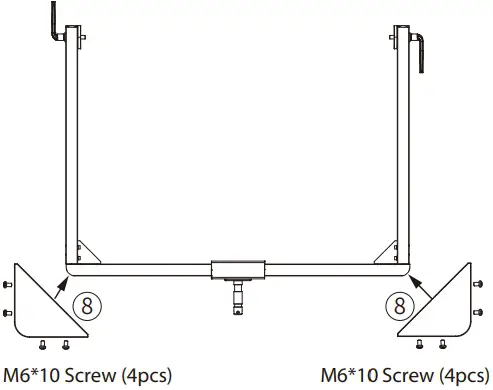
- Install the corner guards of bottom of bracket: Place ⑧ as shown, fix them with 2 sets of 4 pieces M8 * 45 screws.

- Combine the middle and bottom of bracket: Place the components installed in step 6 and step 8 as shown, pull the bottom bracket handle outward (Figure A), push the bottom bracket from bottom to top until the handle is flush with the interface on both sides of the component ①, and tighten the left and right handles to fix them (Figure B)