![]() Wiser IP Camera Indoor
Wiser IP Camera Indoor
Device User Guide
Information about features and functionality of the devices. 11/2022
Legal Information
The Schneider Electric brand and any trademarks of Schneider Electric SE and its subsidiaries referred to in this guide are the property of Schneider Electric SE or its subsidiaries. All other brands may be trademarks of their respective owners.
This guide and its content are protected under applicable copyright laws and furnished for informational use only. No part of this guide may be reproduced or transmitted in any form or by any means (electronic, mechanical, photocopying, recording, or otherwise), for any purpose, without the prior written permission of Schneider Electric.
Schneider Electric does not grant any right or license for commercial use of the guide or its content, except for a non-exclusive and personal license to consult it on an “as is” basis. Schneider Electric products and equipment should be installed, operated, serviced, and maintained only by qualified personnel.
As standards, specifications, and designs change from time to time, information contained in this guide may be subject to change without notice.
To the extent permitted by applicable law, no responsibility or liability is assumed by Schneider Electric and its subsidiaries for any errors or omissions in the informational content of this material or consequences arising out of or resulting from the use of the information contained herein.
Safety information
Important information
Read these instructions carefully and look at the equipment to become familiar with the device before trying to install, operate, service, or maintain it. The following special messages may appear throughout this manual or on the equipment to warn of potential hazards or to call attention to information that clarifies or simplifies a procedure.![]() The addition of either symbol to a “Danger” or “Warning” safety label indicates that an electrical hazard exists which will result in personal injury if the instructions are not followed.
The addition of either symbol to a “Danger” or “Warning” safety label indicates that an electrical hazard exists which will result in personal injury if the instructions are not followed.![]() This is the safety alert symbol. It is used to alert you to potential personal injury hazards. Obey all safety messages that accompany this symbol to avoid possible injury or death.
This is the safety alert symbol. It is used to alert you to potential personal injury hazards. Obey all safety messages that accompany this symbol to avoid possible injury or death.
DANGER
DANGER indicates a hazardous situation which, if not avoided, will result in death or serious injury.
Failure to follow these instructions will result in death or serious injury.
WARNING
WARNING indicates a hazardous situation which, if not avoided, could result in death or serious injury.
CAUTION
CAUTION indicates a hazardous situation which, if not avoided, could result in minor or moderate injury.
NOTICE
NOTICE is used to address practices not related to physical injury.
Wiser IP Camera Indoor
 PDL723419
For your safety
NOTICE
RISK OF DAMAGE TO DEVICE
Always operate the product in compliance with the specified technical data.
Failure to follow these instructions can result in equipment damage.
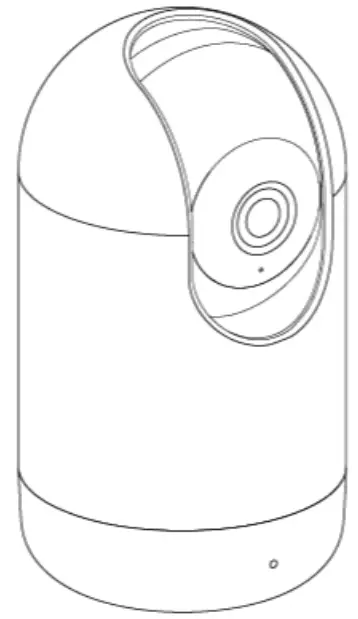
About the device
The Wiser IP Camera Indoor (hereinafter referred to as IP Camera) is a Wi-Fi ® operated device that is used to monitor sensitive areas of your home. You can install the IP camera in all directions, e.g. at the ceiling or just put it on a table. The IP camera can be triggered by other Wiser devices.
Advantages of using an IP camera:
- Increases your overall security
- High resolution recording
- Provides 340° view of the surrounding
- Infrared night vision for low light recording
NOTE: Users are solely responsible for adhering to applicable laws (e.g. privacy or any other relevant laws around surveillance). Users must ensure that guarantees are taken to avoid any misuse of equipment for surveillance or entirely different and unexpected purposes than intended.
Installing the device
Refer to the installation instruction supplied with this product.
See Wiser IP Camera Indoor.
Downloading the app
Install the app on a mobile phone to commission and work with the Wiser system and devices.
- Perform one of the following:
– For Apple mobile phones: Visit https://itunes.apple.com/us/app/wiserby-se/id1026806919?ls=1&mt=8.
Scan QR code to download app for Apple devices
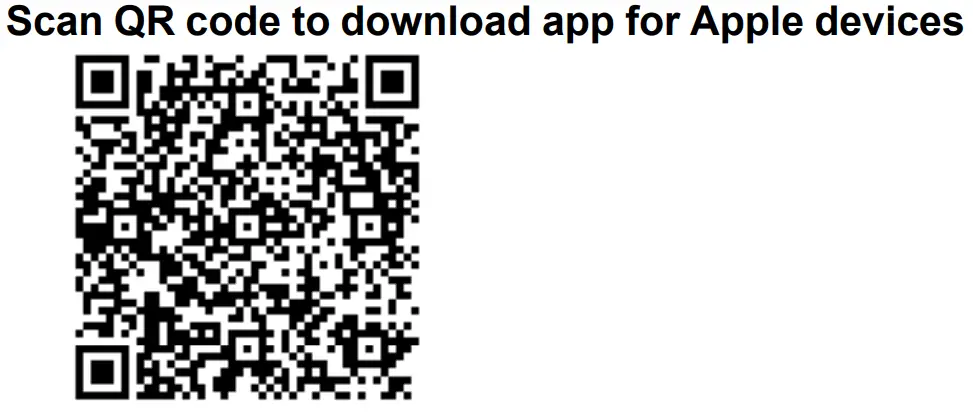 https://itunes.apple.com/us/app/wiser-by-se/id1026806919?ls=1&mt=8
– For Android mobile phones: Visit https://play.google.com/store/apps/details?id=com.schneiderelectric.WiserBySE.
Scan QR code to download app for Android devices
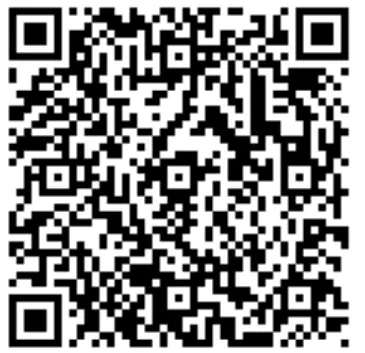 https://play.google.com/store/apps/details?id=com.schneiderelectric.WiserBySE
Pairing the device
Using the Wiser app, pair your device with the local Wi-Fi network to register on cloud to access and control the device.
Before you pair the device, download the Wiser app, page 5 to your mobile device.
Follow the steps to pair the device:
- On the Home page, tap + icon and tap
 .
. - Plug-in the power cable to a power supply to power On the device.
 Make sure that the LED blinks red.
 - In the Wiser app, select Confirm that the LED is blinking red (A) and tap Start Configuration.

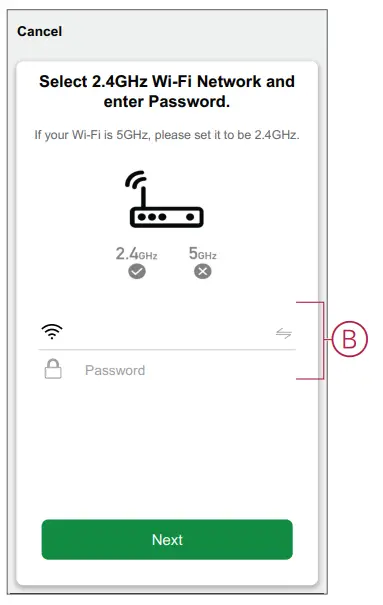
- Select the Wi-Fi network, enter the Password (B) and tap Next.
NOTE: Make sure to first connect your mobile phone to the home Wi-Fi and select 2.4 GHz network.
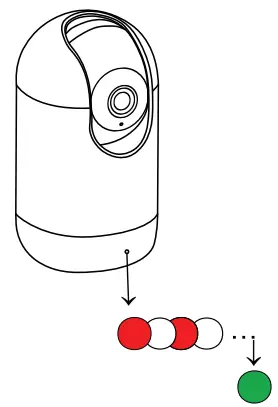
- Wait for a few seconds until the LED blinks green and becomes stable.
The green LED on the IP camera shows that it is successfully connected to the Wi-Fi network and ready to use.
- After the device is connected, tap Done.
 Make sure that the LED blinks red.
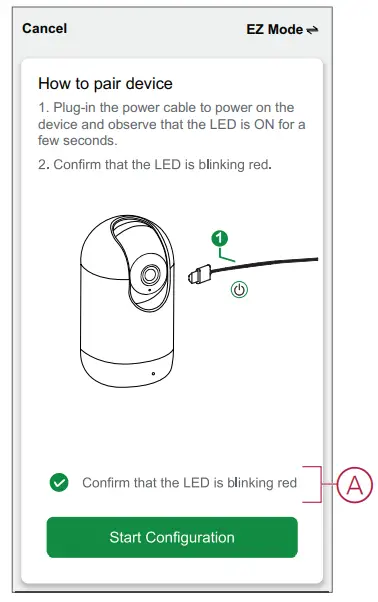
Configuring the device
Changing the device icon
You can change the device icon using the Wiser app.
- On the Home page, select the device for which you wish to change the icon.
- At the top-right corner of the screen, tap
 .
. - Tap
 edit next to the device name.
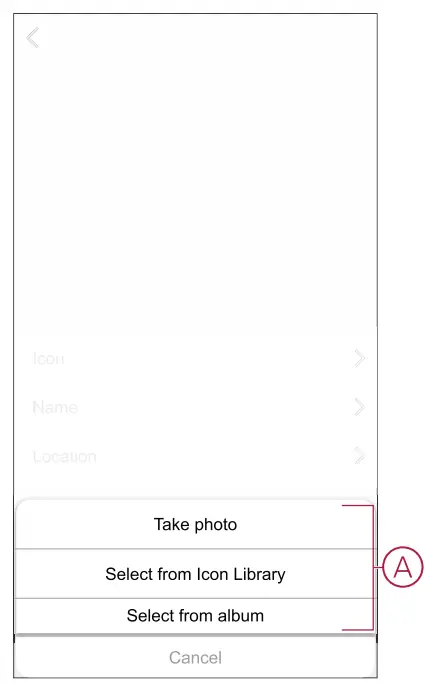
 - Tap Icon to view the menu.
- In the slide-up menu, select any one of the following (A) to change the device icon:
– Take photo – allows you to click a photo from the mobile camera.
– Select from Icon Library – allows you to select an icon from the app library.
– Select from Album – allows you to select a photo from the mobile gallery.
Renaming the device
You can rename the device using the Wiser app.
- On the Home page, select the device for which you wish to rename.
- At the top-right corner of the screen, tap .
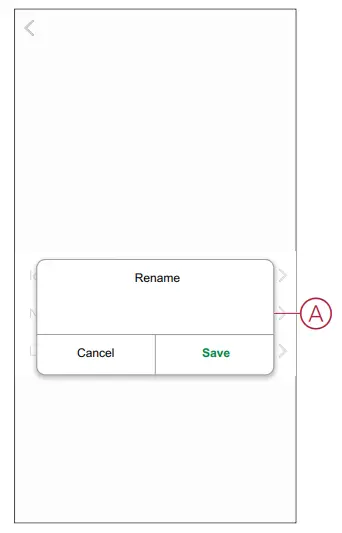
- Tap edit next to the device name.
- Tap Name, enter the new name (A) and then tap Save.

Changing the device location
You can change the device location using the Wiser app.
- On the Home page, select the device for which you wish to change the location.
- At the top-right corner of the screen, tap .
- Tap edit next to the device name.
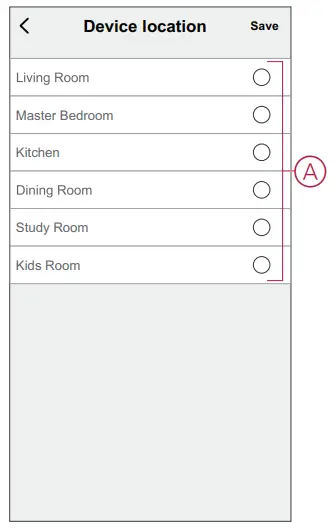
- Tap Location.
- Select the desired location from the list (A) and then tap Save.

Configuring basic function settings
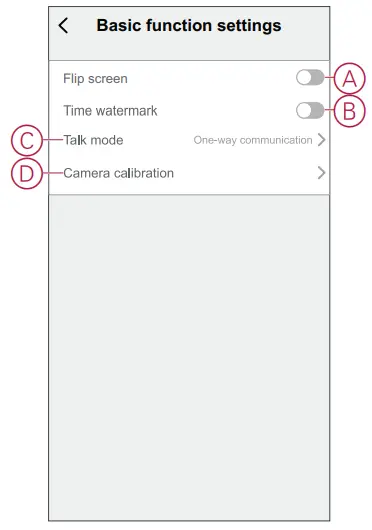
Using the Wiser app, you can configure the following features:
Flip screen
Enabling the Flip screen will turn the screen upside down on the live view on control panel.
Follow the steps to enable the Flip screen:
- On the Home page, tap All devices > IP Camera Indoor.
- Tap and tap Settings > Basic function settings.
- Tap the toggle switch (A) to enable the Flip screen.
Time watermark
Enabling the Time watermark displays the date and time on the live view on control panel.
Follow the steps to enable the Time watermark:
- On the Home page, tap All devices > IP Camera Indoor.
- Tap and tap Settings > Basic function settings.
- Tap the toggle switch (B) to enable the Time watermark.
Talk mode
Using the Talk mode, you can make one-way or two-way communication with the receiver.
Tap Talk mode (C) and select one of the options:
– One-Way Communication – Tap and hold to send a voice message, the other party can receive it and then reply to you with a voice message
– Two-Way Intercom – You and the other party can talk at the same time
Camera calibration
You can use Camera calibration feature to check if the camera is covering wider angle of the view.
Tap Camera calibration (D) and confirm the calibration process.
NOTE: The IP camera will turn automatically during the process. It might take 25 seconds to do the calibration.
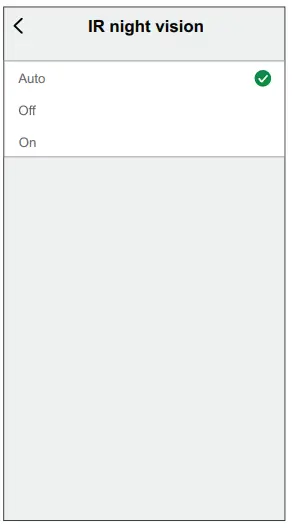
Configuring IR night vision
The infrared LEDs in the camera allows you to see and record a clear black and white video/image in the dark.
Follow the steps to configure the IR night vision:
- On the Home page, tap All devices > IP Camera Indoor.
- Tap and tap Settings > IR night vision.
- Select any one of the following options:
– Auto – Turns On/Off automatically when the environmental light is below/ above a certain threshold of the lux level
– Off – Turns Off the IR night vision at all times
– On – Turns On the IR night vision at all times
Setting offline notification
Using the wiser app, you can receive a notification when the IP camera is offline.
Follow the steps to turn on the Offline notification:
- On the Home page, tap All devices > IP Camera Indoor.
- Tap and tap Settings.
- Tap the toggle switch (A) to turn On the Offline notification and tap Confirm.

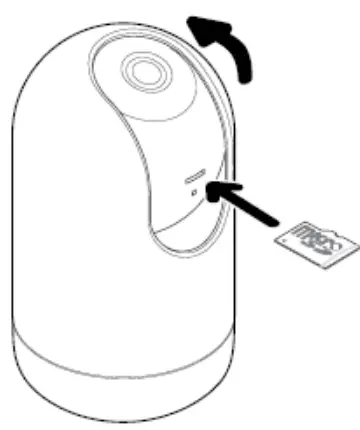
Inserting a micro-SD card
The micro-SD card is inserted in the device to store the recording.
NOTE: The micro-SD card has to be inserted before you power On the device.
If the device is already in On state, then switch Off the device to insert the micro-SD card.
Follow the steps to insert a micro-SD card:
- Move the camera up to see the micro-SD card slot.
TIP: If the IP camera is already in use, then use ˄ icon on the control panel to move the camera up. - Insert a micro-SD card in the slot.
- Move the camera back to its initial position.
Once the micro-SD card is inserted, you can configure the playback settings.
NOTE: A maximum of 128 GB SDHC and SDXC micro-SD cards with FAT32 format are supported.
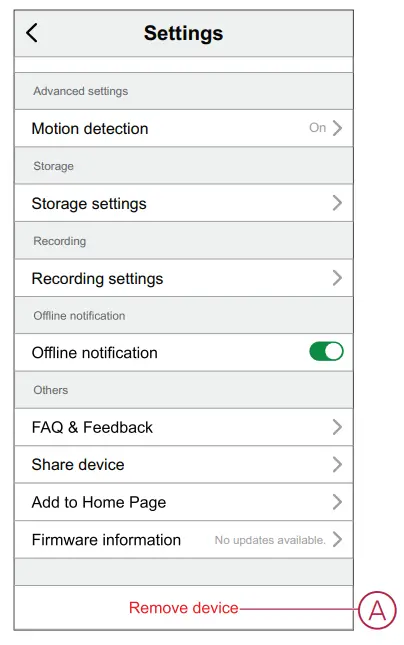
Removing the device
Using the Wiser app, you can remove a device from the device list.
Follow the steps to remove the device:
- On the Home page, tap All devices > IP Camera Indoor.
- Tap and tap Settings.
- Tap Remove device (A) and tap Confirm.
 TIP: Alternatively, you can long tap on the IP Camera Indoor on the home page to remove the device.
NOTE:
• Removing the device will reset the device. The LED starts blinking red indicating that the device is ready to pair with another network.
• If there is a problem while pairing, refer to troubleshooting, page 23 the device.
 TIP: Alternatively, you can long tap on the IP Camera Indoor on the home page to remove the device.
Using the device
Using the control panel of the IP Camera, you can see live video of the indoors on the display screen and includes the following features:
TIP: LED blinks green on the device indicating that the IP Camera is in use.
| Enables audio of the live video | |
| Makes the video fullscreen | |
| Moves the camera in four directions (up, down, right, left) | |
| Takes screenshot of the live view | |
| Lets you communicate with a person near the device | |
| Records the live view |
NOTE:
- To view the saved screenshot/recording, tap > Album.
- To view the notification/alarm messages, tap > Message.
- To review the recordings using playback feature, refer to Playback.
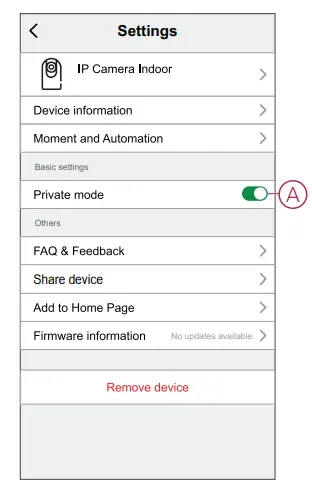
Using private mode
The Private Mode allows you to turn off the live view, thereby disabling all the other features on the control panel for all users connected to the same Zigbee network. Using this mode, the user is able to stay confidential during private moments.
Follow the steps to turn On the private mode:
- On the Home page, tap All devices > IP Camera Indoor.
- Tap > Settings.
- Tap the toggle switch (A) to turn On the Private Mode.

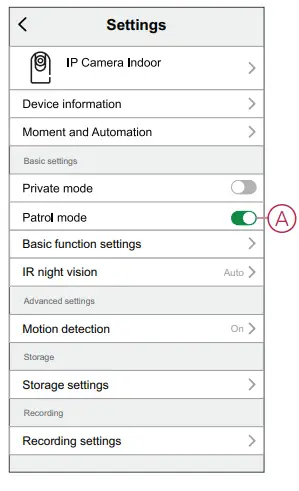
Using patrol mode
The patrol mode allows you to set up movements for camera to scan a large area by rotating the camera in a single continuos path automatically.
Follow the steps to turn On the patrol mode:
- On the Home page, tap All devices > IP Camera Indoor.
- Tap > Settings.
- Tap the toggle switch to turn On the Patrol mode.

Detection alarm setting
The motion detection function enables the IP camera to detect motion in the surveillance area and display notifications in the Wiser app.
Follow the steps to enable the motion detection:
- On the Home page, tap All devices > IP Camera Indoor.
- Tap and tap Settings > Motion Detection.
- Tap the toggle switch (A) to turn On the Motion Detection Alerts.
Alarm sensitivity level
Using the Wiser app, you can adjust the sensitivity level of your motion detector.
Tap Alarm sensitivity level (B) and select any one of the following levels:
– Low
– Medium
– High
NOTE: The high sensitivity level detects the slightest movement and triggers an alarm.
Motion tracking
Enabling the Motion tracking allows the IP camera to detect the motion and automatically move the camera in the direction of the motion.
Tap the toggle switch (C) to enable the Motion tracking.
NOTE: The camera will only move in left and right directions.

Scheduling detection alarm
Using the Wiser app, you can add a schedule that allows you to turn off/on motion detection automatically based on your needs.
Follow the steps to schedule the motion detection:
- On the Home page, tap All devices > IP Camera Indoor.
- Tap and tap Settings > Motion Detection > Schedule.
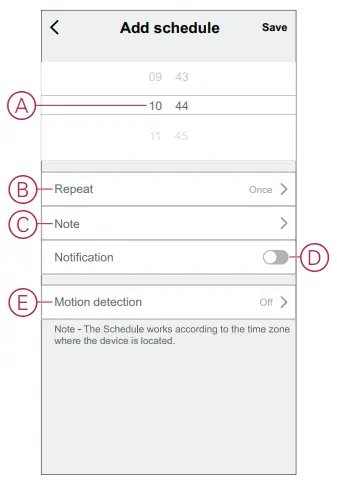
- Tap Add schedule and set the time (A).
- Tap Repeat (B) and select the days you want the schedule to repeat.
- Tap Note (C), enter the note and tap Confirm.
- Tap the toggle switch (D) to turn On the Notification for the schedule.
- Tap Motion detection (E), select one of the options:
– On – Turns On the motion detection on the scheduled time
– Off – Turns Off the motion detection on the scheduled time
- Tap Save.
Playback
Using the Wiser app, you can review the recording whenever you want with the Playback feature.
NOTE: You need to insert a micro-SD card, page 11 (max 128 GB) to use the playback feature.
The control panel of the playback consists of:
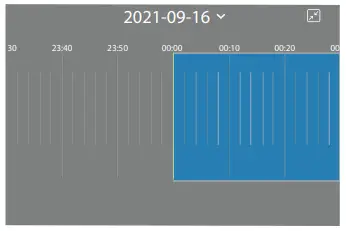 | Select the recording date and time |
 | Click screenshot of the video |
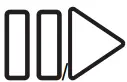 | Pause/play the recording |
 | Record the video |
NOTE:
- A display screen on the control panel shows the previous recordings.
- The screenshot/recording will be saved in the album.
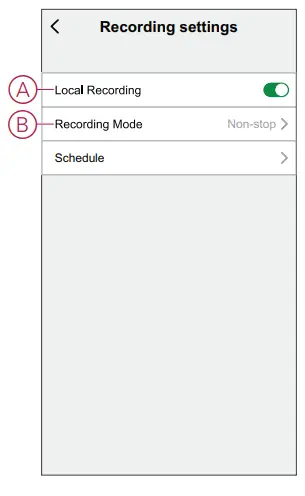
Recording settings
Follow the steps to change the recording settings:
- On the Home page, tap All devices > IP Camera Indoor.
- Tap and tap Settings > Recording Settings.
- In the Recording Settings section, tap the toggle switch (A) to enable the Local recording.
NOTE: The recording will be saved to the micro-SD card. - Tap Recording mode (B) and select one of the options:
NOTE: Recording mode is enabled only when you turn on the Local recording toggle switch.
– Event recording – Records only when there is a motion detection
– Non-stop – Records continuously for 24 hours
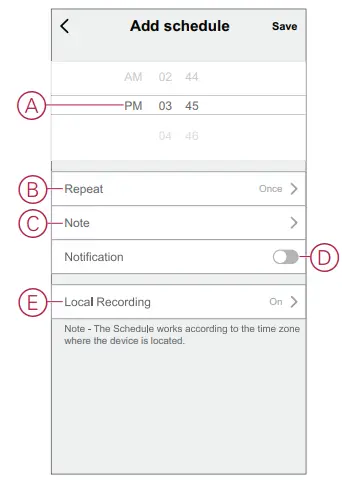
Scheduling playback
Using the Wiser app, you can add a schedule that allows you to turn off/on recording automatically based on your needs.
Follow the steps to schedule the recording:
- On the Home page, tap All devices > IP Camera Indoor.
- Tap and tap Settings > Recording Settings > Schedule.
- Tap Add schedule and set the time (A).
- Tap Repeat (B) and select the days you want the schedule to repeat.
- Tap Note (C), enter the note and tap Confirm.
- Tap the toggle switch (D) to turn on the Notification for the schedule.
- Tap Local recording (E), select one of the options:
– On – Turns on the recording during the scheduled time
– Off – Turns off the recording during the scheduled time
NOTE: The recording will be saved to the memory card.
- Tap Save.
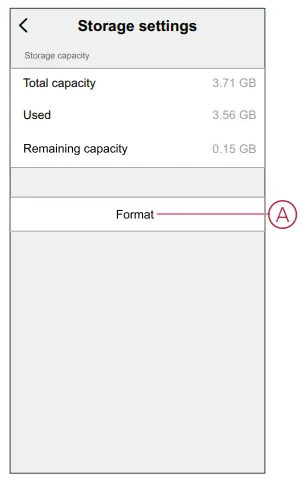
Storage settings
Follow the steps to change the recording settings:
- On the Home page, tap All devices >IP Camera Indoor.
- Tap and tap Settings > Storage Settings.
- In the Storage Settings section, tap Format(A) to format the inserted microSD card.
IMPORTANT: This will delete all the data stored on the micro-SD card.
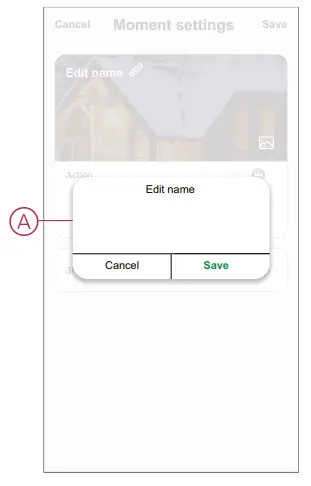
Creating a moment
A Moment allows you to group multiple actions that are usually done together.
Using the Wiser app, you can create moments based on your needs (such as movie night).
Follow the steps to create a moment:
- On the Home page, tap
 .
. - Go to Moment > + to create a moment.
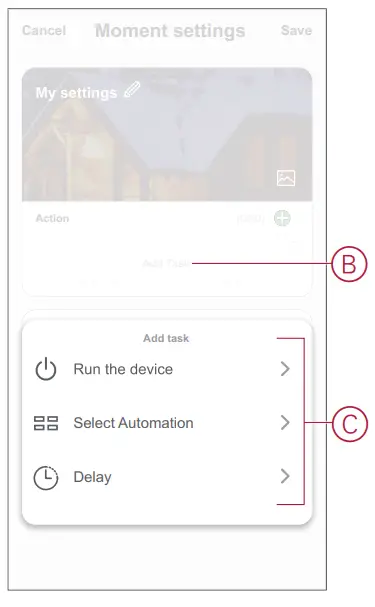
- Tap Edit name, enter the name of the moment (A) and tap Save.
TIP: You can choose the cover image that best represents your moment by tapping .
.
- In the Action section, tap Add task (B) to open the slide-up menu.
- In the Add task menu, you can do either or all of the following actions (C):
– Run the device – Select the devices that you want in a moment
– Select Automation – Select the automation that you want to enable or disable. For more info refer to Automation, page 19
– Delay – Set the delay time
NOTE: You can add one or more actions using .
.
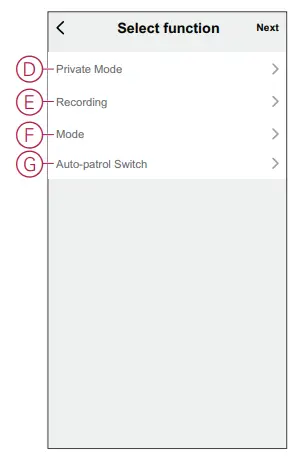
- Tap Run the device > IP Camera Indoor to select either or all of the functions to add in the moment:
– Private Mode – Turn on/off the private mode (D)
– Recording – Turn on/off the recording (E)
– Mode – Select the type of recording (F)
– Auto-patrol Switch – Turn on/off the patrol mode (G)
- Once all the actions are set, tap Save.
Editing a moment
To edit a moment:
- On the Moment tab, locate the moment you want to edit and tap …
- On the Edit page, you can tap each item (such as dimmer, shutter, delay, temperature, etc.) to change the settings.
TIP:
• You can add one or more actions using.
• To delete an existing action, slide the each item towards left and tap Delete.
Creating an automation
An automation allows you to group multiple actions that are usually done together, triggered automatically or at scheduled times. By using the Wiser app, you can create automations based on your needs.
Follow the steps to create an automation:
- On the Home page, tap the.
- Go to Automation > + to create an automation.
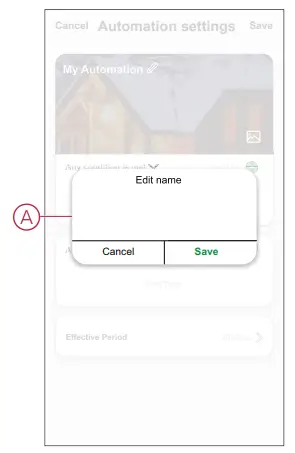
- Tap Edit name, enter the name of the automation (A) and tap Save.
TIP: You can choose the cover image that best represents your automation by tapping.
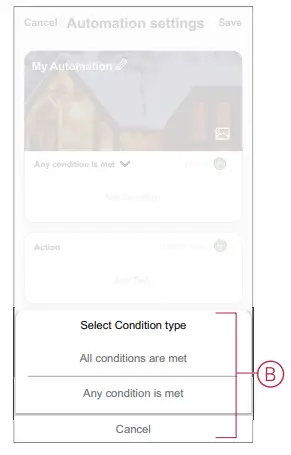
- Tap Any condition is met to select any one of the condition type (B):
– All conditions are met – The automation is triggered when all the conditions are met
– Any condition is met – The automation is triggered when at least one condition is met
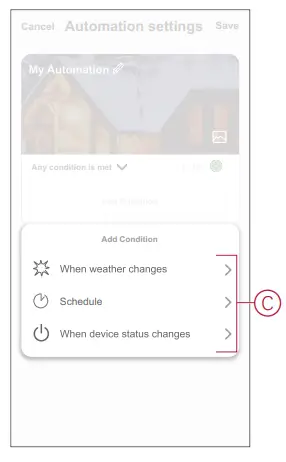
- Tap Add Condition to open the slide-up menu.
- In the Add Condition menu, you can do either or all of the following options (C):
– When weather changes – Select the various weather settings
– Schedule – Set the time and day
– When device status changes – Select the device and it’s function
Note: You can add one or more conditions using.
- Tap When device status changes > Window/Door Sensor > Open.
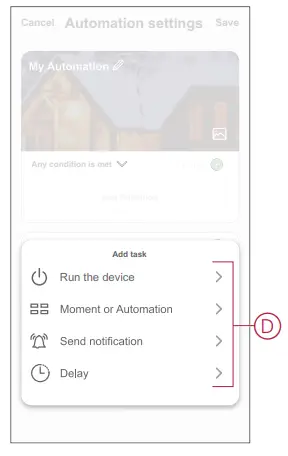
NOTE: : This is an example of an automation to turn On the Auto-patrol mode when the Window/Door is Open. - Tap Add task to open the slide-up menu.
- In the Add task menu, you can do either or all of the following options (D):
– Run the device – Select the devices that you want to be triggered
– Moment or Automation – Select the moment which you want to trigger or select the automation that you want to enable or disable
– Send notification – Turn On notification for the automation
– Delay – Set the delay time
NOTE: You can add one or more actions using.
- Tap Run the device > IP Camera Indoor > Auto-patrol Switch
- Select On and tap Save.

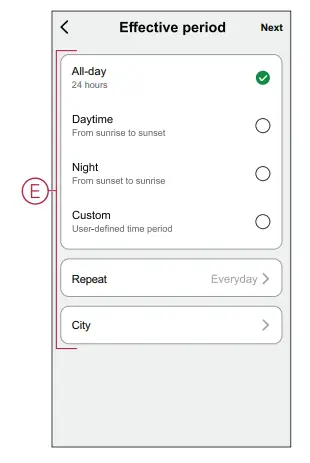
- Tap on Effective period to set the time range for the automation. You can select any one of the following (E):
– All-day – 24 hours
– Daytime – From sunrise to sunset
– Night – From sunset to sunrise
– Custom – User defined time period
- Once all the actions and conditions are set, tap Save. Once the automation is saved, it is visible on the Automation tab. You can tap the toggle switch on the automation to enable it.

Editing an automation
To edit an automation:
- On the Automation tab, locate the automation you want to edit and tap .
- On the Edit page, you can tap each item (such as dimmer, shutter, delay, temperature, etc.) to change the settings.
TIP:
• You can add one or more actions using .
• To delete an existing condition or action, slide each item towards left and tap Delete.
Deleting an automation
To delete an automation:
- On the Automation tab, locate the automation that you want to delete and then tap .
- Tap Delete and tap Ok.
NOTE: After deleting an automation, the device action can no longer be triggered.
LED Indication
| User Action | LED Indication |
| Plug-in the power cable to power on the device | |
| During the pairing process | |
| When the pairing process is complete | |
| While viewing live view on the control panel |  |
Troubleshooting
| Error | Possible cause | Solution |
| The device is not ready to pair after the device is removed from the app. | The device is not reset correctly. | Long press the reset button for 3 seconds located on the back of the device to reset the device.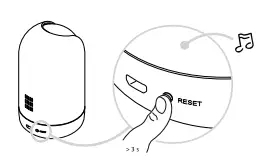 |
| The device does not respond. | Wrong Wi-Fi credentials are entered during the pairing process. NOTE: You must log into 2.4 GHz network. |
Technical Data
| Nominal voltage | AC 100-240 V, 50/60 Hz |
| Power supply | DC 5 V, 2 A |
| Power consumption | max. 10 W |
| Ambient temperature | -10 °C to 45°C |
| Operating humidity | < 95% RH |
| Operating frequency | 2405 — 2480 MHz |
| Max. radio-frequency power transmitted | < 100 mW |
| Wi-Fie standard | IEEE 802.11 b/g/n 2.4 GHz |
| Wi-Fie security | WPA-PSKNVPA2—PSK |
| Channel bandwidth | Support 20/40 MHz |
| Data security | AES128 |
| Resolution | 1080p |
| Wide angle lens | 80° horizontally |
| 40° vertically | |
| IR range | 7 m |
| Pan angle | 0° to 340° |
| Tilt angle | -75° to 75° |
| Local storage support | Micro SD card, max. 128 GB SDHC and SDXC type micro-SD cards with FAT32 format are supported |
Compliance
Compliance information for Green Premium products
Find and download comprehensive information about Green Premium products, including RoHS compliance and REACH declarations as well as Product Environmental Profile (PEP) and End-of-Life instructions (EOLI).
General information about Green Premium products
Click the link below to read about Schneider Electric’s Green Premium product strategy. https://www.schneider-electric.com/en/work/support/green-premium/
Find compliance information for a Green Premium product Click the link below to search for a product’s compliance information (RoHS, REACH, PEP and EOLI).
NOTE: You will need the product reference number or product range to perform the search.
https://www.reach.schneider-electric.com/CheckProduct.aspx?cskey=ot7n66yt63o1xblflyfj
Trademarks
This guide makes reference to system and brand names that are trademarks of their relevant owners.
- Zigbee ® is a registered trademark of the Connectivity Standards Alliance.
- Apple ® and App Store ® are brand names or registered trademarks of Apple Inc.
- Google Play™ Store and Android™ are brand names or registered trademarks of Google Inc.
- Wi-Fi ® is a registered trademark of Wi-Fi Alliance ® .
- Wiser™ is a trademark and the property of Schneider Electric, its subsidiaries and affiliated companies.
Other brands and registered trademarks are the property of their respective owners.
Schneider Electric (NZ) Ltd
Building 6
Level 2. 60 Highbrook Drive, East Tamaki, Auckland 2013
New Zealand Customer Care: 13 73 28
www.pdl.co.nz
As standards, specifications, and design change from time to time,
please ask for confirmation of the information given in this publication.
© 2022 – Schneider Electric. All rights reserved.
DUG_IPC_Indoor_PDL–01


