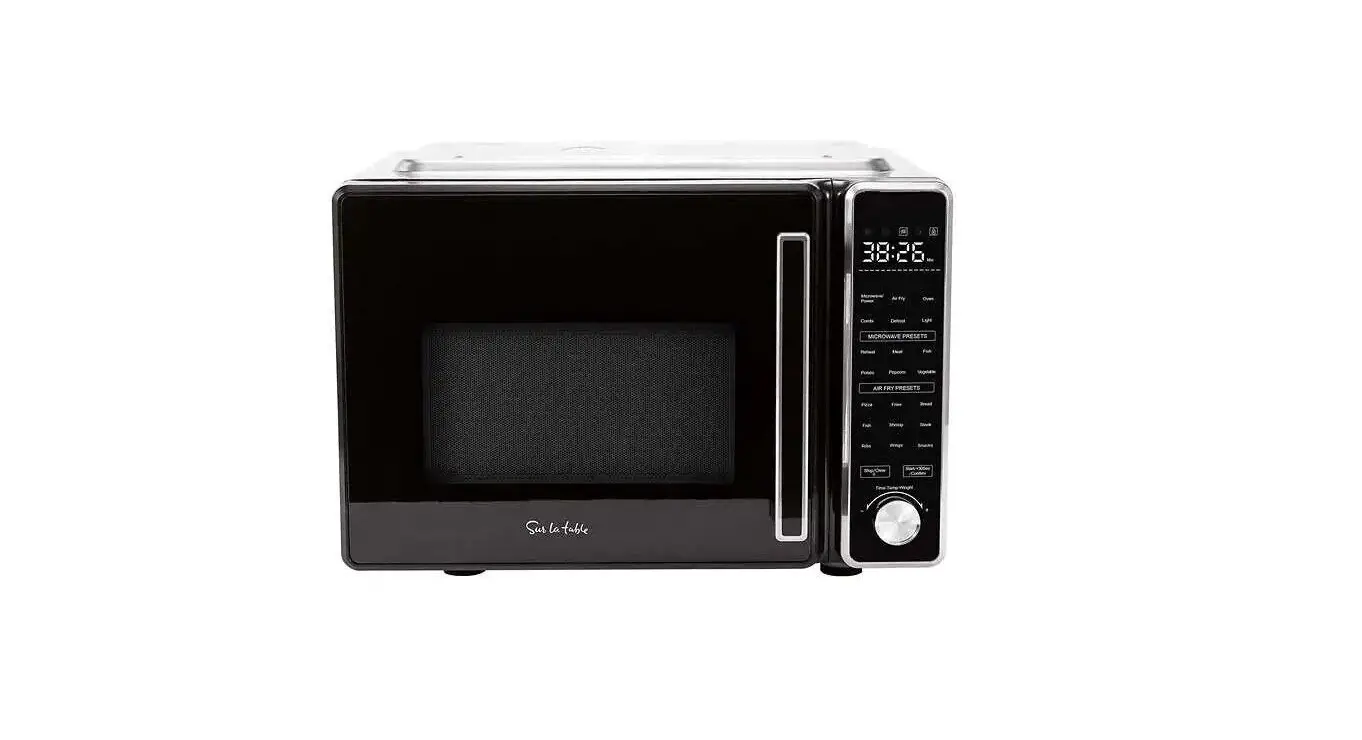
sur la table SLT-1900 Microwave Oven with Air Fryer User Guide
INSTRUCTIONS FOR USE OF THE CONTROL PANEL
DESCRIPTIONS OF PROCEDURES AND FUNCTIONS
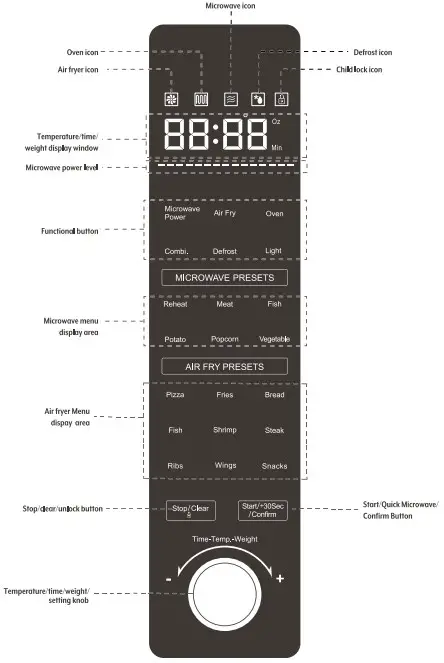
Control Panel Functions
Initial State
Plug in the power and enter the initial interface of the function menu. The buzzer will sound, the “Stop/Clear ![]() ’ will ight up, press “Stop/Clear
’ will ight up, press “Stop/Clear ![]() ” and all functions will light up and be ready for selection. After | second, it will enter the standby state. In the standby state, Press the “Stop/Clear
” and all functions will light up and be ready for selection. After | second, it will enter the standby state. In the standby state, Press the “Stop/Clear ![]() ” key to enter the initial interface of the function menu.
” key to enter the initial interface of the function menu.
(IF there is no operation within 3 minutes, it will enter the lock screen sleep state, the “![]() Screen Lock’ icon and the “Stop/Clear
Screen Lock’ icon and the “Stop/Clear ![]() ” key will light up, and all other lights will go out). In the sleep state of the lock screen, press and hold the “Stop/ Clear
” key will light up, and all other lights will go out). In the sleep state of the lock screen, press and hold the “Stop/ Clear ![]() ” key for two seconds to unlock and enter the initial interface of the function menu. The initial interface of the function menu: all function lights are on, and the digital screen displays 00:00
” key for two seconds to unlock and enter the initial interface of the function menu. The initial interface of the function menu: all function lights are on, and the digital screen displays 00:00
Light Function
In the initial interface of the cooking and function menu, press the “Light” button, the indicator light will turn from steady on to flashing (return to steady on after 3 seconds). The light can be turned on and off, and the light will be automatically turned off after | minute from time it was turened on.) The light is off in the standby and lock screen state; the light will turn off automatically if the door remains open for more than | minute.
NOTE: If the cooking time is less than or equal to 2 minutes, the oven light is always on. If the cooking time is greater than 2 minutes, the oven light will always be on | minute after the start and | minute before the end (the lamp is off at all other times).
![]() Stop/Clear
Stop/Clear ![]() Key Function
Key Function
- During the setting process, press the “Stop/Clear
 ” key to cancel the current setting and return fo the initial interface of the menu.
 - When running, press the “Stop/Clear key to enter the pause state (the indicator light flashes), press the key again to cancel the running program and return fo the initial interface state of the menu. If there is no operation within 60 minutes of the pause state, then Exit the function interface and enter self-locking.
- In the self-locking state, long press the “Stop/Clear ” key for two seconds to unlock.
![]() Start/+30Sec/Confirm Key Function:
Start/+30Sec/Confirm Key Function:
- When setting the function, press the “Start/+30Sec/Confirm” key as the confirmation key.
- After setting the cooking program, press the “Start/+30Sec/Confirm” key to start cooking.
- Inthe cooking pause state, press the “Start/+30Sec/Confirm” key to continue cooking.
Child Lock Function
- In standby mode, the “Child Lock ” icon is on, and pressing any
operation key is invalid at this time. - After power-on, if there is no operation within three minutes, the “Child Lock ” icon will light up and the control panel will be automatically locked.
- After the work is over, if there is no operation within three minutes, the “Child Lock ’ icon will also be triggered automatically at this time.
- Unlock: In the locked state, press and hold the “Stop/Clear ” key for two seconds fo release the “Child Lock ’ icon, the ‘” icon will go out, and the initial interface of the menu will be entered.
Buzzer
There will be | beep for effective key operation, 2 beeps for food prompt (end of preheating for 6 minutes), and 5 long beeps after cooking.
Quick Microwave Function
- In the initial interface state of the menu, every time you press the “Start/+30Sec/Confirm” key, the time will be increased by 30 seconds, the microwave icon on the display will light up, 100% microwave power output will be set, and will start with a delay of 2 seconds.
- During operation, you can press the “Start/+30Sec/Confirm” key to increase the cooking time (30 seconds increments).
- During operation, press the “Stop/Clear ” key once to enter the pause state, and press the “Stop/Clear ” key again to stop the operation and return to the initial interface of the menu.
See OWNERS MANUAL for informtaion on:
- Auto Mode Menu Functions (Microwave & Air Fry)
- Manual Mode Menu Functions (Microwave, Air Fry, Combi. Defrost)
INTRODUCTION TO THE USE OF BAKING PAN & AIR FRY BASKET
The Baking Pan included in this machine has two modes of use, high or low, depending on the size of the food or the degree of browning you desire. To use the high position, just flip the Oven Rack over so the Baking Pan sits higher up in the center ‘Figure 1). Ideal for pizza, chicken legs, French fries, bread, etc. To use the low position, flip Oven Rack so the
Baking Pan sits lower in the center, closer to the glass plate (Figure 2). Ideal for thawing, combined cooking and roasting a whole chicken.
High Baking Pan mode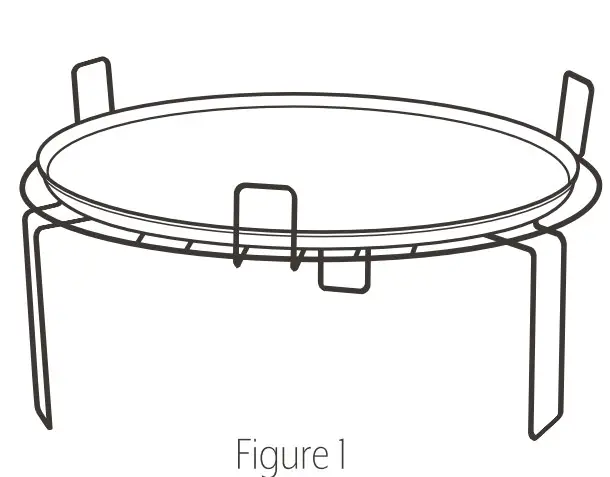
Low Baking Pan mode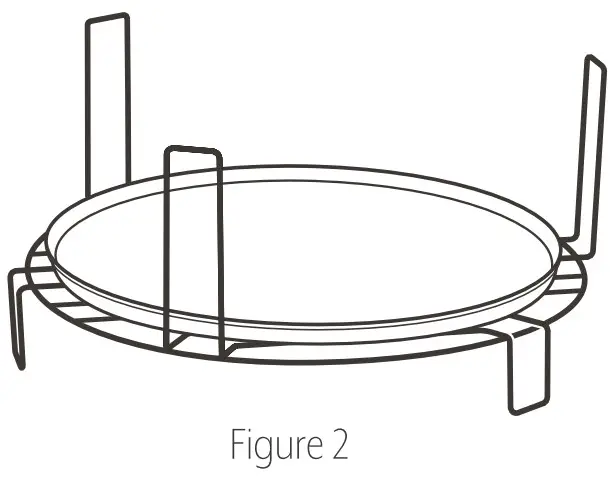
The Air Fry Basket included in this machine should be used on Air Fry or Oven mode. To use simply place the Air Fry Basket on the glass plate included. Use the Bake/Drip Pan under the Air Fry Basket to collect crumbs and drippings from the food (Figure 3). Ideal for chicken wings, French fries, shrimp, etc.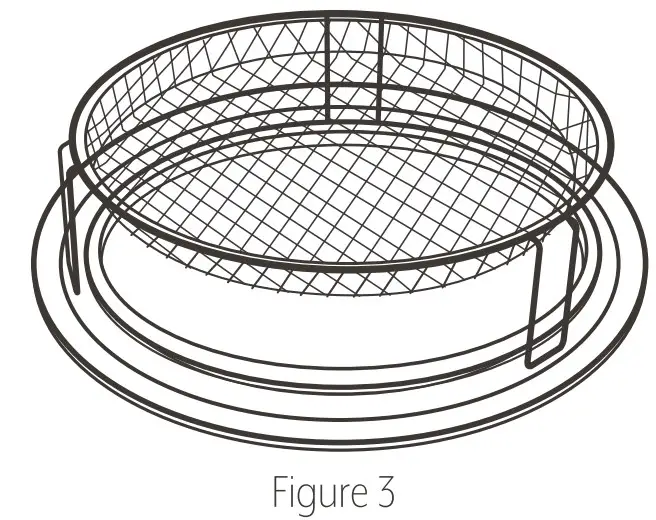
Introduction to the Use of the Knob
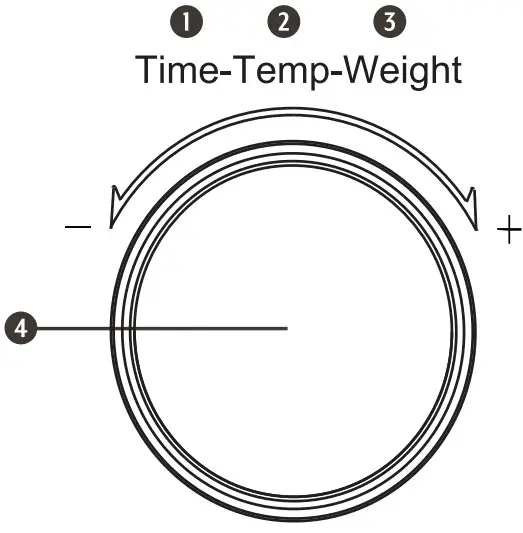
- Time Setting
Itis used to set the time required for cooking. - Temperature Setting
Used to set the cooking temperature. - Weight Setting
Used to set the weight of cooking ingredients. - Microwave Power Adjustment
Used to adjust the Microwave Power Level
| MICROWAVE MENU | |||
| Food | Weight/ Specification | Time (min) | Power Level |
| Potato | 15.9 oz- 21.2.0z | 12:00 | P100 |
| Ribs | 14 oz – 15.9 | 6:30 | P100 |
| Vegetables | 12.3 oz | 4:30 | P100 |
| Fish | 15.9 oz | 6:30 | P100 |
| Soup | 15.9 oz | 4:30 | P100 |
| AIR FRY MENU | ||||
| Food | Weight/ Specification | Air Fry Preheating | Time (min) | Temp(ºF) |
| French Fries | 14 oz | YES | 18:00 | 390 |
| Chicken Wings | 15.9 oz – 23 oz | YES | 20:00 | 350 |
| Fish | 9 oz | YES | 10:00 | 375 |
| Steak | 7 oz | YES | 10:00 | 390 |
| Ribs | 14 oz – 21 oz | YES | 18:00 | 375 |
| Shrimp | 10.5 oz -14 oz | YES | 10:00 | 375 |
| Pizza | 10 inches | YES | 10:00 | 340 |
MICROWAVE + AIR COMBINATION MENU | |||
| Food | Weight/ Specification | Time (min) | Power Level/ temp (ºC) |
| Whole Chicken | 35.2 oz -46 oz | 30:00 | Microwave P100 Air Fry 390 ºF |
Description of Microwave Power Level
During the cooking process, the operator can adjust the power of the knob to microwave as needed.
| MICROWAVEPOWER LEVEL INDICATOR | ||
| MICROWAVE | POWER LEVEL INDICATION | |
| 1 | P100 | |
| 2 | P80 | ——————————————— |
| 3 | P60 | —————————– |
| 4 | P40 | ——————– |
| 5 | P20 | ——– |

Scan here for bonus recipes and to watch how-to videos that will help you make the most of your air fryer.
or go to www.monchateau.us/sltappliances


