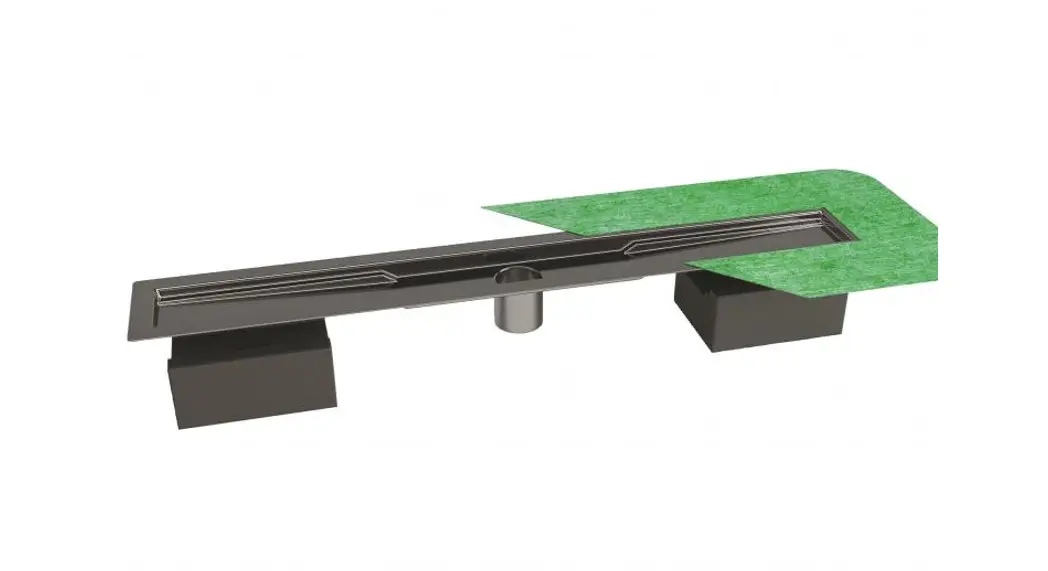
![]() profiles PP Drain Aqua Shower drain base with direct drainage
profiles PP Drain Aqua Shower drain base with direct drainage
Instruction Manual
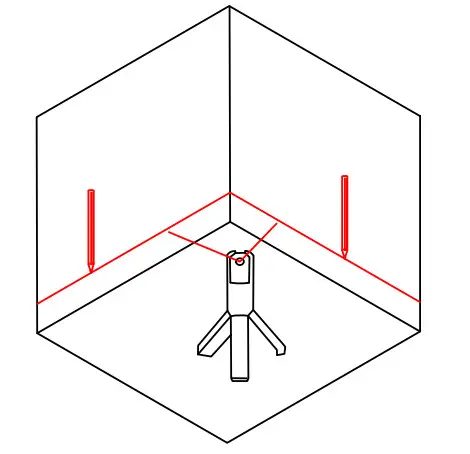
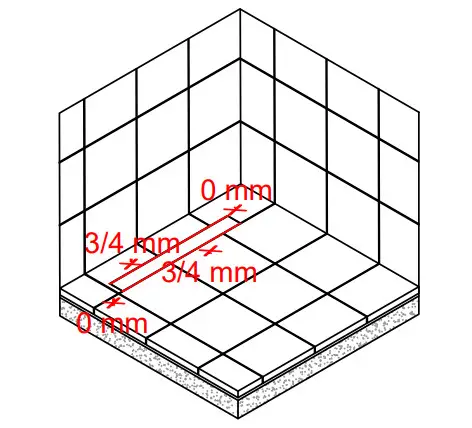
Define the heights of the floor and indicate them on the wall, considering the slopes for water drainage.
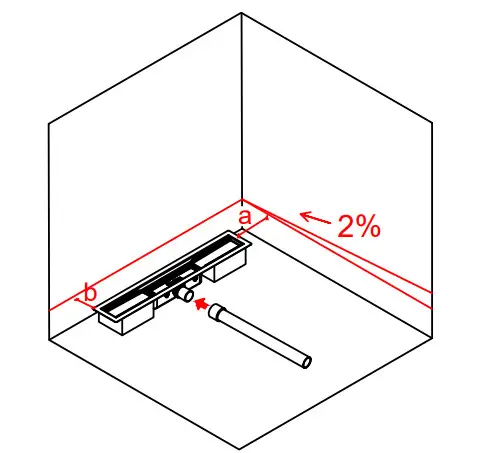 Position the linear shower drain at the desired point and connect it to the drainage system, checking the tightness of the junctions. Level the linear shower drain by using a spirit level. Fasten the shaped bases with glue or fast-setting concrete.

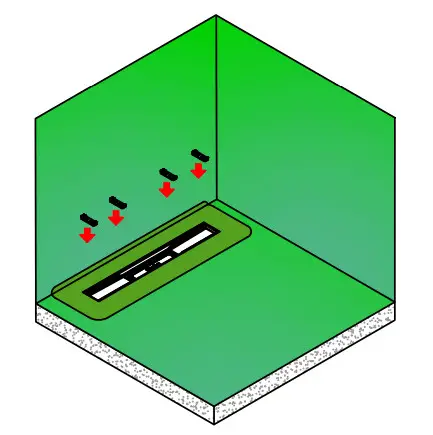
Spread the leveling screed under the linear shower drain and at the level of the flange, respecting the established inclination of the installation surface and being careful not to cut the pre-glued waterproofing membrane on the linear shower drain.
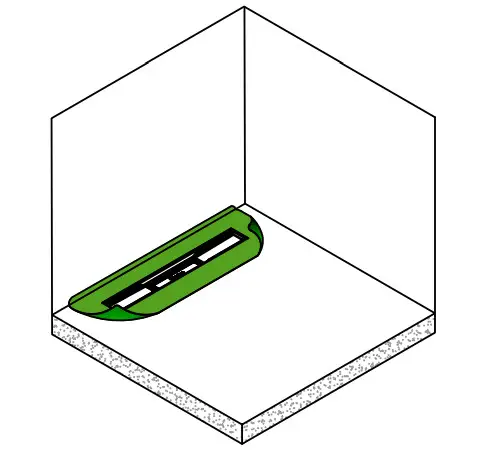
Cover the surrounding area of the flange with a waterproofing membrane such as WP Stop or a waterproofing liquid sheath.
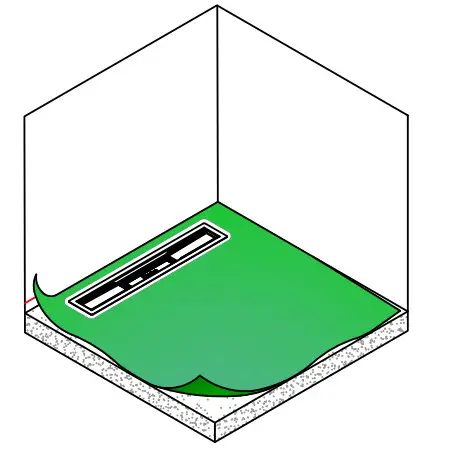
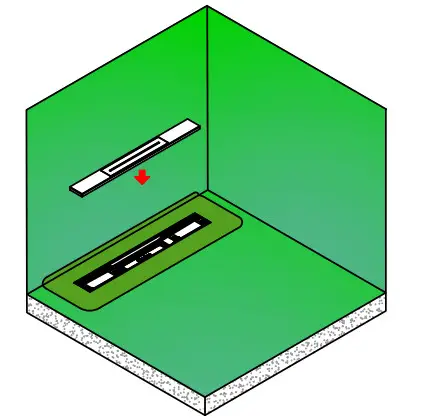
Open the PP DRAIN AQUA membrane by placing it on the insulating layer and gluing it to ensure perfect sealing.
Classic cover
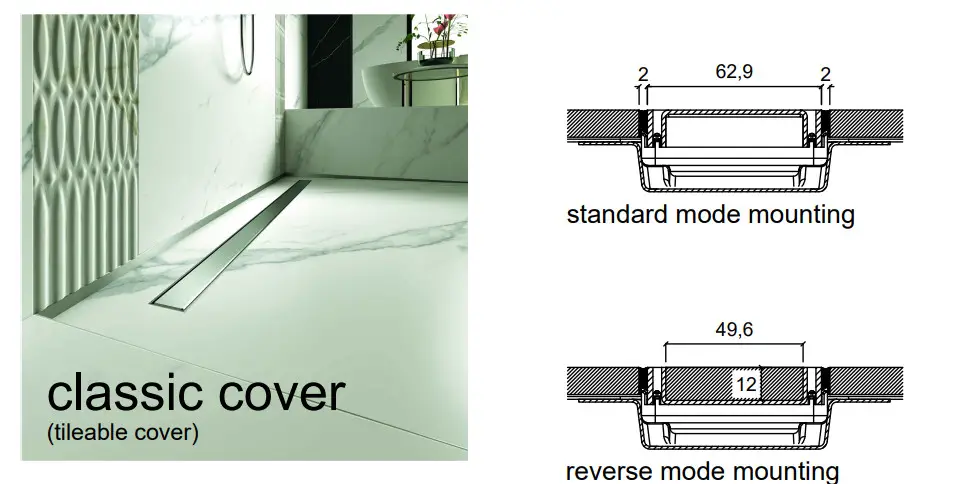
According to the thickness of the tiles, choose the substrate 6-8-10-12.5-15-18 mm.
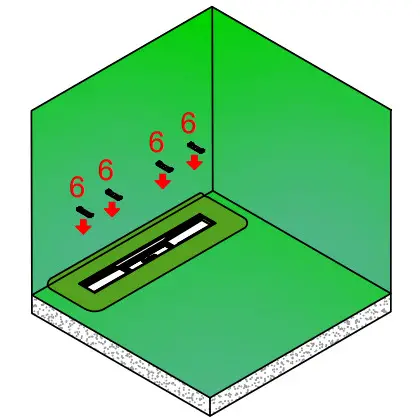
Use nr. 4 supports for the 60, 70 and 80 cm linear shower drains.
Use nr. 6 supports for the 90, 100 and 120 cm linear shower drains.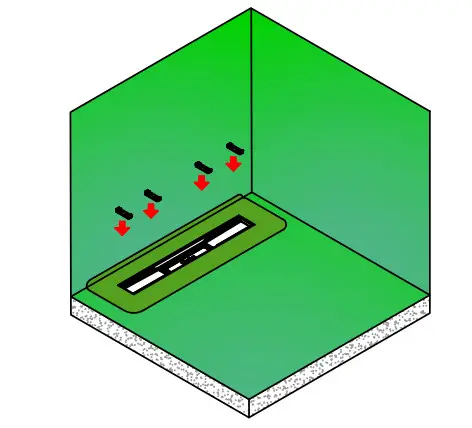
Fasten two supports (among those not used) to the upper part of the frame, then insert the frame on the supports inside the linear shower drain making sure it is well fastened.
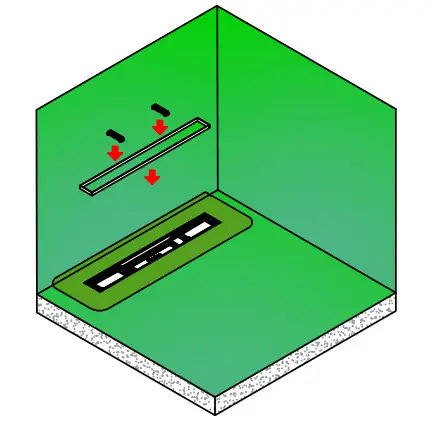
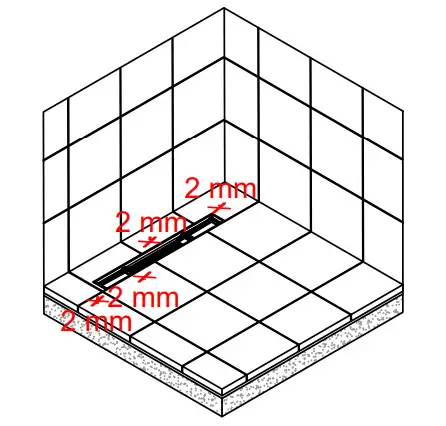
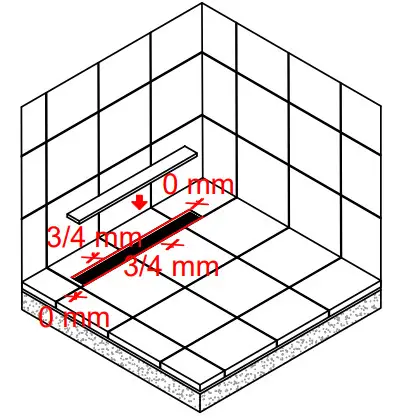
Proceed to glue the floor, keeping it at a distance of about 2 mm from the metal frame.
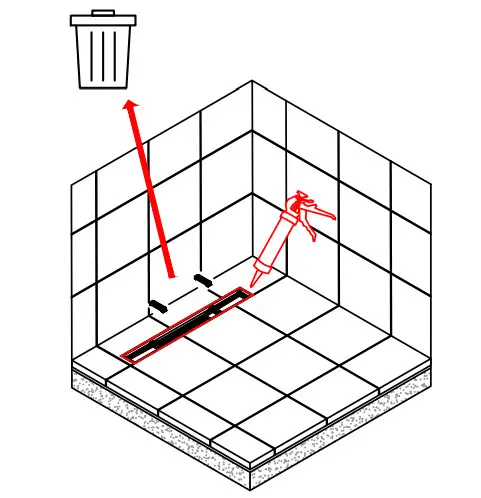
Remove the two supports previously inserted above the frame.
Fill the gap between the tiles and the frame with a suitable sealant.
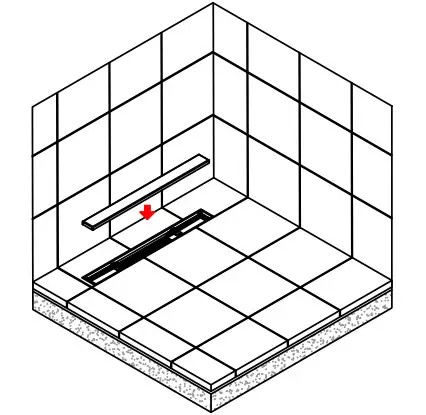
Place the chosen cover inside the frame of the linear shower drain.
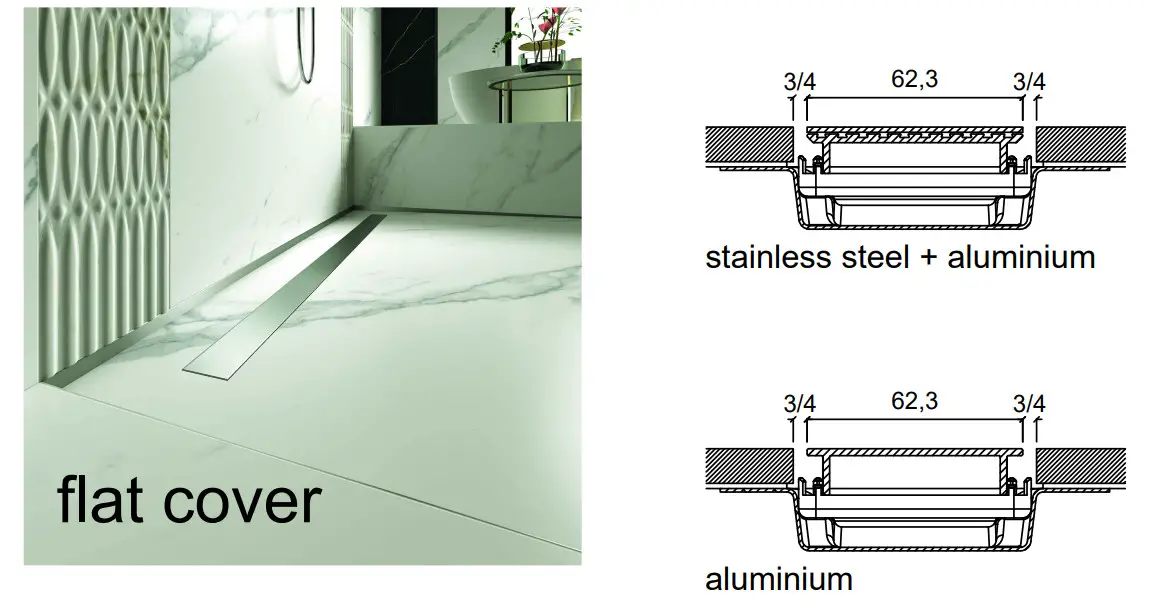
Flat cover
According to the thickness of the tiles, choose the substrate 6-8-10-12.5-15-18 mm.
Use nr. 4 supports for the 60, 70, and 80 cm linear shower drains.
Use nr. 6 supports for the 90, 100, and 120 cm linear shower drains.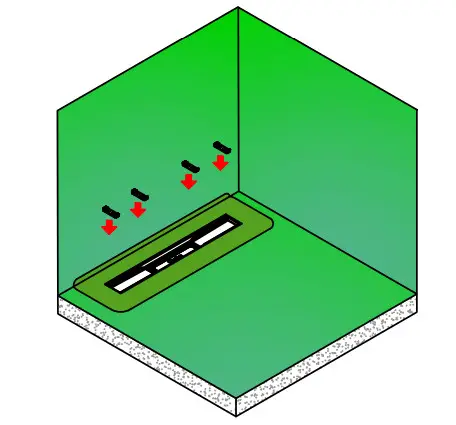
Place Flat Cover on the supports, making sure it is well fastened.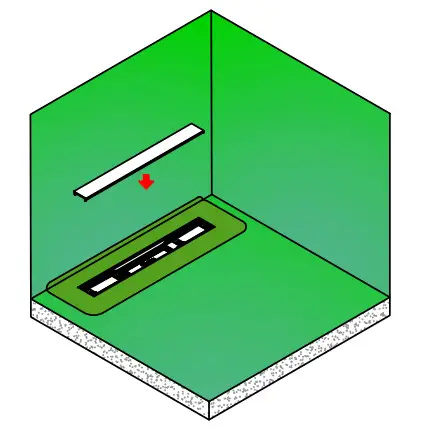
Proceed to glue the floor, keeping it at a distance of 3 or 4 mm from the edge of the flat cover on the long sides and using the special spacers supplied in the box.
Design cover
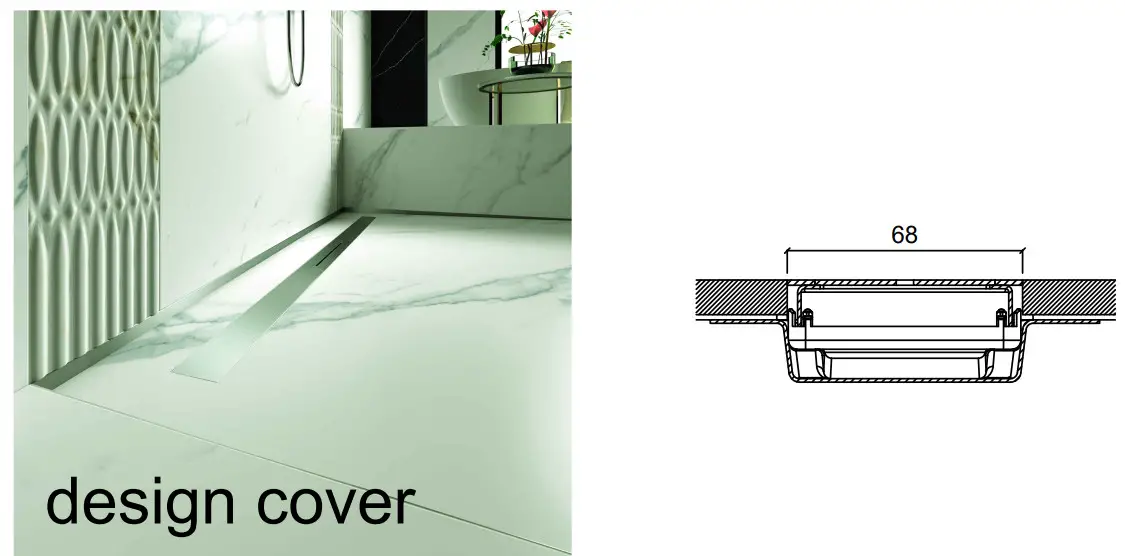
According to the thickness of the tiles, choose the substrate 6-8-10-12.5-15-18 mm.
Use nr. 4 supports for the 60, 70, and 80 cm linear shower drains.
Use nr. 6 supports for the 90, 100, and 120 cm linear shower drains.
Place the Design Cover on the supports, making sure it is well fastened.
Proceed to glue the floor, putting it close to the Design Cover.
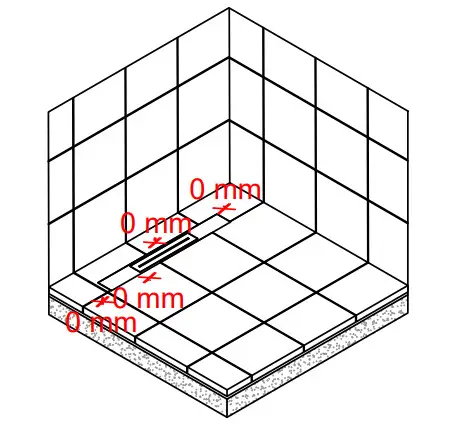
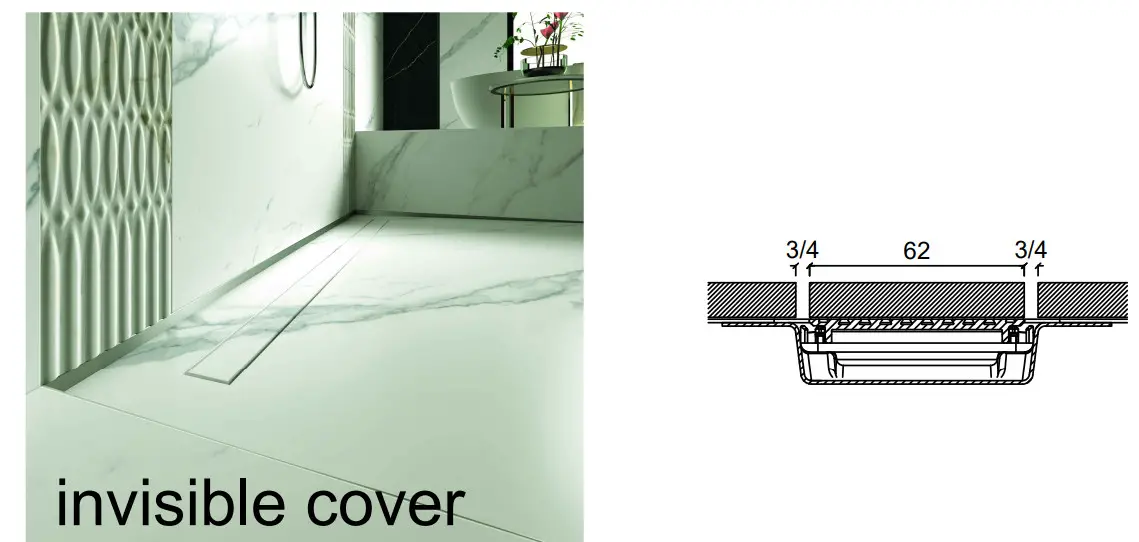
Invisible cover
Choose the 6 mm supports for the Invisible Cover.
Use nr. 4 supports for the 60, 70, and 80 cm linear shower drains.
Use nr. 6 support for the 90, 100, and 120 cm linear shower drains.
Place Invisible Cover on the supports, making sure it is well fastened.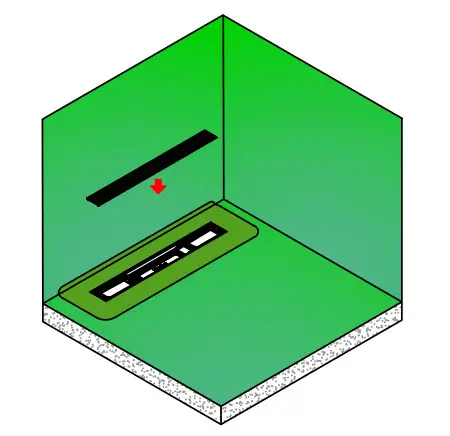
Proceed to cut to size the tile for Invisible Cover and glue the floor leaving a space of 3 or 4 mm on the long sides.
MAINTENANCE
Clean PP Drain Aqua without using aggressive substances (acid or basic) and/or sharp or abrasive objects.
Further information is available on the technical data sheet that can be downloaded from Profilpas’s website.
All our specifications are based on our experience and careful analyses. However, we are unable to verify in detail the diversity of the materials used or the wrong installation of the drain system. The quality and function of your work are therefore dependent on your professional building site assessment and the products you use. Please refer to the application and processing guidelines of the coating manufacturers or the manufacturers of products used.


