![]()
ATS200 QUICK GUIDE
ATID Co., Ltd
Ver 0.1
Revision History
| Version | Date | Purpose | Detail | Writer |
| V0.1 | 2022-02-14 | Draft | Initial Release | Hak-Joo Lee |
Before the Beginning
The objective of the user guide is to pass the basic contents related to ATS200`s maintenance and smooth uses. User guide inclusive of text, images, logos, product names may not be distributed, modified, displayed, reproduced (in whole or in part) without the prior written permission of ATID Co,.Ltd. Furthermore, the described contents in this document are subject to change without notice for improving or maintaining the product and we inform the user that some material can be different with the described contents due to the firmware changes of product.
Ownership of text, images, logos, and product names in the user guide is included in the writer, and some parts of the text, images, logos, and product names in the user guide were borrowed for the user`s understanding at random. if there is a legal restriction such as copyright law, it will be redistributed after adjustment.
Product Overview
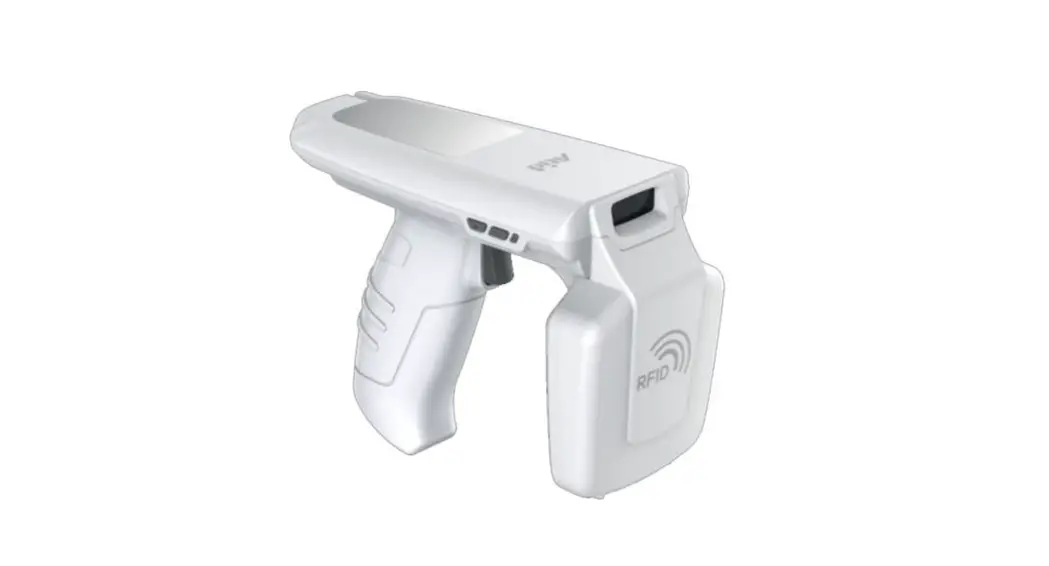
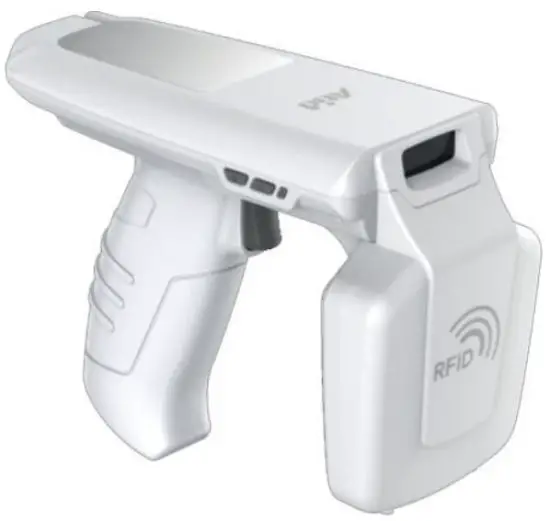
ATS200 is a SLED-type barcode/RFID reader product. This product meets the basic performance of industrial products that can be used in waterproof/dustproof/dustproof and 1.5m drop tests above IP65 and can be used as data collectors in various fields, including medication management, inventory management, and logistics delivery/tracking, production and access control.
This product can collect 1D/2D barcode and UHF RFID Tag information from one device. The collected data can be sent to the Host device via Bluetooth or USB transfer. SDK is supported for easy processing of collected data on host devices with Windows, Android, and iOS.
Key Features
- This product is a SLED-type barcode/RFID reader.
- It is a durable industrial product that meets IP65 and 1.5m drop standards.
- Zebra (formerly Motorola)’s SE4710 barcode engine is adopted, enabling fast and accurate barcode data collection.
- R2000 module from Impinj is built-in, so UHF RFID Tag can be read-written.
- Using a USB Type-C Cable, it can be connected to a PC and charged.
- Even without a dedicated charging adapter, it can be charged using a regular smartphone charger.
Product Specification
| Performance | ||
| Processor | ARM7 Core | |
| Supported Platforms | Windows, Android, iOS (BLE Only) | |
| Internal Storage | – | |
| Physical Characteristics | ||
| Dimensions (W x L x H) | 76.1 x 173.7 x 139.8 mm | |
| Weight | 420g (With Battery) | |
| Power | 5,200mAh Lithium-Ion Battery (Rechargeable) | |
| Display | – | |
| USB Interface | 2 USB Port / Type-C | |
| Notification | LED Indicator, Buzzer, Vibrator | |
| Data Collection | ||
|
RFID (UHF) | Protocol | EPC GEN2, ISO/IEC 18000-6C |
| Reading Range | ~ 6m (Depending on the environment and tag type) | |
| Writing Range | ~ 0.5m | |
| RF Output | 1W (MAX) | |
| Frequency Range | US/FCC EU/CE KR/KC JP/TELEC : 902MHz ~ 928MHz | |
| Antenna | Circular Antenna/1dBi | |
| Barcode | 2D Engine (Support to read 1D & 2D Barcode) | |
| Communication | ||
| Bluetooth | BT V2.1+EDR / BLE V4.1 | |
| WLAN | ||
| User Environment | ||
| Operating Temp | -20°C to 50°C | |
| Storage Temp | -30°C to 70°C | |
| Charging Temp | 0°C to 45°C | |
| Humidity | 5~95% (non-condensing, +25°C | |
| Drop Spec | 1.5m | |
| Sealing | IP65 | |
Configuration of the product
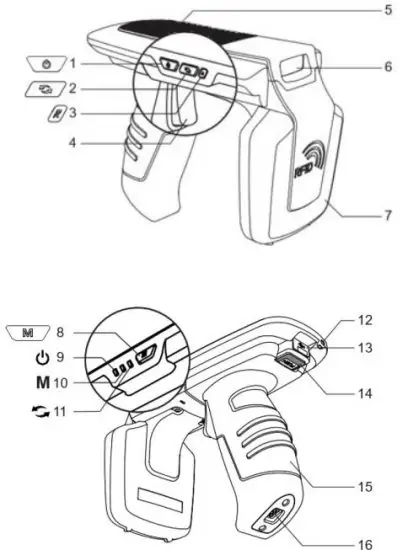
- Name of each part
1: Power Button
2: Communication Mode Switch Button
3: Reset Button
4: Trigger
5: Top Cover
6: Barcode Scanner
7: RFID Antenna
8: Barcode / RFID Toggle Button
9: Charging LED
10 : Barcode / RFID LED
11: Communication Mode LED
12: Hand Strap Connection Hole
13: USB Port (Type-C)
14: Gun Handle Release Button
15: Gun Handle (Built-in Battery)
16: Cradle Connection Terminal
- Power On
1) Turn on the power by pressing the power button until the buzzer sounds.
2) If the communication mode LED blinks after the buzzer sounds, the power is on. If the gun handle has been disassembled and reassembled, the instrument will not power on immediately when the power button is pressed. This is not a malfunction, but a procedure to check the battery status when first connecting the battery. In this case, if you hold down the power button longer than normal, it will power on normally.
 - Power Off
1) If the power button is pressed while the power is on, the power is turned off.
|2) If the communication mode LED turns off after the buzzer sounds, the power is off. - Data Communication Mode Setting
1) Press the communication mode switch button to sequentially switch between ‘Bluetooth data communication mode’ and ‘USB data communication mode’.
2) It takes about 2~3 seconds to change the data communication mode. - Switch Barcode / RFID Function
Each time the Barcode/RFID toggle button is pressed, the ‘Barcode’, ‘RFID’, ‘Trigger Input’ mode is sequentially switched.
‘Trigger input mode’ is a mode in which the barcode or RFID reading function does not operate when a trigger signal is an input and only the trigger signal is input to the host device. ‘Trigger input mode’ is a mode in which the barcode or RFID reading function does not operate when a trigger signal is an input and only the trigger signal is input to the host device.
Using Android Host Demo Application
- Android Host – Bluetooth Connection
1) Install the Demo Application (Hereinafter: Demo App) included in the provided SDK.• In order to connect the Android Demo App and the device, the Bluetooth Data Communication Mode of the device must be set to SPP mode.
• Demo App for Android is available from Android version 4.2 Jelly Bean or later.
• For the smooth operation of the app, it is recommended to use a device with Android version 6.0 or higher.
2) Run the downloaded Demo App with the icon shown below. 3) Click ‘Allow’ on the next screen to activate the Bluetooth function of the host device.
 4) Click ‘New Device’ from the menu that appears when you click the
  icon in the upper right corner.
 5) Select ‘BLUETOOTH’ on the converted ‘Regist Device’ screen and click the ‘Scan Device’ button.
 6) Connectable devices are displayed in ‘New Devices’. If you click on the product, the device information is registered and you return to the previous screen.
 7) Touch and hold the
  icon of registered device information.
 8) Click the ‘Connect’ Button among the activated menus.
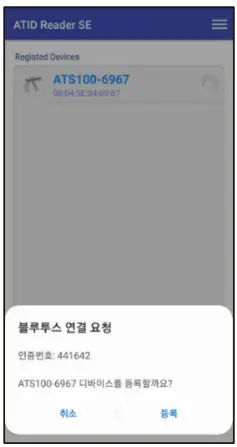
9) When connected to the device normally, the ‘Bluetooth connection request’ window is activated. Click ‘Pair’ to connect the ATS200 to the host device.

- Android Host – Disconnect Bluetooth
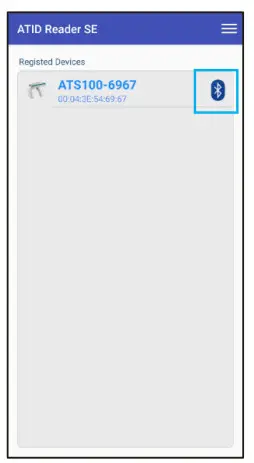
1) While the ATS200 is connected to the host device, touch and hold the icon of the registered device on the ‘Registered Devices’ selection screen. 2) Click ‘Disconnect’ in the activated menu to disconnect the connection between the host device and the ATS200.
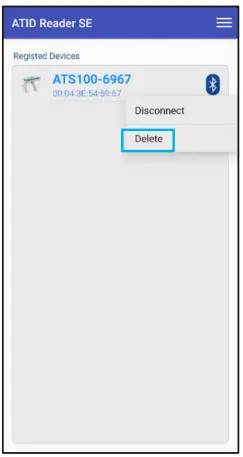
- Android Host – Remove Bluetooth Connection Information.
1) While the ATS200 is connected to the host device, touch and hold the icon of the registered device on the ‘Registered Devices’ selection screen.2) Click ‘Delete’ in the activated menu to delete ATS200 device registration information. Even if the connected device is deleted from the app list, it is not removed from the Android device’s Bluetooth connection list.
 • In order to connect the Android Demo App and the device, the Bluetooth Data Communication Mode of the device must be set to SPP mode.
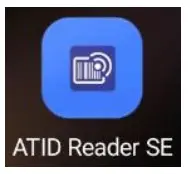 3) Click ‘Allow’ on the next screen to activate the Bluetooth function of the host device.
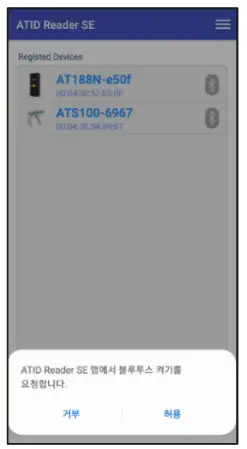 4) Click ‘New Device’ from the menu that appears when you click the
 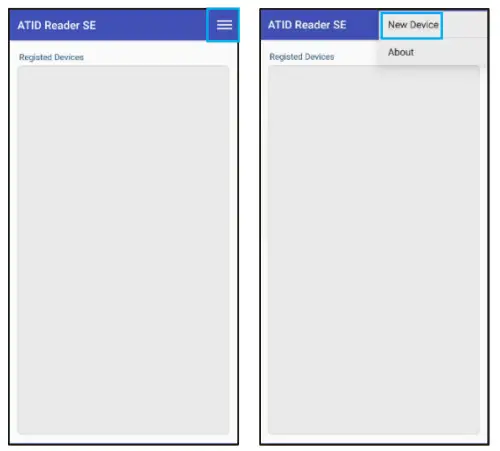 5) Select ‘BLUETOOTH’ on the converted ‘Regist Device’ screen and click the ‘Scan Device’ button.
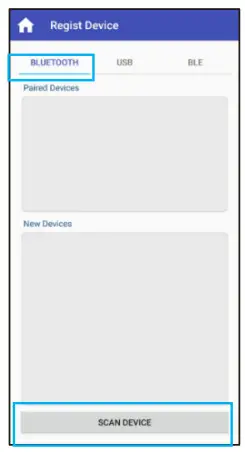 6) Connectable devices are displayed in ‘New Devices’. If you click on the product, the device information is registered and you return to the previous screen.
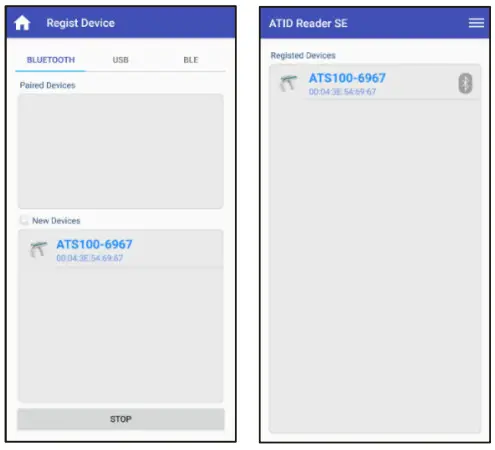 7) Touch and hold the
 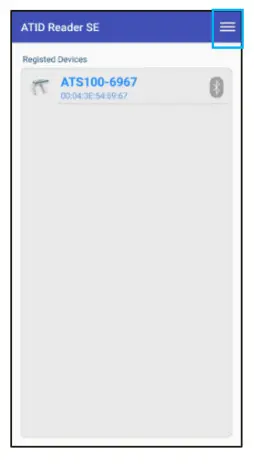 8) Click the ‘Connect’ Button among the activated menus.
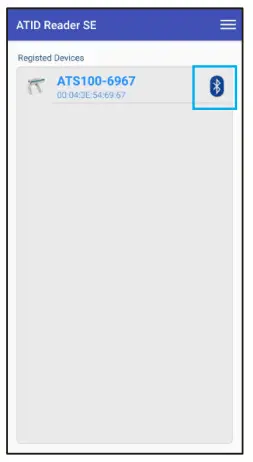
 2) Click ‘Disconnect’ in the activated menu to disconnect the connection between the host device and the ATS200.
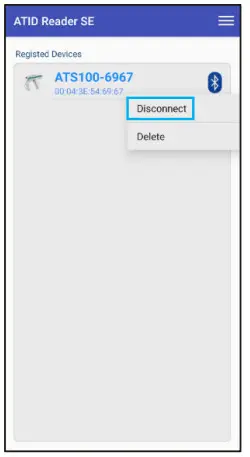
SDK (Software Development Kit)
When the device operates in interactive mode, a separate program must be developed by referring to the SDK provided by ATID in order to utilize the data transmitted from the host device. ATID BluetoothReader SDK supports three platforms: Android, Windows, and iOS.
Platform | Development Tool | Development Language | |
| Android | Andorid Studio | Java | |
| Windows | Visual Studio | .NET Framework (C#), UWP (C#) | |
| iOS | XCODE | Objective-C | |
| SDK Package Configuration | Details | ||
| Demo | Demo Application | ||
| Doc | Development documents such as user guides/manuals, | ||
| programmer guides, demo guides, etc. | |||
| Lib | Library for application development | ||
| Sample | Sample Code | ||
| USB Drive for Windows | ATID Bluetooth Reader의 Windows USB Driver | ||
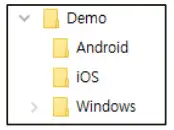
![]() Each folder is composed of subfolders for each platform as shown below.
Each folder is composed of subfolders for each platform as shown below.
Product Warranty
- ATS200 Product Details
For more information on product details ATS200, please visit the address below. http://www.atid1.com - SDK Download
If you need an ATS200 SDK, please contact us or the place of purchase. - Warranty and Technical Support
All ATID products can be repaired free of charge for one year based on the product manufacturing date. However, in principle, any defects caused by customer carelessness in use shall be repaired even during the free repair period.
For warranty, technical support, and inquiries on this product, please contact the distributor or ATID. - Certifications
This product is KC, FCC, CE, and TELEC certified, but we are not responsible for any issues arising during use outside of the certified area.
For details, please contact the distributor or ATID.
ATID
Address: #1402, 83, Gasan Digital-1ro, Geumcheon-gu, Seoul, Republic of Korea (Zip code. 08589)
Phone : +82-2-544-1436
Fax : +82-2-859-0045
Homepage : www.atid1.com
Email : [email protected]
For a Class B digital device or peripheral, the instructions furnished to the user shall include the following or similar statement, placed in a prominent location in the text of the manual:
NOTE: This equipment has been tested and found to comply with the limits for a Class B digital device, pursuant to part 15 of the FCC Rules. These limits are designed to provide reasonable protection against harmful interference in a residential installation. This equipment generates, uses and can radiate radio frequency energy and, if not installed and used in accordance with the instructions, may cause harmful interference to radio communications. However, there is no guarantee that interference will not occur in a particular installation. If this equipment does cause harmful interference to radio or television reception, which can be determined by turning the equipment off and on, the
user is encouraged to try to correct the interference by one or more of the following measures:
– Reorient or relocate the receiving antenna.
– Increase the separation between the equipment and receiver.
– Connect the equipment into an outlet on a circuit different from that to which the receiver is connected.
– Consult the dealer or an experienced radio/TV technician for help.
This device complies with Part 15 of the FCC Rules.
Operation is subject to the following two conditions: (1) this device may not cause harmful interference, and (2) this device must accept any interference received, including interference that may cause undesired operation.
FCC CAUTION:
Any changes or modifications in the construction of this device that are not expressly approved by the party responsible for compliance could void the user’s authority to operate the equipment.
FCC NOTE:
The manufacturer is not responsible for any radio or TV interference caused by unauthorized modifications to this equipment. Such modifications could void the user’s authority to operate the equipment.
Label Requirements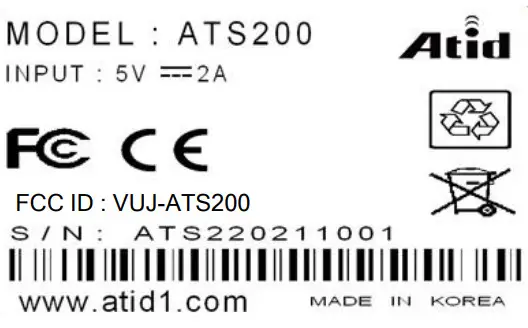
FCC RF Exposure Information and Statement
This device meets the government’s requirements for exposure to radio waves. The guidelines are based on standards that were developed by independent scientific organizations through periodic and thorough evaluations of scientific studies. The standards include a substantial safety margin designed to assure the safety of all persons regardless of age or health. The SAR limit of the USA (FCC) is 1.6 W/kg averaged. Device types: UHF RFID Reader (FCC ID: VUJ-ATS200) has also been tested against this SAR limit. SAR information on this and other pads can be viewed online at http://www.fcc.goWoet/eaficcid/. Please use the device FCC ID number for the search. This device was tested simulation typical 50 mm for RFID transmission to the body. To maintain compliance with FCC RF exposure requirements, should maintain a separation distance between the user’s bodies mentioned above.


