
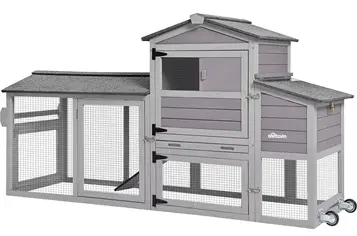
aivituvin AIR 59 Outdoor Chicken Coop Guinea Pig Cage
INSTRUCTION MANUAL
AIR 59
NOTICE
Please retain these instructions for future
- Firmly secure all bolts,screws and knobs before use.
- Reconfirm that all bolts,screws,and knobs are secure every 90 days.
- Fasten screws loosely during initial assembly. Do not fully tighten screws until the item is completely assembled.
- Do not use or store this item in the proximity of open flame or flammable/combustible chemicals.
- Be aware that some parts are heavy and have sharp edges.
- Be aware that moving parts can injure,crush and cut.
- If any parts are missing,broken,damaged,or worn,stop using this product until repairs are made and/or factory replacement parts are installed.
- Do not use this item in a way inconsistent with the manufacturer’s instructions as this could void the product warranty.
TOOLS REQUIRED

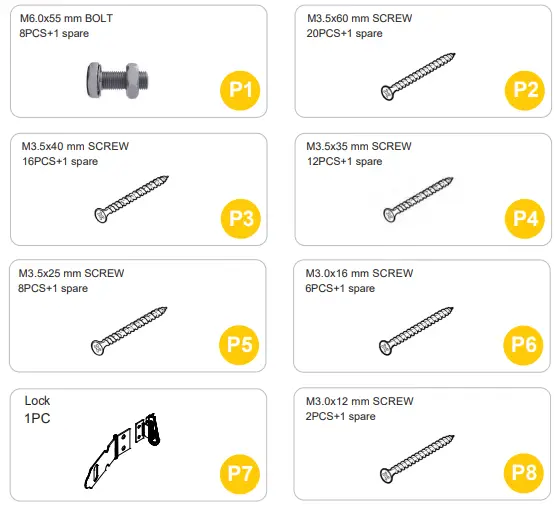
HARDWARE

PARTS


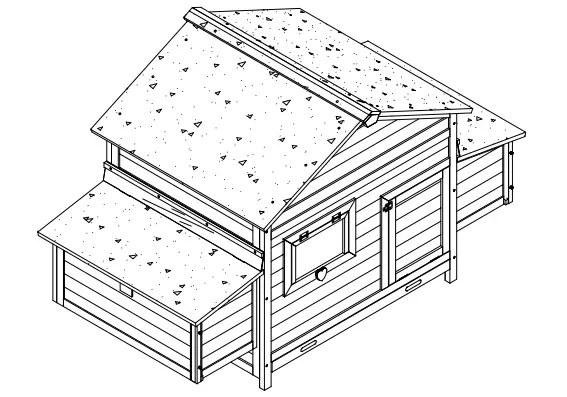
PRODUCT ASSEMBLY
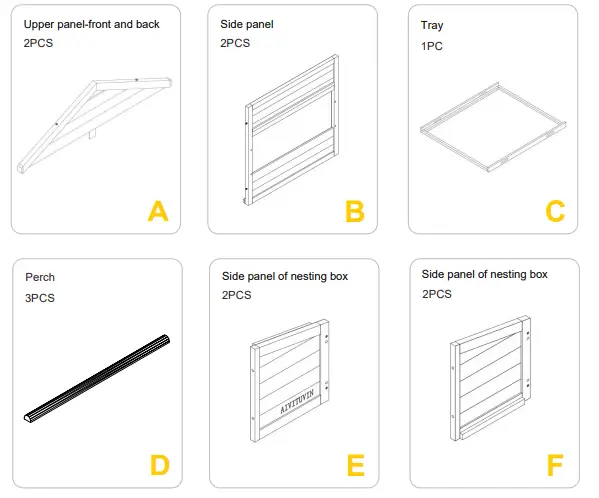
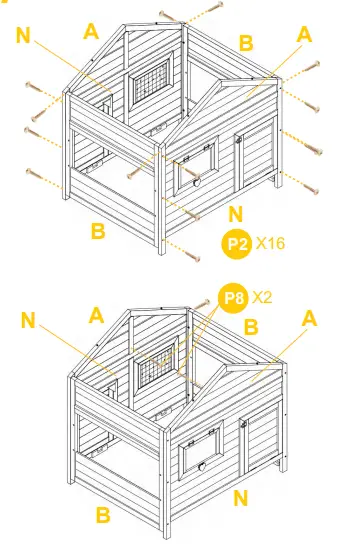
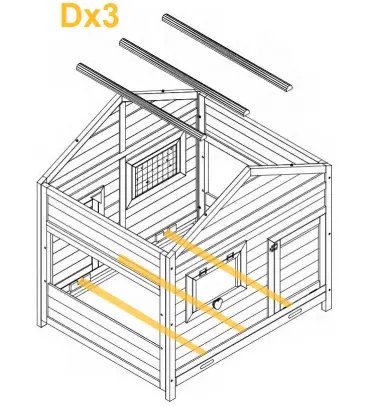
- Attach Part A & N to the side panel Part B by 16XP2 screws, then connect the Part A & N

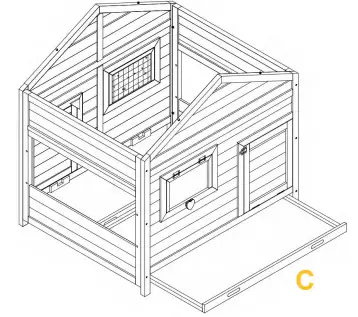
- Slide in the metal tray Part C.

- Insert the perches 3xPart D into the slots inside the front and back panel of coop.

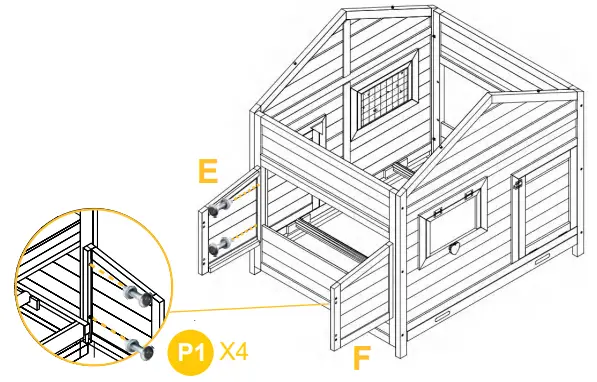
- Attach the side panels of nesting box Part E & F to the left side of coop by bolt 4xP1.

- Attach the side panels of nesting box Part E & F to the right side of coop by bolt 4xP1.

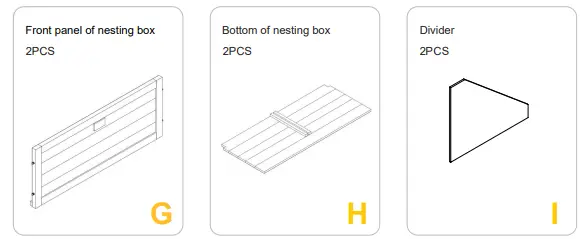
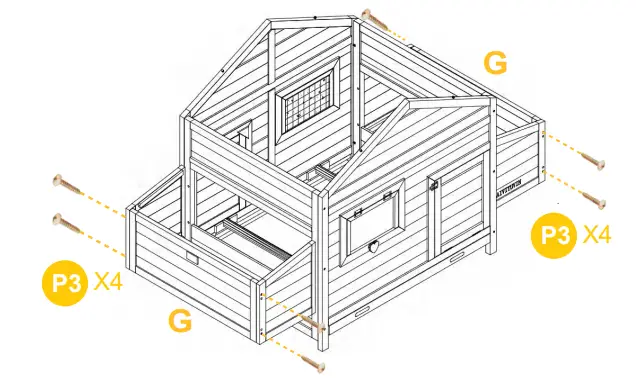
- Attached the front panel of nesting box Part G by 4xP3 screws each side. .

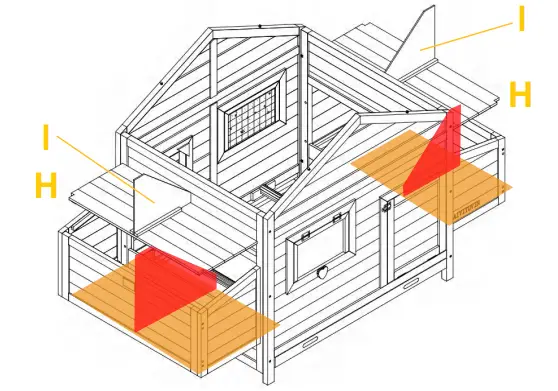
- Drop in the bottom panel of nesting box Part H.
Slide in the divider Part I each side.
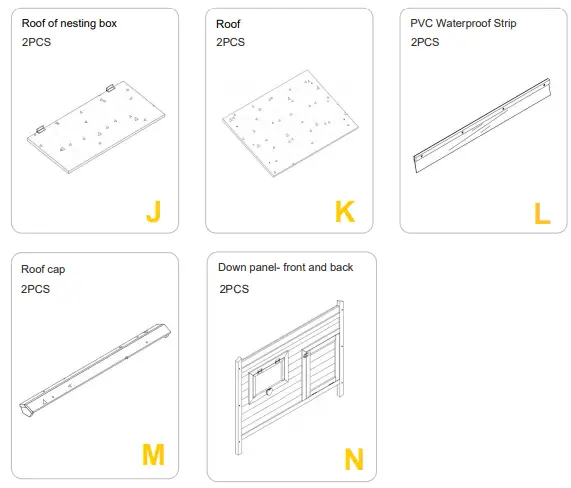
- Attach the roof of nesting box 2xPart J to the nesting box by 4XP5 screws each side.
Make sure the lock is functioning propely before locking the roof.
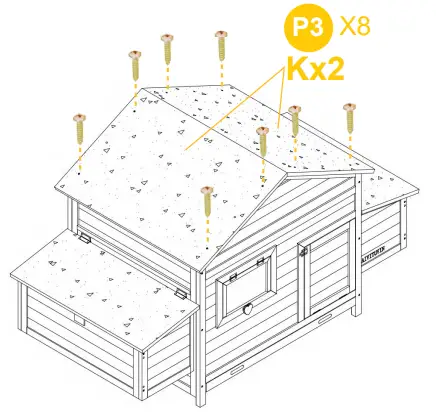
- Attach the coop roof 2xPart K to the coop by 8XP3 screws.

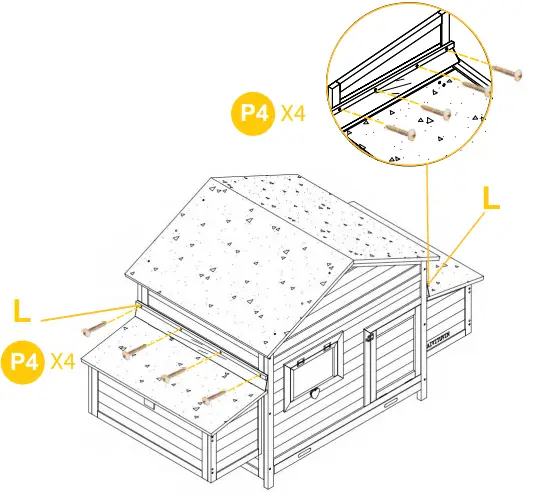
- Attach PVC Waterproof Strip 2xPart L to the nesting box by 4XP4 screws each side.

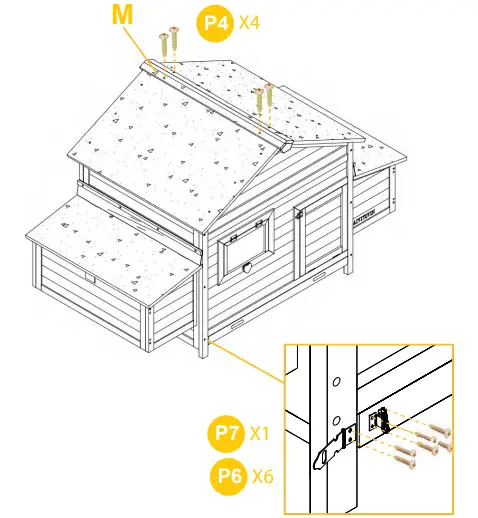
- Attach the roof cap Part M by 4XP4 screws.
Attach lock P7 to the tray by 6xP6. Finish here for only buying one coop
Notice
Read Before Assemble!
Pls ignore the following for only one coop owner !
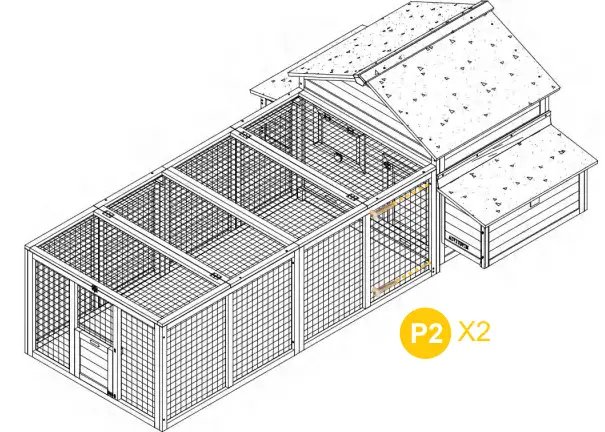
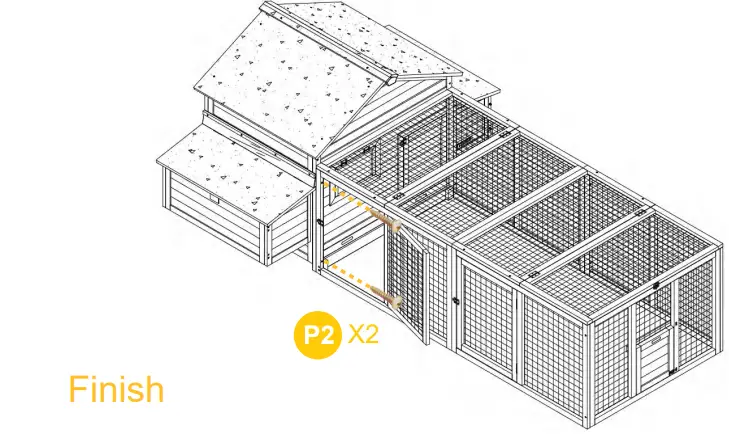
- Attach the run to the coop by 2xP2 screws.

- Attach the run to the coop by 2xP2 screws.


 Finish here for only buying one coop
WARNING
Manufacturer and seller expressly disclaim any and all liability for personal injury,property damage or loss,whether direct,indirect,or incidental,resulting from the incorrect attachment,improper use,inadequate miantenance,or neglect of this


