
![]()
WALKER EDISON Bookcases and Book Shelves Instruction Manual
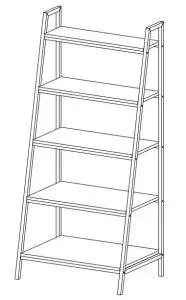
Item no. BS56MWLD
Please visit our website for the most current instructions, assembly tips report damage, or request parts. www.walkeredison.com
General Assembly Guidelines
- Ensure that all parts and hardware are available before beginning assembly.
- Follow each step carefully to ensure the proper assembly of this product.
- Two people are recommended for ease in the assembly of this product.
- The two main types of hardware used to assemble this product are: screws and bolts.
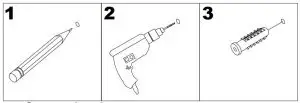
- A Phillips head screwdriver is required for the assembly of this product .

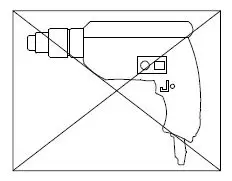
- Power tools should not be used to assemble this product.

- Drill may be needed for securing product to wall.
Parts List

Hardware List
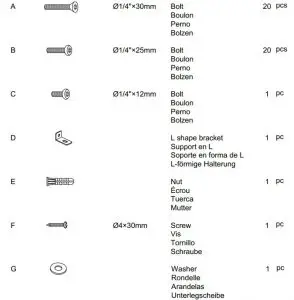

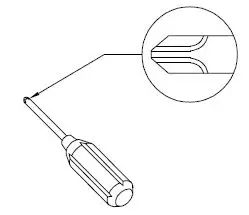
Philips head screwdriver required for assembly (not included)
The hardware quantities listed above are required for proper assembly.Some extra hardware may also have been included.
Assembly

Using Bolt(B) attach part (3) to part (6),part(3,4) to part (5) with Hex key(H) as per diagram
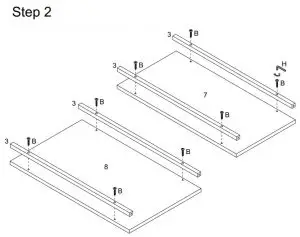
Using Bolt (B) attach part (3) to parts (7,8) with Hex key(H) as per diagram.
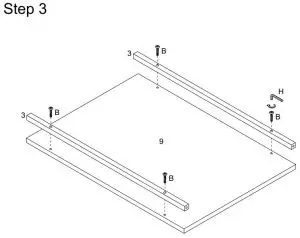
Using Bolt (B) attach part (3) into part (9) with Hex key(H) as per diagram.

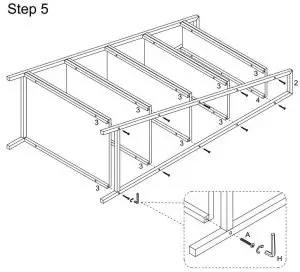
Using Bolt(A) secure part (1) into part (3) on parts (5,6,7,8,9),part(4) on part (5) with Hex key
(H) as per diagram.
Using Bolt (A) attach parts (2) to part (3) ,part (2) to part (4) with Hex key(H) as per diagram.
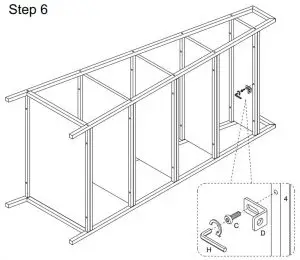
Using bolt (C) secure L shape bracket (D) to part (4) with Hex key(H) as per diagram.
Step 7
WARNING
Serious or fatal injuries can occur from furniture tipping over. To prevent the furniture from tipping over we recommend that it is permanently fixed to the wall. Wall anchor and hardware are included with this product. Please make sure hardware is suitable for your walls before installing, as different wall materials may require different types of anchors.
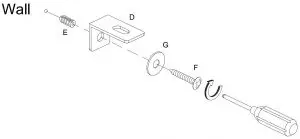
Using Screw (F) attach washer (G) into L shape bracket(D) and into nuts (E) to wall with
Philips head screwdriver as per diagram.

Final Assembly
Read More About This Manual & Download PDF:


