Grade 2 Heavy Duty Deadbolt
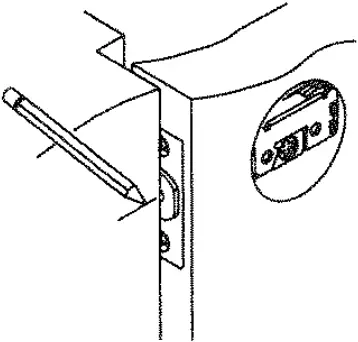
1. Mark Door
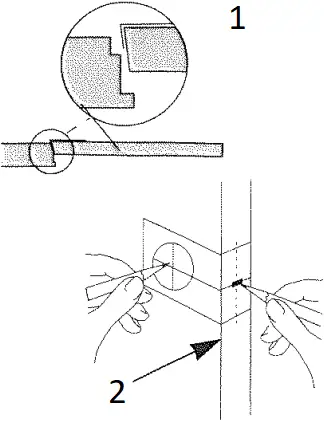
- Door bevel
- High side of door bevel
A. Check lock for proper backset before marking.
B. Fold template over door edge.
C. Mark center for 2 1/8″ (54mm) hole.
D. Mark center for 1″(25mm) diameter latch hole in door edge.
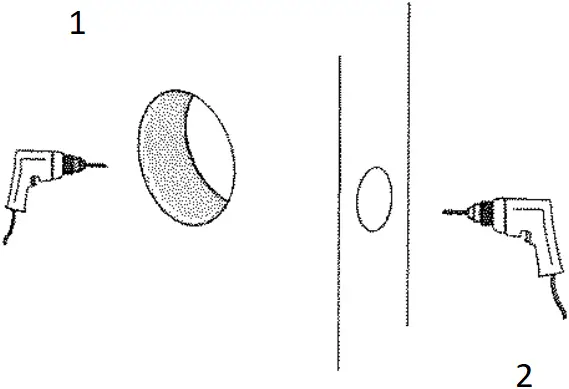
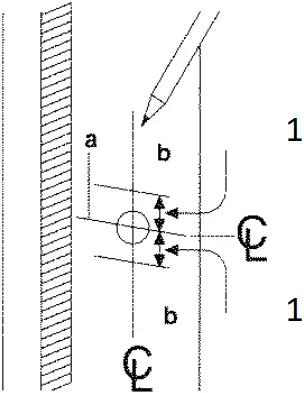
2. Drill holes
- B
2 1/8″(54mm) - C
1″(25mm)
A. Determine backset (2 3/4″ or 2 3/8″) of the lock.
B. Drill a 2 1/8″(54mm) hole through both sides of the door as shown.
C. Drill a 1″(25mm) hole into front face of the door.
Be certain holes are perpendicular.
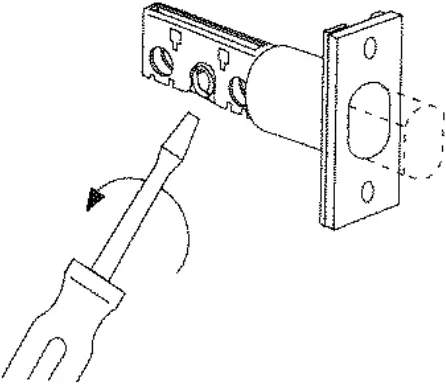
3. Install Dead Bolt
Adjustable deadbolt is factory preset 2 3/4″(70mm) backset.
A. Bolt must be retracted.
Retract deadbolt(If necessary, use screwdriver to turn cam and retract bolt).
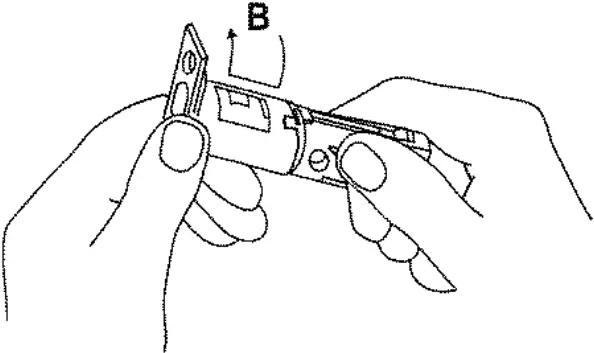
B. How to adjust for 2 3/8″(60mm) backset.
NOTE: Press on the bolt with thumb.
Rotate faceplate and push down to move housing to next position.

- Faceplate
- Combi Screws
- Mortise a 5/32″(4mm) deep
C. Scribe line around faceplate.
D. Chisel out scribed area to depth of 5/32″(4mm) or until face is flush with door edge.
E. Insert deadbolt and fasten with two screws.
4. Prepare Door Jamb
Note : Close door to mark horizontal center line of strike.
- 3/8″(10mm)
A. Locate exact centerline of bolt and mark centerline on jamb.
B. Mark drill points 3/8″(10mm) above and below centerline.
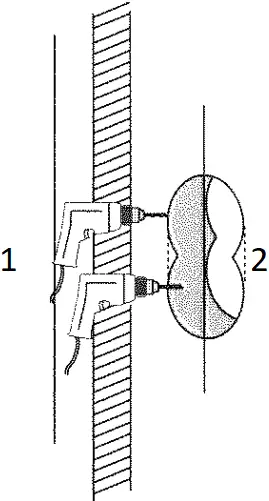
- 1 1/8″ (32mm)
deep - 7/8″
C. Drill two overlapping 7/8″(22mm 3/4″(10mm) above and below ce to a depth of 1 1/8″(32mm).
5. Install Strike
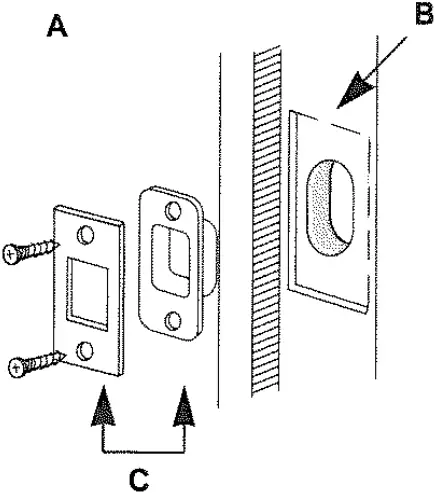
A. Place strike box in hole. Place strike over the strike box and use it as pattern for cutout.
B. Chisel about 1/8″(3.2mm) deep for flush fit of box and strike.
C. Install strike box and strike with combi screws
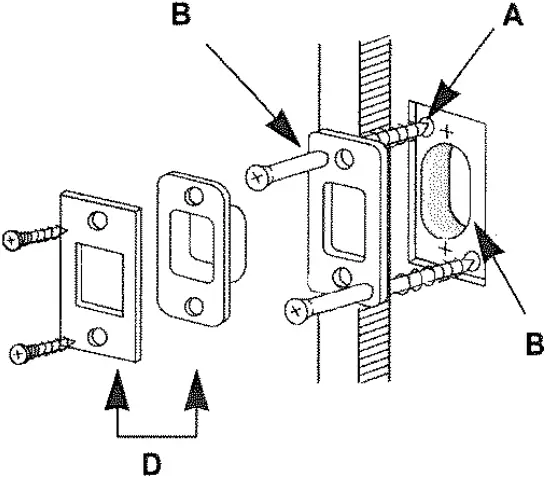
A. Place reinforcer over holes with screw holes as shown.
Mark and drill 3/16″(5mm) holes for reinforcement screws.
B. Chisel about 1/4″(6mm) deep for flush fit of reinforcer box and strike.
C. Install Reinforcer with 3″(76mm) wood screws.
D. Install strike box and strike with combi screws.
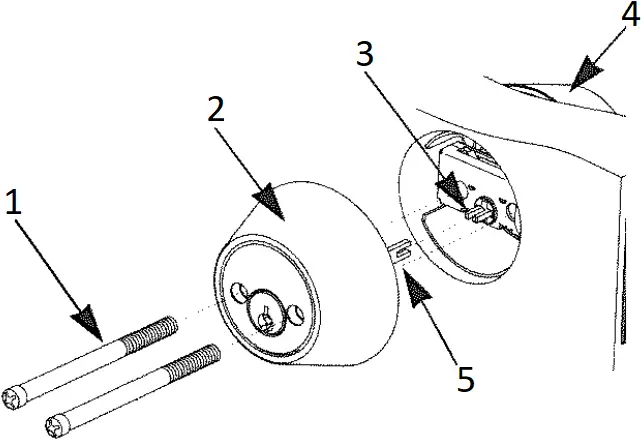
6. Install Single Cylinder
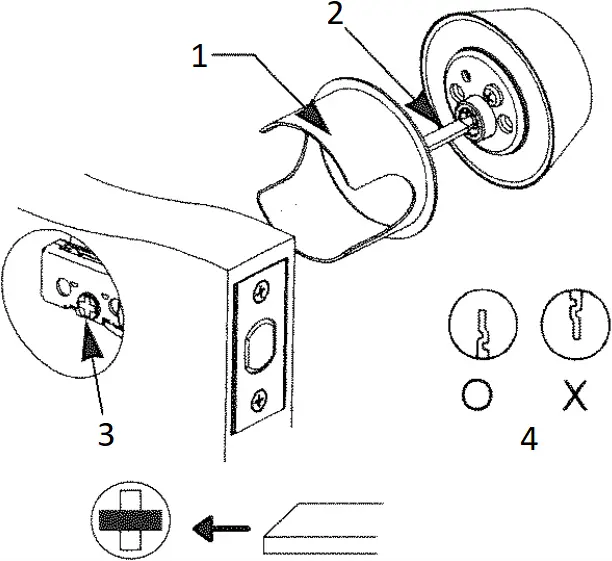
- Removable anti-pry shield
- Exterior Tailpiece
- Latch Crank
- Key hole
A. Retract deadbolt to unlock position.
B. Insert exterior tailpiece horizontally through latch crank.
C. Press cylinder against door.
D. Place inside turn piece assembly and tighten installation screws.
- Installation screw
- Inside turn piece
- Exterior Cylinder
7. Install Double Cylinder
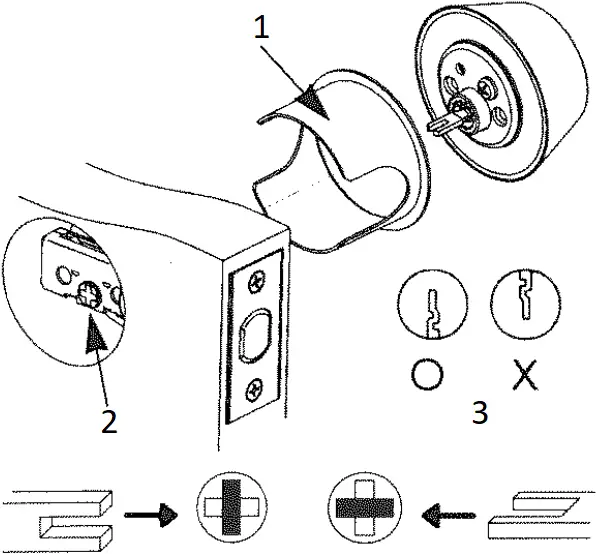
- Removable anti-pry shield
- Latch Crank
- Key hole
A. Retract deadbolt to unlock
B. Insert exterior tailpiece h through latch crank.
C. Press exterior cylinder flus door.
D. Insert interior tailpiece v through latch crank.
E. Press interior cylinder flush door and tighten installation
- Installation screw
- Interior cylinder
- Exterior tailpiece
- Exterio
- Interior tailpiece
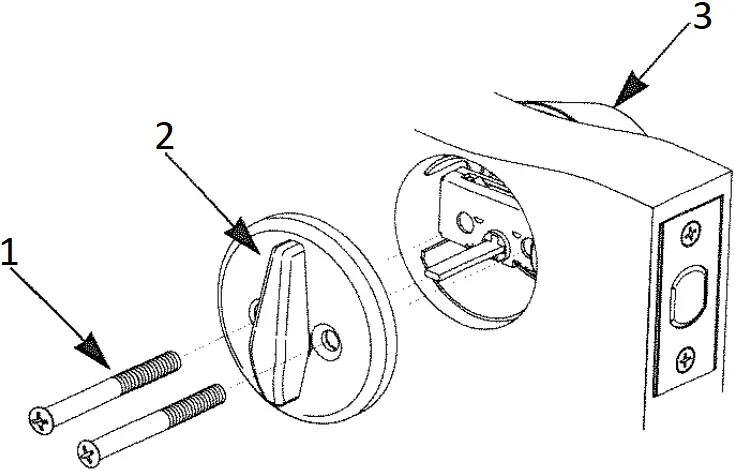
INSTALL THUMB TURN AND INDICATOR ASSEMBLIES
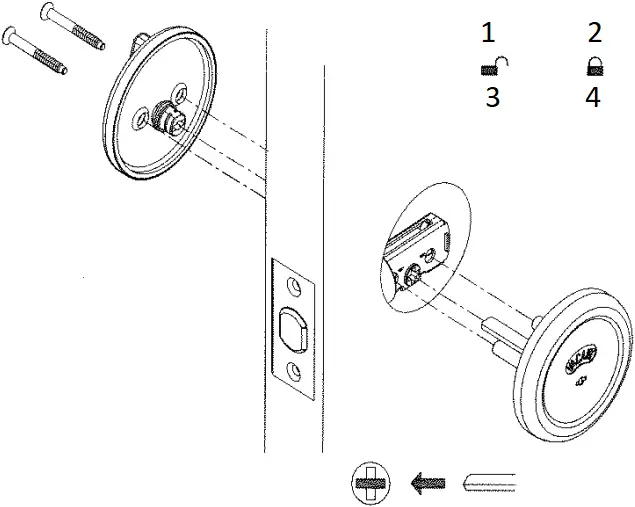
- VACANT
- INUSE
- Unlocked
- Locked
A. With the deadbolt latch in the retracted position.
B. Rotate the tailpiece of the indicator assembly to the horizontal position (unlocked).
C. Insert the tailpiece through the deadbolt latch and hold the indicator assembly flush with the surface of the door.
D. Install the thumb turn assembly by rotating the thumb turn in the vertical position and slide the thumb turn assembly over the tailpiece of the indicator assembly.
E. Insert mounting screws into the thumb turn assembly, through the deadbolt latch and into the threaded posts on the indicator assembly.
F. lighten screws until the thumb turn and indicator assemblies are tight against the door.
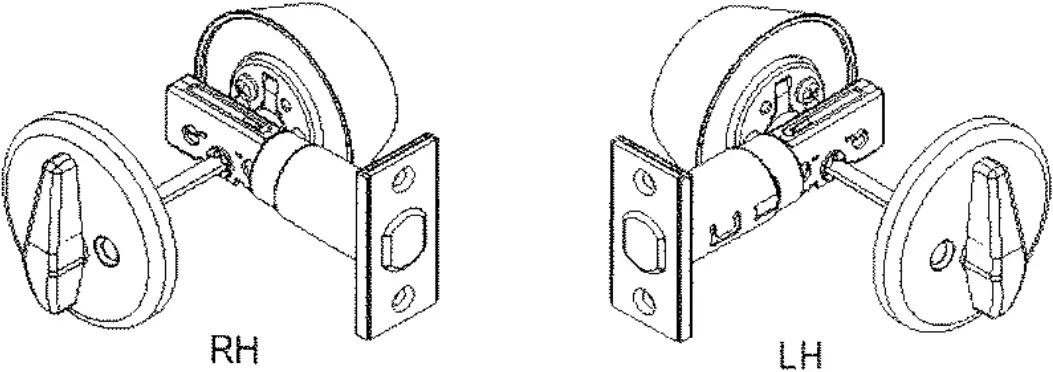
CAUTION FOR CLASSROOM FUNCTION
A. Check handing of lock installation (RH or LH).
B. Insert the cam with Point upward into thumb turn piece.
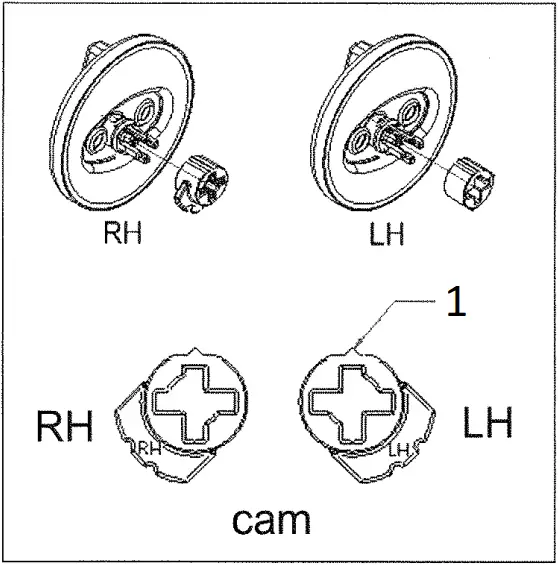
- Point
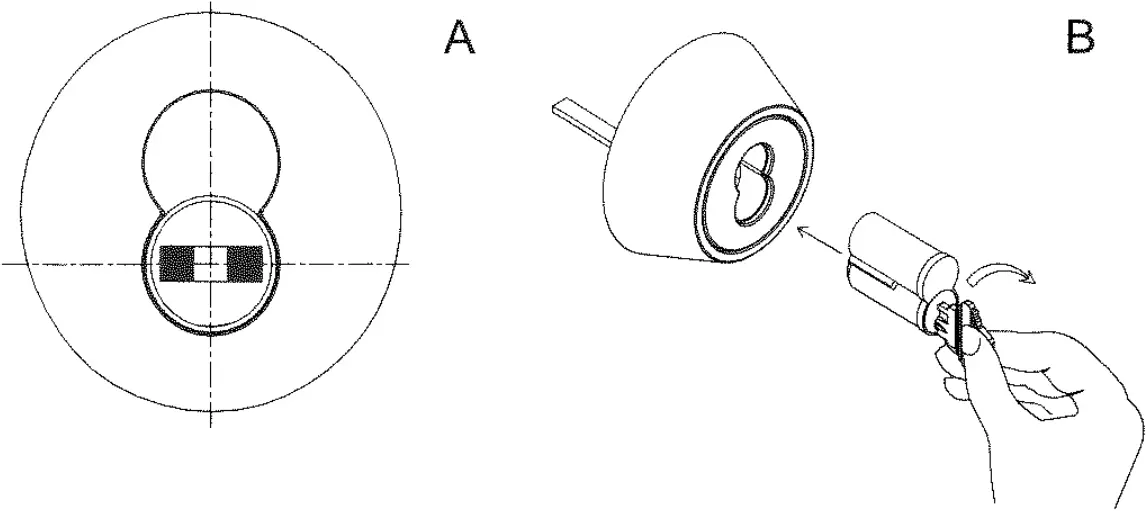
Small Format Interchangeable Core(Optional)
A. Align driver as shown below.
B. Core Installation : turn control key clockwise, then insert core into deadlock.
Turn control key back to vertical position and remove it from the core.
Test operation with user key.
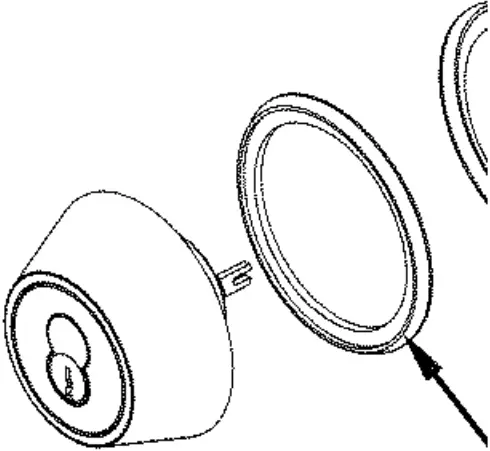
![]() Adapter Ring (Thin Door Kit)
Adapter Ring (Thin Door Kit)
To install on 1-3/8″ door, use optional adapter ring.
Single Double
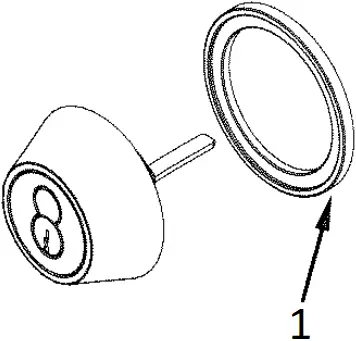
- Adapter Ring
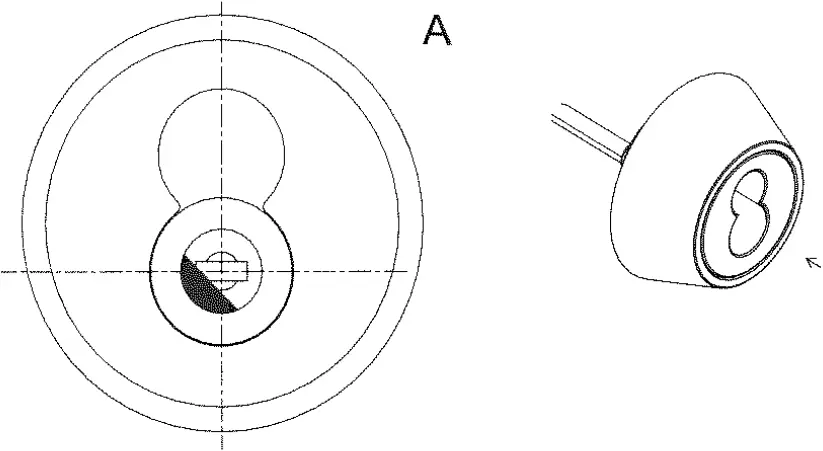
Large Format Interchangeable Co
A. Align driver as shown below.
B. Core Installation : turn control key clockwise, then insert core into deadlock.
Turn control key back to vertical position and remo
Test operation with user key.
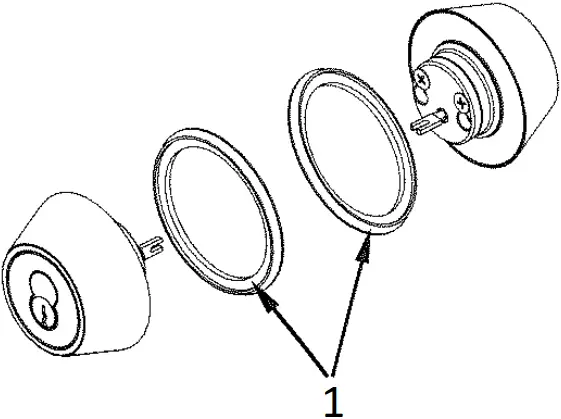
![]() Adapter Ring (Thin Door Kit)
Adapter Ring (Thin Door Kit)
To install on 1-3/8″ door, use optional adapter ring.
Single Double
- Adapter Ring


