![]() Digital to Analogue Audio Converter
Digital to Analogue Audio Converter
TosLink + S/PDIF →
2x RCA + 3.5mm AUX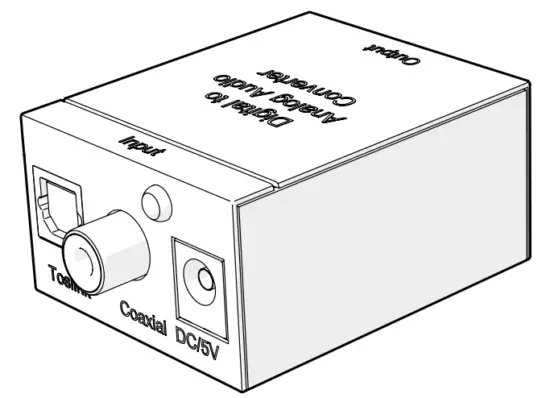 ACON2510BK
Quick start guide
![]()
http://ned.is/ACON2510BK
Digital to Analogue Audio Converter
ACON2510BK![]() For more information see the extended manual online: ned.is/acon2510bk
For more information see the extended manual online: ned.is/acon2510bk![]() Intended use
Intended use
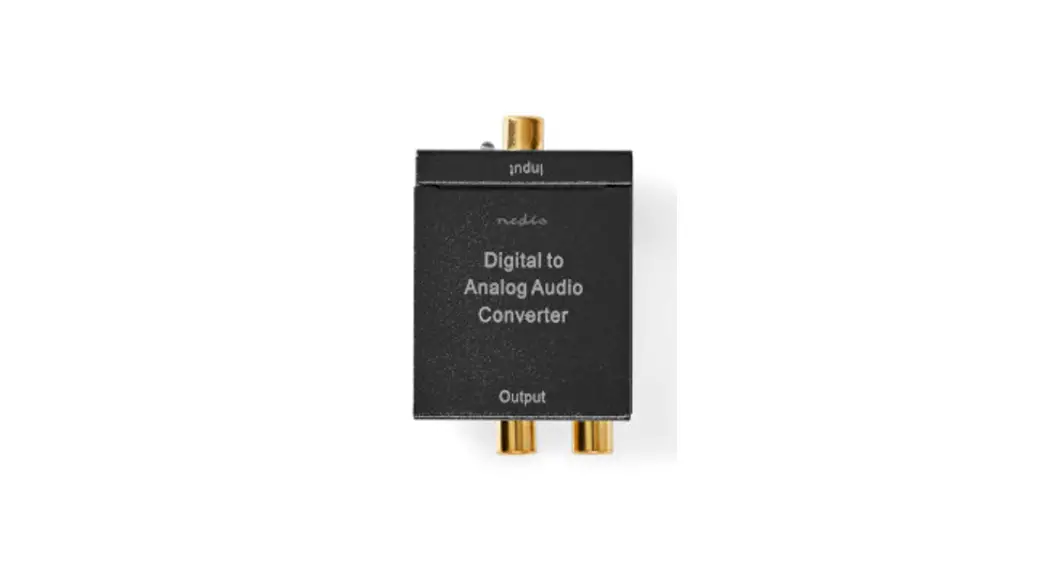
This product is a converter for coaxial or Toslink digital audio to analog L/R audio.
The product is intended for indoor use only.
Any modification of the product may have consequences for safety, warranty, and proper functioning.
Specifications
| Product | Digital to Analogue Audio Converter |
| Article number | ACON2510BK |
| Dimensions (l x w x h) | 51 x 41 x 26 mm |
| Weight | 78 g |
| Power input | 5.0 VDC ; 0.6 A |
| Operating temperature | 0 °C – 70 °C |
| Operating humidity | 10 % – 85 % (RH) |
| Storage humidity | 10 % – 85 % (RH) |
| Power consumption | 3.0 W |
| Supported bitrates | 32 kHz 24-bit 44.1 kHz 24-bit 48 kHz 24-bit 96 kHz 24-bit |
Main parts (image A)
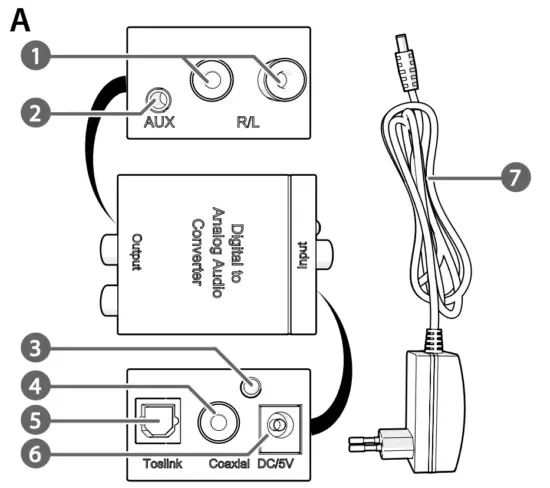
| 1 R/L output 2 AUX output 3 Power indicator LED 4 Coaxial input | 5 Toslink female input 6 DC power port 7 Power cable |
Safety instructions
![]() WARNING
WARNING
- Ensure you have fully read and understood the instructions in this document before you install or use the product. Keep the packaging and this document for future reference.
- Only use the product as described in this document.
- Do not use the product if a part is damaged or defective.
- Replace a damaged or defective product immediately.
- Do not drop the product and avoid bumping.
- Do not expose the product to water or moisture.
- Only use the provided power cable.
- Disconnect the product from the power source and other equipment if problems occur.
- Do not unplug the product by pulling on the cable. Always grasp the plug and pull.
- This product may only be serviced by a qualified technician for maintenance to reduce the risk of electric shock.
Installing the product
![]() Make sure all the devices you want to connect have been switched off.
Make sure all the devices you want to connect have been switched off.
- Plug a twin R/L cable (not included) into the R/L output A1 or plug an AUX cable or headphone (not included) into the AUX output A2.
- Plug the other end of the cable into your audio output device.
- Plug a coaxial cable (not included) into the coaxial input A4 or plug a Toslink cable into the Toslink female input A5.
- Plug the other end of the cable into your audio output device.
Using the product
- Plug the power cable A7 into the power port A6.
- Plug the other end of the A7 into a power outlet.
The product switches on.
The power indicator LED A3 lights up. - Switch on the connected audio devices.
![]() Nedis BV
Nedis BV
De Tweeling 28, 5215 MC ’s-Hertogenbosch
The Netherlands
01/22


