![]() G4 SilveradoSierra A-Pillar Light Mounts
G4 SilveradoSierra A-Pillar Light Mounts
Instruction Manual
Product Packing List
Product: SDHQ-70-1206-G4
Description: Gen 4 Silverado/Sierra A-Pillar Light Mounts 2019+ 1500, 2020+ 2500/3500
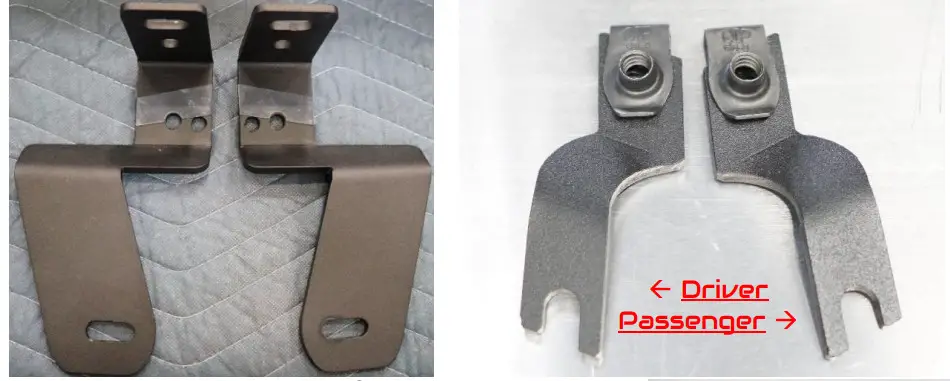
(1) Driver Side Mount
(1) Passenger Side Mount
(1) Driver Side Support Bracket
(1) Passenger Side Support Bracket
(2) Aluminum Spacers
(1) Hardware Package
(2) M8 – 1.25 x 60mm S.S. Hex Head Bolt
(2) 5/16” S.S. Washer
(2) ¼” – 20 x ¾” S.S. Button Head Bolt
(2) M6 – 1.0 x 20mm S.S. Button Head Bolt
(4) ¼” S.S. Washer (2) ¼” – 20 x 17/32” Clip on Barrel Nut
(2) SDHQ Silicone Protective Pads
SDHQ-70-1206-G4-A
SDHQ-70-1206-G4-B
SDHQ-70-1206-G4-C
SDHQ-70-1206-G4-D
SDHQ-70-1206-G4-E
SDHQ-70-1206-G4-F
INSTALLATION INSTRUCTIONS
Product: SDHQ-70-1206-G4
Description: Gen 4 Silverado/Sierra A-Pillar Light Mounts.
| Parts List | Hardware List | Required Tools |
| (1) Driver Side Mount SDHQ-70-1206-G4-A. (1) Passenger Side Mount SDHQ-70-1206-G4-B. (1) Driver Side Support Bracket SDHQ-70-1206-G4-C (1) Passenger Side Support Bracket SDHQ-70-1206-G4-D. (2) Aluminum Spacer SDHQ-70-1206-G4-E (1) Hardware Package SDHQ-70-1206-G4-F | (2) M8 – 1.25 x 60mm S.S. Hex Head Bo(2) 5/16” S.S. Washers. (2) ¼” – 20 x ¾” S.S. Button Head Bolt(2) M6 – 1.0 x 20mm S.S. Button Head Bo(4) ¼” S.S. Washer. (2) ¼” – 20 Clip on Barrel Nut. (2) SDHQ Silicone Protective Pads. | 10mm, 13mm Short Drive Socket 13mm offset Ratcheting Wrench Extension ¼” Ratchet Torx T30 Bit Hood Prop Blue Painters Tape 5/32” and 4mm Hex Drive Sharpie Flush Cut Pliers Razor Blade |
Tech Notes
Use Anti-Seize on all Stainless Steel (S.S.) hardware.
Trimming of cowl end caps is required.
Does NOT fit 2019+ GMC 1500. See SDHQ-77-1206-S4.
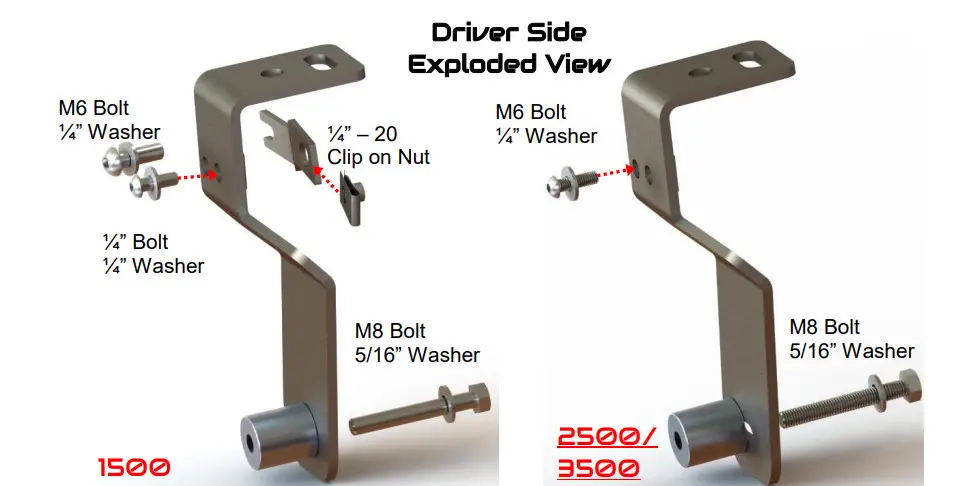
HD 2500/3500 trucks will NOT use support brackets; see exploded views below.
Approx. Install Time: 1 Hour.
***READ ALL INSTRUCTIONS THOROUGHLY FROM START TO FINISH BEFORE BEGINNING INSTALLATION! ***
Installation Instructions:
- Unbox and verify all parts are accounted for. Familiarize yourself with the parts and diagrams.
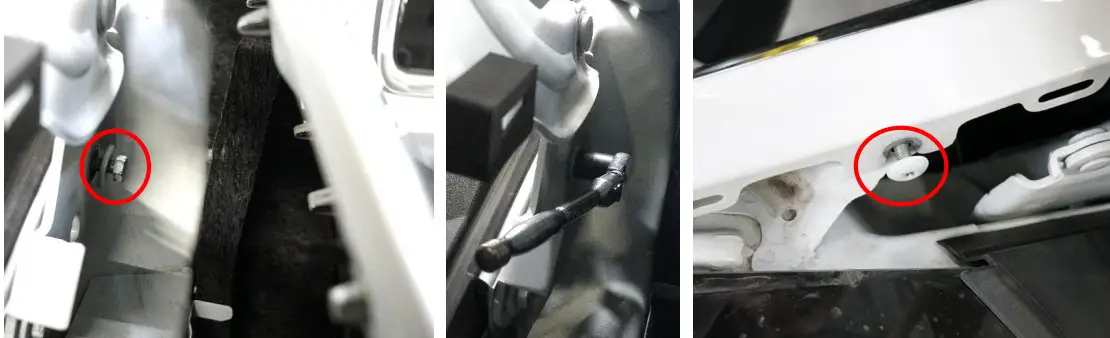
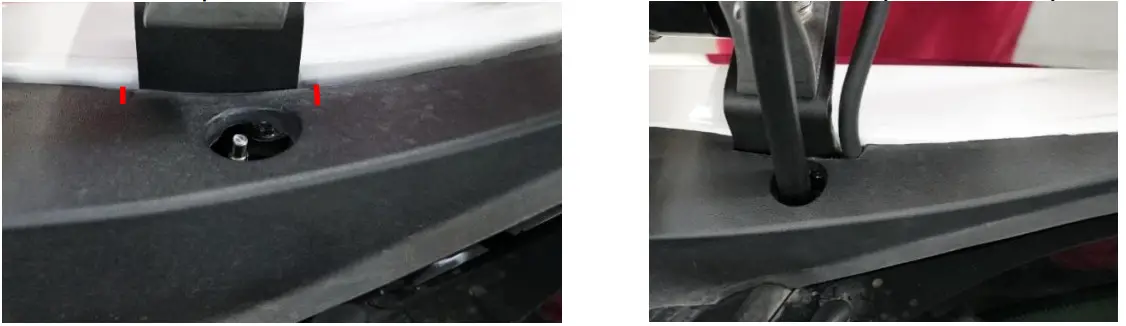
- Locate (2) Silicone Protective Pads provided in the hardware kit. Install on mounts as pictured below (make sure surface is clean for best adhesion). Remove the clear hard plastic cover. Install the ¼” – 20 x 17/32” Clip on Barrel Nuts onto support brackets as shown below.

- Apply masking tape to hood and fender where you will be working. Remove antenna. Open the hood and remove the foam cowl end caps. Support the hood with a hood prop. Remove the (2) 10mm head bolts securing the antenna mount.

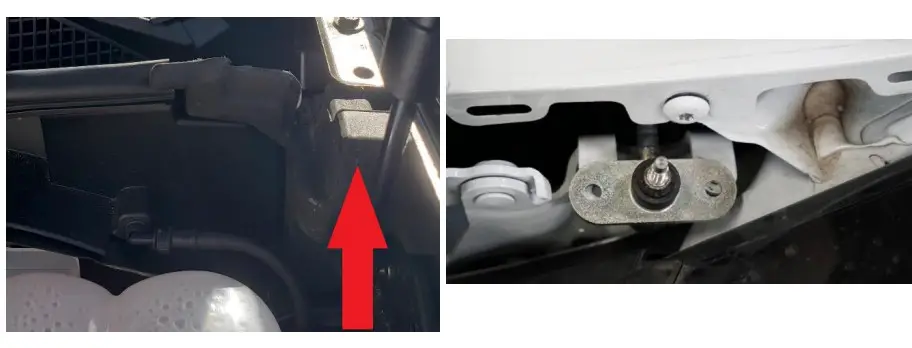
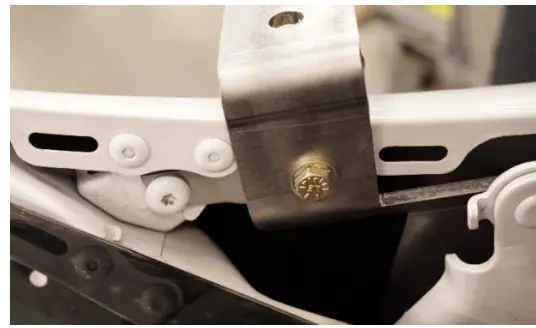
- Starting on the driver side, remove the bolt circled below using a short 13mm socket and ¼” ratchet, or 13mm wrench. Remove the Torx T30 head bolt circled below.

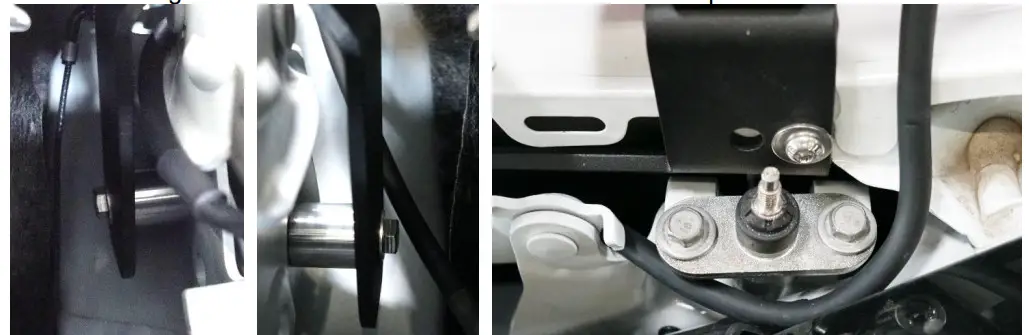
- Carefully lower the driver side mount between the hood hinge and fender. Once lowered, insert (1) M8 bolt and (1) 5/16” washer through the lower mounting slot. Place (1) aluminum spacer between the mount and the hood hinge. Begin threading the M8 bolt.
- Chevy 1500 owners will need to proceed to Step 9. Chevy/GM 2500/3500 owners can proceed to the next step. 2500/3500 owners will NOT use support brackets provided.
- Chevy/GM 2500/3500: Align the rear slot on the mount to the threaded hole from Step 4. Thread (1) M6 bolt and (1) ¼” washer into the threaded hole. Adjust the mount such that the top is flat with the ground and tighten both M6 and M8 hardware. Support Brackets not used.

- Repeat Steps 4-7 for the passenger side. Once the mount is tight, tighten the (2) 10mm head bolts securing the antenna mount to the truck. Proceed to Step 11.

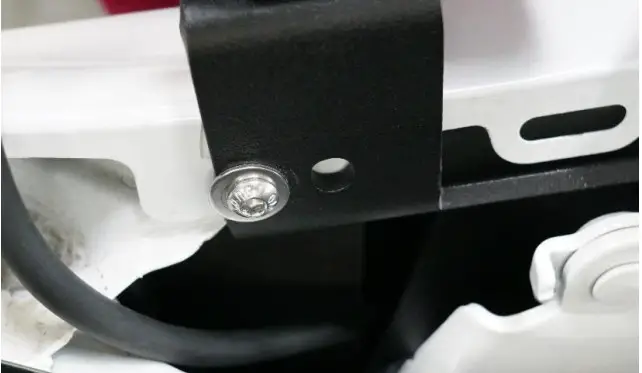
- Chevy 1500: Position the driver side support bracket as shown. Thread (1) M6 bolt and (1) ¼” washer into the threaded hole to secure the support bracket. Align the driver mount and support bracket. Thread (1) ¼” bolt and washer through the mount and into the support bracket. Adjust the mount such that the top is flat with the ground and tighten all hardware. (Hardware shown in the picture to right is not correct)

- Repeat Steps 4, 5 and 9 for the passenger side. Once the mount is tight, tighten the (2) 10mm head bolts securing the antenna mount to the truck.
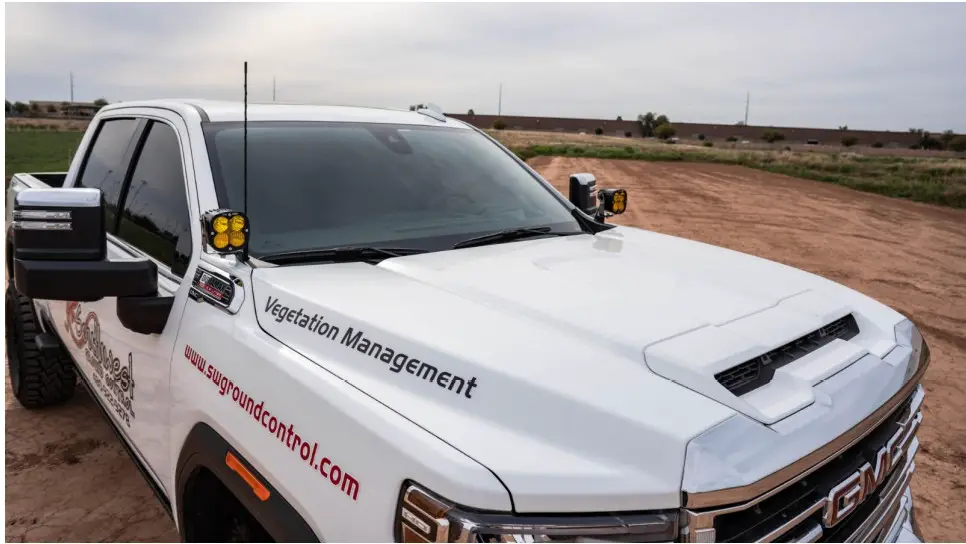
- With both A-Pillar mounts installed, install and wire your lights. Bigger lights such as a Baja XL series will mount to the outer slot.
- Trimming Cowl End Caps: Position the driver side cowl end cap on the fender as if you were going to install it. Mark 1/8” outside of where the cowl will contact the mount or wire. Remove the cowl end cap. Remove ¼” of material between the marks. Repeat for the passenger side.

- Install the trimmed cowl end caps and antenna. Finish wiring your lights and enjoy your new SDHQ A-Pillar Light Mounts!
***Double check all hardware is installed correctly and tight***
***Re-torque ALL bolts after 100 miles***
190 S McQueen Rd
Ste 109 Gilbert, AZ 85233.
Phone: 480-633-2929.
Fax: 480-633-1791.
www.sdhqoffroad.com
Follow us on:![]() Facebook
Facebook![]() Instagram
Instagram
For questions or help with the installation, please email [email protected].
Store front hours: Mon. – Fri. 8:00am – 5:30pm and Sat. 9:00am – 2:00pm Arizona Time.


