IDEMIA ID Screen, ID Screen US
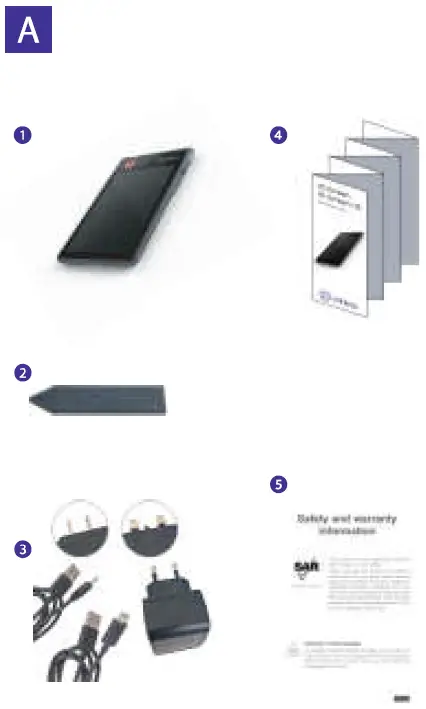
Content of the box
- O ID Screen
- Lid opening too
- Power adaptor, plugs (country dependent) & cables (USB-C+ USB cable/ DC-in)
- Quick start guide
- Safety leaflet
 More about
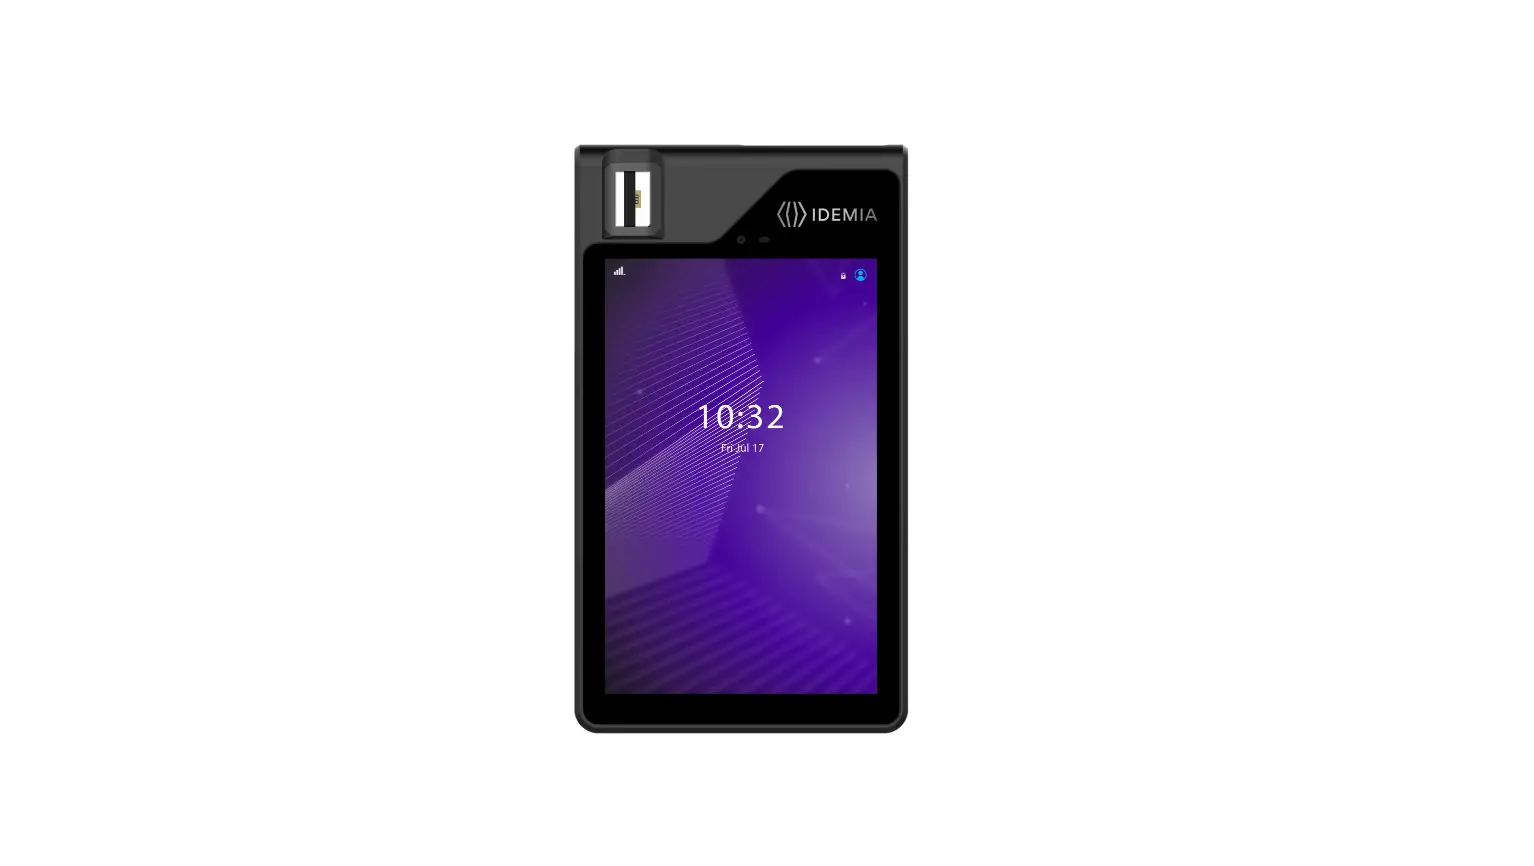
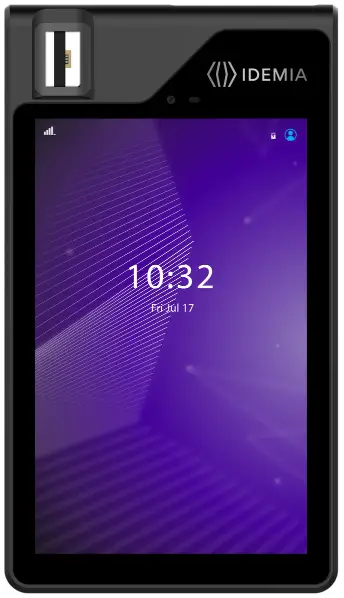
Your ID Screen
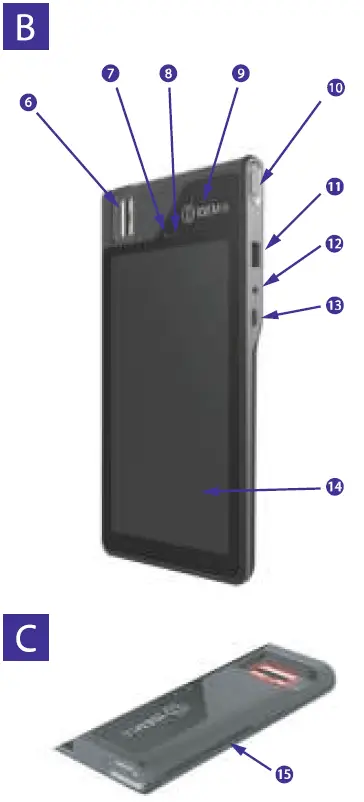
Front & Right views (Fig. B) - Fingerprint sensor
- Camera
- Light sensor
- NFC reader
- Power on/off
- USB Type A
- Audio Jack
- USB Type C
- Touch Screen

Top view (Fig. C) - Contact smartcard reader
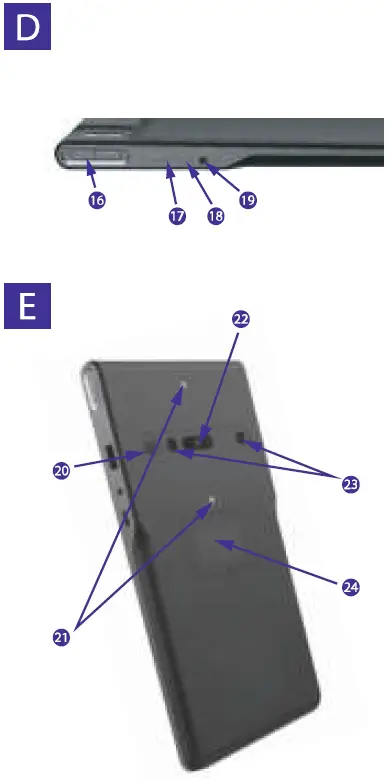
Left view (Fig. D) - Volume +/-
- SD card slot
- Microphone
- Power DC-in
Back view (Fig. E) - Speaker
- Dual Flash
- Camera

- Infrared LEDs (only IRIS option)
- SIM/SAM lid
Getting started with
Your ID Screen
PRESS THE POWER BUTTON FOR 5 SECONDS TO TURN YOUR ID Screen ON
STAND-BY MODE
In standby mode, the ID Screen display is turned off.
- Press and release the power key to place your ID Screen in standby mode.
POWER OFF YOUR ID Screen
- Press and hold the power key until the device options dialog box is displayed (Fig.3)
- Select power-off option
RESTART YOUR ID Screen
If the application is not responding,
- Press and hold the power key until the device automatically restarts
CHARGE YOUR ID Screen USING ONE OF THE FOLLOWING OPTIONS:
Using a wall-mounted charger (Fig. F
- USB Cable/DC-in +Power Adaptor+ related country plug
Using a PC (Fig. C)
- USB-C/USB cable connected to a PC
HOW TO INSERT SD CARD
- Open the SD card lid using the lid opening tool (Fig. H)
- Insert the SD card connectors facing up into the slot
- Close and press the SD card lid after insertion
HOW TO REMOVE SD CARD
- Open the SD card lid using the lid opening tool (Fig. H)
- Use the lid opening tool to remove the SD card
- Close and press the SD lid after the removal
HOW TO INSERT SAM CARD or MICRO SIM
- Open the SIM/SAM lid using the lid opening tool (Fig. )
- Insert the SAM Card or the Micro SIM card
- Close and press the SIM/SAM lid after installation
HOW TO REMOVE SAM CARD or MICRO SIM
- Open the SIM/SAM lid using the lid opening tool (Fig. I)
- Remove the SAM Card or the Micro SIM card
Close and press the SIM/SAM lid after the removal
 Gmail is Google’s email service.
 Take advantage of map and GPS services with Google Maps and Navigation.
 Google Play provides access to films, music, apps, and more to download.
 YouTube lets you watch, send and share videos.
 Gmail is Google’s email service.
Additional information is available at:


