
![]() Interthings Technology IPC163 Smart Baby Camera
Interthings Technology IPC163 Smart Baby Camera
Instruction Manual
What’s Included
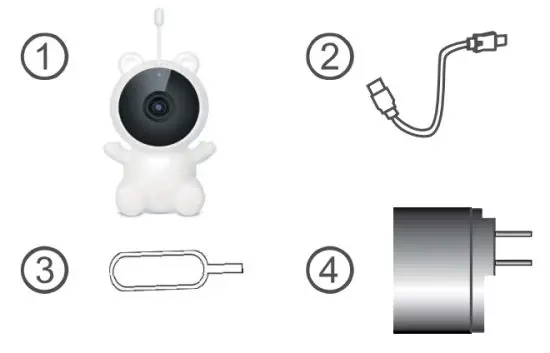
- Smart Baby Camera
- Micro USB Charging Cable
- Reset Pin
- AC Charger
Parts of the Camera
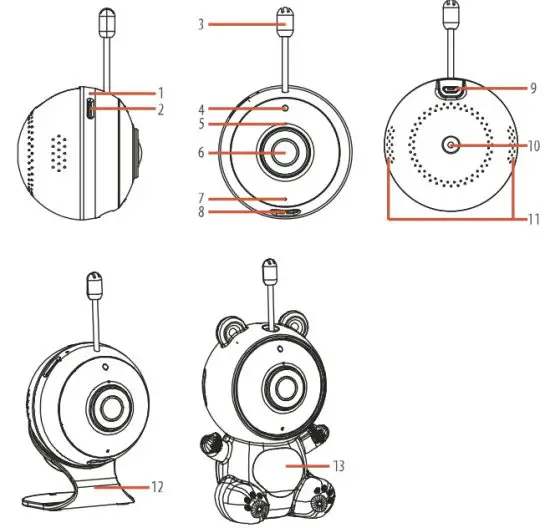
| 1. Reset Button | 8. Night Lamp |
| 2. Micro SD Card Slot | 9. Micro USB |
| 3. Temperature Sensor | 10. Tripod |
| 4. Light Sensor | 11. Dual Speakers |
| 5. Built-in MIC | 12. Magentic Base (optional) |
| 6. Lens | 13. Teddy Silicon Case (optional) |
| 7. Indicator Light | |
Initial Setup
Turning On the Camera 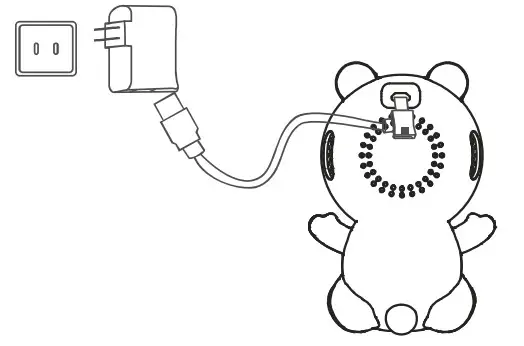
If the camera is failed to connect, it needs to be reset.
To reset the IP camera, use the setup tool to press the “Reset” button on the back of the camera.
Press and hold until the indicator turns red.
Release the “Reset” button and wait for the system to reboot. This will takes around 15 seconds.
Connect the power supply with the IP Camera and the RED indicator light will turn on. 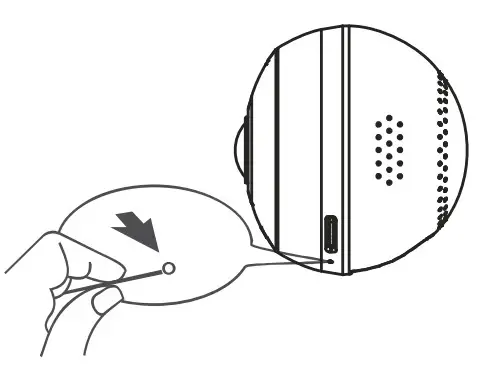
Installing the Memory Card
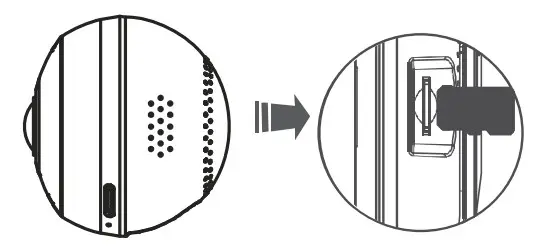
Class 4 or higher Micro SD memory card required (up to 32GB) for normal use.
Indicator Light
When the red indicator light flashes quickly, it is in a setting mode which means you can set up the camera via your mobile device.
When the blue indicator light is steady, it indicates that the camera is connected to the Wi-Fi.
Camera Operation
Preparations before use
Mobile device system requirements:
Android OS 4.4 or higher
iOS 9.0 or higher 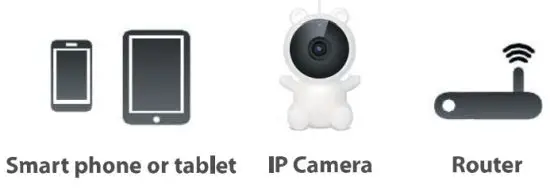
Install the App
Use your mobile phone or tablet to search for “TuyaSmart “in Google Play (for Android OS) or in the Apple app store(for iOS) to find the app, and install it according to the instructions. 
Register an account
If this is the first time using the app, you need to register an account as per below: 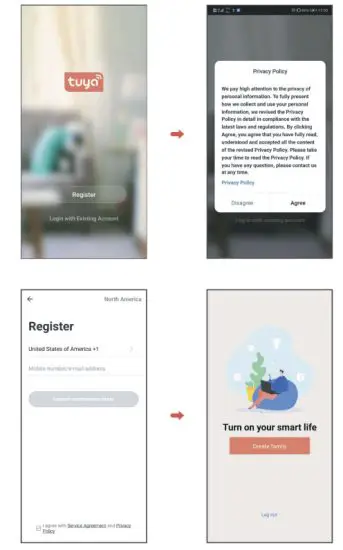
Connecting Your IP Camera with the App
Note: Your IPC Camera is supported only on a 2.4GHz Wi-Fi network. For setup, make sure your mobile device is connected to a 2.4GHz Wi-Fi network
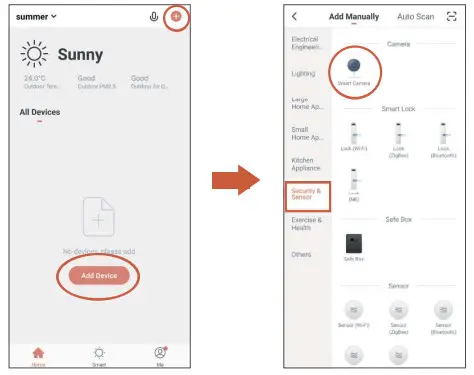
- After installing the app ‘ TuyaSmart: launch the app and follow the prompts to set up the app. Then tap ‘+’ or ‘Add Device’ from the home page.
Tap ‘Security & Sensor ‘, then choose ‘Smart Camera’.
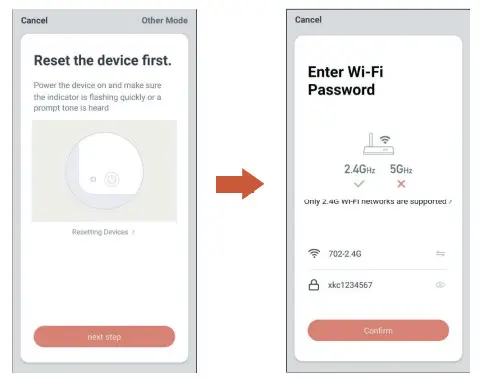
- Power the device on and make sure the indicator is flashing quickly or a prompt tone is heard. Then tap ‘next step’.
 Make sure your smart device is connected to a 2.4G Wi-Fi network, then tap ‘Confirm’.
 - The app will guide you to scan your mobile device with the camera.
When you tap ‘Continue’ the mobile phone displays a QR code.
Hold the camera 15 to 20 cm in front of the mobile device for the camera to scan the QR code.
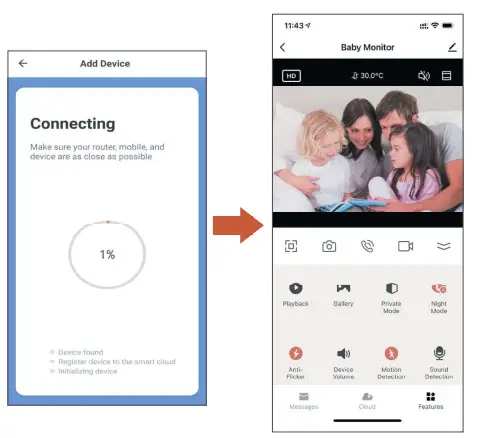
- In connecting, make sure your router, mobile, and device are as close as possible.
Once the camera gets the information from the mobile device, the camera indicator will turn and keep to blue color which means the camera is connected successfully.
Your camera’s Live Camera view with streaming video will be opened.
 Make sure your smart device is connected to a 2.4G Wi-Fi network, then tap ‘Confirm’.
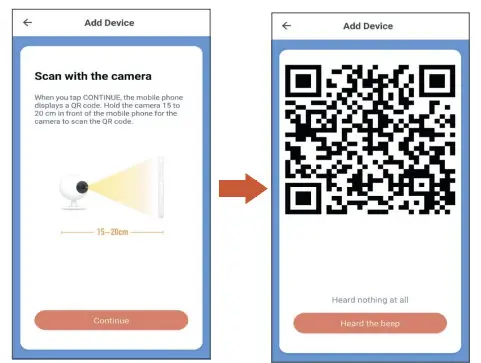
TROUBLESHOOTING
| The camera does not find or connect the router. | Make sure the Wi-Fi router supports DHCP protocol. Make sure that the DHCP option is turned on. Make sure the camera and your mobile device are connected to the same Wi-Fi router. Make sure you selected the correct 2.4GHz router only in your device’s Wi-Fi setting. Make sure you entered the correct password for the router you selected. Make sure you are within the Wi-Fi range of the router. Make sure the Wi-Fi router is enabled. Make sure the camera is properly powered on. Make sure the Wi-Fi router has enabled SSID broadcasting. |
| Poor video stream or video quality is not clear. | Please check your home upload speed to meet the minimum requirement. 1Mbps for 480P stream, 2Mbps for 720P, and 4Mbps for 1080R Clean the lens if it’s dirty or has fingerprint marks on it. |
| There is no video or light indicator. | Verify that the camera is powered on and is plugged in properly. |
SPECIFICATION
| Item | Specification |
| Image Sensor | 1/2.7″ Colour CMOS |
| Recording Resolution | 1920 x 1080 15fps, 640 x 480 20 fps |
| Viewing Angle | 100°(D) |
| Night Vision | up to 5m |
| Video Compression | H.264 |
| Audio | Two-way talk |
| WIFI | 2.4GHz |
| Wireless Security | WEP, WPA, WPA2 |
| Power Consumption | up to 5W |
| Micro SD Card | up to 32GB Class 10 |
This device complies with part 15 of the FCC Rules.
Operation is subject to the following two conditions: (1) This device may not cause harmful interference, and (2) this device must accept any interference received, including interference that may cause undesired operation.
NOTE: This equipment has been tested and found to comply with the limits for a Class B digital device, pursuant to part 15 of the FCC Rules.
These limits are designed to provide reasonable protection against harmful interference in a residential installation.
This equipment generates, uses, and can radiate radio frequency energy and, if not installed and used in accordance with the instructions, ay cause harmful interference to radio communications.
However, there is no guarantee that interference will not occur in a particular installation. If this equipment does cause harmful interference to radio or television reception, which can be determined by turning the equipment off and on, the user is encouraged to try to correct the interference by one or more of the following measures:
- Reorient or relocate the receiving antenna.
- Increase the separation between the equipment and receiver.
- Connect the equipment into an outlet on a circuit different from that to which the receiver is connected.
- Consult the dealer or an experienced radio/ TV technician for help.
Warning: Changes or modifications to this unit not expressly approved by the party responsible for compliance could void the user’s authority to operate the equipment.
FCC Radiation Exposure Statement
This equipment complies with FCC radiation exposure limits set forth for an uncontrolled environment.
This equipment should be installed and operated with a minimum distance of 20cm between the radiator & your body.


