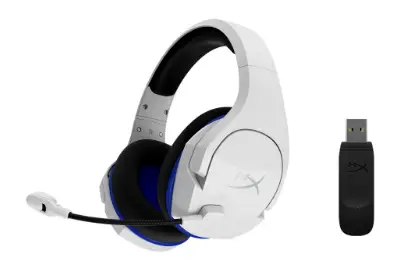
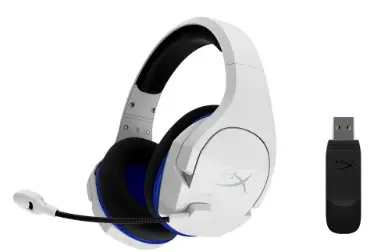
HyperX Cloud Stinger 2 Wireless Gaming Headset
Overview
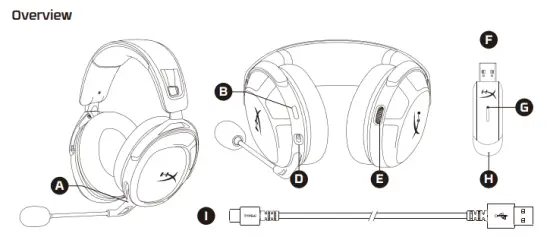
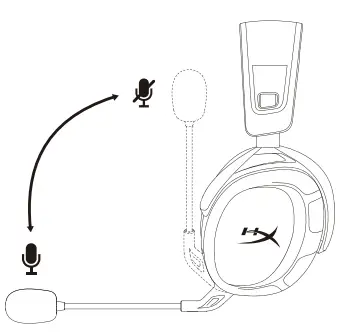
- A Swivel to mute the microphone
- B Status LED
- C Power button
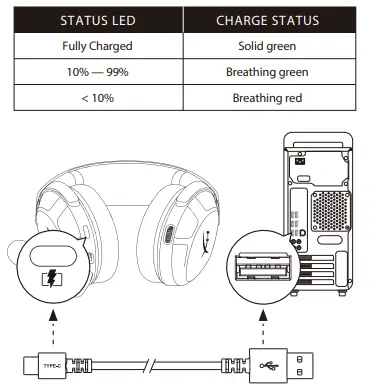
- D USB-C charge port
- E Volume wheel
- F USB wireless adapter
- G Wireless pairing pinhole
- H Wireless status LED
- I USB-C charge cable
Using the Headset
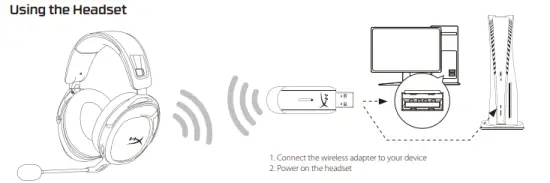
- Connect the wireless adapter to your device
- Power on the headset
Setting up with PC
Right-click speaker icon > Select Open Sound settings > Select Sound control panel
Playback Device
Set Default Device to “HyperX Cloud Stinger 2 Wireless”
Recording Device
Set Default Device to “HyperX Cloud Stinger 2 Wireless”
Setting up with PlayStation 5
Go to the home screen and select Settings > Sound
Microphone
- Input Device: USB Headset “HyperX Cloud Stinger 2 Wireless”
Audio Output
- Output Device: USB Headset “HyperX Cloud Stinger 2 Wireless”
- Output to Headphones: All Audio
Power on/off – Hold button for 3 seconds to power headset on/off
Status LED
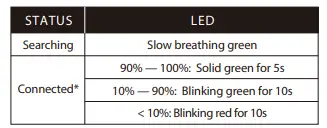
- Battery level indication
- The status LED will automatically turn off to conserve battery life
Volume wheel
Scroll up and down to adjust the volume level.
Swivel to Mute Microphone 
Charging
It is recommended to fully charge your headset before first use.
HyperX INGENUITY Software
Go to hyperxgaming.com/ngenuity to download the INGENUITY software. INGENUITY software features include:
- DTS Headphone:X
- Adjustable EQ settings
- Battery level indicator
Questions or Setup Issues?
Contact the HyperX support team or see the user manual at hyperxgaming.com/support/headsets
WARNING: Permanent hearing damage can occur if a headset is used at high volumes for extended periods of time.


