IP Finder IPF-NX
Version 1.2.9
User Guide
This IP Finder apply to, supported camera models:
FEX30SHD-B-RSNP2, Part Number: F104E001 or 01010725A0
FEX30SHD-S-RSNP2, Part Number: F104E002 or 01010725A3
Use this IP Finder as the Camera IP Search Tool to search for cameras on the network. This software will check for the IP address and other essential information. Basic settings can be adjusted using this software, such as IP address change, and a forgot password feature.
Before using this IP Search Tool, you need to connect the camera to a PC/laptop directly with a network cable, or to a network switch. The camera needs to be powered on and connected properly for the software to detect it.
Introduction
This document is a brief guideline which makes you know how to operate this application so as to search IP cameras in general network environment. This document also provides a lot of illustrations to have you understand the procedure easily.
Requirement

You may have one or more network interfaces such as physical network card embedded in motherboard, USB network card, etc… Before using the application tool, make sure your IP cameras are connected to network group that associated with different network interfaces in local system.
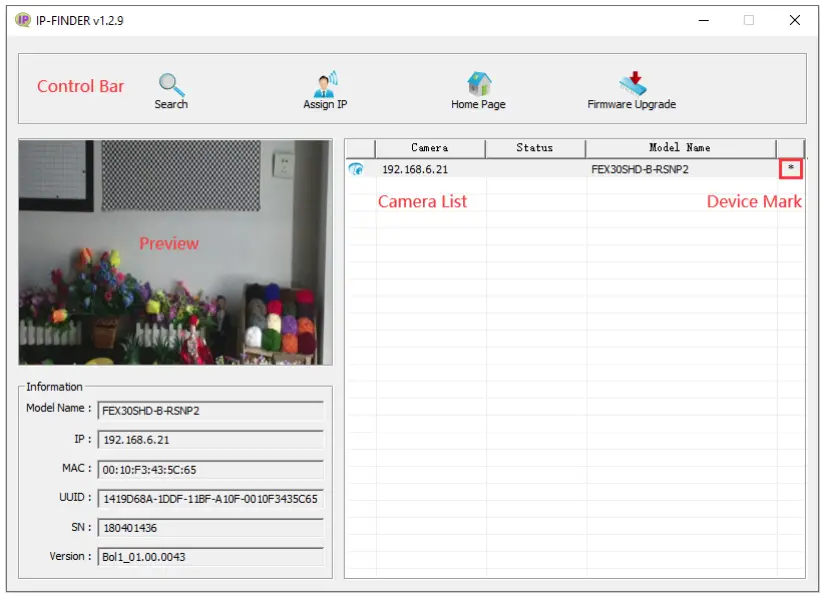
User Interface
| UI Block | Description |
| Control Bar | Contains [Search], [Assign IP], [Home Page] and [Firmware Upgrade] Buttons. |
| Preview | Show the selected camera image. |
| Information | Show the selected camera information such as Model Name, IP, MAC, UUID, SN and Version. |
| Camera List | All cameras list by searching function. Each camera shows the “IP”, “Status”, “Model Name” and “Device Mark”. User can also click these header columns to sort list out. |
| Device Mark | Star sign means this device has “Preview”, “Assign IP” and “Firmware Upgrade” functions. |
Functions
There are four buttons on the control bar. Each function describes as below:Function Button Description Search 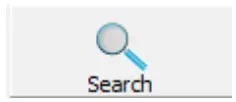
Discover IP cameras on network. Assign IP 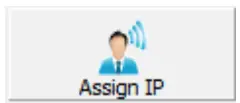
Change IP address of camera that user assigned. Home Page 
Create a new Browser within the home page of camera. Firmware Upgrade 
Upgrade camera firmware.
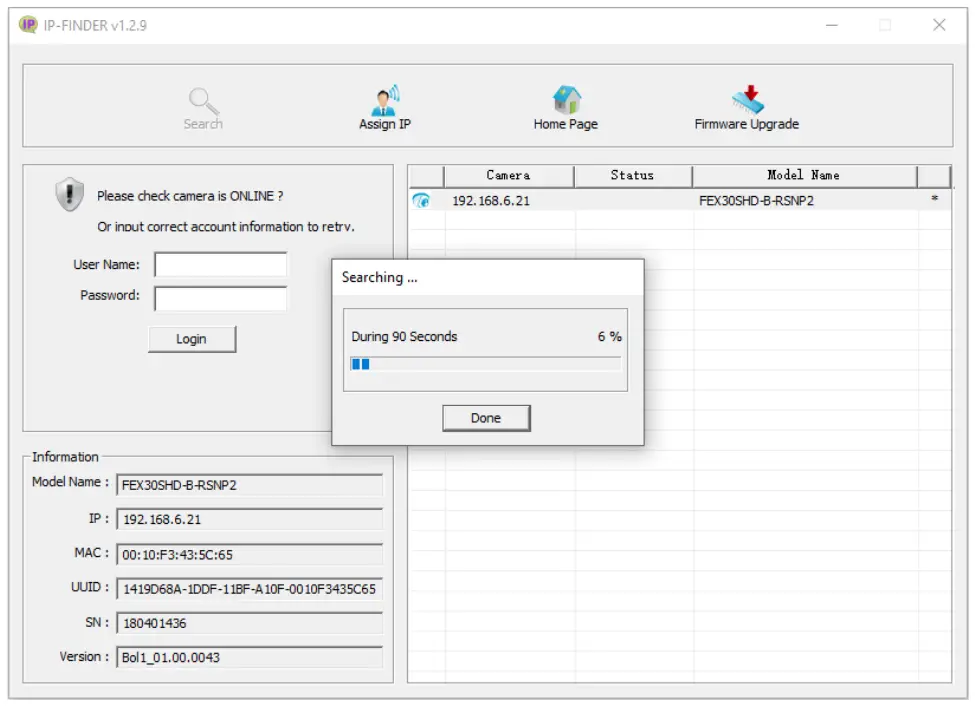
Search
When [Search] button was clicked, application program starts searching each camera which is located on the network. You can click [Done] button to stop searching. Certainly, user can also wait it till 90 seconds expired.
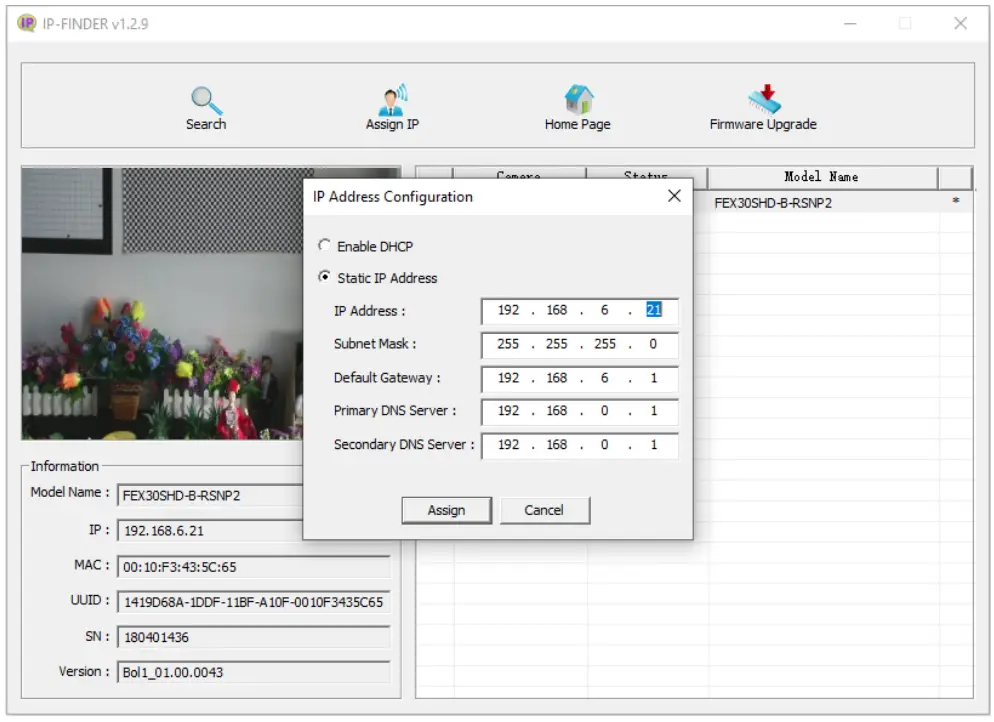
Assign IP
User can choose a camera to change its IP address and others by means of clicking the [Assign IP] button.
Once user ran this function, it will pop up “IP Address Configuration” dialog box window. Then you can change the “IP Address”, “Subnet Mask”, “Default Gateway” and other information on the dialog.
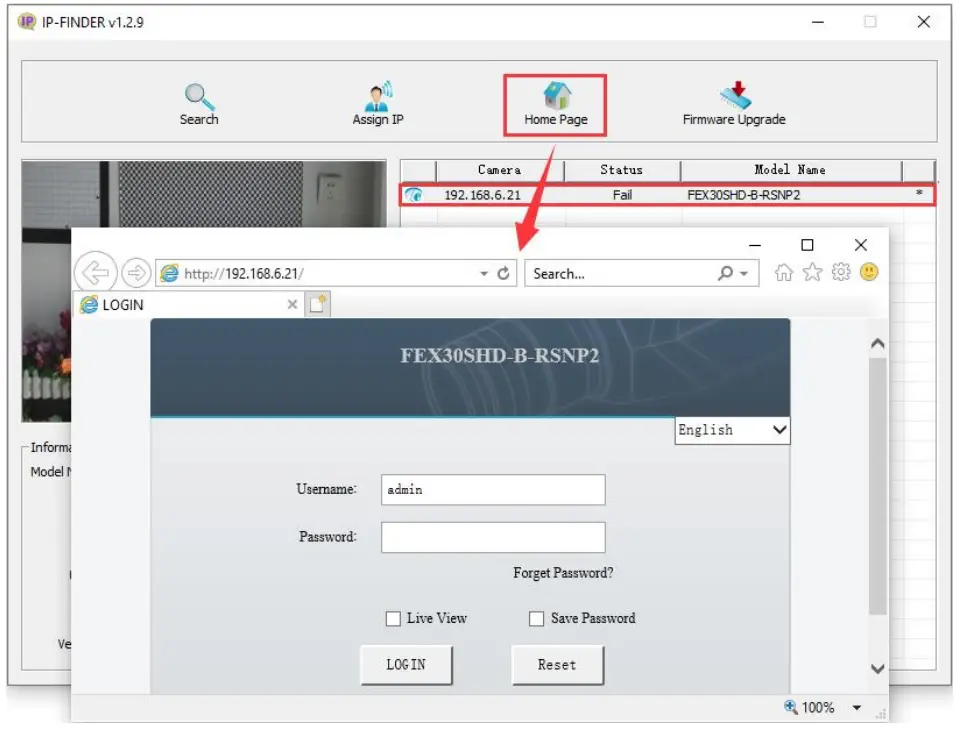
Home Page
To view the home page of camera, you double click the single device in the list or clicked [Home Page] button and it will create a browser then shows home page on it.
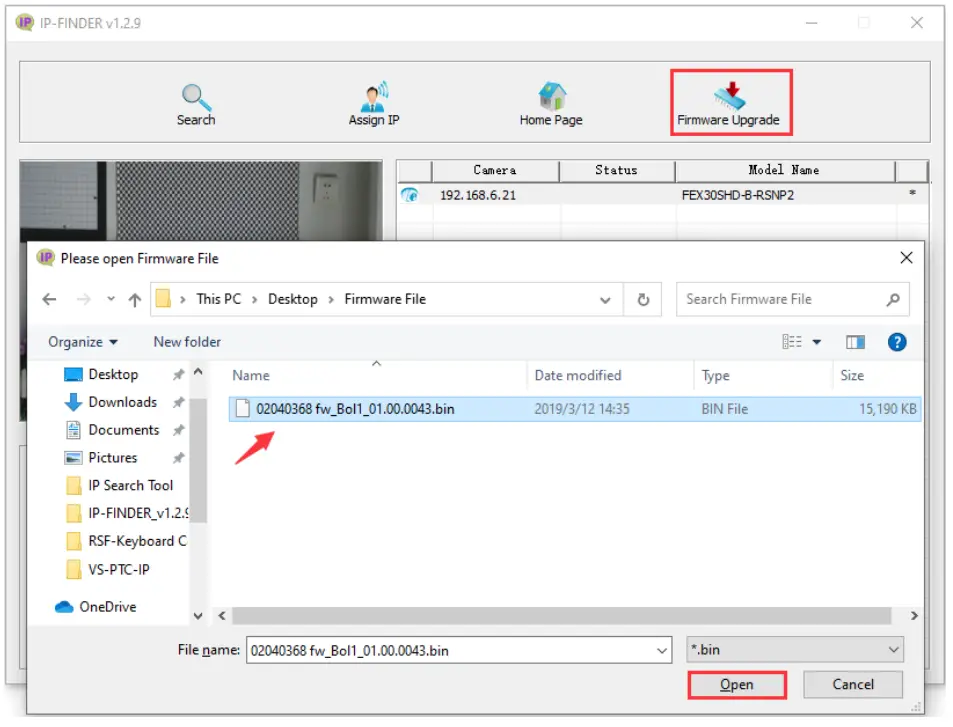
Firmware Upgrade
To upgrade camera firmware is to select single camera at first then click [Firmware Upgrade] button. If your device supports firmware upgrade, you load the firmware file for the next step.
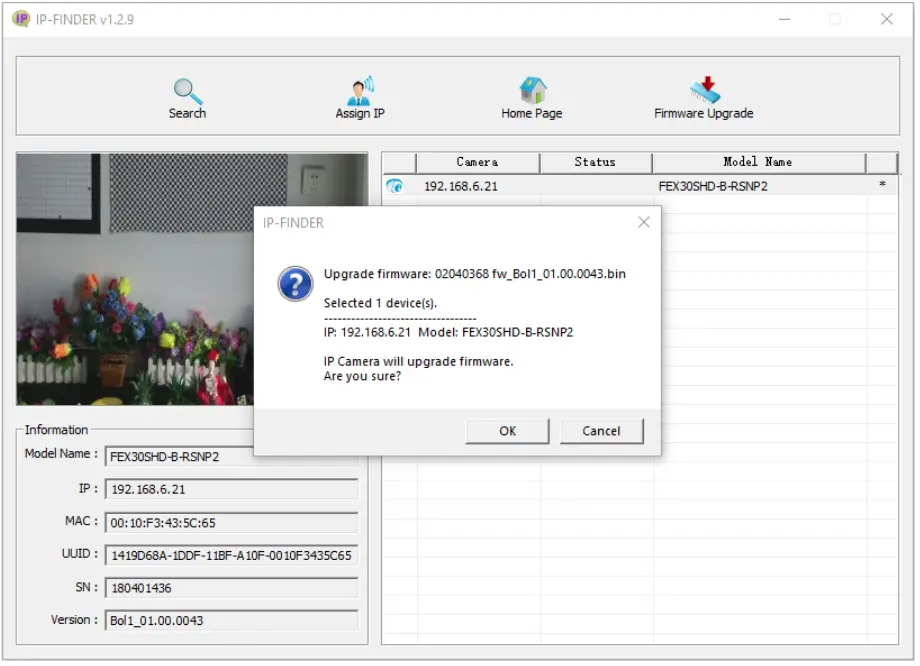
After all of steps are done, AP will pop up a dialog box window to show the information of your assigned camera. If all are confirmed well, click [OK] button to do the upgrading progress.

The following picture shows the upgrade is proceeding.
FAQ and Troubleshooting
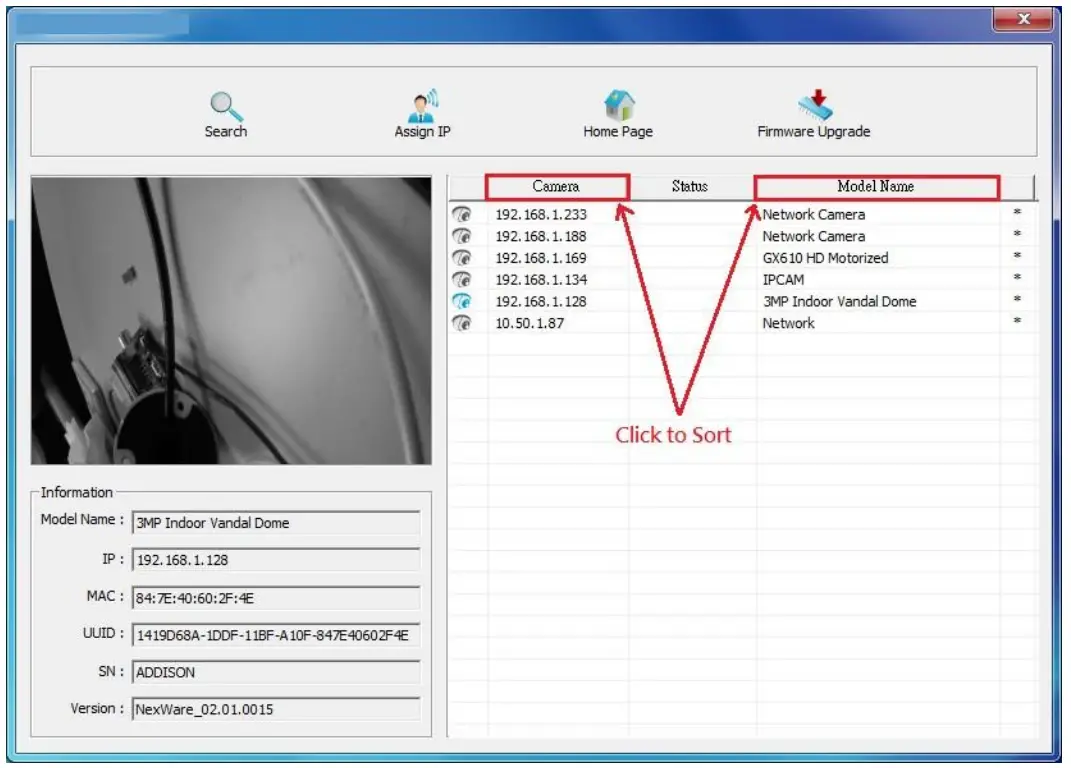 – A: User can click each header column such as “Camera” or “Model Name” to sort list.
– A: This is a conflicting issue in IP address. Please assign them to different IP address.
– Five situations.
– Situation 1: No star sign in “Device Mark” means device doesn’t support “Preview”.
– Situation 2: Camera is rebooting, please wait for a while…
– Situation 3: After discovering devices, user manually change the http IP address or port on camera web page. So, just click [Search] button to refresh device information again.
– Situation 4: Camera’s MJPEG stream is OFF. Please turn it ON for previewing image.
– Situation 5: User’s camera is out of local network. User could use the following the steps to append additional domain:
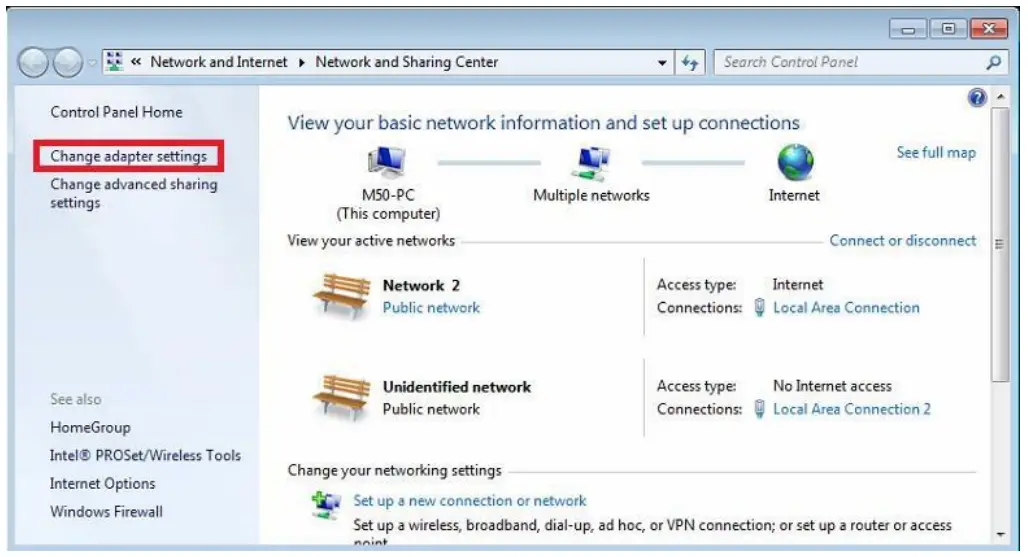

– Choose the “Internet Protocol Version 4 (TCP/IPv4)” on “Local Area Connection 2 Properties” panel.
– Click [Properties] button on “Local Area Connection 2 Properties” panel.
– Click [Advanced…] button on “Internet Protocol Version 4 (TCP/IPv4) Properties” panel.
– Click [Add] button to add IP address on “Advanced TCP/IP Settings” panel.
 – A:This firmware maybe has been modified from unknown reason or lost some information. Please choose the correct file and retry again.
 – A: Because this firmware is not the right version or not the right type for that device. Please choose the correct firmware to do the upgrade process.
– A: If preview region shows a offline icon(See figure). It means camera is offline, you need to search again to refresh the list to see this camera is still online or not. – If preview region shows the following figure. It means the camera maybe offline or login information is changed. Please check the camera online status or input the correct login username and password.
End of this document.


 Agilex Fpga Ip Design Example User Guide")

