![]()
AWNINGS
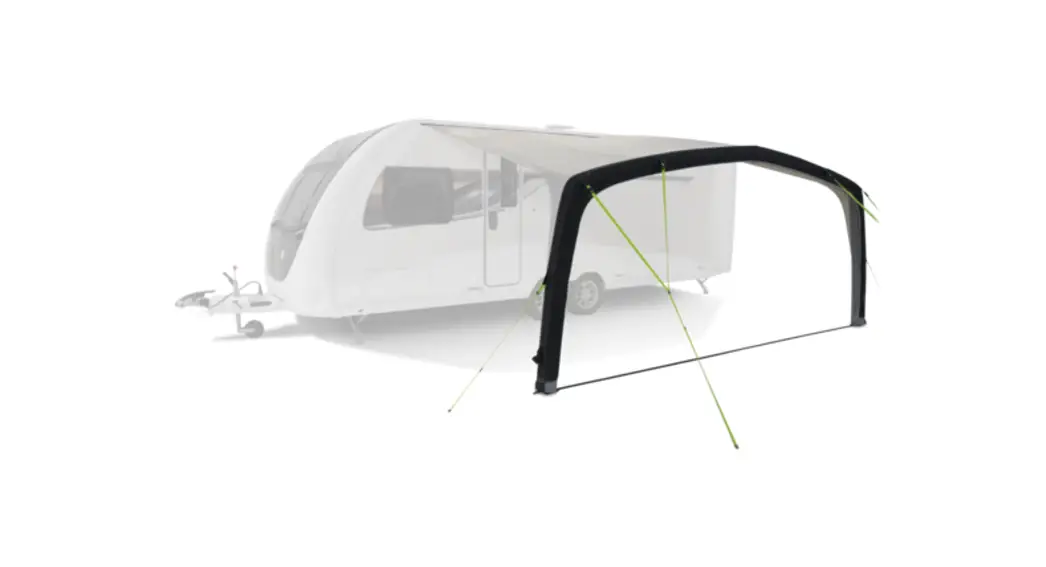
SUNSHINE AIR
SUITABLE FOR:
SUNSHINE AIR
300, 400, 500
User Guide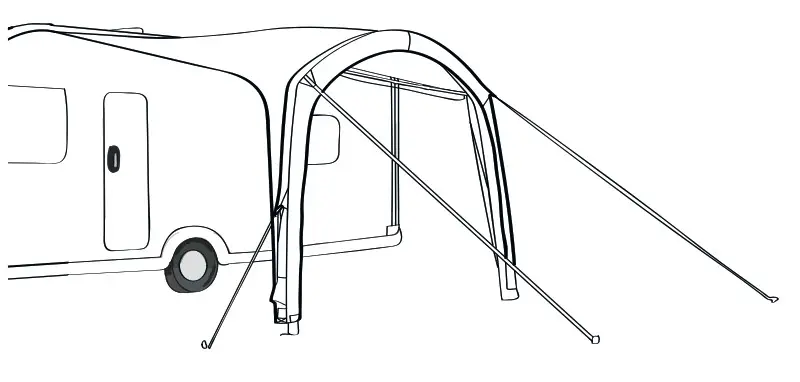

 Welcome
Thank you for purchasing your Dometic awning. Please read these instructions carefully before attempting set up and retain them for future reference. If used properly, your awning should give you years of trouble-free use. We recommend that your awning is insured against accidental and storm damage as this is not covered by the warranty.![]() IMPORTANT – PLEASE READ:
IMPORTANT – PLEASE READ:
Fabrics can be weakened by prolonged exposure to sunlight. Under normal holiday use your awning will give long service but use for extended periods in strong sunlight will soon cause deterioration. In those cases, it would be wise to use a site as shaded as possible. UV degradation is not covered under the warranty. The warranty does not cover products on permanent sites, displays, or for commercial purposes.
The awning material has a waterproof PU coating over its entire surface (except All-Season) and the main seams of your awning have been factory taped to help prevent leakage. Depending upon your expectations, it may be necessary to treat the remaining seams with a seam sealant. Seams treated with seam sealant cannot leak. Seam sealant should also be applied to areas
where the taping is damaged or has peeled away through wear and tear. It can also be applied to areas where a leak may have developed. Dometic seam sealant is available from your dealer.
The awning keder beading is sewn to the awning with a special waterproof sewing thread. This thread swells when wet to fill the needle holes but the thread needs to become wet several times before it is totally effective. This process is known as ‘weathering’ and it may take several soaking for the weathering to be fully effective. This area can also be treated with seam sealant.
![]() Your awning is designed for use in light to moderate weather. During very strong winds or snowfall, we recommend that you take your awning down. The awning is designed for touring use; it is not designed for seasonal pitch or commercial use.
Your awning is designed for use in light to moderate weather. During very strong winds or snowfall, we recommend that you take your awning down. The awning is designed for touring use; it is not designed for seasonal pitch or commercial use.
We recommend a trial run before using your awning for the first time. This will allow you to familiarise yourself with the awning, its set up and any limitations the awning may have for your particular use.
Set-Up
Slide the awning keder beading, on the rear of the awning roof (see Diagram 1), through the caravan awning channel until it is in your required position. The awning should be positioned on a horizontal part of the caravan (see Diagram 2).
Locate the deflation valves at the bottom of each of the AirPoles (3). Ensure that the deflation valves are closed by turning the tap clockwise 90° (see Diagram 3).
Locate the inflation valve on the awning (4). Unscrew the top cap and attach the pump nozzle (5). Start to pump (6).
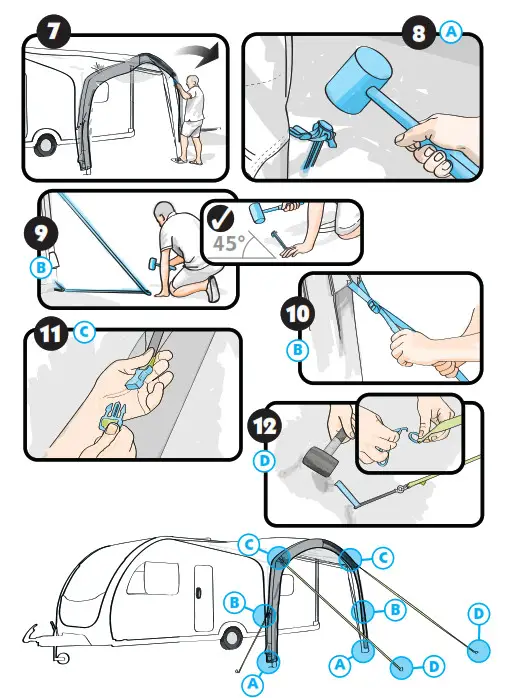
Once the awning has a good amount of air in it, pull the front of the awning outwards so that the AirPoles can assume their correct shape (7).
Pegging Point A: Peg the corners of the awning (8a). Each corner should be pegged vertically in-line with the top of the canopy, at an equal distance away from the caravan and in-line with each other.
Pegging point B: Loosen the quick pitch straps and peg them out diagonally from the corners (9b). Tighten the quick pitch straps once in position(10b).
Clip the storm straps into place (11c) and hook the pegging “O” ring onto the bottom of the strap (12d) and peg down using the provided steel peg.
Keep pumping until the ideal inflation pressure of 9 psi (0.62 BAR) is achieved. If necessary take a rest before adding more pressure.
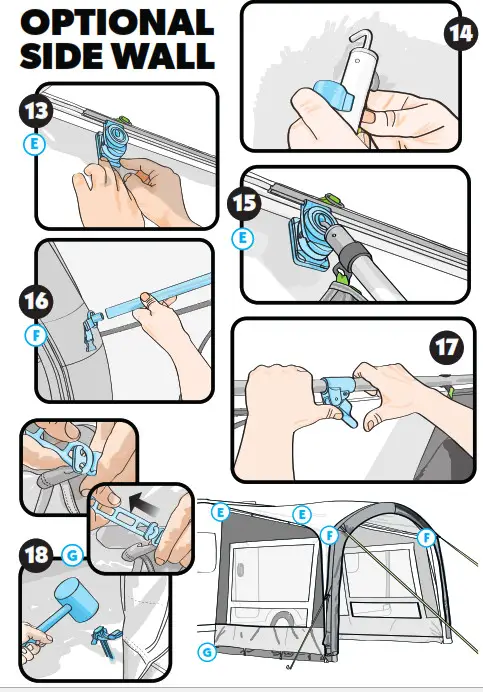
Optional Side Wall Set-Up
Attach the AccessoryTrack awning bracket to the AccessoryTrack placement located in the inside corners of your sunshine awning (13e).
Clip the hooks at the top of the side wall fabric to the long pole (14).
Place the hooked end of the pole into the AccessoryTrack awning bracket (15e) then push the open end of the pole onto the connection point inside the front corner of the awning (16f).
Use the locking mechanism (17) once in place to stabilize the pole and help keep sidewalls taut.
Attach the ladder pegging straps to the anchor points located at the bottom of the sidewalls, then start by pegging the rear pegging points of the sidewall (18g) slightly underneath your caravan.
Continue pegging the remaining pegging points of the sidewall.
Mobile living made easy.
![]()
| YOUR LOCAL DEALER dometic.com/dealer | YOUR LOCAL SUPPORT dometic.com/contact | YOUR LOCAL SALES OFFICE dometic.com/sales-offices |
A complete list of Dometic companies, which comprise the Dometic Group, can be found in the public filings of:
DOMETIC GROUP AB


