hama 00186357 LCD Thermometer
Contents hide
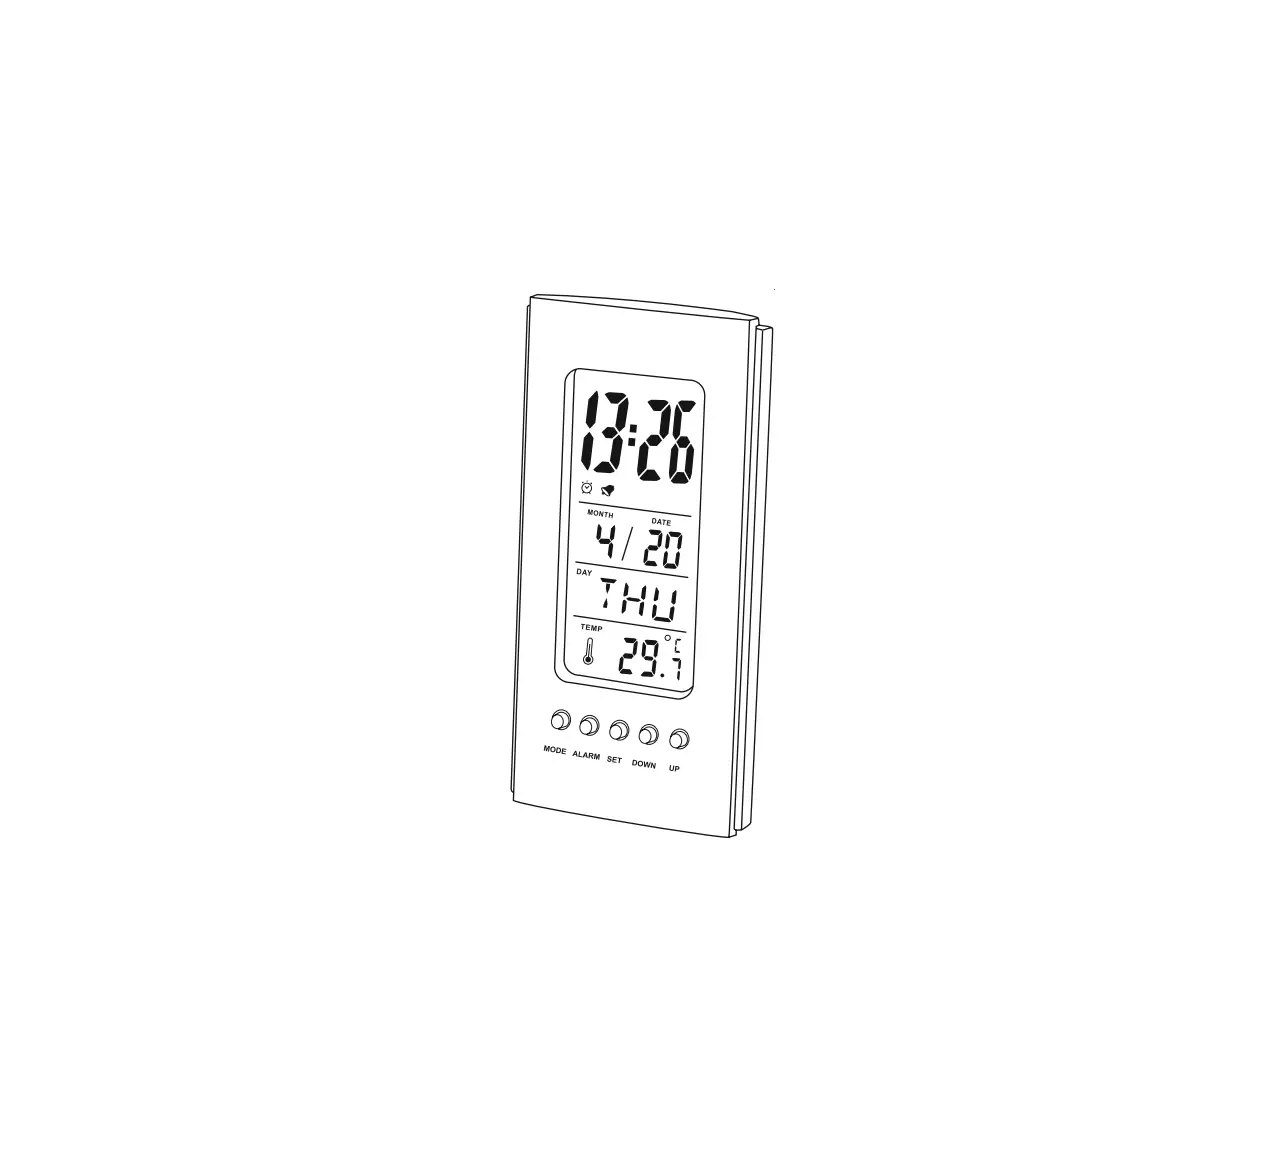
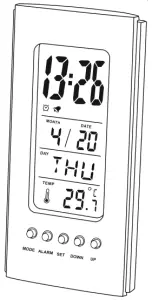
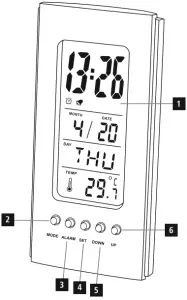
Controls and Displays
- Display
- MODE button
= switches display - ALARM button
= display alarm mode - SET button
= settings/confirms the setting/switches between °C and °F - DOWN button
= reduces the current set value / plays melody - UP button
= increase the current set value / activate/deactivate snooze function
Explanation of Warning Symbols and Notes
 | Warning This symbol is used to indicate safety instructions or to draw your attention to specific hazards and risks. |
 | Note This symbol is used to indicate additional information or important notes. |
Package Contents
- LCD thermometer
- 2 LR1130 button cell batteries, 1.5 V (already inserted)
- These operating instructions
Safety Notes
- The product is intended for private, non-commercial use only.
- Use the product for its intended purpose only.
- Do not use the product in the immediate vicinity of heaters or other heat sources or in direct sunlight.
- Keep this product, as all electrical products, out of the reach of children!
- Protect the product from dirt, moisture and overheating, and only use it in a dry environment.
- Do not operate the product outside the power limits given in the specifications.
- Do not use the product in moist environments and avoid splashes.
- Do not use the product in areas where the use of electronic devices is not permitted.
- Do not drop the product and do not expose it to any major shocks.
- Do not attempt to service or repair the product yourself. Leave any and all service work to qualified experts.
- Dispose of packaging material immediately according to locally applicable regulations.
- Do not modify the product in any way. Doing so voids the warranty.
| Warning – Batteries
|
Getting Started
Open the battery compartment and remove the contact breaker. Close the battery compartment cover.
Operation
| Note – Settings
|
Setting the date/time/time format
- After the batteries’ contact breaker is removed, the normal time is
displayed in 12-hour format and a melody signals that the product is ready for use. (Normal time mode) - Press the MODE button (2) to switch between the 12 and 24-hour formats. In the 12-hour format, PM is displayed before the time from noon to one minute before midnight.
- Use the UP button (6) or DOWN button (5) to select the desired format.
- Then press the SET button (4) to make the following settings in order:
• Hours
• Minutes
• Year
• Month
• Day - To select individual values, press the UP button (6) or the DOWN button (5) and confirm each selection by pressing the SET button (4).
- Press the SET button (4) to adopt the set value displayed and to skip.
Setting and using the alarm function
- In normal mode, press the MODE button (2) twice or the ALARM button (3) once to set the alarm function. The display shows ALARM.
- Then press the SET button (4) to make the following settings in order:
• Hours
• Minutes
• Alarm melody - To select individual values, press the UP button (6) or the DOWN button (5) and confirm each selection by pressing the SET button (4).
- Press the SET button (4) to adopt the set value displayed and to skip.
- Press the MODE button (2) repeatedly to switch between the various modes.
- The alarm function is activated and ALARM is displayed in normal mode
- If the alarm is triggered, the selected alarm melody sounds.
- Press any button to stop the alarm. Otherwise, it will stop automatically after 1 minute.
| Note
|
| Note – Snooze function
|
Birthday reminder
- Press the MODE button (2) three times in normal time mode to go to the
birthday reminder settings. - Then press the SET button (4) to make the following settings in order:
• Hours
• Minutes
• Year
• Month
• Day - To select individual values, press the UP button (6) or the DOWN button (5) and confirm each selection by pressing the SET button (4).
- Press the SET button (4) to adopt the set value displayed and to skip
- Press the MODE button (2) repeatedly to switch between the various modes.
| Note – Birthday reminder The reminder plays a birthday song at the specified time. This alarm melody cannot be changed and continues to play for 5 minutes. |
Timer function
- Press the MODE button (2) four times in normal time mode to go to the timer function settings.
- Press the SET button (4). The hours display begins to flash.
- Press the DOWN button (5) or the UP button (6) to select the hour and confirm your selection by pressing the SET button (4). The minutes display begins to flash.
- Repeat the process to set the minutes.
- After the selection has been made and confirmed by pressing the SET button (4), the count-down timer is activated.
| Note – Count-down timer
|
Temperature Function
- Temperature measurement starts automatically as soon as the batteries are inserted. The display shows the current ambient temperature.
- In normal time mode, press the SET button (4) to set Celsius or Fahrenheit as the unit of measurement.
Music function
- In normal time mode, press the DOWN button (5) to activate the music function.
- The activated music function is indicated by a symbol in the display. popular melodies automatically play on repeat.
- Once they are playing, you can press the DOWN button (5) to deactivate the music function.
Care and Maintenance
Only clean this product with a slightly damp, lint-free cloth and do not use aggressive cleaning agents. Make sure that water does not get into the product.
Warranty Disclaimer
Hama GmbH & Co. KG assumes no liability and provides no warranty for damage resulting from improper installation/mounting, improper use of the product or from failure to observe the operating instructions and/or safety notes.
Technical Data
| Power supply | 2 LR1130 button cell batteries |
| Measuring range, Temperature | Measuring range (indoors): 0°C to +50°C |
Hama GmbH & Co KG
86652 Monheim/ Germany
Service & Support
![]() www.hama.com
www.hama.com![]() +49 9091 502-115
+49 9091 502-115