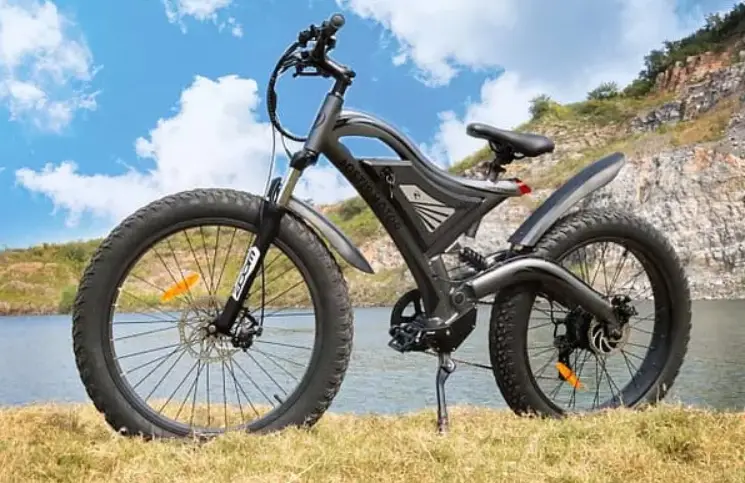
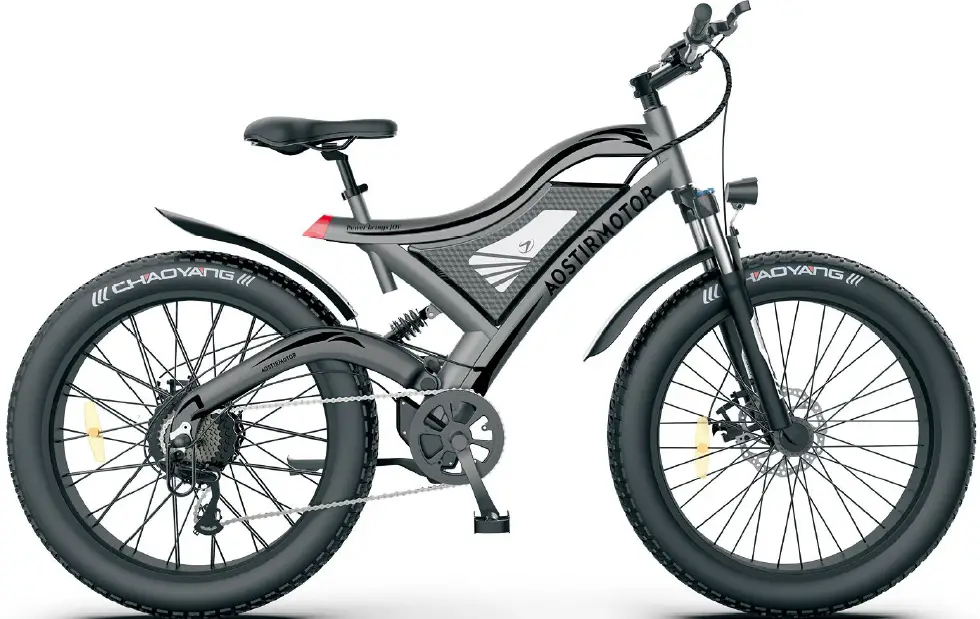
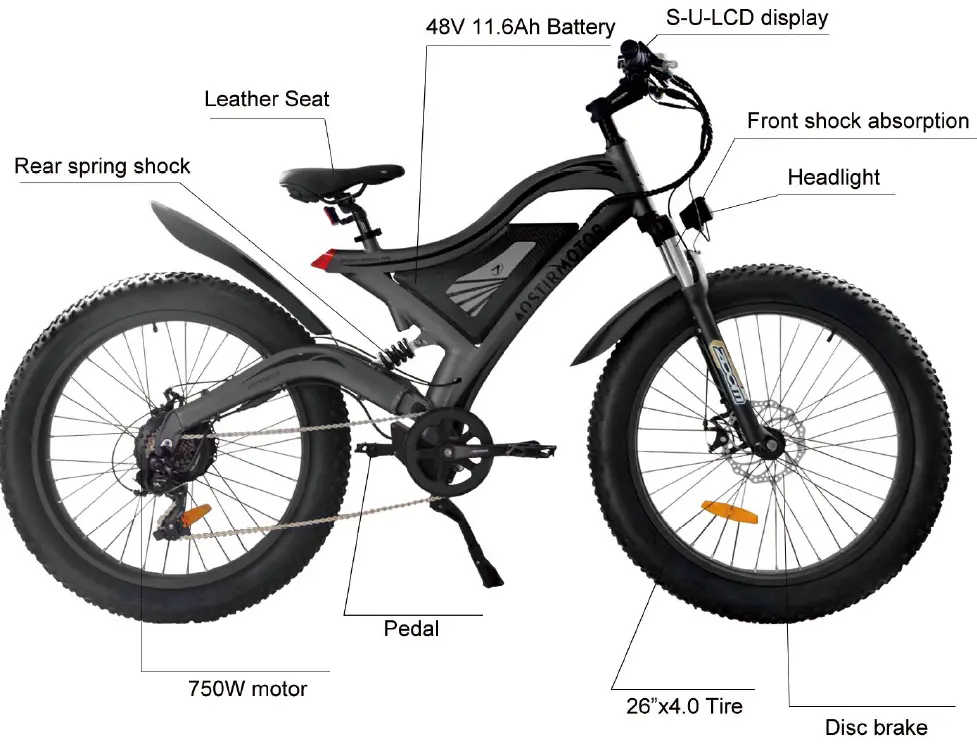
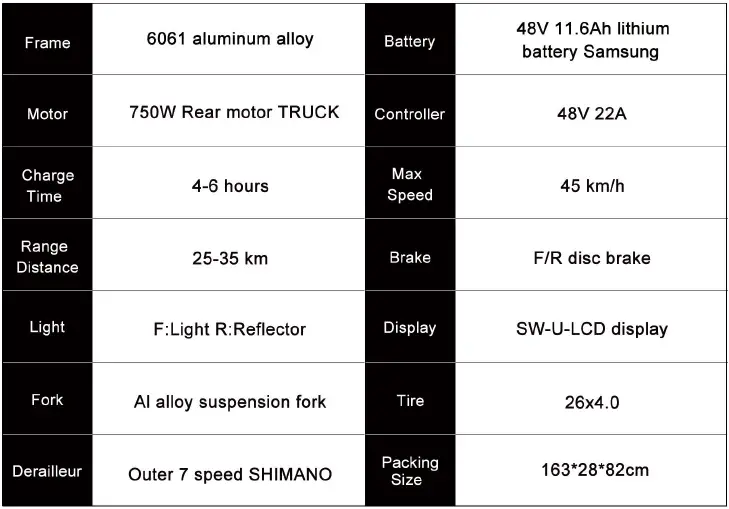
AOSTIRMOTOR S18 750W Electric Bike
Product Description
Safety Notice
To Ensure Your Safety, Make the Following Functional Checks Before Driving:
- Testbrakesystem,throttle,aOOpower system
- Tife pressure$houldbe a t30p$i.
- Checkfront wheel lug-nuts, securelyti ghtenbeforeeveryride
- Balterycharge level-found onside ofbattery
- Braking systema djustmentand fr?operation.
Installation Instructions
- Open your package.
- Take out the tool box.
- Take out the bicycle from the package and put it on a soft surface to avoid scratches.
Cut the tie that secures the front wheel to the side - Remove the protective foam.
- Open the accessory kit and remove the tool kit
- Invert the bicycle.
- Remove the large fixing bolt on the front fork.
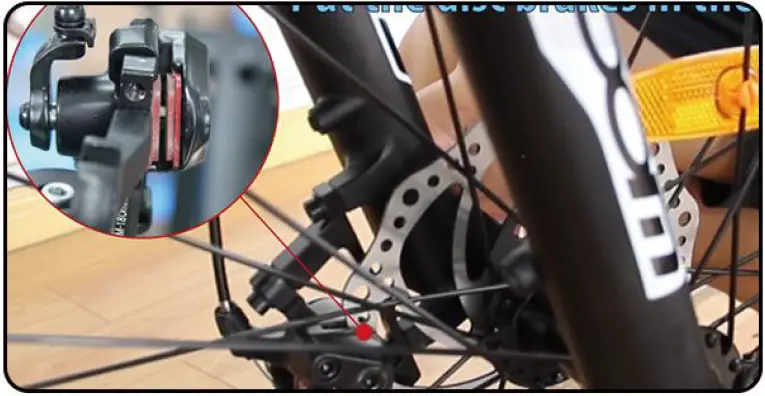
- Put the front wheel on the front fork and place the disc brake pad on the front wheel in the middle of the disc brake caliper.

- Use the supplied 15mm flat tool to tighten the two bolts.
- Tie the key to the handlebar clamp, cut the zipper, and then use the Allen wrench in the tool kit to remove the clamp.
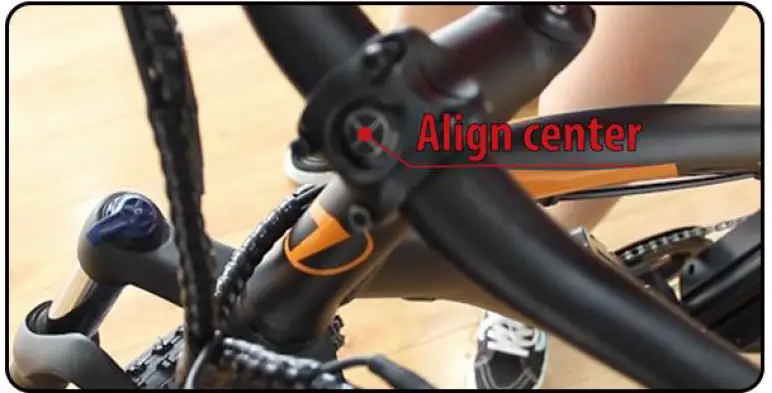
- Place the handlebar in the middle position, install the rod clamp and tighten the screws with the included Allen wrench.

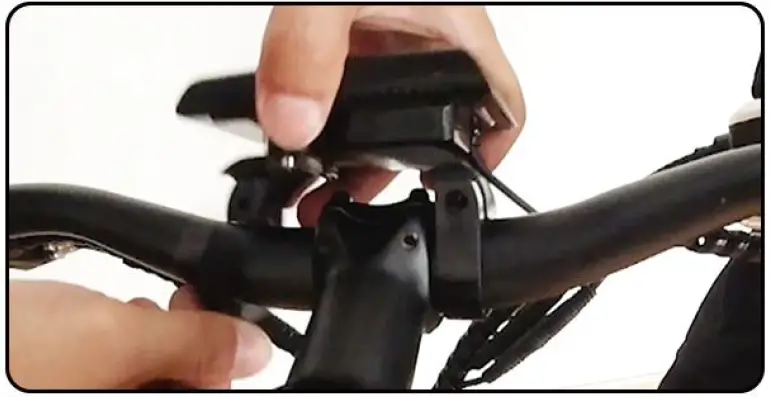
- Install the LCD-display on the handlebar ,
 tighten the screws, and connect the green connecting wire
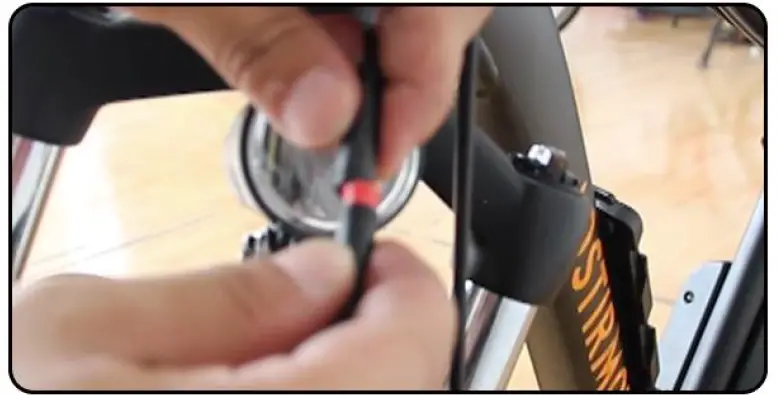
- Grasp the bicycle light and unscrew the lens. Then, remove the plastic insulator, re-tighten the lens, and then connect the red cable,
 and connect the bicycle light to the screw above the front fork.
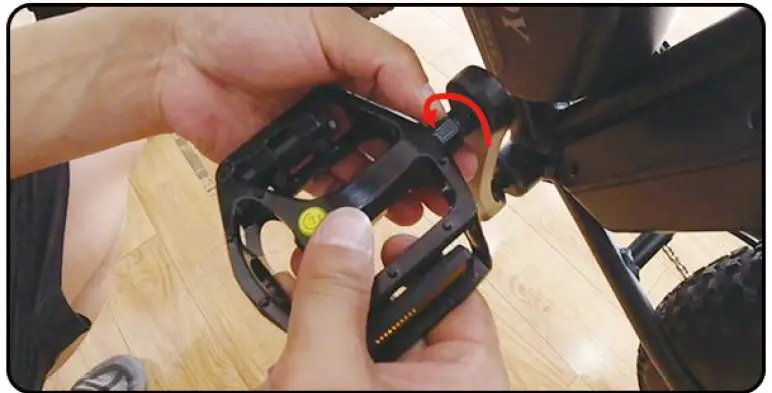
- Install the pedal. The right pedal rotates clockwise ,and the left pedal rotates counterclockwise.
 NOTE: Pedal mark “L” means left and “R” means right.
 - Vertical bicycle
- Push the seat into the column, fix it in the desired position, tighten the screws, and ther fix it.
- Installation is complete.When connecting meters, headlights, brake circuit breakers, handlebars, etc., please align them and do not install violently.
 tighten the screws, and connect the green connecting wire
 and connect the bicycle light to the screw above the front fork.
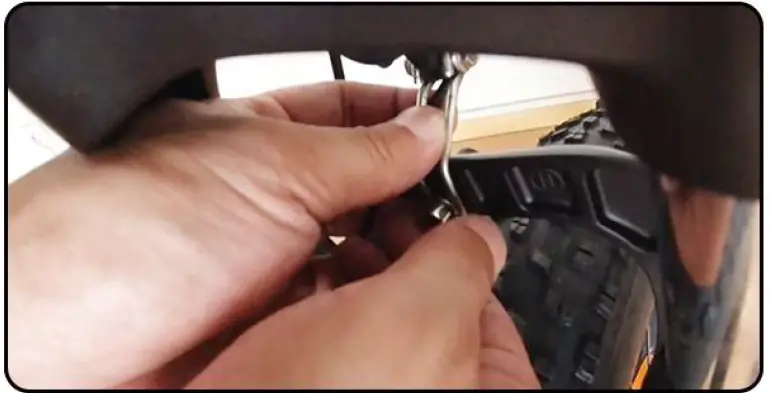
 and the left pedal rotates counterclockwise.
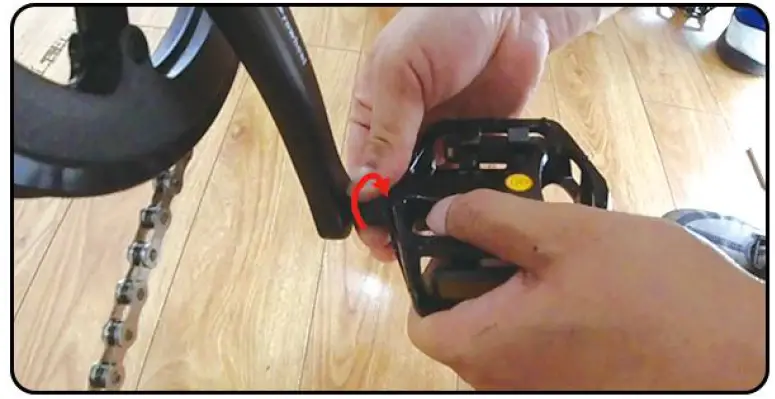 NOTE: Pedal mark “L” means left and “R” means right.
Battery Installation & Maintenance
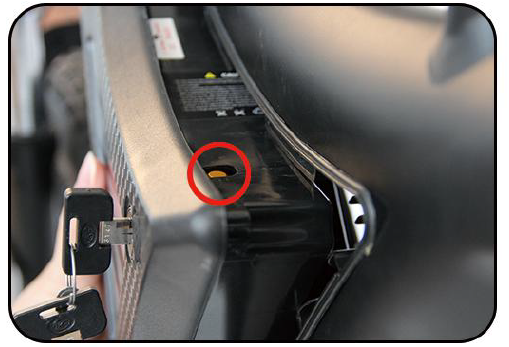
- Please check the situation of the lock core before installation, Step 2 and Step 3 for details.

- Turn your key counterclockwise to make the lock cylinder downward.

- As shown in the left picture, align the slider

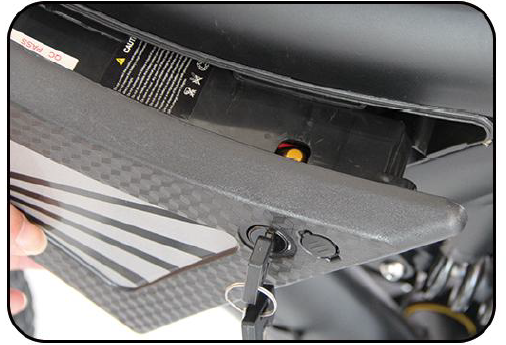
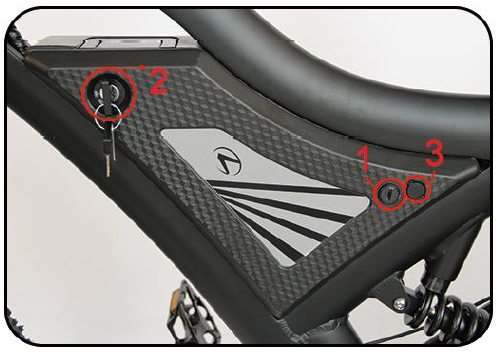
- There are two lock positions, the locking principle is the same, and the other lock position can also control the switch of the battery.
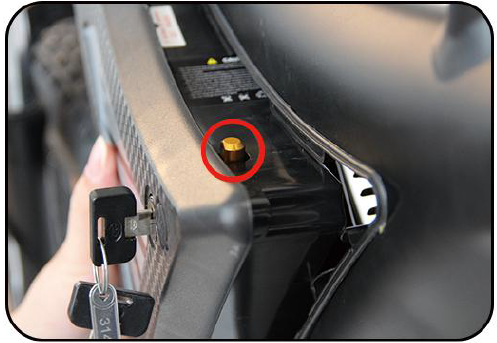
The No. 3 port is the charging port
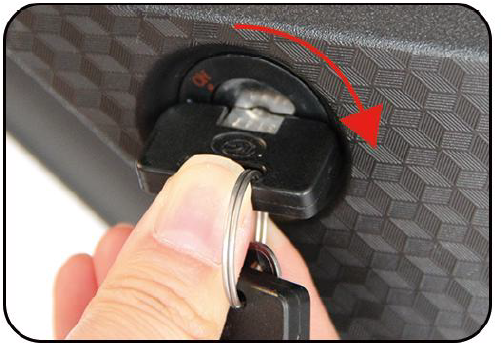
- Turn it clockwise to lock your battery.

- Press down the key and turn it counterclockwise to unlock your battery.


- When not using the battery for a long time, please charge it 1-2 times every month
- Please keep the key properly. If your key is lost, we can provide a new key according to the nameplate number on the key
- Please keep the battery environment dry, for example, do not stay in the rain for a long time
- Please use a universal meter to test the battery attenuation regularly
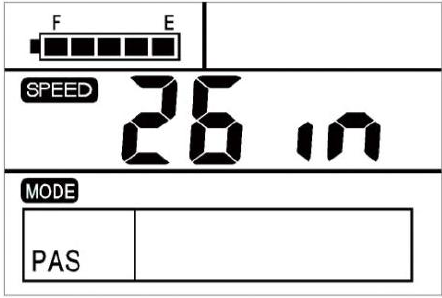
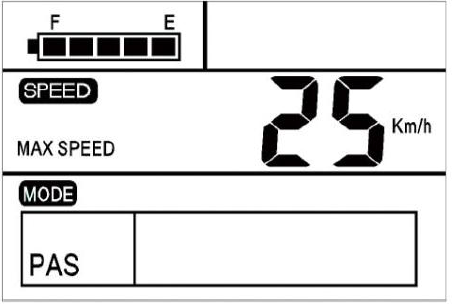
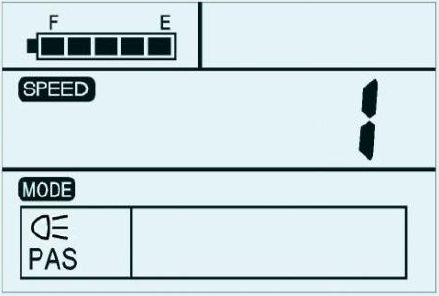
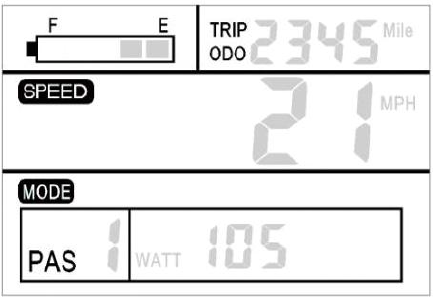
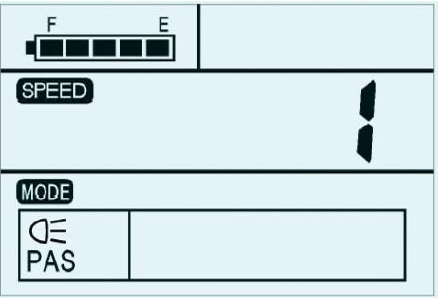
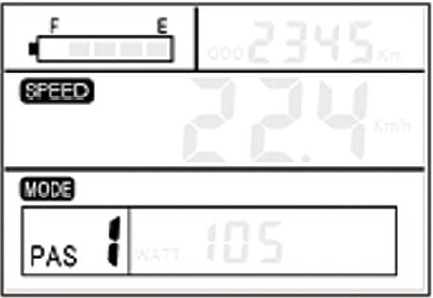
Display Use & Maintenance
SW-LCD display
OPEN:Mode/M 1.5 seconds long press
CLOSE:In standby mode, long press Mode/M for 3 seconds
SETTING: After booting, press UP+DOWN for 2.5 seconds(exit in the same way)
The detailed settings are as follows:(on the boot state)
Wheel Diameter Setting:
- UP or DOWN
- 16-28inch(default 26inch)
- Select, Mode Confirm

Speed Setting:
- UP or DOWN
- 12-45 KM/H
- Select, Mode Confirm

Light Setting:
- UP or DOWN
- 1-3 (Brightness)
- Select, Mode Confirm

MPH/KM Setting:
- UP or DOWN
- MPH or KM/H
- Select, Mode Confirm


SPEED Setting:
- UP or DOWN For 3 seconds
- MAX/AVG/NOW
- Select, Mode Confirm

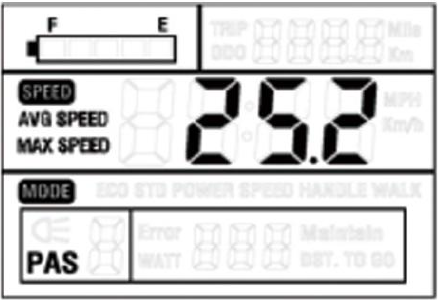
RANGE Setting:
- PRESS Mode/M
- Riding mileage / accumulated total mileage

Front Light Open:
- Exit Settings
- UP FOR 3 Seconds
- Front lamp will work
- Default: 1

Power Shift Setting:
- Exit Settings
- UP/DOWN
- 1-5 (Power)
- Default: 1

Cruise Mode Setting:
- Exit Settings
- PRESS DOWN FOR 3 Seconds
- Default: 6KM/H

- Ride your bike in a safe way. Don’t hit or knock the display.
- Keep away from the bad environments when use, such as downpour, large snow-flakes and solarization.
- Try not to use in under-voltage condition.
- The screen will gets dark along with the temperature reduction when temperature below -10 °C. The screen will return to normal when the temperature rises again
Controller Use & Maintenance
- Battery negative connection line
- Battery positive connection line
- Phase line
- Tail light wire
- Integrated main line
- Power sensor line
- Motor Hall plug wire

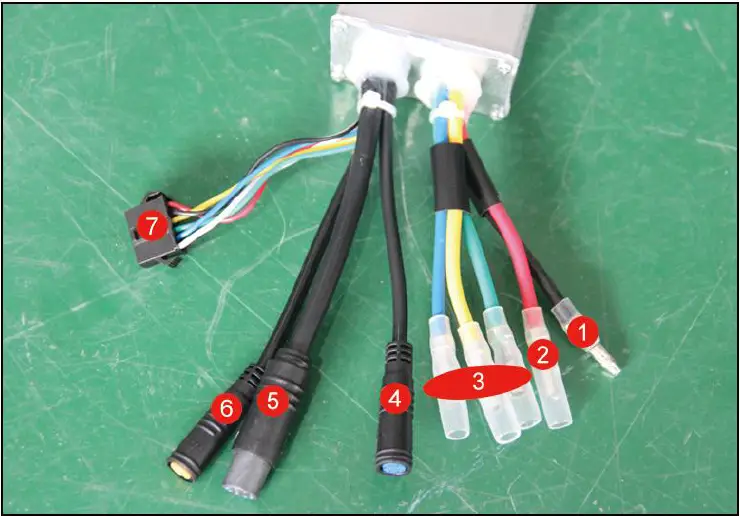
- Please be careful not to get water into the controller box
- When the bike does not work:
- Check the connection of controller cables;
- Try to restart or Replace the controller;
- Contact us with email
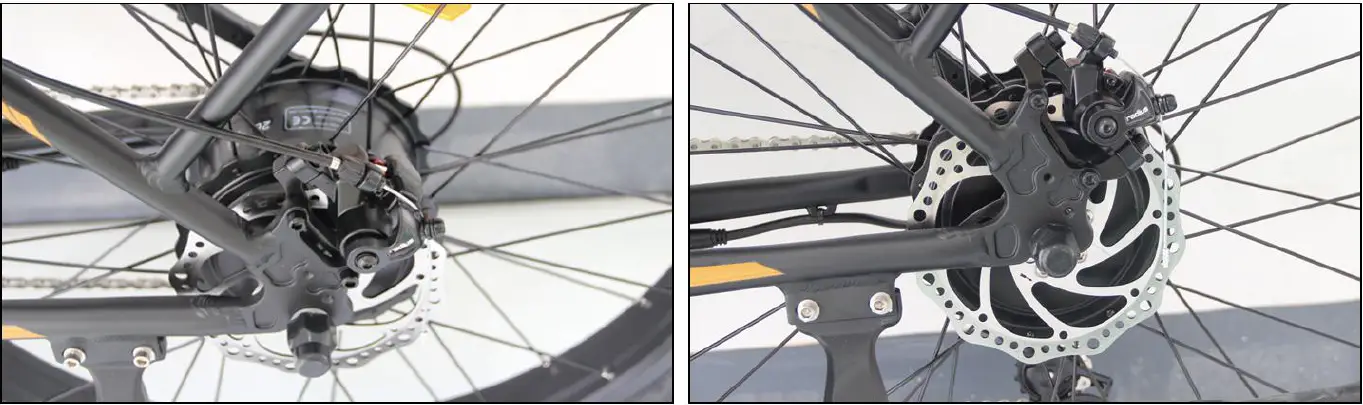
Motor Maintenance
- Please check the integrity of motor blocking piece regularly.
- Please check the integrity of cable before and after riding.
- Please check the integrity of motor shell before and after riding.
- Please do not use the motor in extreme environments, and do not let the motor work in water.
- When you find the motor power is insufficient, please get out of the bike and not force it.

FAQ
- Is there a power usage or battery gauge on the bike?
Yes, there is a full screen LCD display. There is also an additional LED battery gauge on the side of the battery pack. 2x the info! - Is there a switch to prevent accidental starting?
Yes, there is an on/off button on the battery pack. The brake levers also come standard with a safety power stop switch built in. - How do I lock it up and what can I do to help minimize the chance of it being stolen?
AOSTIRMOTOR Bike has some great anti-theft features, including a locking battery rack with keys to keep bike safe, and rear wheel which is bolted down reduce the chances to be stolen.
Most standard U-locks and cable locks work fine on our AOSTIRMOTOR Ebike. - Does it work in the rain?
The components are all waterproof and work very well in wet conditions,
But we do not suggest to use our ebike in a rain day. We suggest that you should keep your bike parked indoors and keep him in a dry situation.
POWER BRINGS JOY
www.AOSTIRMOTOR.com
[email protected]


