
![]() XLITE WIRELESS SOFTWARE
XLITE WIRELESS SOFTWARE
USER MANUAL
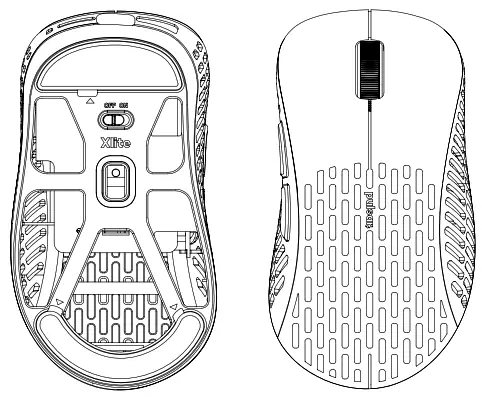

| 1. Mouse Key Setting 2. DPI Setting 3. Macro Setting | 4. Language setting 5. Info 6. battery status | 7. Restore 8. Export the profile 9. Import the profile |
 A Debounce Settings
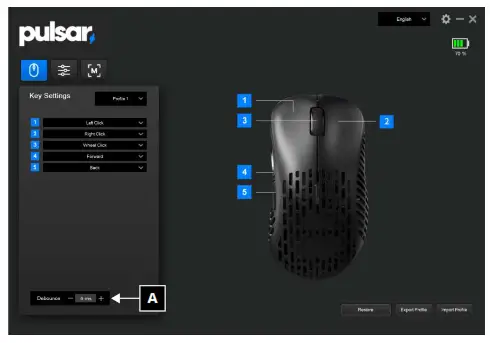 A Debounce Settings
Adjust the mouse’s debounce time.
Debounce time is basically the amount of time that the switch doesn’t register another click.
A higher debounce time prevents double clicks but increases input delay.
Adjustable from 0 to 30ms (milliseconds).

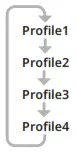
B Profile Setting
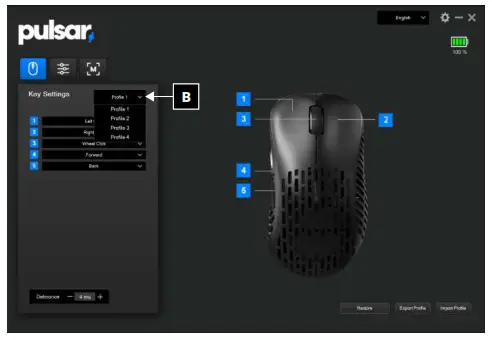
Open the profile list and select the profile to set. You can save and use up to 4 profiles.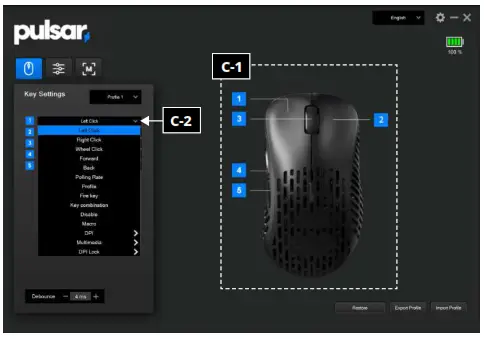
C Key Setting
C-1 First, check the number of the button you want to change.
- Left-click
- Right-click
- Wheel button
- Side button 1
- Side button 2
C-2 Select the button you want to change and set the desired key.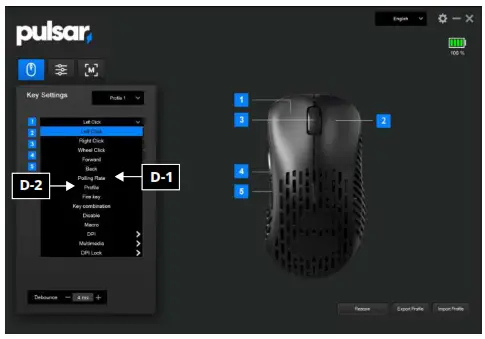
D Key Description
![]() D-1 Polling Rate
D-1 Polling Rate
Changes polling rate in loop
125Hz-250Hz-500Hz-1000Hz.
 D-2 D-2 Profile
Changes Profile.
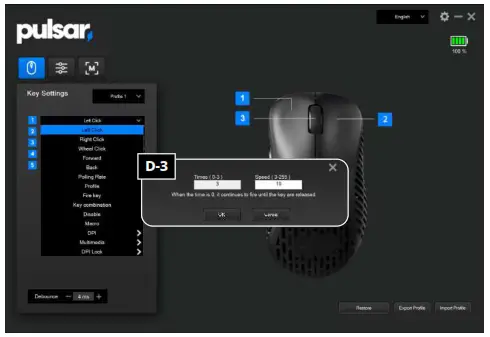
D-3 Fire Key
(in-game function) Fires a bullet repeatedly at a set interval (ms).
The number of shots can be set from 0-3.
If set to 0, the shot will continue to fire while the button is pressed.
The speed can be set (3-255) in milliseconds.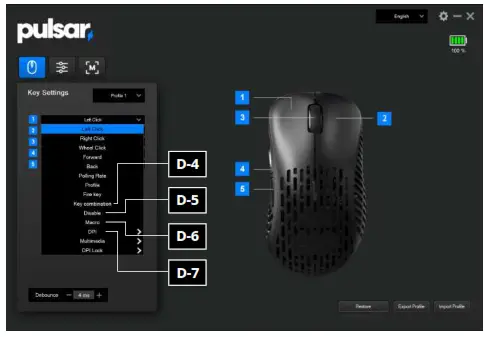
D-4 Key combination
you can set the key from 1 key to a maximum of 3 combinations.
D-5 Disable
Deactivating the key. D-6 Macro
Select already made macro.
D-7 DPI
Change DPI in Loop (4 stages) and you can set this on the DPI page.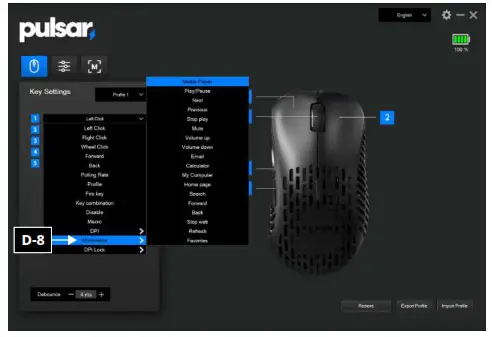
D-8 Multimedia
You can set it as a multimedia key shortcut.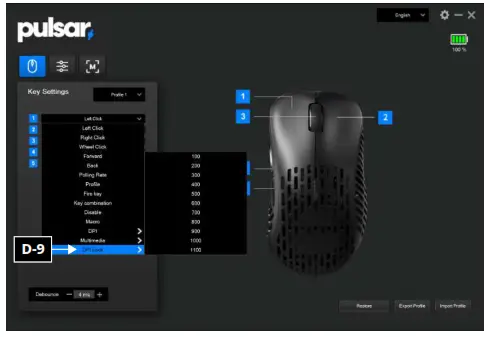
D-9 DPI Lock
DPI can shift to the selected DPI and stay while you are pressing holding the key.
You can choose from 100~1100dpi and this function is useful when playing FPS games in Sniper mode.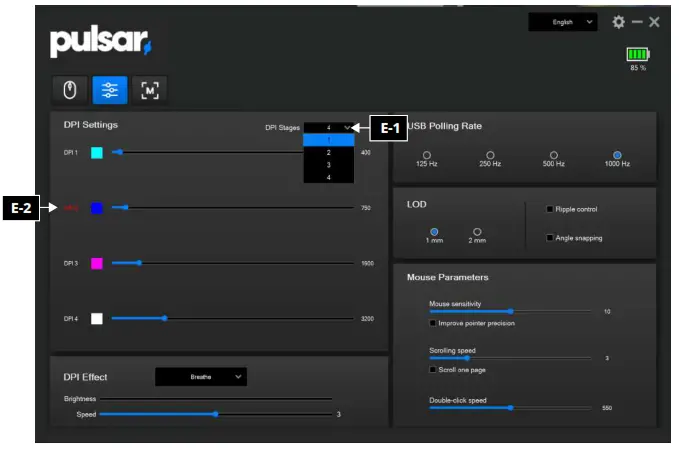
E DPI Settings
E-1 DPI Stages
Up to 4 Stages.
E-2 DPI Select
You can select DPI by clicking DPI1, DPI2, DPI3, or DPI4. The selected DPI is in red color.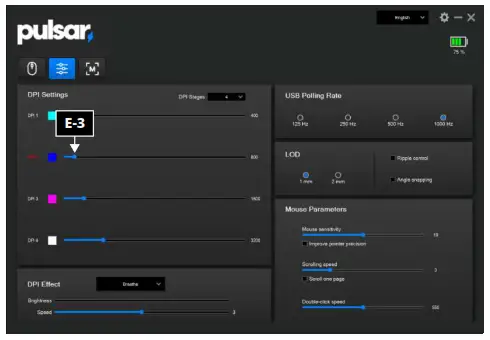
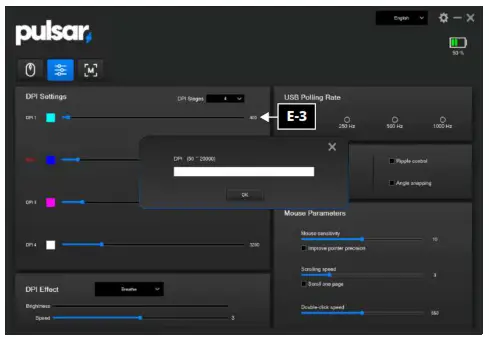 E-3 DPI Input
You can either use the scroll bar to adjust DPI or Double Click the number to pop up the window and type in your desired DPI.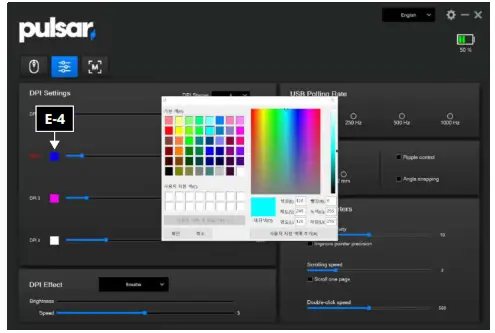 E-4 DPI Light Color Setting
Double click the color box to change the color of the LED.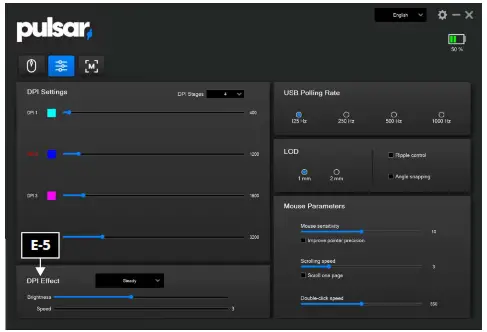 E-5 DPI Effect
You can choose from 3 effects (steady, breathe, Off)
If you choose steady, you can adjust the brightness.
If you choose to breathe, you can adjust the speed.
If you turn off the LED, the battery will last longer.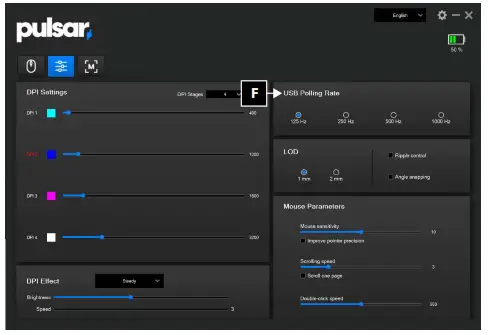
F USB Polling rate
Choose polling rate.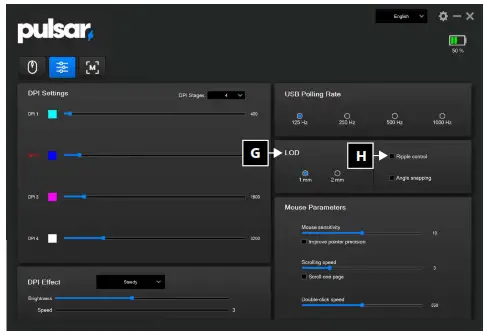
G LOD
LOD = Lift off distance
LOD is a sensor detecting distance. If you set 1mm, the sensor will
detect lift up to 1mm height from the surface.
H Ripple control / Angle snapping
- Ripple control: Line smoothing in order to reduce jitters.
- Angle snapping: Predicts when you want to draw a straight line and then corrects your mouse movements so it goes in a straight line.

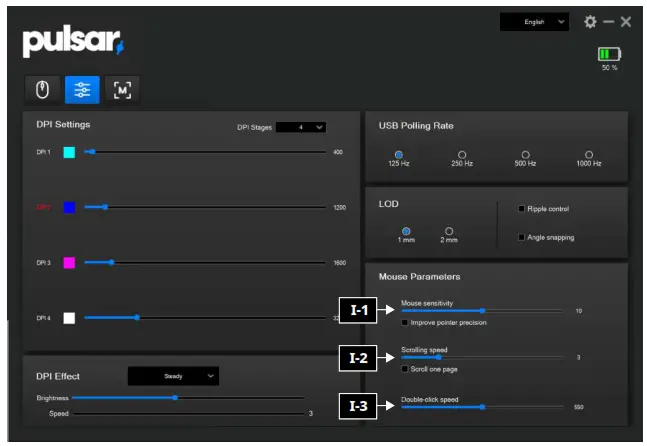
I Mouse Parameters
I-1 Mouse sensitivity
Adjust the mouse sensitivity. It can be adjusted from 1 to 20.
I-2 Scrolling speed
Adjust the scroll speed. It is adjustable from 1 to 10.
I-3 Double-click speed
Adjusts the double-click speed. Adjustable from 900 to 200.
J Macro Settings
J-1 New Macro
Create a new macro.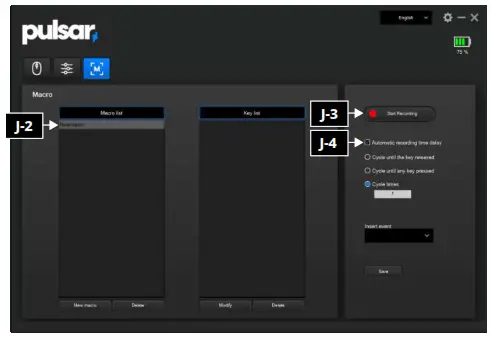 J-2 Choose macro
Click macro.
J-3 Start Recording
Record macro.
J-4 Automatic recording time delay
Automatic recording time delay Check: Automatically detects the delay between macros and inserts them.
Automatic recording time delayUncheck: Inserts macros without the delay between macros.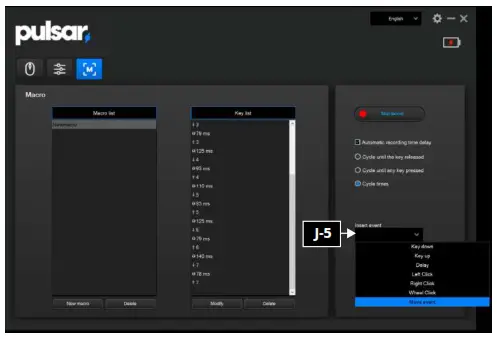 J-5 Insert event
If you want to make a more accurate macro, use insert event and precisely make your macro.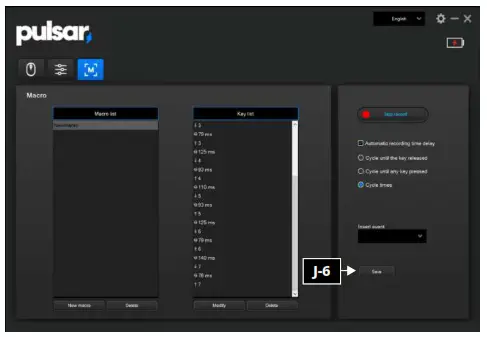 J-6 Stop record
Press stop record and press save.
Thanks for choosing Pulsar.
If you have any questions or comments, please do not hesitate to contact us.
[email protected]


