![]()
Original Instructions
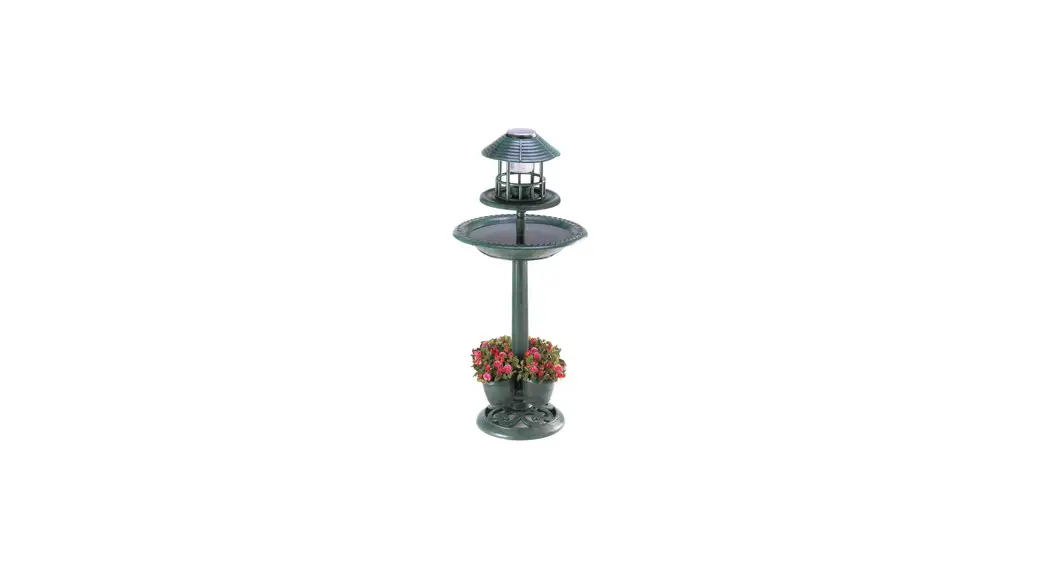
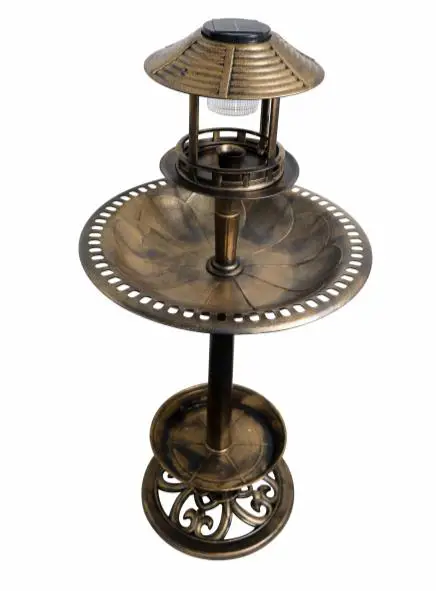
Bird Bath with Solar Light and
Planting Bowl
Article No. 94 00 85
Assembly
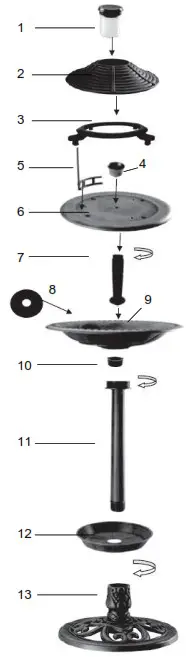
| 1 Solar Lamp 2 Roof 3 Roof Bracket 4 Feeding Trough 5 Roof Support (4x) 6 Feeder Base 7 Interim Rod | 8 Rubber Seal 9 Water Basin 10 Plastic Nut 11 Pole 12 Plant Pot 13 Base 14 Safety Pegs (w/o Fig.) |
Safety Notes
![]() Please note the following safety notes to avoid malfunctions, damage or physical injury:
Please note the following safety notes to avoid malfunctions, damage or physical injury:
- The article is not a toy. Do not allow children to play with the article.
- This manual belongs to the product. It contains important notes on operating the unit. Please pass it on along with the unit if it is handed over to a third party!
- Dispose of the packaging materials carefully. Plastic bags may become a deadly toy for children.
- Treat the solar module as a glass product. Do not continue to use the solar light if the solar module becomes damaged. Repair work must be done by a qualified service technician.
- Do not disassemble the unit or attempt to repair it yourself. It does not contain parts serviceable by you. In the case of questions or problems, turn to our customer support.
| Batteries do not belong in household garbage. For battery disposal, please check with your local council. |
Technical Data
Before first Use
Remove all parts from the packaging. Dispose of packaging material or store it in a safe place. There is risk of suffocation for small children!
Assembly
For assembly, please observe the exploded view on page II.
Place the rubber seal (8) in the water bowl (9) and screw the plastic nut (10) hand-tight onto the interim rod (7).
- Find a suitable place for the article. Make sure that direct sunlight can shine on the solar module.
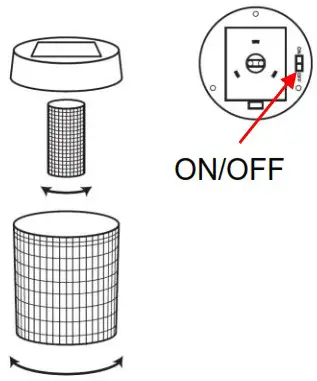
- Charge the solar module before using it for the first time. For doing this, unscrew the lamp cover by turning it counterclockwise.
Open the battery compartment and remove any transport protection strips. - Set the ON/OFF switch to the “ON” position The solar module must be charged for at least 6 hours in direct sunlight.
Note: The amount of energy absorbed by the solar module depends on the installation location, geographical region, weather and season. On cloudy days, there may not be enough sunlight for a full charge, so the solar light will not shine for long time.
After charging the solar module for the first time, you can either leave the ON/OFF switch to the position ON or turn it off and turn it on again only when needed. - Fill the feeding bowl with birdseed (not included).
- Fill the water basin with water.
- Put some plants into the planting bowl (not supplied).

Replace the Battery
Replace the battery when the solar light no longer illuminates even after several days of direct sunlight.
- Remove the lamp cover and open the battery compartment.
- Set the ON/OFF switch to the “OFF” position.
- Place one new rechargeable battery of the same type and dimensions (1.2 V HR6/AA 600 mAh NiMH) in the battery compartment.
- Set the ON/OFF switch to the “ON” position to charge the battery.
Make sure that at least 6 hours of direct sunlight can shine on the solar module.
Maintenance and Cleaning
- Clean the solar module regularly with a dry cloth to ensure that sufficient sunlight can be absorbed by the solar module. Treat the solar module like a glass product.
- Do not immerse the solar lamp into water.
- Clean all parts of the bird bath with a clean, damp cloth. Do not use scratching, abrasive or aggressive cleaning agents to avoid damaging the surfaces.
- Change the water in the water bowl regularly
Technical Data
| Total Height | 105 cm |
| Diameter Water Basin | 50 cm |
| Water Basin Capacity | 5 Litters |
| Weight approx. | 3 kg |
| Battery needed | 1x NiMH 1.2 V HR6/AA 600 mAh |
| Degree of Protection for Solar Light | IP44 |
EC Declaration of Conformity
We, the Westfalia Werkzeugcompany, Werkzeugstraße 1, D-58093 Hagen, declare by our own responsibility that the product
Bird Bath with Solar Light and Planting Bowl
Article No. 94 00 85
is according to the basic requirements, which are defined in the European Directives and their amendments.
2011/65/EU
Restriction of the Use of certain hazardous Substances in electrical and electronic Equipment (RoHS)
2014/30/EU
Electromagnetic Compatibility (EMC)
EN IEC 55015:2019+A11, EN 61547:2009
The technical documentations are on file at the QA department of the Westfalia Werkzeug company.
Hagen,29 of December, 2022

Thomas Klingbeil,
QA Representative
Customer Services
| Westfalia Werkzeugstraße 1 D-58093 Hagen Telefon: (0180) 5 30 31 32 Telefax: (0180) 5 30 31 30 Internet: www.westfalia.de | Westfalia Moosham 31 A-4943 Geinberg OÖ Telefon: (07723) 4 27 59 54 Telefax: (07723) 4 27 59 23 Internet: www.westfalia-versand.at | Westfalia Wydenhof 3a CH-3422 Kirchberg (BE) Telefon: (034) 4 13 80 00 Telefax: (034) 4 13 80 01 Internet: www.westfalia-versand.ch |
Disposal
 Dear Customer,
Please help avoid waste materials.
If you at some point intend to dispose of this article, then please keep in mind that many of its components consist of valuable materials, which can be recycled.
Please do not discharge it in the rubbish bin, but check with your local council for recycling facilities in your area.
© Westfalia 12/22


