![]()
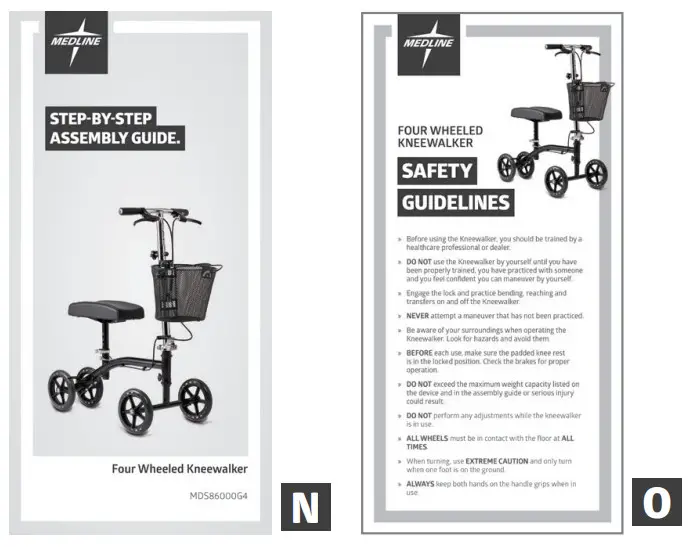
STEP-BY-STEP
ASSEMBLY GUIDE.
Four-Wheeled Kneewalker
MDS86000G4
What’s Included:

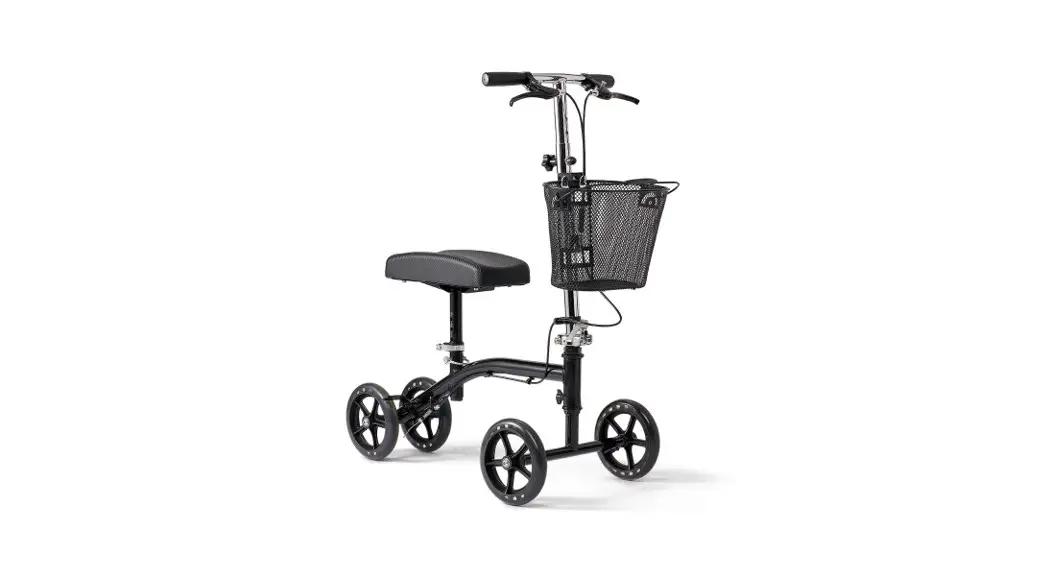
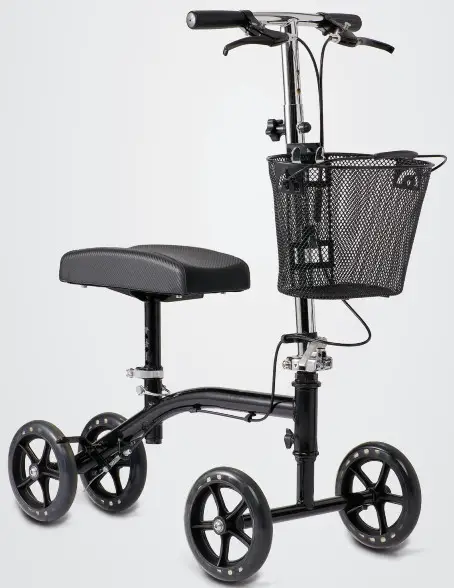
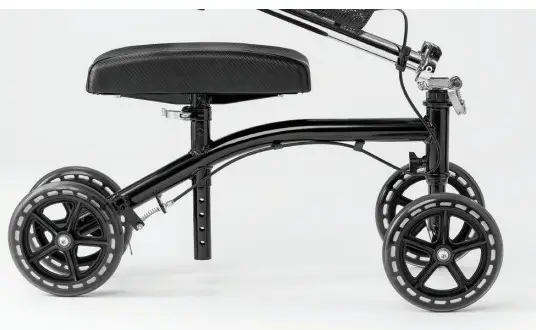
| A Hand Brakes B Hand Grips C Brake Cables D Handle Height Adjust Knob E Handle Bar | F Tiller Cam Lock G Kneepad H Brake Blades I Rear Wheels J Front Wheels | K Seat Cam Lock L Seat Height Adjust Pin M Storage basket N Step-By-Step Assembly Guide O General Warnings |
This guide applies to the following knee walker:
| Item Number | Description | Frame Color | Weight Capacity |
| MDS86000G4 | 4 wheel knee walker with padded foam knee rest and front storage basket. | Black | 300 lbs (136 kg) |
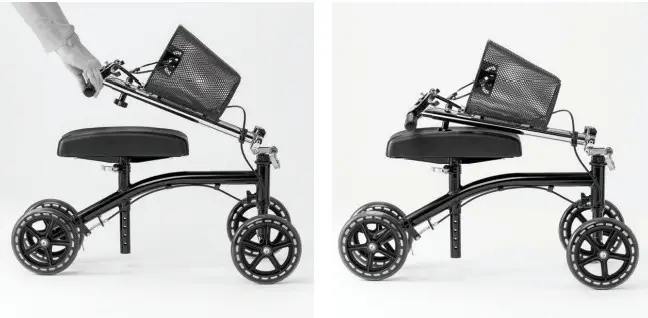
First: Open and secure handle bar
- Remove contents from carton.
- Unfasten the hook and loop strap that holds the tiller down to the kneepad.
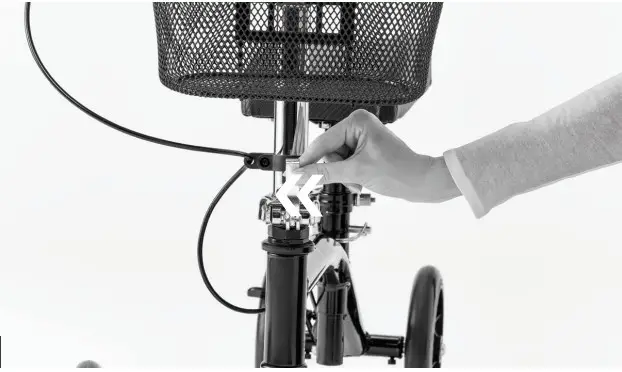
- Raise the tiller to the upright position. The tiller will snap into position and lock when it reaches its full upright position.


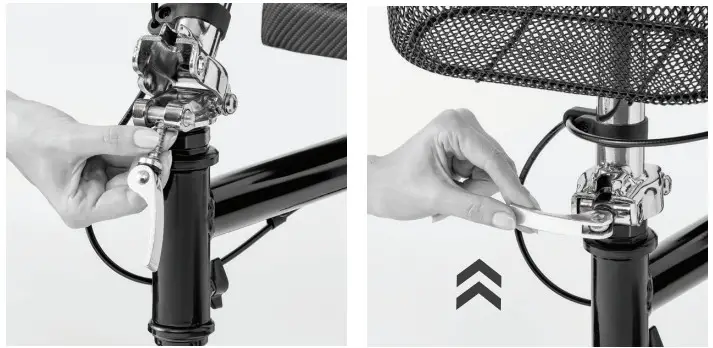
- Lift Tiller Cam Lock and rotate it up and over the Tiller flange. Then press down to secure.
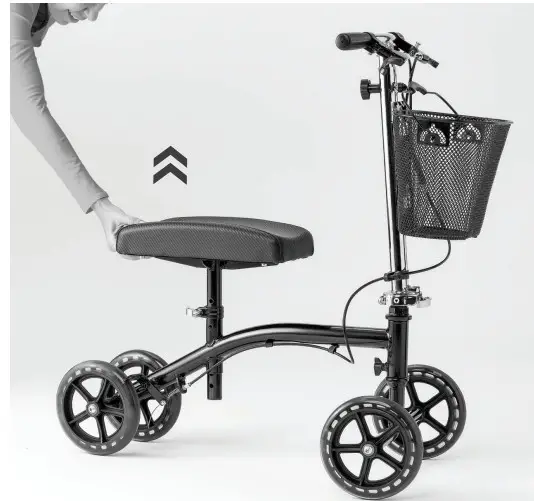
Next: Set Desired Kneepad Height
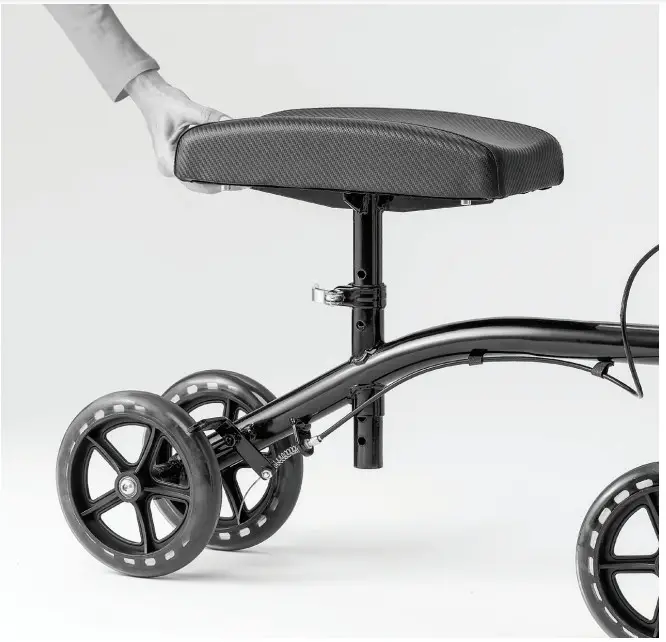
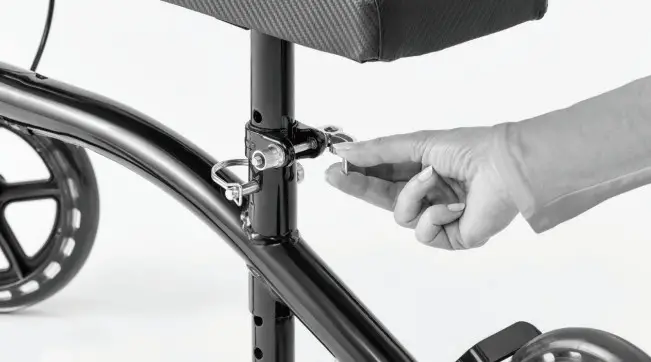
- Raise the Kneepad to desired height.

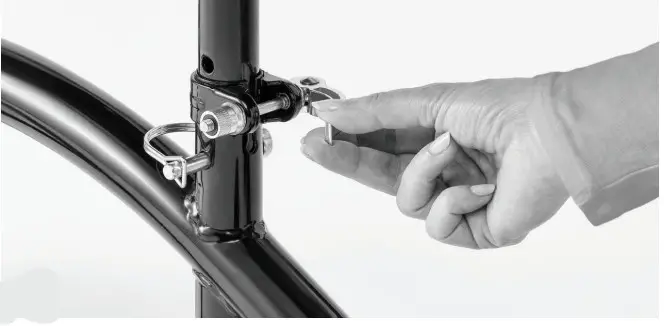
- Insert the Seat Height Adjust Pin into the hole. Lock the pin in place by sliding the loop over the protruding end of the pin.

- Insert the wheel stem into the tube, making sure to align the hole in the wheel stem with the hole in the tube.
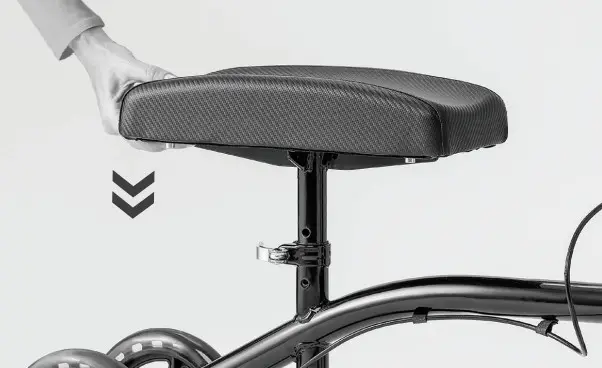
Adjusting The Knee Pad Height
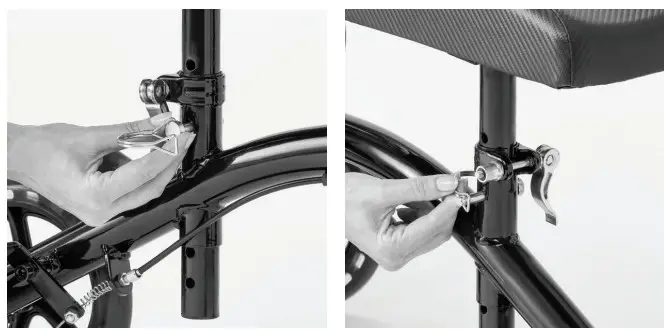
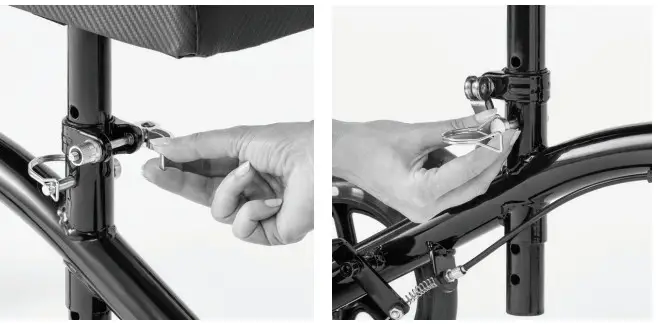
- Loosen the Seat Cam Lock under the knee pad and remove locking pin.

- Adjust pad to the desired height.
- Reinstall the locking pin and secure it in place with the retainer tab.
- Next tighten the Seat Cam Lock to lock pad in place.
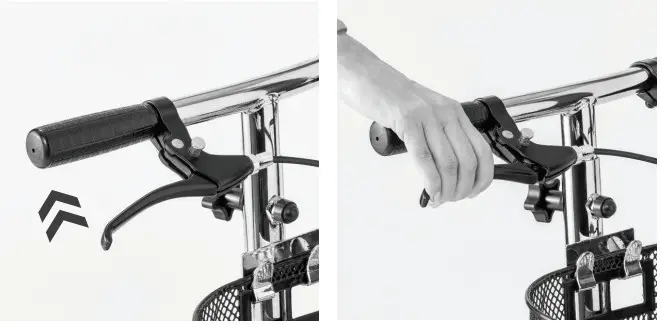
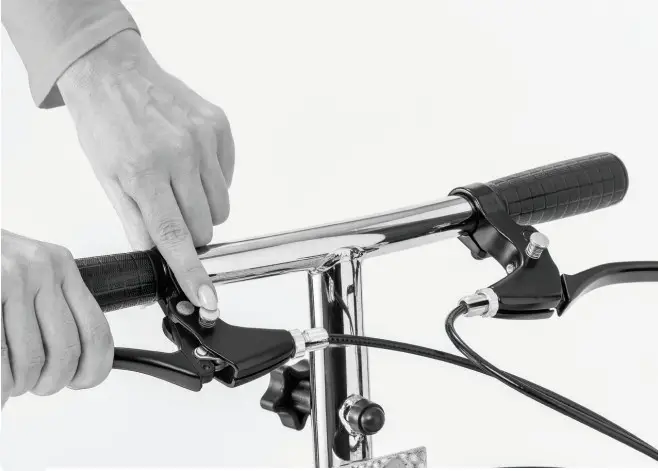
Now: Using the Hand Brakes
- To apply the brakes, simply pull one or both of the hand brake levers with your fingertips toward the hand grip. Either lever will operate the brake by itself.

- To lock the brake, squeeze and hold one of the hand brake levers to the Hand Grip and push and hold down the spring-loaded push button (located on top of brake). Release the hand brake lever. When done correctly, the push-button with remain down and the hand brake lever will be locked in place. Rear wheels should not be able to rotate.

- To release the brake, pull the lever towards the hand grip. Push pin will pop up automatically.
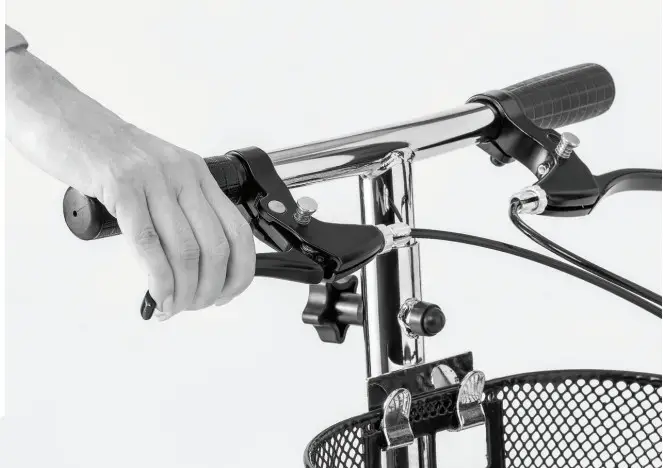
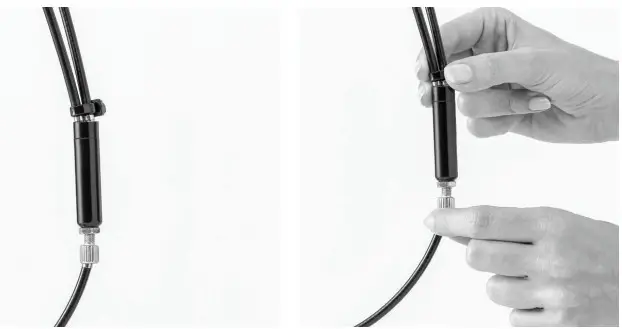
Next: Adjusting the Hand Brakes
For minor adjustment use the brake adjuster located on the front of the tiller.
- Turn the thumbscrew counterclockwise to tighten the brake or clockwise to loosen the brake. When done, tighten the adjustment nut
back to the brake adjuster housing without turning the thumbscrew.
- If further adjustment is required, apply the same method of adjustment at the lower cable adjuster above the brake.
- As you adjust the cable thumbscrew and the adjustment nut away from each other the brakes will tighten, and as you adjust them closer the brakes will loosen.
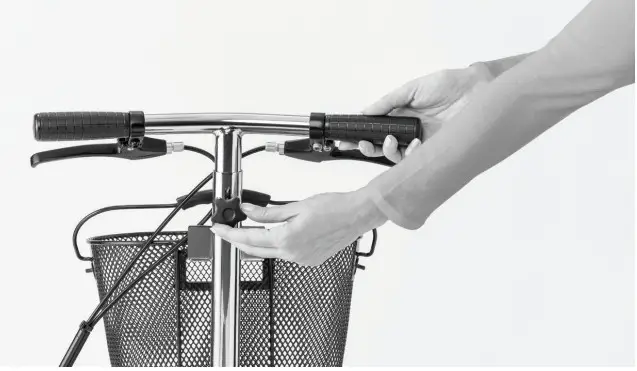
Finally: Adjust Handle Height
- To adjust the handle height, loosen the adjustment screw on the tiller below the handle by turning it counterclockwise until it can be removed.
- Adjust the hand grip to the desired height and reinstall the adjustment screw by turning it clockwise until it is tightened.
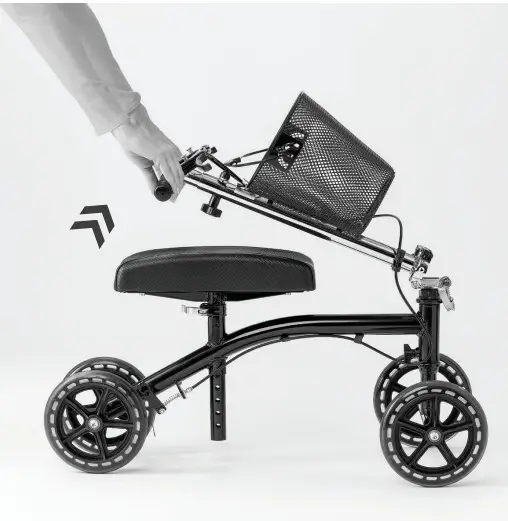
To Fold the Kneewalker - Release the Seat Cam Lock and kneepad height adjustment pin.

- Lower the knee pad all the way.

- Lift Tiller Cam Lock.

- Slide assembly to the side until the tiller is disengaged.

- Fold the tiller down until it rests on the knee pad.
MEDLINE | MDS86000G4 | PIC-00311 (Rev: 10-10-19)


