![]() TOP CUISINE
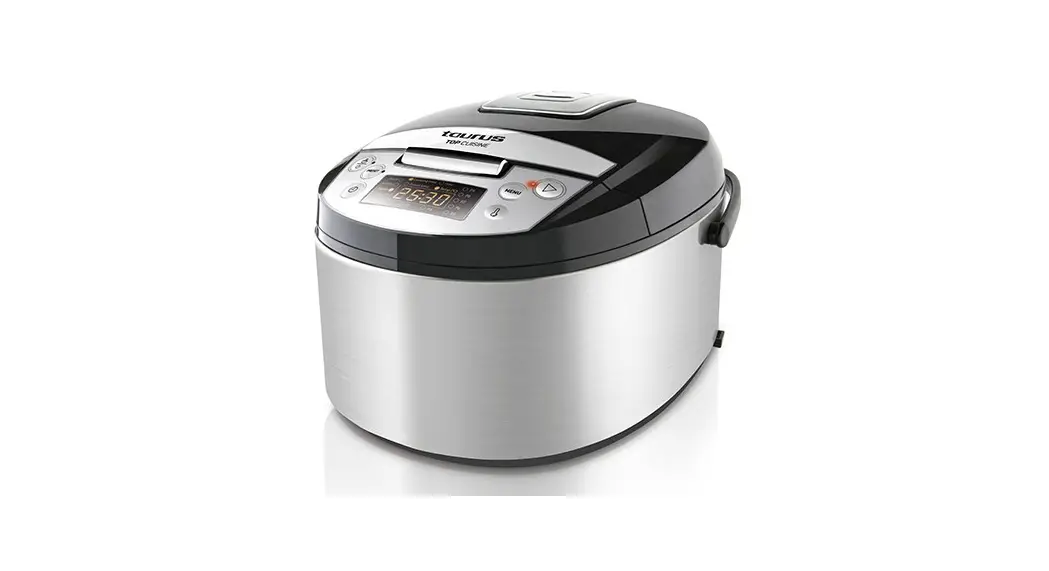
TOP CUISINE
Multi-cooker

 PANEL DE CONTROL
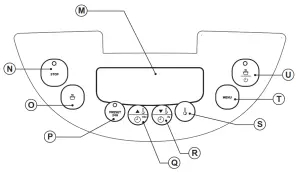
CONTROL PANEL
MULTI-COOKER TOP CUISINE
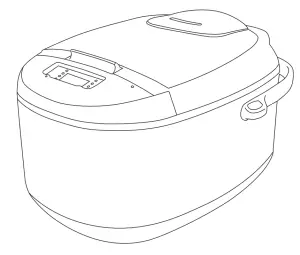
| DESCRIPTION | CONTROL PANEL |
| The Main unit B Lid C Removable non-stick inner pot D Control panel E Lid release button F Steam vent G Carry handle H Power cord I Spatula J Spoon K Steam basket | L Measuring cup M Digital display N Stop button O Keep warm button P 24h timer programming button Q Hours/temperature increase selection button R Minutes/temperature decrease selection button S Temperature selector T Function selector U Start button |
USE AND CARE:
– Fully extend the appliance’s power cable before each use.
– Do not use the appliance if the inner pot is not properly fitted.
– Do not use the appliance if the accessories attached to it are defective. Replace them immediately.
– Do not use the appliance if the inner pot is empty.
– Do not use the appliance if the on/off switch does not work.
– Do not move the appliance while in use.
– Use the appliance handle/s, to catch it or move it.
– Do not use the appliance if it is tipped up and does not turn it over.
– Do not turn the appliance over while it is in use or connected to the mains.
– To keep the non-stick treatment in good condition, do not use metal or pointed utensils on it.
– Do not force the appliance’s work capacity.
– Respect the MAX and MIN levels.
– Disconnect the appliance from the mains when not in use and before undertaking any cleaning task.
– This appliance is for household use only, not professional, industrial use.
– Store this appliance out of reach of children and/or persons with physical, sensory, or reduced mental or lack of experience and knowledge.
– Do not store the appliance if it is still hot.
– Do not store the appliance in areas where the temperature could be lower than 2ºC.
– Do not expose to extreme temperatures or strong magnetism.
– Keep the appliance in a dry, dust-free place, out of direct sunlight.
– Before each use, check that the valve is not blocked.
– Liquids heated in this appliance may boil violently, take care when handling the liquid container.
– Only use heat-resistant utensils. The spatula and ladle supplied with this appliance cannot withstand high temperatures.
INSTRUCTIONS FOR USE
BEFORE USE:
– Make sure that all the product’s packaging has been removed.
– Before using the product for the first time, clean the parts that will come into contact with food in the manner described in the cleaning section.
– Make sure that the inner pot is correctly positioned on the heating plate, otherwise, errors may occur.
– Prepare the appliance according to the function you wish to use:
USE:
– Extend the cable completely before plugging it in.
– Ensure that the electronic connector is properly attached to the appliance.
– Connect the appliance to the mains.
– The digital display will illuminate and a beep will sound indicating that the product is ready to operate.
– Select the appliance function desired.
– Press the function selection button (T) as many times as necessary so that the icon representing the desired function flashes on the digital display.
– In each function, the digital display will show the time with which it will work. In all programs, you can adjust the operating time according to the table that appears at the beginning of the recipe book. If you want to adjust the operating time, press the time selection button (Q or R) until the screen shows the time you want, depending on the variable time range assigned to each function and the range of minutes stipulated in the table at the end of this manual.
– The MULTIFUNCTION and SOFRITO functions also allow the adjustment of the operating temperature. Press the temperature selection button (S) until the display shows the desired temperature.
– Press the start button (U) and a beep will sound indicating that the product has started working.
– The MULTIFUNCTION, SOFRITO, and P8 functions will start to deduct the time when the selected temperature is reached.
MULTIFUNCTION MODE
– You can use this program to adjust the time and temperature in a range that allows you to adapt the appliance operation to your recipe.
– We recommend that you start off with the preset programs and, once you have more experience in the operation of the appliance, you can then try out your own time and temperature combined- tions using the MULTIFUNCTION mode.
– WARNING: this function is programmed to start counting the working time after the appliance reaches the selected temperature.
– Once the selected time has elapsed, the appliance will emit acoustic signals indicating that the cooking time has expired.
SOFRITO (SAUTÉ) FUNCTION
– This program is ideally suited to sautéing food.
– Once the cooking time has ended, the appliance switches to the keep warm function automatically, the indicator LED on the stop button (N) lights up. If you want to stop the keep warm function, press the stop button(N).
– Once the selected time has elapsed, the appliance will emit acoustic signals indicating that the cooking time has expired.
– CAUTION: this function is programmed to start to count the cooking time from the time at which the appliance reaches the selected temperature.
– The keep-warm function will automatically activate when the selected time expires and is limited to 1 hour.
PAELLA FUNCTION
– This program is ideally suited to making paellas.
– Once the cooking time has ended, the appliance switches to the keep warm function automatically, the indicator LED on the stop button (N) lights up. If you want to stop the keep warm function, press the stop button(N).
– WARNING: this function is programmed to start counting the working time after the appliance reaches the selected temperature.
– Once the selected time has elapsed, the appliance will emit acoustic signals indicating that the cooking time has expired.
– The keep-warm function will automatically activate when the selected time expires and is limited to 1 hour.
P1 FUNCTION
– This program is ideally suited to making cakes and pastries.
– Grease the inner pot with a little butter or oil.
Put the ingredients into the pot or the previously
prepared cake mix, depending on the recipe.
– Once the cooking time has ended, the appliance switches to the keep warm function automatically, the indicator LED on the stop button (N) lights up. If you want to stop the keep warm function, press the stop button (N).
– Once the selected time has elapsed, the appliance will emit acoustic signals indicating that the cooking time has expired.
– The keep-warm function will automatically activate when the selected time expires and is limited to 12 hours.
P2 FUNCTION
– This program is ideally suited to making soups and broths.
– Once the cooking time has ended, the appliance switches to the keep warm function automatically, the indicator LED on the stop button (N) lights up. If you want to stop the keep warm function, press the stop button (N).
– Once the selected time has elapsed, the appliance will emit acoustic signals indicating that the cooking time has expired.
– The keep-warm function will automatically activate when the selected time expires and is limited to 12 hours.
P3 FUNCTION
– This program is ideally suited to the food roasting function.
– Once the cooking time has ended, the appliance switches to the keep warm function automatically, the indicator LED on the stop button (N) lights up. If you want to stop the keep warm function, press the stop button (N).
– Once the selected time has elapsed, the appliance will emit acoustic signals indicating that the cooking time has expired.
– The keep-warm function will automatically activate when the selected time expires and is limited to 12 hours.
P4 FUNCTION
– This program is ideally suited to cooking pasta.
– Fill the pot with the pasta and water, without exceeding the 10 measuring cups marked on the pot.
– The water/pasta ratio is very important, follow the steps indicated in the recipe.
– Once the cooking time has ended, the appliance switches to the keep warm function automatically, the indicator LED on the stop button (N) lights up. If you want to stop the keep warm function, press the stop button (N).
– Once the selected time has elapsed, the appliance will emit acoustic signals indicating that the cooking time has expired.
– The keep-warm function will automatically activate when the selected time expires and is limited to 12 hours.
P5 FUNCTION
– This program is ideally suited for making yogurts and other deserts requiring slow cooking at a low temperature.
– Once the selected time has elapsed, the appliance will emit acoustic signals indicating that the cooking time has expired.
P6 FUNCTION
– This program is ideally suited for steam cooking.
– Firstly, pour in the required amount of water according to the amount of food, ensuring that it is at least 3 measuring cups. Put in the basket (K) and the food, ensuring that the food doesn’t touch the led when closed.
– Once the cooking time has ended, the appliance switches to the keep warm function automatically, the indicator LED on the stop button (N) lights up. If you want to stop the keep warm function, press the stop button (N).
– Once the selected time has elapsed, the appliance will emit acoustic signals indicating that the cooking time has expired.
– The keep-warm function will automatically activate when the selected time expires and is limited to 12 hours.
– Note: If the water evaporates before the end of the program, the appliance will automatically switch to the keep warm function for safety.
P7 FUNCTION
– This program is ideally suited for making rice pudding and preparing porridge of oats and other cereals.
– Once the cooking time has ended, the appliance switches to the keep warm function automatically, the indicator LED on the stop button (N) lights up. If you want to stop the keep warm function, press the stop button(N).
– Once the selected time has elapsed, the appliance will emit acoustic signals indicating that the cooking time has expired.
– The keep-warm function will automatically activate when the selected time expires and is limited to 1 hour.
P8 FUNCTION
– This program is ideally suited to cooking rice.
– Once the cooking time has ended, the appliance switches to the keep warm function automatically, the indicator LED on the stop button (N) lights up. If you want to stop the keep warm function, press the stop button(N).
-WARNING: this function is programmed to start counting the working time after the appliance reaches the selected temperature.
– Once the selected time has elapsed, the appliance will emit acoustic signals indicating that the cooking time has expired.
– The keep-warm function will automatically activate when the selected time expires and is limited to 1 hour.
PRESET FUNCTION
– Once the function has been selected and the cooking time, the cooking time can be preprogrammed.
– The appliance allows selecting the cooking start time based on the function selected. The use of this function is optional.
– This function is not available for P1, P3, P4, and P5 functions.
-After selecting the function and time, press the 24h timer programming button (P). The PRE- The SET button will flash.
– Press the time selection button (Q or R) to select the time within which you want the food to start cooking (from 0 minutes to 24 hours in 1-minute intervals).
– Once you have selected the function, time and program, open the lid and put the food in the pot.
– Press the start button (S).
– Note: The keep-warm function has a 12-hour limit.
ONCE YOU HAVE FINISHED USING THE APPLIANCE:
– Turn the appliance off, using the on/off switch.
– Unplug the appliance from the mains.
– Clean the appliance
CARRY HANDLE/S:
– This appliance has a handle at the top to make it easy and convenient to carry (G).
HANDY TIPS:
– The lid can be opened during cooking, allowing you to stir the food or to see how it is going. As the appliance carries on working while the lid’s open, we would recommend opening it as little as possible and closing it as soon as possible.
– Take particular care when opening the lid, to avoid burns, as the inner temperature could be high.
CLEANING
– Disconnect the appliance from the mains and allow it to cool before undertaking any cleaning task.
– Disassemble the appliance as follows:
– Remove the pot.
– To clean the steam valve (F), remove it from the appliance by pulling upwards. Turn it over and remove the cover by turning this clockwise. Make regular checks to ensure that the parts are clean and to prevent the valve from becoming blocked.
– Except for the power unit and the mains connection, all the parts can be cleaned with detergent and water or in washing up liquid. Rinse thoroughly to remove all traces of detergent
– Clean the electrical equipment and the mains connection with a damp cloth and dry. DO NOT IMMERSE IN WATER OR ANY OTHER LIQUID.
– Clean the equipment with a damp cloth with a few drops of washing-up liquid and then dry.
– Do not use solvents, or products with an acid or base pH such as bleach, or abrasive products, for cleaning the appliance.
– Do not let water or any other liquid get into the steam vents to avoid damage to the inner parts of the appliance.
– Never submerge the appliance in water or any other liquid and place it under running water.
– It is advisable to clean the appliance regularly and remove any remains of food.
– If the appliance is not kept clean, its surface may become damaged, inevitably affecting the duration of its useful life and leading to a hazardous situation.
– The following parts can be cleaned in hot soapy water or in a dishwasher (using a gentle dishwashing program):
– Inner pot
– Steam basket
– Spatula
– Ladle
– Measuring cup
– The draining/drying position of the parts that can be washed in the dishwasher or sink, must allow the water to easily drain away.
– Then dry all the parts before assembling and storing them.
FAULTS AND REPAIR
– In case of detecting any anomaly, check the following table:
| Anomalies | Causes | Solutions |
| Error El | The temperature sensor on the bottom is disconnected. | Take the appliance to the Technical Assistance Service. |
| Error E2 | The temperature sensor on top is disconnected. | Take the appliance to the Technical Assistance Service. |
| Error E3 | The temperature sensor on the bottom is a short circuit. | Take the appliance to the Technical Assistance Service. |
| Error E4 | The temperature sensor on top is a short circuit. | Take the appliance to the Technical Assistance Service. |
| Function | SpecieIlly | Default settings | Adjustable time range | Adjustable temperature range | Auto Keep Warm | 24 H preset | |||||
| Time | 7emperetum | Mn | Max | Periods | Mn | Max | Periods | ||||
| Mundt=Son | 5 mm | 40°C | 5 mu, | 12 horn | 1 min | 40°C | 160°C | 5°C | No | Yes | |
| Soffit° | Soho | 30mM | 140°C | 10 nn | 1 hour | 5 min | 100°C | 160°C | 20°C | 1 hour | Yes |
| Pasta | Peels | 25 mm | 120-125°C | 20 nal | 40mM | 5 mm | – | – | – | 1 hour | Yes |
| P1 | Cakes end pies | 1 hour | 1113•122°C | 30 rrin | 4 hours | 10mA | • | – | • | 12 hours | No |
| P2 | Soups and Wore | 2 tour | 90°C | 20 min | 8 hours | 5 mm | – | 12 hats | Yes | ||
| P3 | Baking | 30min | 160°C | 10 I’S | 4 hours | 5 mM | – | – | • | 12 hours | No |
| P4 | Pasta | 8 mon | 118-120°C | 5 min | 20 min | I min | – | – | – | 12 hours | No |
| PS | Yogis and slow-cooked desserts | 8 hours | 38-42°C | 6 hours | 12 hours | 30 min | – | • | No | No | |
| P6 | Steam coding | 20min | 115.120°C | 5 min | 15 ban | 1 Tr | – | • | 12 hOSS | Yes | |
| P7 | Rice with milk and porridge | 35 mil | 95°C | 5 min | I hour | 5 mil | – | – | – | 1 hour | Yes |
| P8 | Ricecooleng | 25 min | 100°C | 15 min | 2 hours | 5 Mr | – | • | I hour | Yes | |
| Keep warm | 12 hours | 97-103 °C | – | – | |||||||
| COUNTRY | ADDRESS | PHONE |
| Algeria | Zone d’Activite, N° 62, Constantine | 213770777756 |
| Argentina | Av. del Libertador 1298,(B1638BEY), Vicente Lopez (Pcia. Buenos Aires) | 541153685223 |
| Belgium | Mariendonkstraat 5, 5154 EG, Elshout | 31620401500 |
| Benin | 359 Av. Steinmetz, 1930, Cotonou | 0299-21313798 |
| Bulgaria | 265,Okolovrasten Pat, Mladost 4, 1766, Sofia | 35929211120 / 35929211193 |
| Burkina Faso | Avenue Bassawarga, 01 BP915, Ouagadougou | 226 25301038 |
| Congo (Republic of) | 98 Blvd General Charles de Gaulle, Pointe Noire | 242066776656 |
| Cyprus | 20, Bethlehem Str. / P.O.Box 20430, 2033, Strovolos | 35722711300 |
| Czech Republic | Milady Horakove 357/4, 568 02, Svitavy | 420 461 540 130 |
| Democratic Republic of the Congo | AV. Pont Canale N° 3440, Kinshasa | 00243-991223232 |
| Equatorial Guinea | SN Av Patricio Lumumba y C/ Jesus B, Bata | 00240 333 082958 / 00240 333 082453 |
| Equatorial Guinea | Calle de las Naciones Unidas, PO box 762, Malabo | 240333082958 / 240333082453 |
| Espana | Avda Barcelona, S/N, 25790 Oliana (Lleida) [email protected] | 902 118 050 |
| Ethiopia | Lideta Sub City Kebele 10 H.NO 124, Addis Ababa | +251 11 5518300 |
| France | Za les bas musats 18, 89100, Malay-le-Grand | 03 86 83 90 90 |
| Gabon | BP 574, Port-Gentil Centre-ville | 24101552689 / 24101560698 |
| Ghana | Ederick Place, Accra-Ghana | 302682448 / 302682404 |
| Gibraltar | 11 Horse Barrack Lane, 54000, Gibraltar | 00350 200 75397 / 00350 200 41023 |
| Greece | Sapfous 7-9, 10553, Athens | +30 21 0373 7000 |
| Guinea | BP 206, GN, Conakry | (224) 622204545 |
| Hong Kong | Unit H,13/F., World Tech Centre, Hong kong | (852) 2448 0116 / 9197 3519 |
| Hungary | Kesmark utca 11-13, 1158, Budapest | +36 1 370 4519 |
| India | C-175, Sector-63, Noida, Gautam Budh Nagar – 201301, Delhi | (+91) 120 4016200 |
| Ivory Coast | 01 Rue Des Carrossiers-Zone 3, B.P 3747, Abidjan 01 (RCI) | 22521251820 / 225 21 353494 |
| Jordan | 28 Basman St Down town, Amman | +962 6 46 222 68 |
| Kuwait | P.O. BOX 3379 hawally, 32034, Hawally | +965 2200 1010 |
| Lebanon | Damascus Highway, Sciale Building, Jamhour | 9615922963 |
| Luxembourg | Mariendonkstraat 5, 5154 EG, Elshout | 31620401500 |
| Mali | BP E2900, Dravela Bolibana | 223227216 / 223227259 |
| Marruecos | Big distribution society 4 Rue 13 Lot. Smara Oulfa, Casablanca | (+212) 522 89 40 21 |
| Mauritania | 134 Avenue Gamal Abdener Hot D, Nouakchott | 2225254469 / 2225251258 |
| Mexico | Rosas Moreno N° 4-203 Colonia de San Rafael C.P. 06470 – Delegacion Cuauhtemoc, Ciudad de Mexico | (+52) 55 55468162 |
| Montenegro | Rastovac bb, 81400, Niksic | +382 40 217 055 |
| Netherlands | Mariendonkstraat 5, 5154 EG, Elshout | 31620401500 |
| Nigeria | 8, Isaac; John Str,G.R.A Ikeja Lagos | 23408023360099 |
| Paraguay | Denis Roa 155 c/ Guido Spano, Asuncion | 21665100 |
| Peru | Calle los Negocios 428, Surquillo, Lima | (511) 421 6047 |
| Portugal | Avenida Rainha D. Amelia, n°12-B, 1600-677, Lisboa | +351 210966324 |
| Romania | Dudesti Pantelimon 23, 410554, Bucharest | 031.805.49.58 |
| Serbia | Rastovac bb, 81400, Niksic | +382 40 217 055 |
| Slovakia | Milady Horakove 357/4, 568 02, Svitavy | 420 461 540 130 |
| Southafrica | Unit 25 & 26, San Croy Office Park, Die Agora Road, Croydon, Kempton Park, 1619, Johannesburg | (+27) 011 392 5652 |
| Tunisia | 2, Rue de Turquie, Tunis | 21671333066 |
| Ukraine | Block 6, Ap Housing Estate Topol-2, B, 49000, Dnepropetrovsk | 380563704161 / 380563704161 |
| United Arab Emirates | P.O.BOX 8543, Dubai | 14506246200 |
| Uruguay | Luis Alberto de Herrera 3468, 11600, Montevideo | 598 2209 28 00 |
| Vietnam | Lot 7 Ind. Zone for, Ha Noi | 84437658111 / 84437658110 |
![]() Avda. Barcelona, s/n
Avda. Barcelona, s/n
25790 Oliana
Spain


