![]()
Instruction manual
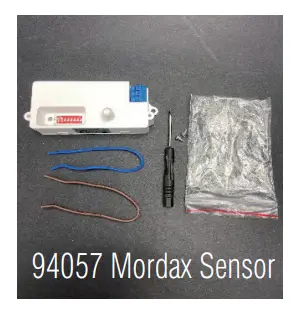
MORDAX SENSOR
94057
Thank you for purchasing this light fitting. Please read the instruction carefully before use to ensure the safe and satisfactory operation of this product. Please retain these instructions for future reference.
SPECIFICATIONS
Power source:220-240V/AC
Power frequency: 50/60Hz
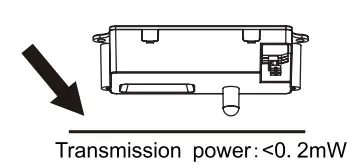
Transmission power: <0.2mW
Rated load: 1000W /5A, Max, tungsten(cos=1)(220-240V / AC) 300W /2. 5A, Max, fluorescent( coscp=O. 5 )(220-240V /AC)
HF system: 5. 8GHz CW electric wave, ISM band
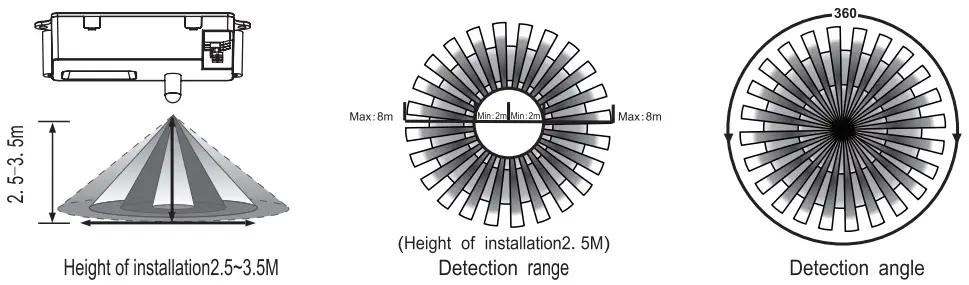
Detection angle: 360°
Detection range: 20%/50%/75%/100%
NOTE: The high-frequency output of this sensor is <0. 2mW- that is just one 5000″ of the transmission power of a mobile phone or the output of a microwave oven.
Time setting: 10sec±3sec/1 min±1 Osec/5min±30sec/ 10min±1 min/15min±1 min/20min±2min/ 25mi n±2m i n/30min±3mi n (adjustable)
Light-control: 24H/1 OLUX/20LUX/50LUX/1 OOLUX/ 200LUX/300LUX/500LUX (adjustable)
Installation sit: indoors, ceiling mounting
Working temperature: -15°C-+70C
Power consumption: approx. 0. 5W
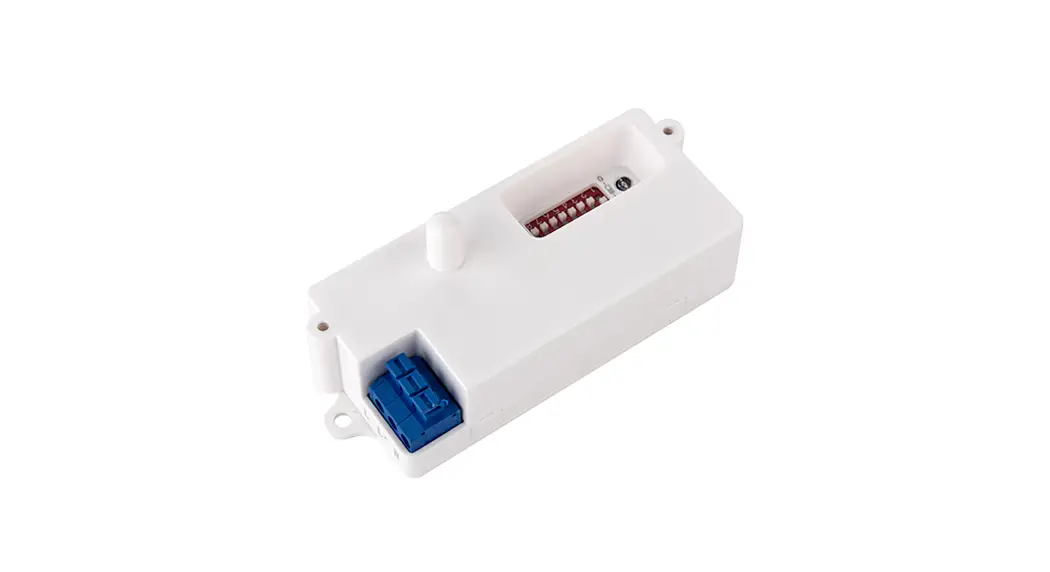
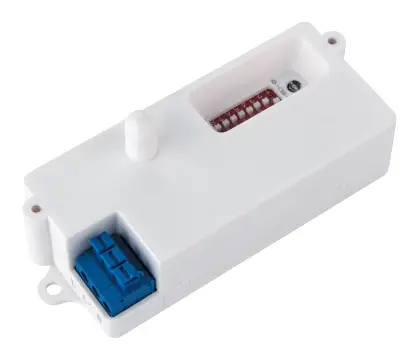
SENSOR INFORMATION
UTILIZING FIELD AND INTRODUCTION
94057 is a moving object sensor that can detect a range of 360°and its working frequency is 5.8GHz.The advantage of this product is its stable working state (stable working temperature: -15°C~+ 70°C), which adopts a microwave sensor(high-frequency output<0.2mW), so that it is safe and performs better than the infrared sensor.
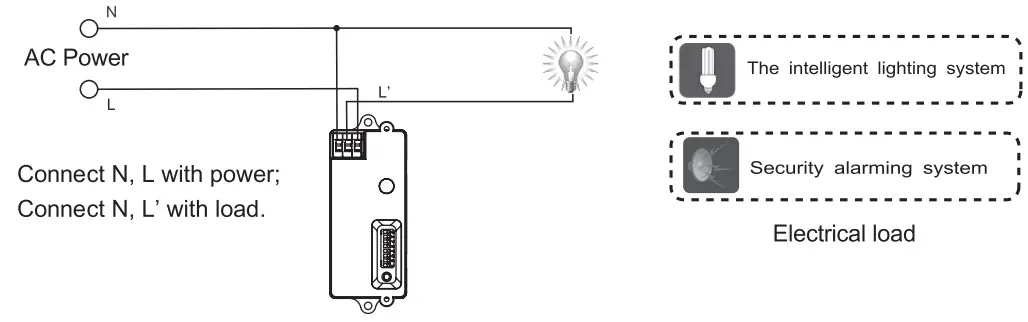
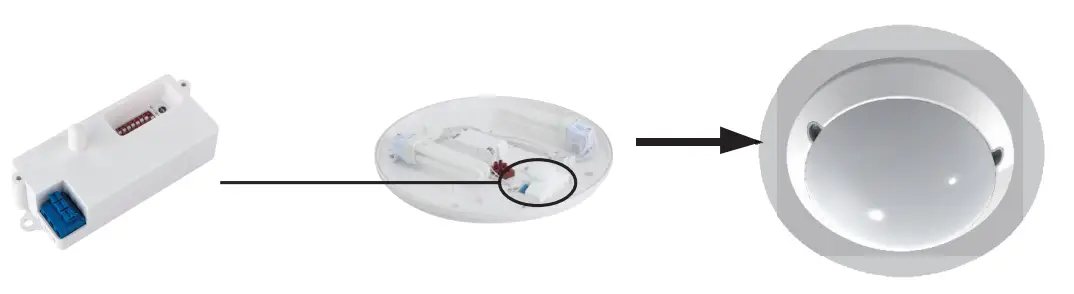
It can be installed inside of product which is made of glass and plastic because the microwave can go through them effect to microwave. Connect the product as below: you can change a common light into an automatic light.
UTILIZED IN-CEILING LIGHT
This product can be utilized in more fields than the above examples.
You can also install 94057 alone to act intelligent switch to control another load.
This product will be faithfully waiting for you. It will turn on the light automatically when you pass by and turn off the light automatically when you leave off. You can set the closing delay time to meet your needs. For example, you may adjust the TIME sliding controller to select the delay time 10sec-30min when you think you will come back in 30mins. The TIME sliding controller is as follows (Keep away from the detecting zone after adjusting the testing time or that the detecting time will be inaccurate when any moving object is detected again by the product).
PARAMETER SETTING
Shown as the chart below: By setting the S1, S2 to set the detection range of products, by setting S3, S4, S5 to set the delay time of products, by setting the S6, S7, S8 to set the light-control of products.

Detection range setting (sensitivity)
Detection range is the term used to describe the radius of the more or less circular detection zone produced on the ground after mounting the sensor light at a height of 2.5m,pulling the switch to the ON position as “1”, pull the switch to the OFF position as “O”, switch location and detection range of the corresponding table is as follows:
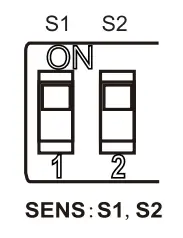
| S1 | S2 | detection range |
| 0 | 0 | 20% |
| 0 | 1 | 50% |
| 1 | 0 | 75% |
| 1 | 1 | 100% |
Note: the above detection range is gained if the detected person is between 1.6m~1. 7m tall with a middle figure and moves at a speed of 1. 0-1. 5m/sec.
if a person’s stature, figure, and moving speed change, the detection distance will also change.
ATTENTION: When using this product, please adjust the sensitivity to an appropriate position you need, please do not adjust the sensitivity to maximum, in case the product
works abnormally because of wrong motion detection, including blowing leaves & curtains, small animals, or even power grid & electrical equipment. All the above factors
can lead to abnormal work. When the product does not work normally, please try to lower the sensitivity appropriately, and then test it.
Time setting
The light can be set to stay ON for any period of time between approx.10sec and a maximum of 30min. Any movement detected before this time elapses will re-start the timer. It is recommended to select the shortest time for adjusting the detection zone and for performing the walk test.
Pull the switch to the ON position as “1”, pull the switch to the OFF position as “O”, switch location and detection range of the corresponding table is as follows:
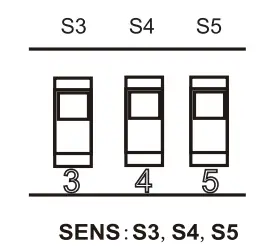
| S3 | S4 | S5 | TIME |
| 0 | 0 | 0 | 10s |
| 0 | 0 | 1 | min |
| 0 | 1 | 0 | 5min |
| 0 | 1 | 1 | login |
| 1 | 0 | 0 | 15min |
| 1 | 0 | 1 | 20min |
| 1 | 1 | 0 | 25min |
| 1 | 1 | 1 | 30min |
NOTE: after the light switches OFF, it takes approx. 4sec before it is able to start detecting movement again. The light will only switch on in response to movement once this period has elapsed.
Light-control setting
The chosen light response threshold can be infinitely from approx. 10-5001ux, pull the switch to the ON position as “1”, pull the switch to the OFF position as “O”, switch location and light-control of the corresponding table is as follows:

| S6 | S7 | S8 | LUX |
| 0 | 0 | 0 | 24H |
| 0 | 0 | l | lOLUX |
| 0 | 1 | 0 | 20LUX |
| 0 | 1 | 1 | 50LUX |
| 1 | 0 | 0 | lOOLUX |
| 1 | 0 | 1 | 200LUX |
| 1 | 1 | 0 | 300LUX |
| 1 | 1 | 1 | 500LUX |
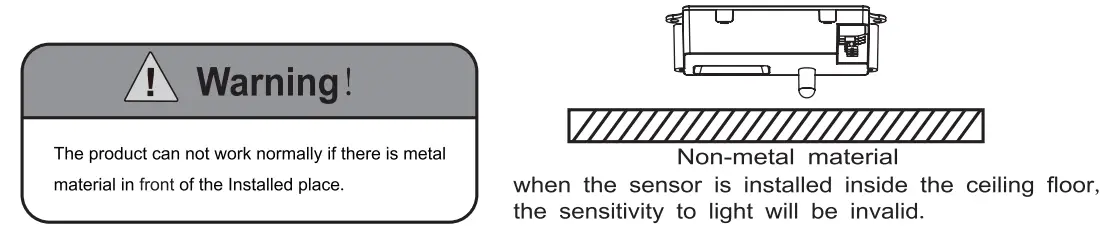
 Warning! The following situation will lead to misoperation
- Being installed in the rocking object will lead to misoperation.
- The shaking curtain which is blown by the wind will lead to misoperation, please select the suitable installed place.
- Being installed in the place where the traffic is busy will lead to misoperation.
- It will lead to misoperation when there are sparks produced by some equipment nearby.
TROUBLESHOOTING
| Malfunction | Cause | Remedy |
| The load will not work | · wrong light-control setting selected | · Adjust setting |
| · load faulty | · Change load | |
| · mains switch OFF | · Switch ON | |
| The load work always | · continuous movement in the detection zone | · check zone setting |
| The load work without any identifiable movement | · the sensor not mounted for detecting movement reliably | · securely mount enclosure |
| · movement occurred, but not identified by the sensor(movement behind the wall, movement of a small object in immediate lamp vicinity, etc.) | · Check zone setting | |
| The load will not work despite movement | · rapid movements are being suppressed to minimize malfunctioning or the detection zone you have set is too small | · Check zone setting |
Additional instruction manual
To prevent electrocution switch off at the mains supply before installing or maintaining this fitting.
Ensure other persons cannot restore the electrical supply without your knowledge.
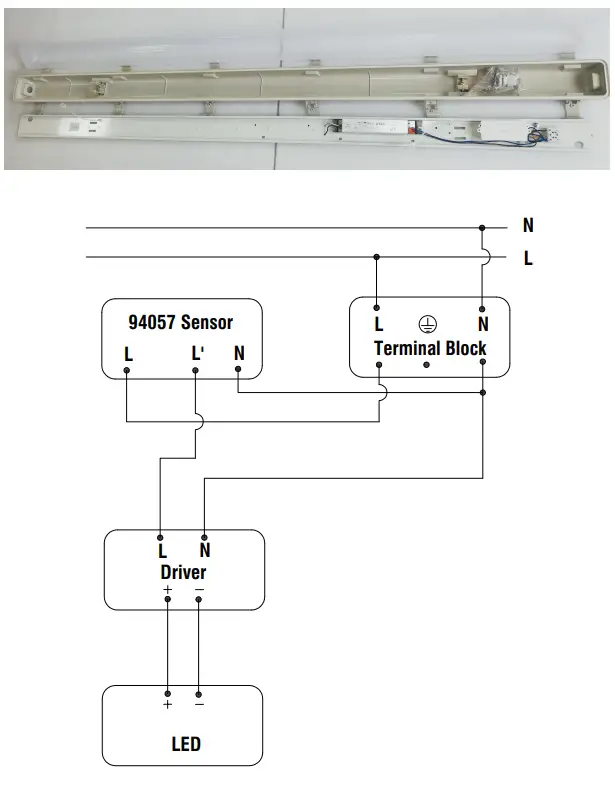
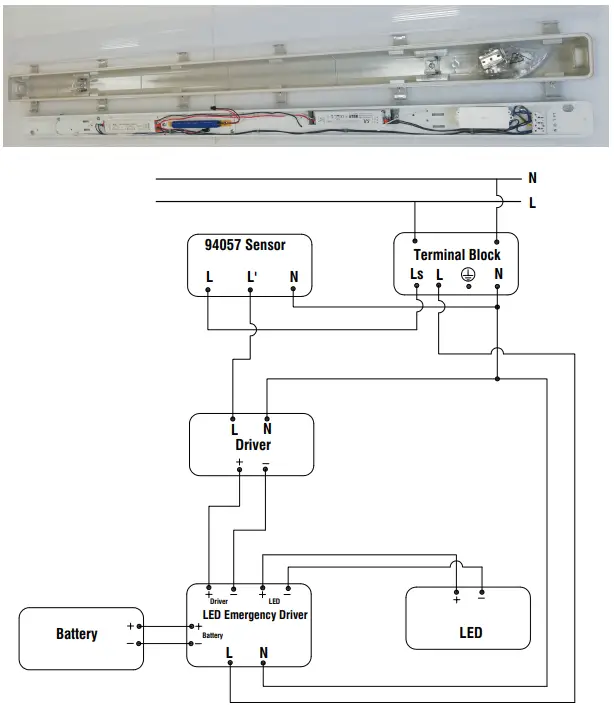
Mordax 72700, 72701, 72702, 72703, 72704 with Sensor
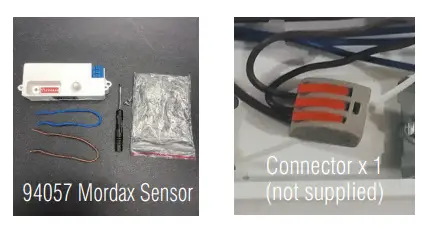
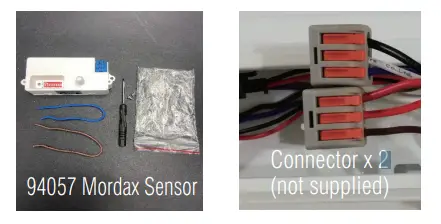
Accessories:
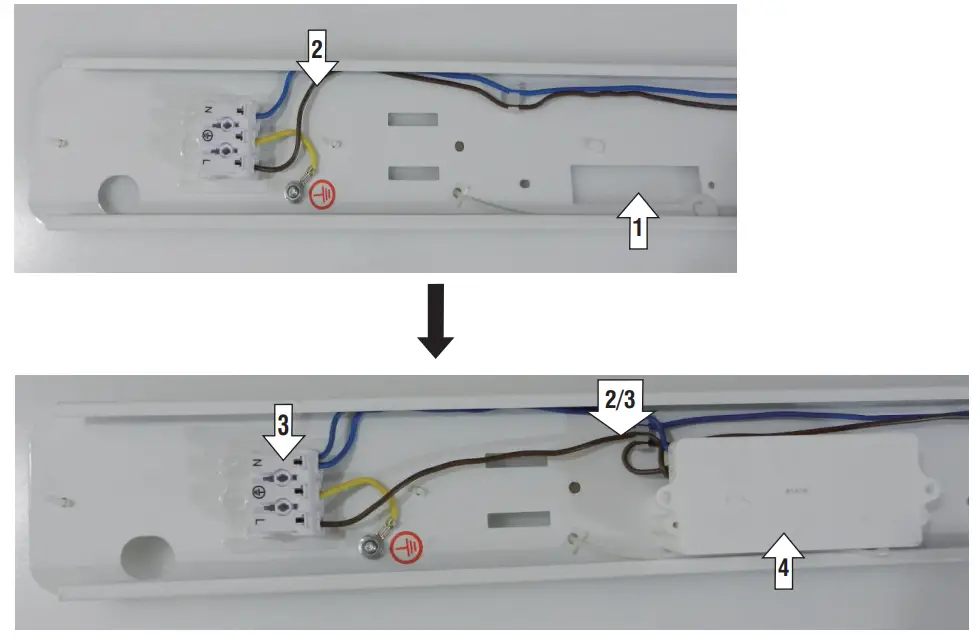
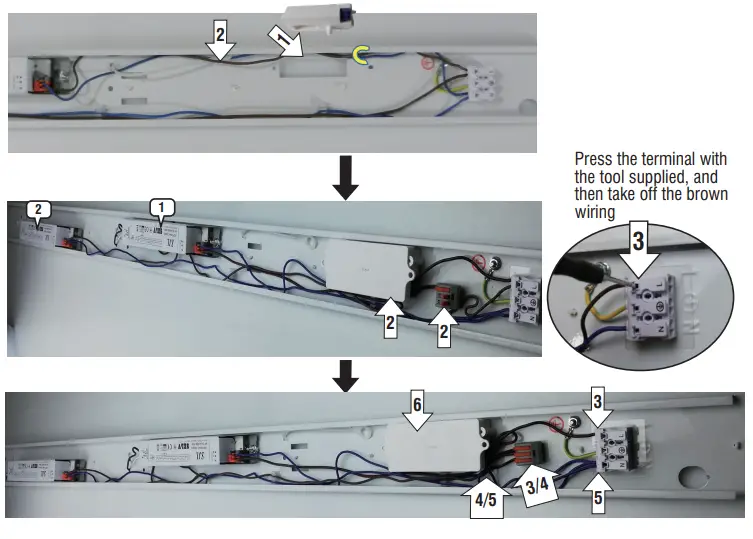
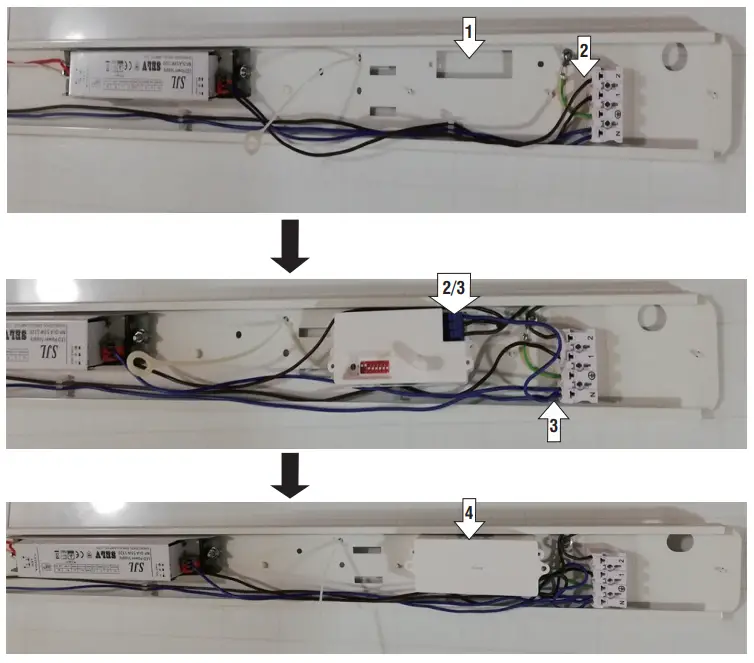
- Locate the 94057 sensor position.
- Cut off the brown wire’s inappropriate length, connect the terminal L to the sensor’s L, and connect the driver L to sensor’s L’.
- Take an appropriate length of the blue wire, connect sensor’s N to terminal’s N.
- Install the 94057 sensor controller.
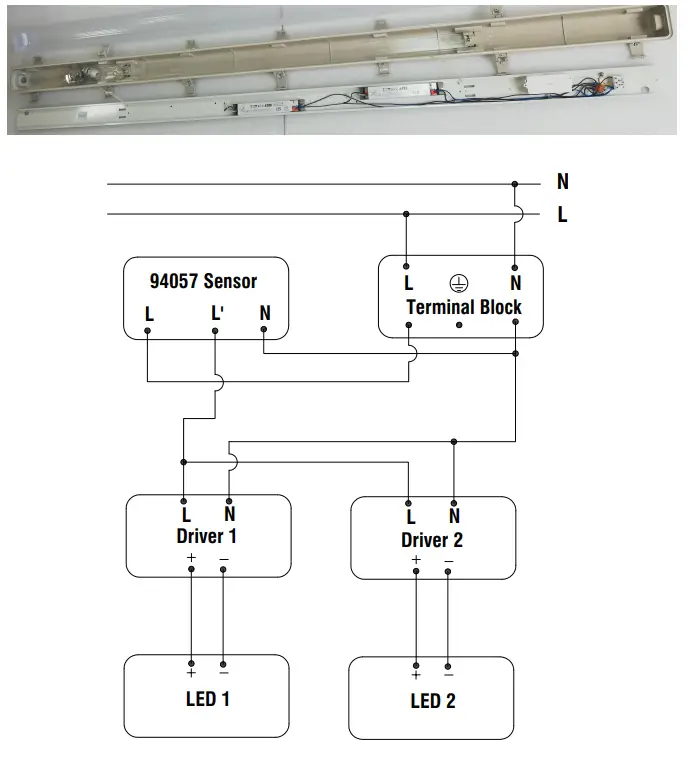
Mordax 72705 with Sensor
Accessories:
- Locate the 94057 sensor position.
- Cut the brown wire in the appropriate length between NO.1 LED driver input end and terminal. Then connect the terminal’s L to the sensor’s L
with the short end of the brown wire, and connect the No.1 LED driver to a connector with the other part of the brown wire. - Locate the brown wire between the terminal and the No.2 LED driver, remove it from the terminal, then connect to the connector.
- Take an appropriate length of the brown wire, connect the sensor’s L’ to the connector.
- Take an appropriate length of blue wire, connect sensor’s N to terminal’s N.
- Install the 94057 sensor controller.
Mordax EM 72706, 72707, 72708, 72709, 72710 with Sensor
Accessories:
- Locate the 94057 sensor position.
- Cut off the brown wire between terminal 2(Ls) and the LED driver in the appropriate length. connect two ends to
the sensor’s L and L’ (L’ to the driver). - Take an appropriate length of the blue wire, connect the sensor to the terminal’s N.
- Install the 94057 sensor controller.
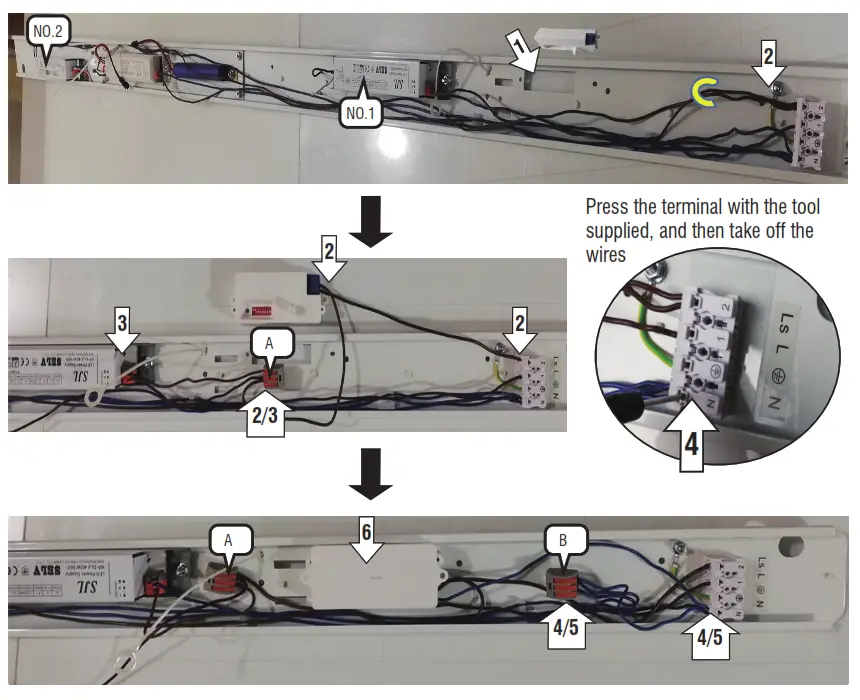
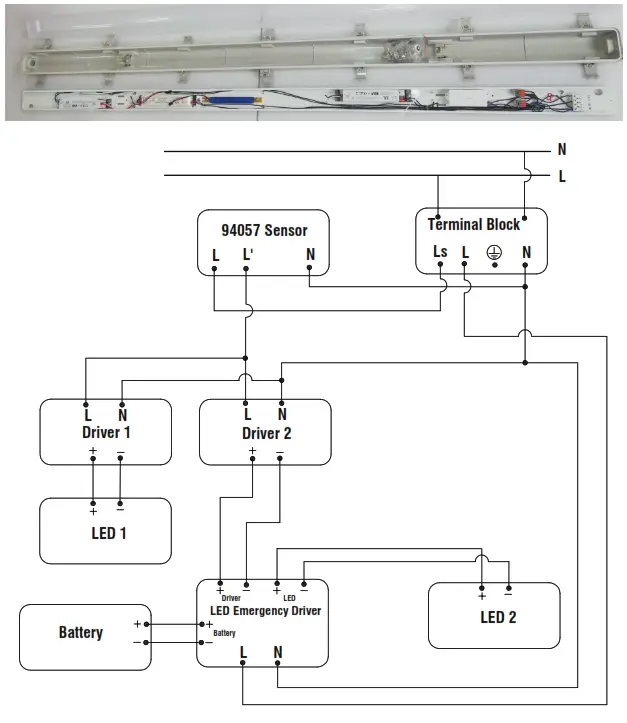
Mordax EM 72711 with Sensor
Accessories:
- Locate the 94057 sensor position.
- Cut off two brown wires between terminal 2(Ls) and NO.1 & NO. 2 LED drivers in the appropriate length. Connect terminal’s 2(Ls)
to sensor’s L with one of the brown wires, and take off the other one, use it to connect sensor’s L’ to one connector (A). - Connect two brown wires of NO.1 and NO.2 LED driver to the connector (A).
- 1) Locate the blue wire between No.1 driver and terminal’s N, remove it from the terminal, and then insert it into connector (B);
2) Locate the blue wire between the No. 2 driver and terminal’s N, remove it from the terminal, and then insert it into the connector (B). - Take blue wire in the appropriate length, connect terminal’s N to the connector (B).
- Take blue wire in the appropriate length, connect terminal’s N to sensor’s N.
- Install the 94057 sensor controller.
Saxby Lighting. BH17 7BY
V2 21/04/2020


