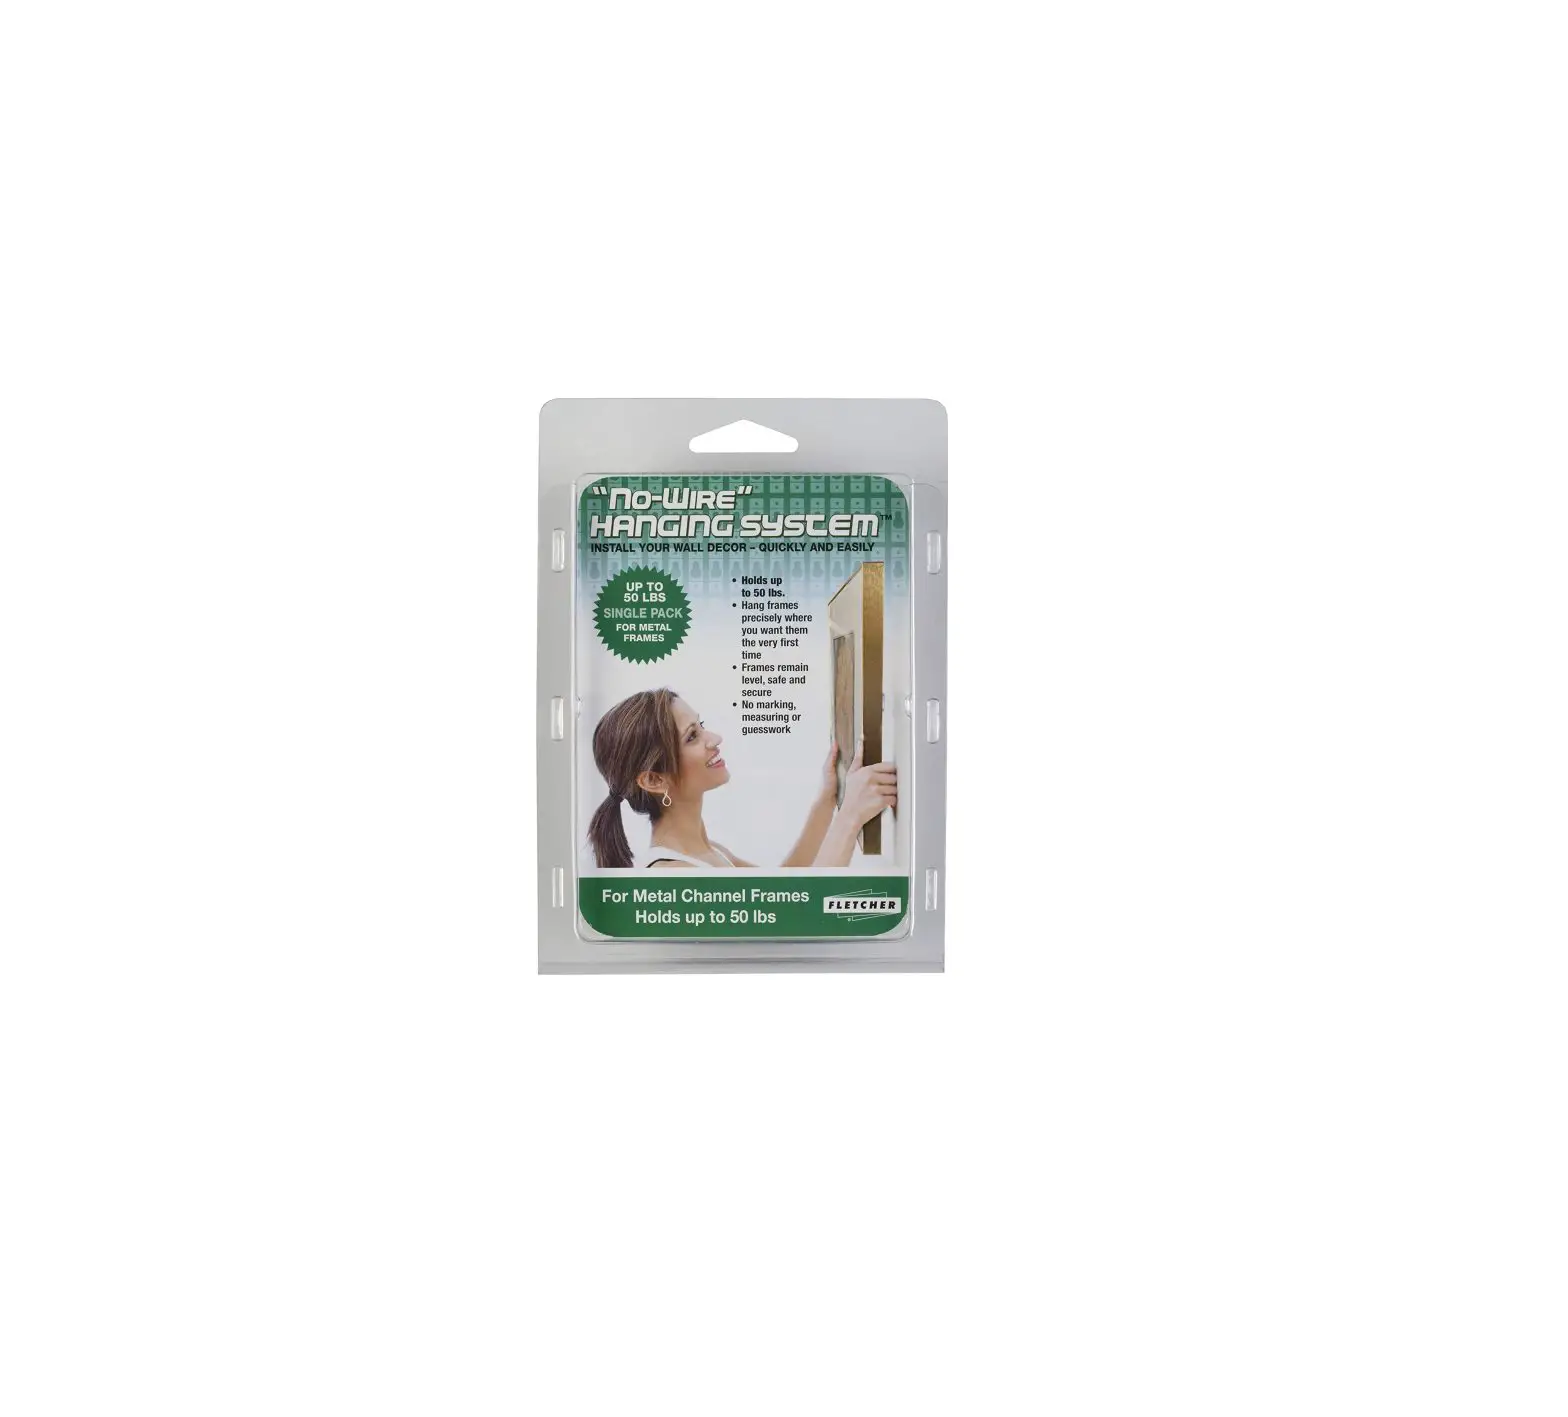
FLETCHER-Terry No Wire Hanging System Kit

PARTS LIST

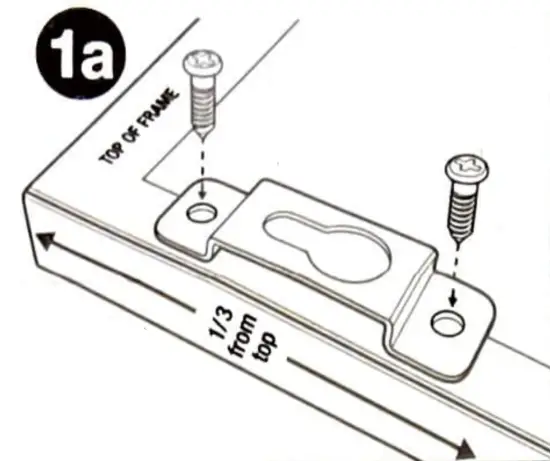
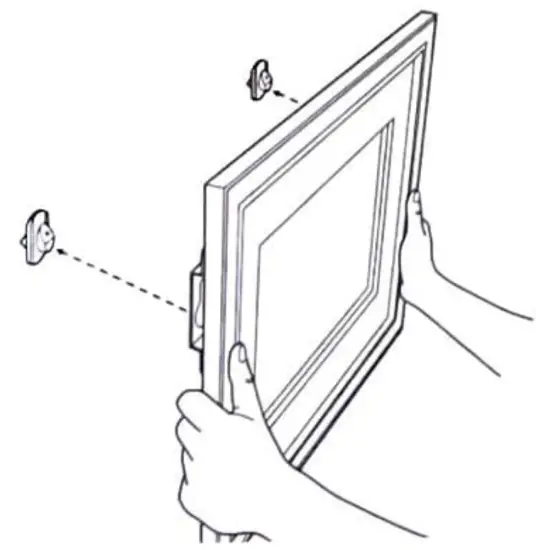
FOR SMALL FRAMES
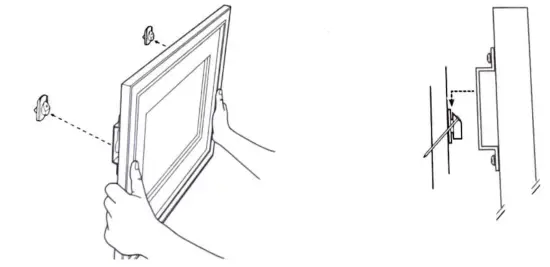
- a. Attach brackets to frame 1/3 from top
If brackets are already attached to frame, proceed to step 1b
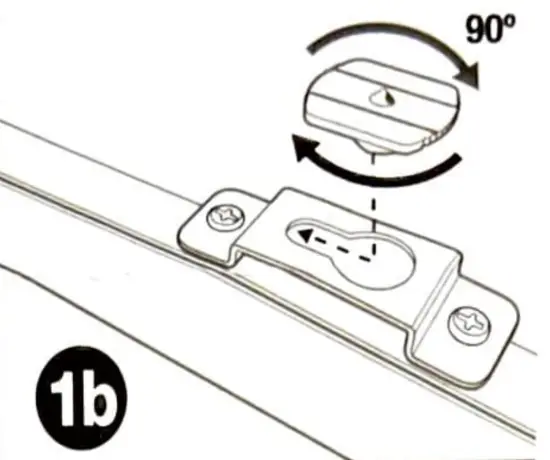
b. Insert markers & rotate to lock
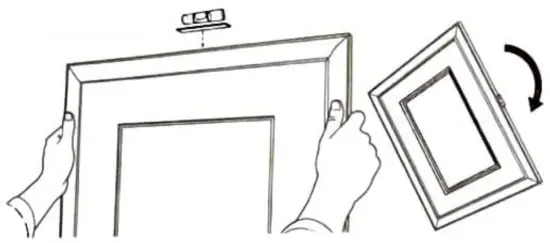
- • Attach level to top of frame using tape.
• Attach bumper to bottom of frame in the middle.
Do NOT attach foam tape to decora/Jve moldmgs such as those with a “gold leaf” finish
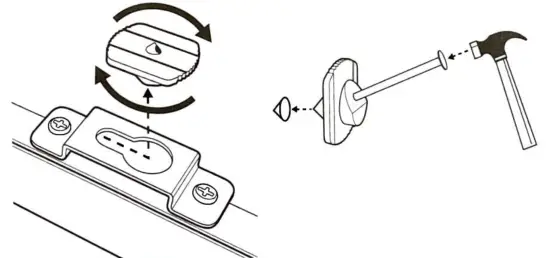
- Rotate markers to unlock and remove them from the brackets; then place the markers into the dimples and nail the markers to the wall

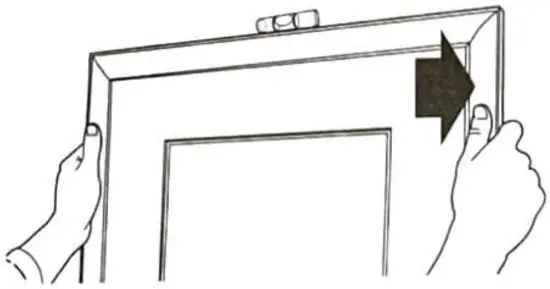
- Push brackets onto the markers, then pull down to lock in place. Remove tape and bubble level to complete your installation.


FOR FRAMES 20″ or WIDER
- • Attach brackets to both sides of frame
• Insert a marker into the LEFT bracket
• Determine desired mounting location
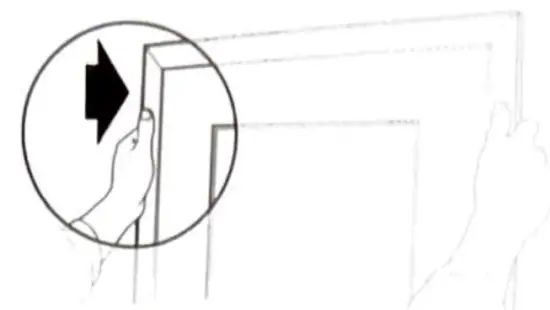
• Press frame firmly into wall surface to create LEFT dimple mark
- Rotate to unlock marker
Insert marker into dimple and nail into wall - • Affix foam tape & level to frame
• Attach bumper to buttom of frame
• Insert a maker into RIGHT bracket
• Seat LEFT bracket onto the wall
• Allow frame to swing down
- • Raise frame until bubble reads “level”
• Press RIGHT side of frame firmly into wall surface to make RIGHT dimple mark
• Allow frame to swing down
• Repeat Step #2 to install the RIGHT marker
• Push brackets onto the markers, then pull down to lock in place.
• Remove tape and bubble level to complete your installation.
To see installation video, go to: www.fletcher-terry.com
©2018 The Fletcher-Terry Company, LLC. All rights reserved_
U.S. Patent Nos. 7,497,028 and 7,836,605. Other p~tent~ pending
Designed and engineered in the U.S. – Made in China.


