
Orbic RC178LW Smart Wrist User Manual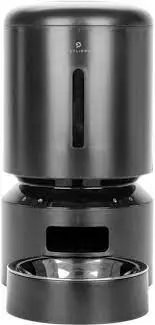
IN THE BOX
- Automatic Pet Feeder

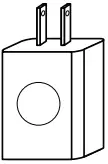
- Power Adapter

- Quick Start Guide

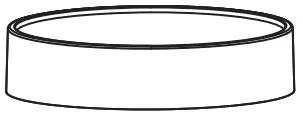
- Stainless Steel Bowl
- Bowl Tray

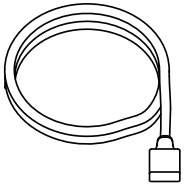
- Power Cable

- Desiccant Bag

- Bowl Tray

- Power Cable

- User Manual


PRODUCT OVERVIEW
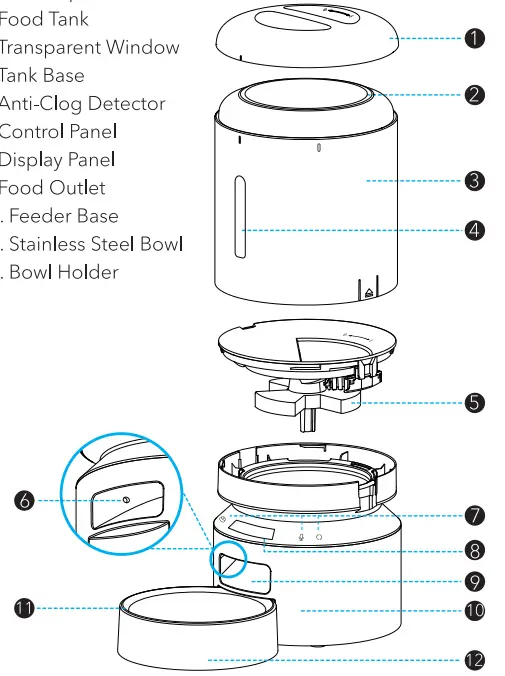

- Lid
- Seal Strip
- Food Tank
- Transparent Window
- Tank Base
- Anti-Clog Detector
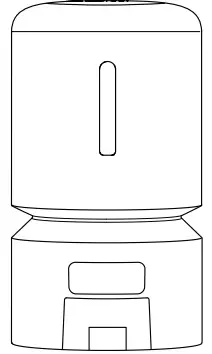
- Control Panel
- Display Panel
- Food Outlet
- Feeder Base
- Stainless Steel Bowl
- Bowl Holder
- Desiccant Bag Holder
- Power Port
- Battery Compartment
- Battery Compartment Cover
- Speaker
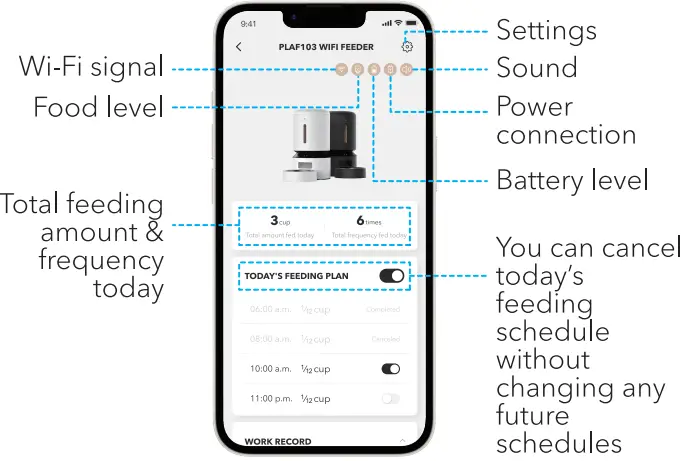
Display Area
| lndicator Type | lndicator Status | Device Status |
| Low food level indicator (red) | On | Low food storage level |
| Lock indicator (white) | Cn | The buttan are locked |
| Wi-Fi indicator (white) | Flashes one every one second | Network configuration mode |
| Flashes twice every one second | The device is connecting to Wi-Fi | |
| Flashes three times every one second | Firmware update | |
| On | Wi-Fi is connected | |
| off | Wi-Fi is turned of | |
| Warning indicator (red) | On | Low battery level, the food gets stuck, or something is wrong with the motor |
Buttons

| Buttons | Operation |
| Unlock | Press and hold for five seconds to unlock the buttons, and the device will emit a reminder sound. In the locked status, only this button works |
| Manual | In the unlocke’ status, press one to dispense one portion of food |
| Play | In the unlocked status, press once to play the feeding recording |
| Reset | In the unlocked status, press and hold until the device emits a reminder sound and the Wi-Fi indicator flashes |
SETTING STARTED
Installation
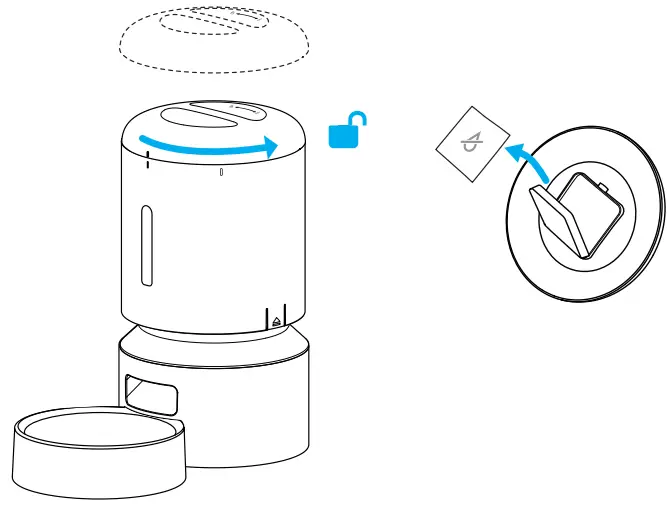
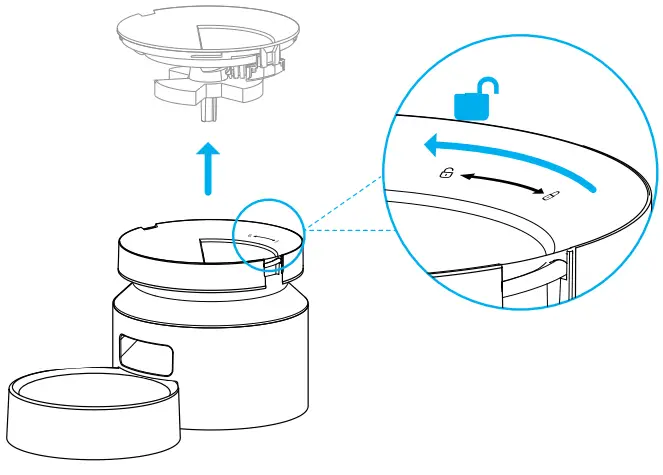
- Tum the lid counterclockwise to remove it.
- Place the desiccant bag in the desiccant bag holder under the lid.
- Add dry pet food to the food tank.
- Replace the lid and turn it clockwise.
- Install the stainless steel bowl and bowl Bottom view tray
Power on
- Connect the (eeder to a wall outlet with the power adapter and power cable, and it automatically turns on.
- Install three D alkaline batteries into the battery compartment in case of a power outage.
Notes
- To avoid a sudden power outage that affects the feeding of your pet, do not use the batteries as the only power source. The batteries can only be used as an emergency plan.
- When the power adapter, power cable, and batteries are used at the same time, the feeder will only draw power via the power cable.
- When the feeder is powered only by batteries, the Wi-Fi function, play button, and reset button would be disabled to extend the working time, but the meal schedules would be carried out normall.
Power off
Unplug the cable (rom the outlet and remove the batteries.
APP CONTROL
Network, router & system requirements
- The feeder supports 2.4GHz and 5GHz Wi-Fi.
- Keep the feeder clase to your router for a better Wi Fi connection. The ideal range is within óm (19.7ft) without obstacles and walls.
- Supports iP h on es ru n ni n g iOS 12.0 ar Iate r a n d Android smartphones running Android 5.0 or later.
lnstall the app & log in
- Scan the QR cade below Or search “PETLIBRO” i n the App Store or Google Play to download the app.
- Sign up and log into your account


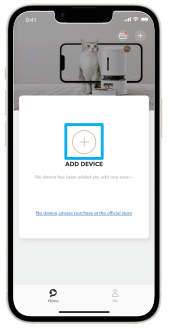
Automatically add the device
Turn On the Bluetooth and IocatiOn services On your phone before adding a device.
- Open the app and tap the “+” symbol.

- The app will automatically search nearby devices. Tap the device you want to add and follow the on-screen instructions.


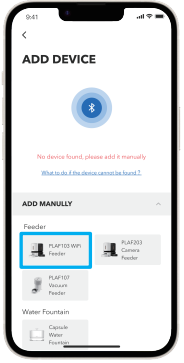
Manually add the device
If the app can’t find any devices, you can manually add the device.
- Tap the device you want to add in the “ADD MANUALLY” list and follow the on-screen instructions.

- Tap the device (Or contrOls.
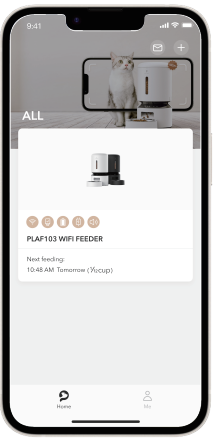
Note: All successfully added devices will appear in the Home page.
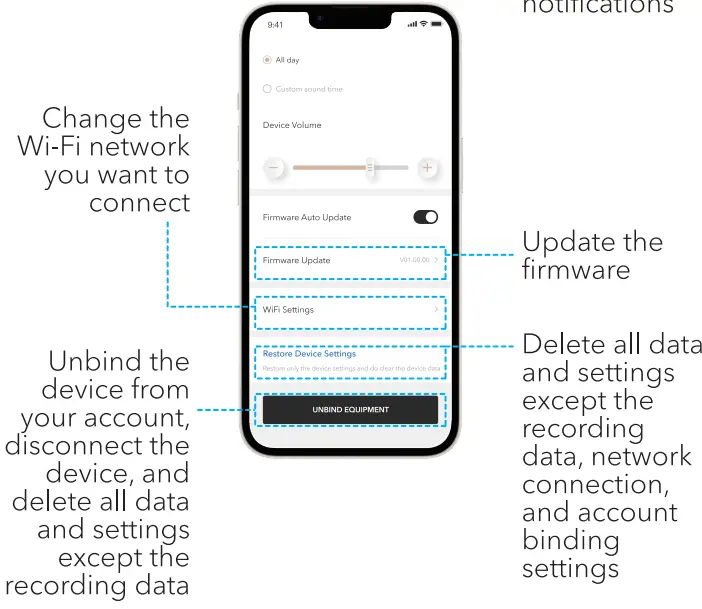
Device controls & settings
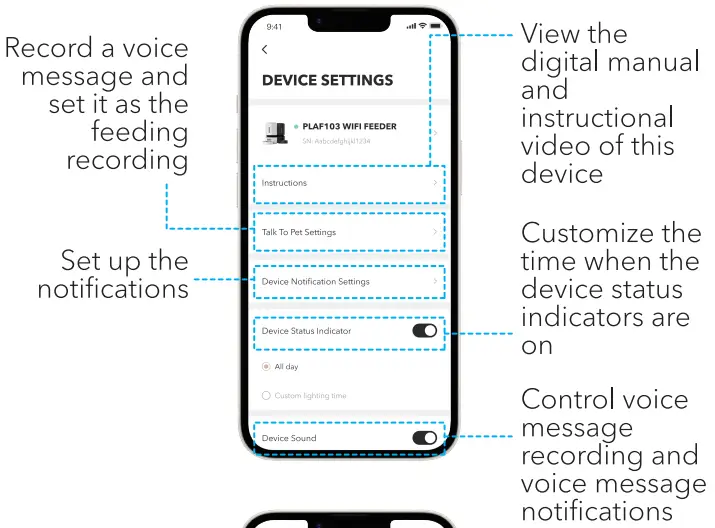
Feedback & FAQ
Go to Me > Feedback in the app to chat with a customer service staff online or send an inquiry email. You can also check the FAQ in the app.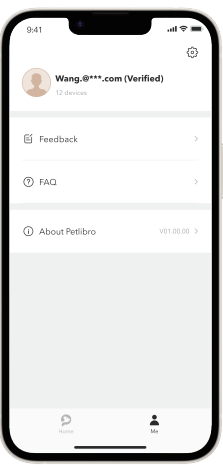
Recommended feeding portions
| Model | Dàily lntake | Meals per Day | Ponions per Meal | Per Ponion |
| PLAF103 | 1/2 cup | 2 | 3 3 | 1/1 cup (20m) |
| 3 | 2 2 2 | |||
| 4 | 1 2 1 2 | |||
| /3 cup | 2 | 2 2 | ||
| 3 | 2 | |||
| 4 | 1 1 1 1 | |||
| 2/3 cup | 3 | 2 3 3 | ||
| 4 | 2 2 2 2 | |||
| 3/4 cup | 2 | 4 5 | ||
| 3 | 3 3 3 | |||
| 4 | 2 2 2 3 | |||
| 9/10cup | 2 | 5 6 | ||
| 3 | 3 4 4 | |||
| 4 | 2 3 3 3 | |||
| 1 cup | 2 | 6 6 | ||
| 3 | 4 4 4 | |||
| 4 | 3 3 3 3 | |||
| 11/4 cup | 2 | 7 8 | ||
| 3 | 5 5 5 | |||
| 4 | 3 4 4 4 | |||
| 11/2 cup | 3 | 6 6 6 | ||
| 4 | 45 45 | |||
| 11/3 cup | 2 | 88 | ||
| 3 | 5 5 5 | |||
| 3 | 4 4 4 4 | |||
| 2/3 cup | 3 | 6 7 7 | ||
| 4 | 5 5 5 5 |
CARE AND MAINTENANCE
- Power off the device before cleaning.
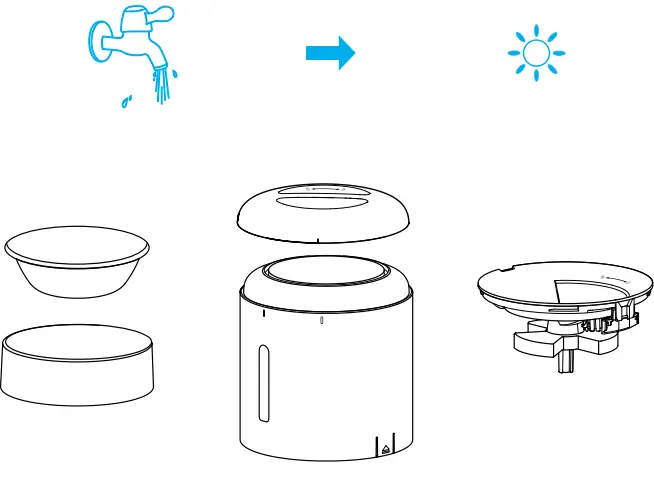
- Clean the lid, food tan k, tank base, stainless steel bowl, and bowl tray with tap water.
- Do not clean the feeder in a dishwasher. Only the stain less steel bowl is dishwasher sa(e. Use a soft dry cloth to c|ean the feeder base. Do not wash any part with eleotronio components.
- Replace the desiccant bag every hal( a mOnth tO keepfood fresh.
- Remove the desiccant bag before cleaning the lid.
Disassemble for cleaning
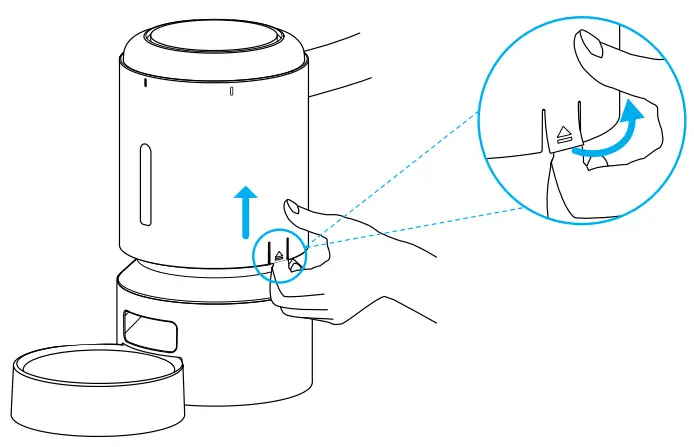
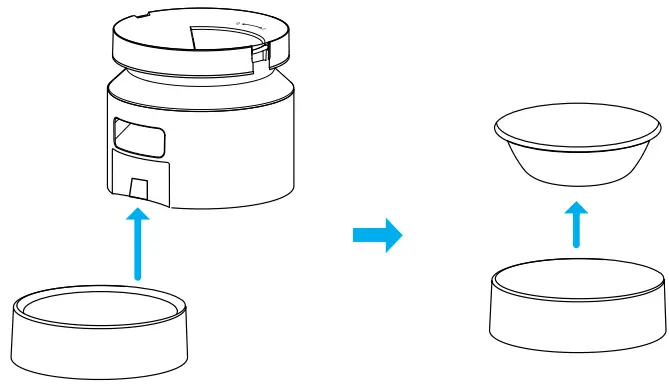
- Remove the lid and take out the desiccant bag.

- Make sure the (ood tank is empty. Pull the notches on both sides of the food tank outward a little and then up to remove the food tank

- Hold the feeder base, turn the tank base counterclockwise, and lift the tank bas

- Remove the stainless steel bowl and bowl tray (rom the feeder

- Thoroughly rinse and air-dry the lid, food tank, tank base, stainless steel bowl, and bowl tray.

TROUBLESHOOTING
- If the feed er is not dispensing food, make sure you have filled the tank with enough food.
- If the feeder won’ t turn on, check if the power adapter, power cable, or batteries are correctly installed.
- Please make sure the (ood in the tank is dry, and (ood size is within 2—15mm (0.07—0.óin) in diameter.
- If the food won’ t come out, remove the (ood tank andtank base, and check if the chute inside is blocked.
- If the food won’ t come out, check whether the battery level is low, whether the power adapter is connected, and whether a power outage occurs when the power adapter is connected but batteries are not installed.
- The first few portions may vary, but it doesn‘ I mean the feeder is faulty. After about Ó feedings, porcions should be almost even.
SPECIFICATIONS
| Model | PLAF103 |
| Input | AC 100-240V 50/60Hz |
| Capacity | 5L |
| Battery power option | 3 • D alkaline batteries |
| Operating Temperature | 0″C-40″C / 32″F-104″F |
| Dimensions | 340 x 190 x 190mm /13.4 s 7.5 • 7.5in |
| Net weight | .66kg / 3.66lb |
SAFETY INSTRUCTIONS
- Dispose of alI packaging m ate rials properly. So me items may be packed in plastic bags; these bags could cause suffocation. Keep them away from children and pets.
- Do not use the feeder with pets that are not a ble to reach the food tray or with any physical disability.
- Do not immerse the base part in water at any time as it may da ma ge eI ectro nic com po nents like the contraI panel.
- Do not use the feeder outdoors. Check its operation frequently to be sure it is dispensing properly.
- Do not use wet, canned or moist food.
- Do not disassemble the (eeder other than as instructed in this user manual.
- O nly use accesso ries recommended or sold by the manufacturer. The use of accessories not recommended or sold by the manufacturer may cause an unsafe condition.
- Do not modify the pet feeder.
- Examine the feeder after installation. Do not plug in ifthere is water on the power cable or plug.
- To avoid tripping, always position the power cable out of the way of foot traffic.
- Do not install or store the pet feeder where it will be exposed to weather or temperatures below 0”C (32”F).
- Use D alkalin e batteries to power the feed er. Do not use rechargeable batteries.
- Check the batteries regul arly. Before leavinp for an extended period of time, always replace batteries with gpgpg
- Do not lift the pet feeder by the lid, food tank, or food bowl. Lift and carry it usinp both hands and the base while keeping the feeder in an upright posicion.
- Suitable for d ry (ood only, with kibble sizes ranking from 2—15 mm (0.07—0.óin) in dia meter. Larger kibble may get stuck at the food outlet.
- Do not put your fingers into the food outlet or let your fingers touch the rotor.
- Power off the device when it‘ s not in use
WARRANTY
- 12-month warranty
- For guidance on product use, please contact our customer service team via email: [email protected].
NOTICE
FCC statement
This device complies with Part 15 of the FCC Rules. Opertation is subject to the following two conditions:
(1) this device may not cause harmful interference, and (2) this device m ust accept any interference received, including inter(erence that may cause undesired operation. Ch a n g es or m odificatia ns to this unit n ot expres sly approved by the party responsible for compliance could void the user‘s authority to operate the equipment.
NOTE:
This equipment has been tested and found to comply with the limits for a Class B digital device, pursuant to Part.
15 of the FCC Rules. These limits are desig ned to provide reaso na bIe protection a ga inst harmful interfe rence in a residential instal lation. This equip ment generates, uses an d ca n ra d i ate ra d io fre qu en cy en e rg y a nd, if n ot installed and used in acco rdance with the instr uctio ns, may cause harm(ul inter(erence tO radiO communicatiOns. However, there is no guarantee that interference wilI not occur in a particular instal lation. If this equi pment does cause harm(ul interference to radio ar television rece ption, which can be determined by turning the equipment off and an, the user is enco ura ged to try to correct the interference by one or more of the fallowing measures:
- Reorient or relocate the receiving antenna.
- Increa se the separation between the equipment and
- Connect the equipment into an outlet on a circuit differ nt from that to which the receiver is connected.
- Consult the dealer or an experienced radio/TV technician (or help. This device and its antenna(s) must not be co-Iocated or operated in conjunction with any other antenna or transmitter
Radio frequency exposure statement
To ma inta in compliance with the FCC’s R F Exposu re Guidelines, this equipment should be installed and oper ated with a minimum distance o( 20cm from your body.


