
![]() PN 90029656 Rev 2
PN 90029656 Rev 2
Inseego Wavemaker™
5G Outdoor CPE FW2010
Installation Guide
About the FW2010
Description
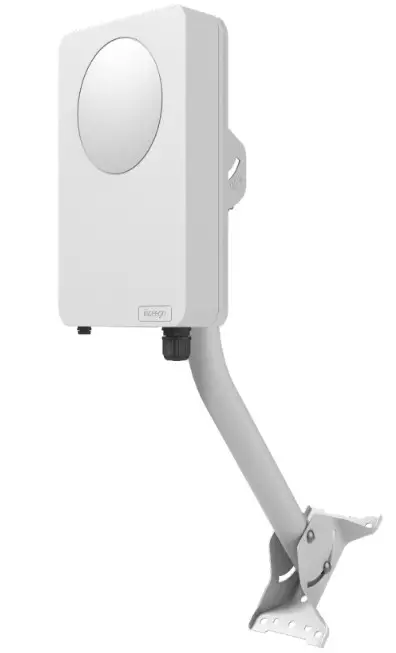
The 5G Outdoor CPE FW2010 delivers multi-gigabit data rates over 5G millimeter wave networks using high power phased array antenna modules. The FW2010 provides extended range and coverage for millimeter wave cellular networks and delivers data connectivity to existing in-building networks.
Durability
The FW2010 has an environmental rating of IP67 for water and dust ingress and can operate within a temperature range of -30°C to 60°C (-22 to 140°F).
Preparing to Install
Tools and materials
- Installation handle
- Ladder
- Round 4.5mm to 6.5mm Cat6A PoE* cable (RJ45 fittings attached)
- Smartphone/device for Inseego Mobile App
- SIM card (4FF Nano)
- Phillips-head screwdriver
- M6 4mm hex driver
- Drill
- 14mm socket wrench/driver
- Ground wire
- Cat6A Ethernet cable
- Sealing/weatherproofing material
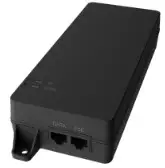
Your FW2010 package includes: FW2010 device, PoE injector, and SIM tool.
NOTE: Mount installation packages are ordered and shipped separately.
*Power over Ethernet
Pre-installation
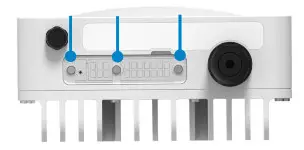
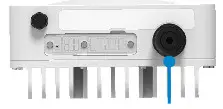
- Unscrew the protective shield over the SIM slots using a Phillips-head screwdriver.

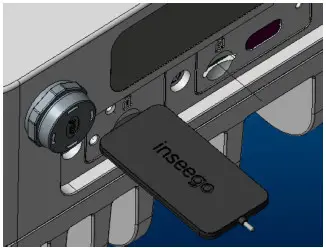
- Use the included SIM tool to insert a Nano 4FF SIM card into the appropriate SIM slot. Be careful to not use excessive force.
 NOTE: This device supports only Nano SIM cards.
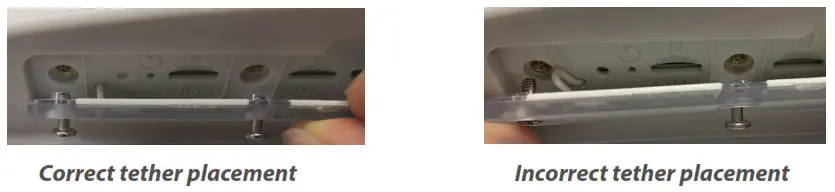
- Reattach the protective shield cover to a torque of 0.49 Nm (0.36 ft/lb), making sure the tether passes through the hole of the rear housing and is not bent or bunched.
 WARNING! If the tether is bunched, it could prevent the compartment from being effectively sealed.
 - For ease of carrying during the location survey, attach the installation handle* to the back of the device with a Phillips-head screwdriver.

- Install the PoE cable:
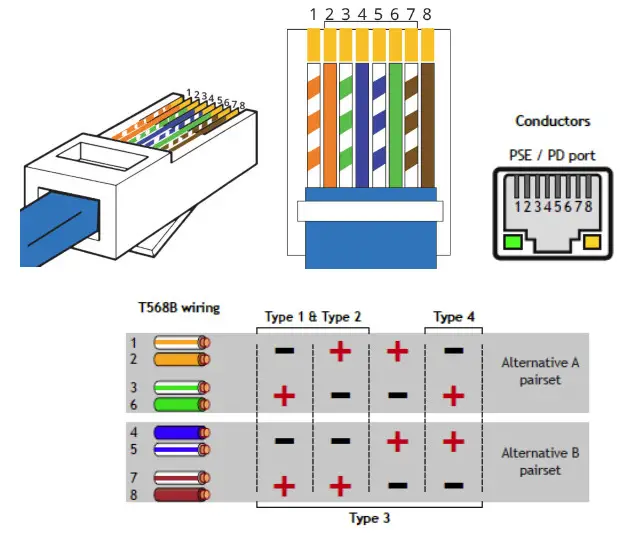
NOTE: Make sure your PoE cable wiring is correct (see “PoE RJ45 fitting cable wiring diagram”).
a. Unscrew the PoE gland cap assembly. b. Thread the PoE cable through the sealing cap, clip, and body of the gland assembly.
 *Installation handle sold as an optional accessory.
c. Screw the body of the gland to the FW2010. d. Connect the two parts of the sealing around the cable, then slide the sealing into the gland body.
 e. Slide the clip and the sealing cap along the cable and screw the sealing cap tightly to the gland body. The sealing cap will keep the PoE connection secure and watertight.
f. Insert the other end of the cable into the PoE injector Data & Power Out port. Plug the PoE injector into an earthed AC outlet.
 NOTE: This device supports only Nano SIM cards.
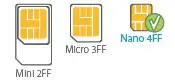
 WARNING! If the tether is bunched, it could prevent the compartment from being effectively sealed.
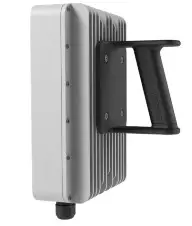
 b. Thread the PoE cable through the sealing cap, clip, and body of the gland assembly.
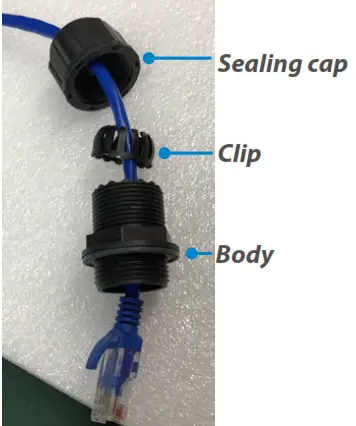 *Installation handle sold as an optional accessory.
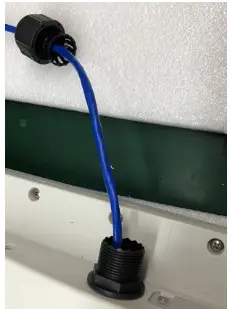 d. Connect the two parts of the sealing around the cable, then slide the sealing into the gland body.
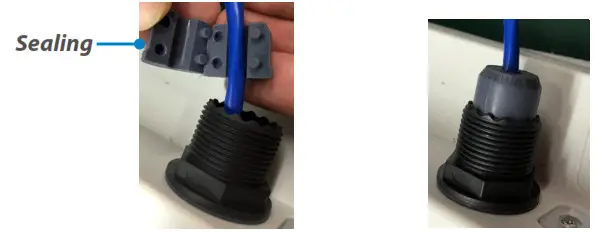 e. Slide the clip and the sealing cap along the cable and screw the sealing cap tightly to the gland body. The sealing cap will keep the PoE connection secure and watertight.
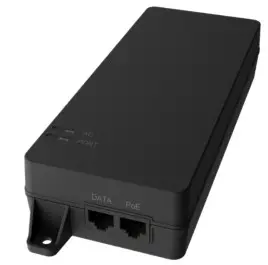
Location survey
- Scan the QR code to download the Inseego Mobile App from Apple Store or Google Play Store, or visit https://inseego.com/inseego-connect-getapp to download the App.
- Follow instructions within the Inseego Mobile App to connect to the FW2010 and perform a 5G site survey to identify the ideal location to install.
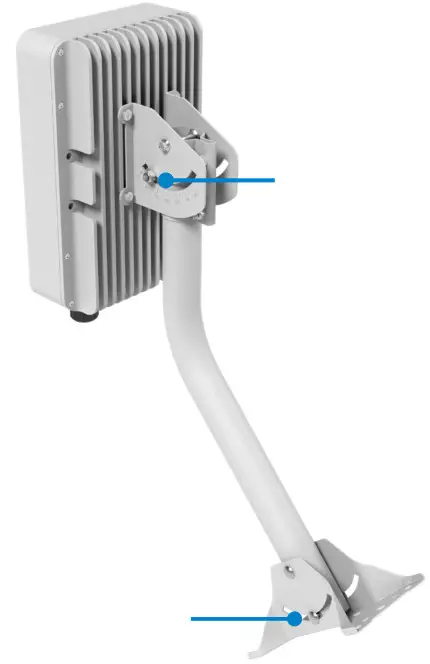
Option #1: J-Arm Mount Installation
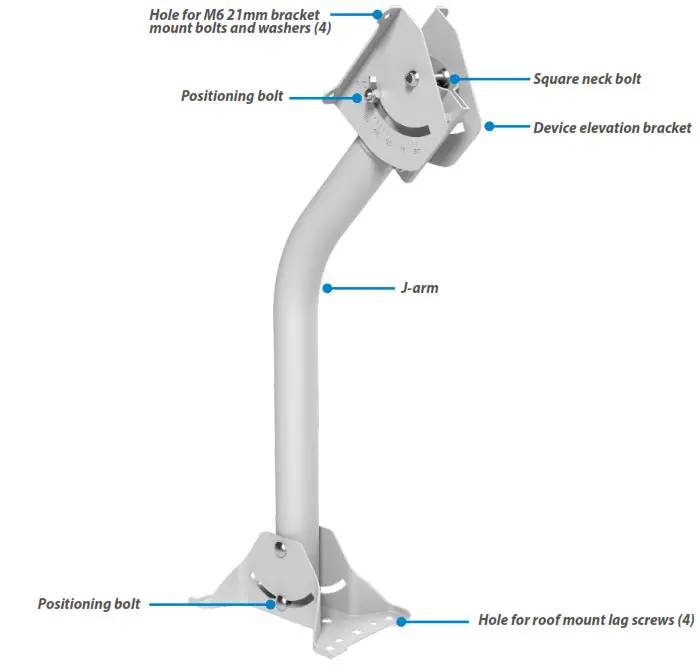
Attaching the FW2010 to the device elevation bracket
- Remove the installation handle and unplug the PoE cable from the PoE injector.
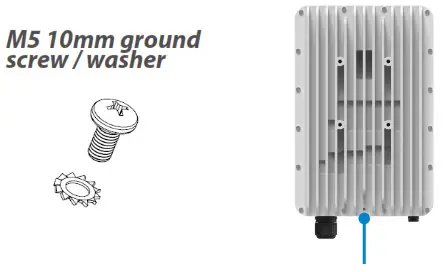
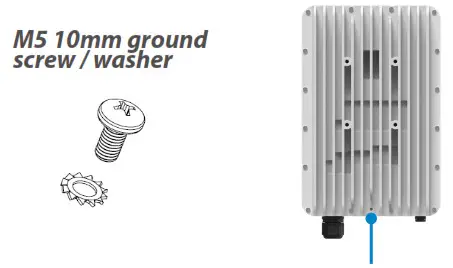
- Attach a ground wire to the back of the device with the ground screw.

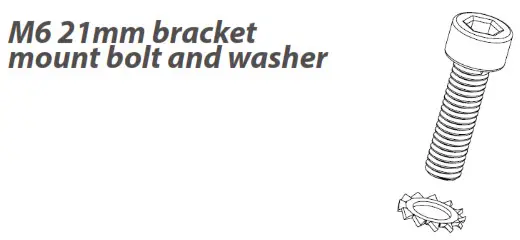
- Place the M6 external locking washers on the M6 21mm bracket mount bolts.

- Mount the device to the device elevation bracket using a hex driver to tighten the bolts to 2.0 Nm (1.48 ft/lb).


Securing the J-arm mount
The J-arm mount is adjustable and can be mounted on vertical, horizontal, and slanted exterior surfaces. The mount is attached using the four roof mount lag screw in the corners of the base.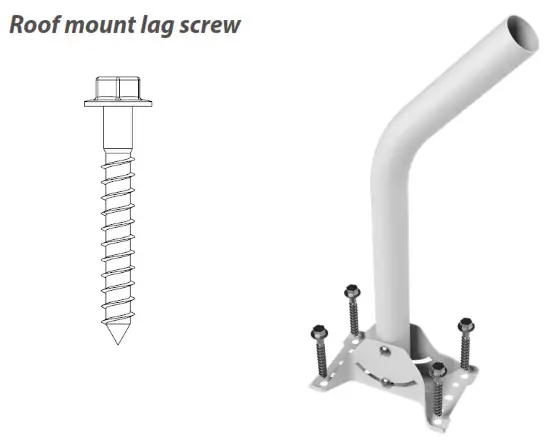
- Pre-drill holes in the surveyed location.
- Attach the mount using a hex driver to tighten the lag screws.
NOTE: Concrete anchors are provided if mounting to concrete or brick.
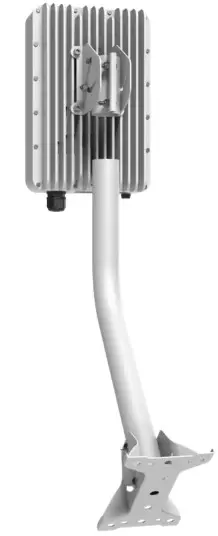
Attaching the device to the J-arm mount
- Attach the device elevation bracket to the J-arm mount and tighten the square neck bolts along the back to 2.0 Nm (1.48 ft/lb) using a ratcheting socket wrench.
- Secure the ground wire to an appropriate earth ground.

Orienting the device
- Run the PoE cable to the desired location of the PoE injector and insert the cable into the Data & Power Out port on the PoE power injector.
- Take a racheting socket wrench and device/ smartphone with the Inseego Mobile App to the FW2010 location.
- Use the Inseego Mobile App and the positioning bolts on the device elevation bracket and bottom of the mount to fine tune the horizontal and vertical angle of the FW2010 for the best signal.
- Tighten the positioning bolts to 15.0 Nm (11 ft/lb).

- Use sealing/weatherproofing material to seal any holes drilled in the structure to run the PoE cable.
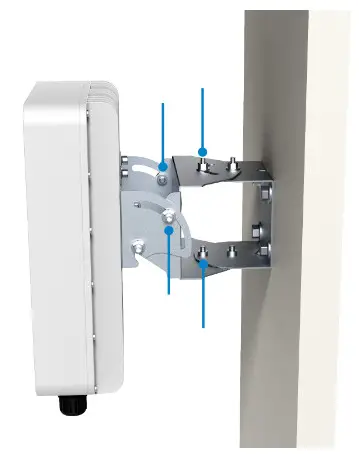
Option #2: Pole Mount Installation

Assembling the pole mount bracket
- Attach the azimuth bracket to the zenith bracket using the four hex flange head bolts and PEM nuts.
- Insert the M10 carriage bolts through the azimuth bracket and secure with external locking washers, washers, and M10 hex nuts.
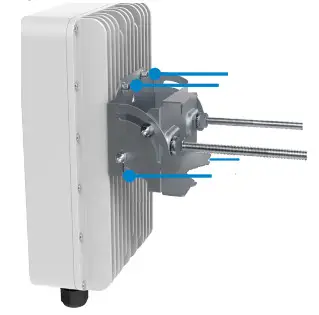
Attaching the FW2010 to the pole mount bracket
- Remove the installation handle and unplug the PoE cable from the PoE injector.
- Attach a ground wire to the back of the device with the ground screw.

- Place the M6 external locking washers on the four M6 21mm bracket mount bolts.
- Attach the pole mount bracket to the FW2010 using a hex driver to tighten the bolts to 2.0 Nm (1.48 ft/lb).

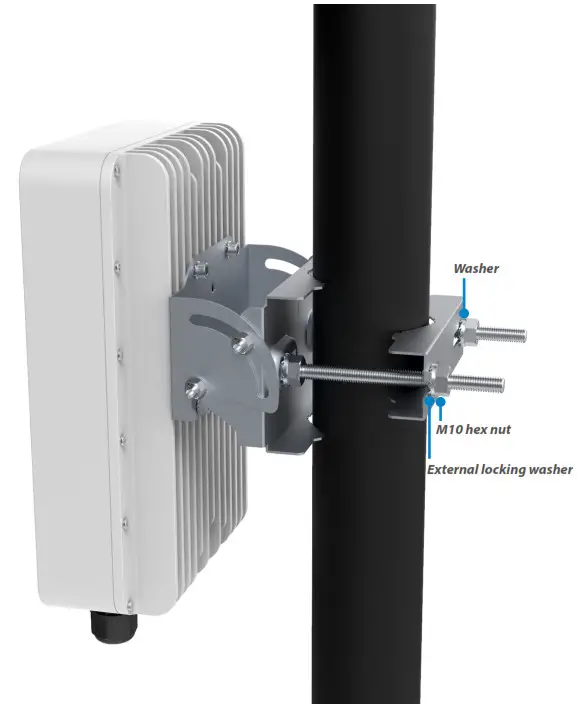
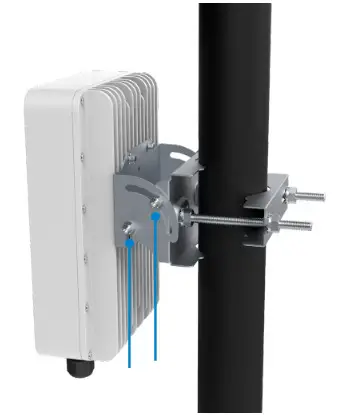
Securing the device to the pole
- Place the device against the pole.
- Slide the U-bracket onto the M10 carriage bolts and secure with external locking washers, washers, and M10 hex nuts tightened to 4.0 Nm (2.95 ft/lb).

- Secure the ground wire to an appropriate earth ground.
Orienting the device
- Run the PoE cable to the desired location of the PoE injector and insert the cable into the Data & Power Out port on the PoE power injector.
- Take a racheting socket wrench and device/ smartphone with the Inseego Mobile App to the FW2010 location.
- Use the Inseego Mobile App and the positioning bolts on the pole mount bracket to fine tune the angle of the FW2010 for the best signal.

- Tighten the positioning bolts to 15.0 Nm (11 ft/lb).
Option #3: Wall Mount Installation
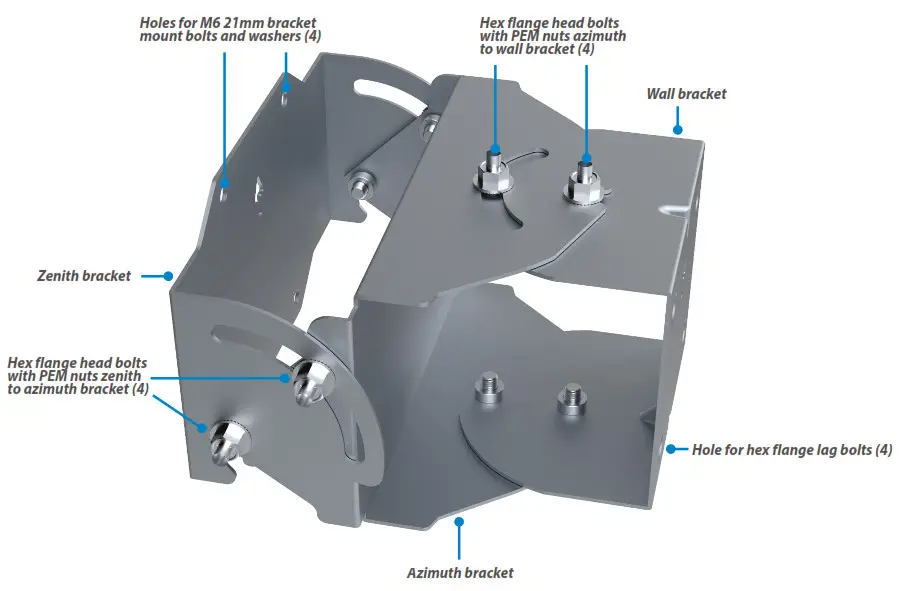
Assembling the wall mount bracket
- Attach the azimuth bracket to the zenith bracket using four flange head bolts and PEM nuts.
- Attach the azimuth bracket to the wall bracket using four flange head bolts and PEM nuts.
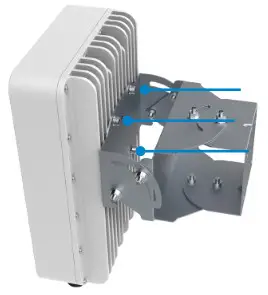
Attaching the FW2010 to the wall mount bracket
- Remove the installation handle and unplug the PoE cable from the PoE injector.
- Attach a ground wire to the back of the device with the ground screw.
- Place M6 external locking washers on four M6 21mm bracket mount bolts.
- Attach the device to the wall mount bracket using a hex driver to tighten the bolts to 2.0 Nm (1.48 ft/lb).

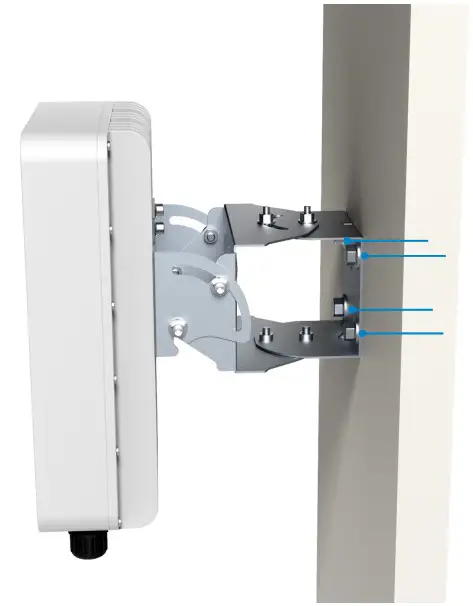
Securing the device to the wall
- Use four hex flange head lag bolts to attach the wall bracket to the wall.

- Secure the ground wire to an appropriate earth ground.
Orienting the device
- Run the PoE cable to the desired location of the PoE injector and insert the cable into the Data & Power Out port on the PoE power injector.

- Take a racheting socket wrench and device/ smartphone with the Inseego Mobile App to the FW2010 location.
- Use the Inseego Mobile App and the positioning bolts on the wall mount bracket to fine tune the horizontal and vertical angle of the FW2010 for the best signal.

- Tighten both sets of positioning bolts to 15.0 Nm (11 ft/lb).
Testing the connection
Checking the LED on the device
The LED is located in the SIM compartment and is visible through the protective shield.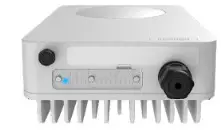
| LED Color | Operation | Meaning |
| Blue | Solid Blinking | Strong 5G connection (3 – 5 bars) Weak 5G connection (1 – 2 bars) |
| Green | Solid Blinking | Strong 4G connection (3 – 5 bars) Weak 4G connection (1 – 2 bars) |
| Yellow | Solid | Software update is in progress |
| Red | Solid Blinking | Router is booting up No service, SIM error, or locked SIM card |
Connecting a device
You can connect any router or device with Ethernet capability and an Internet browser to the FW2010. Connect an Ethernet cable from the Data In port on the PoE power injector to the connecting device.
Monitoring and managing your FW2010
You can use multiple options to monitor and manage your 5G Outdoor CPE:
- Inseego Mobile App – Use the same mobile app you used to install your FW2010 to perform basic device monitoring and management.
- FW2010 Admin Web UI – Access the Web UI at http://192.168.1.1 for a full set of device management features. The initial sign in password is: “Fast5G! “.
- Inseego Connect – Go to connect.inseego.com to sign up for a free Inseego Connect account, which lets you configure the settings, monitor status, and update the firmware on your device. Additional functionality can be obtained with a subscription to Inseego Connect Standard or Advanced.
PoE RJ45 fitting cable wiring diagram
The recommended PoE cable is Cat6A with T568B on both ends.
 Important Information
 Important Information
Inseego Mobile App requirements
Smartphone or device on iOS 13 or above, or Android 9.0 or above.
System requirements
Any device with Ethernet capability and an Internet browser. The FW2010 is compatible with the latest major operating systems and versions of Web browsers.
Approved firmware versions
This device will only operate with firmware versions that have been approved for use by your service provider and the device manufacturer. If unauthorized firmware is placed on the device it will not function.
5G
Not all devices, signals, or uses are compatible; check device specifications. See your service provider’s website for 5G coverage, access, and network management details.
Information about safeguarding devices
We encourage customers to take appropriate measures to secure their devices and invite them to take advantage of the features available on this device to help secure it from theft and/or other unauthorized access and use. This device has a locking function (e.g., user-defined codes or patterns) that can serve as a first line of defense against unauthorized use or access to stored information. Preloaded security applications that allow customers to track or locate misplaced devices can be found on several devices. Lost or stolen devices should be immediately reported to your service provider so that proper measures can be taken to protect accounts. For additional information, visit your service provider’s Privacy Policy.
Support and more
More information
To access a User Guide, go to: www.inseego.com/support-documentation/
Customer service and troubleshooting
Please contact your reseller.
PN 90029656 Rev 2 © 2021 Inseego Corp. All Rights Reserved


