
SUNRICHER RF+Bluetooth CCT Wall Mounted Remote

Important: Read All Instructions Prior to Installation
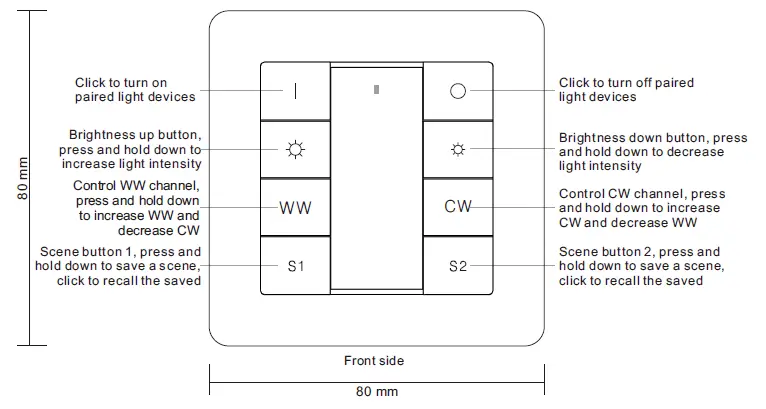
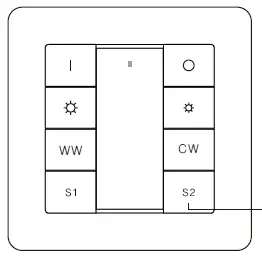
Function introduction

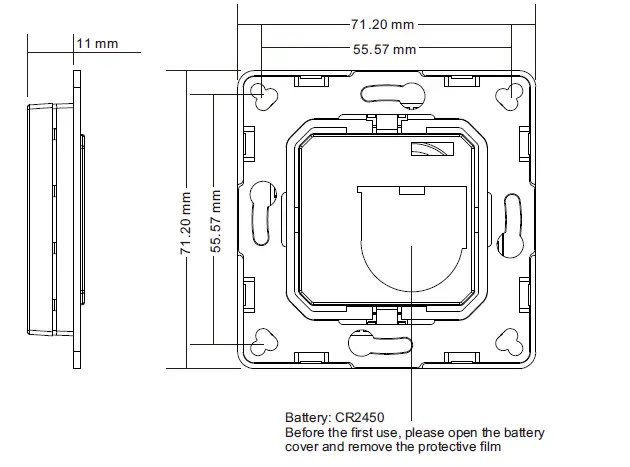
Product Data
| Output | RF+Bluetooth signal |
| Operation Frequency | 2.4GHz |
| Power Supply | 3V(1xCR2450 battery) |
| Operating temperature | 0-40°C |
| Relative humidity | 8% to 80% |
| Dimensions | 80x80x13.6mm |
- RF+Bluetooth CCT remote
- Control 1 zone of RF+Bluetooth receiver
- Enables to save and recall 2 scenes for each zone
- Easy & quick pairing to the RF+Bluetooth receivers by simply pushing the buttons
- Mesh network for further control distance, receivers can transmit signal to each other
- Each remote can control numerous receivers
- Each receiver can be paired to max. 8 remote controls
- The controlled receiver status can be quickly synchronized to the smart APP
- Transmission range between every two neighbor devices up to 30m
- Bluetooth low power consumption technology, long battery life
- Waterproof grade: IP20
Safety & Warnings
- This device contains a button lithium battery that shall be stored and disposed properly.
- DO NOT expose the device to moisture.
- Do not ingest battery, Chemical Burn Hazard
- This product contains a coin / button cell battery. If the coin / button cell battery is swallowed, it can cause severe internal burns in just 2 hours and can lead to death
- Keep new and used batteries away from children.
- If the battery compartment does not close securely, stop using the product and keep it away from children.
- If you think batteries might have been swallowed or placed inside any part of the body, seek immediate medical attention
Pair with RF+Bluetooth receiver
- Step 1:Do wiring the RF+Bluetooth receiver according to wiring diagram(please refer to the instruction of RF+Bluetooth receiver that you would like to pair with.
- Step 2:Click the Prog. Key or Reset button on RF+Bluetooth receiver (or reset power of the receiver 3 times continuously if the button is not accessible) to set it into pairing to RF remote status

- Step 3:Click any button of the remote(e.g. button receiver flicker means the receiver is paired with the remote successfully. Note: one receiver can be paired with max 8 remote controls.


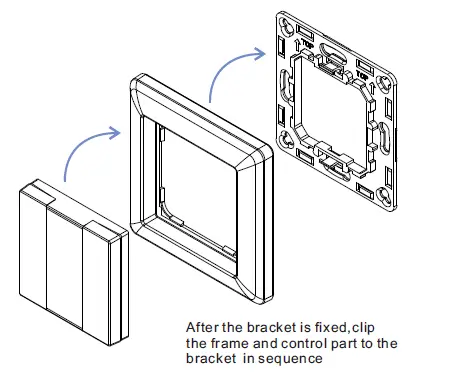
Installation
Remove battery insulator
Install the controller to wall(2 methods)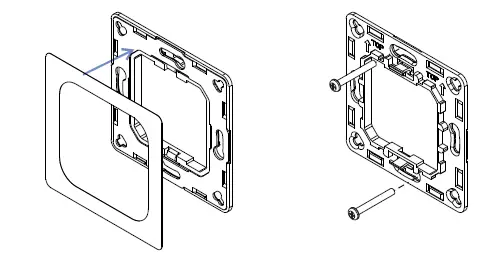
- Method 1:Stick 3M glue on the back of the bracket and then stick the bracket to the wall
- Method 2:Screw the bracket to the wall
The key part of this controller is a universal, standard size design switch element that can be integrated in numerous frames by different manufactures as below list:
| BERKER | S1, B1, B3, B7 glass |
| GIRA | Standard55, E2, Event, Esprit |
| JUNG | A500, Aplus |
| MERTEN | M-smart, M-Arc, M-Plan |
CAUTION
Risk of explosion if the battery is replaced by an incorrect type
- replacement of a battery with an incorrect type that can defeat a safeguard (for example, in the case of some lithium battery types);
- disposal of a battery into fire or a hot oven, or mechanically crushing or cutting of a battery, that can result in an explosion;
- leaving a battery in an extremely high temperature surrounding environment that can result in an explosion or the leakage of flammable liquid or gas;
- a battery subjected to the extremely low air pressure that may result in an explosion or the leakage of flammable liquid or gas.


