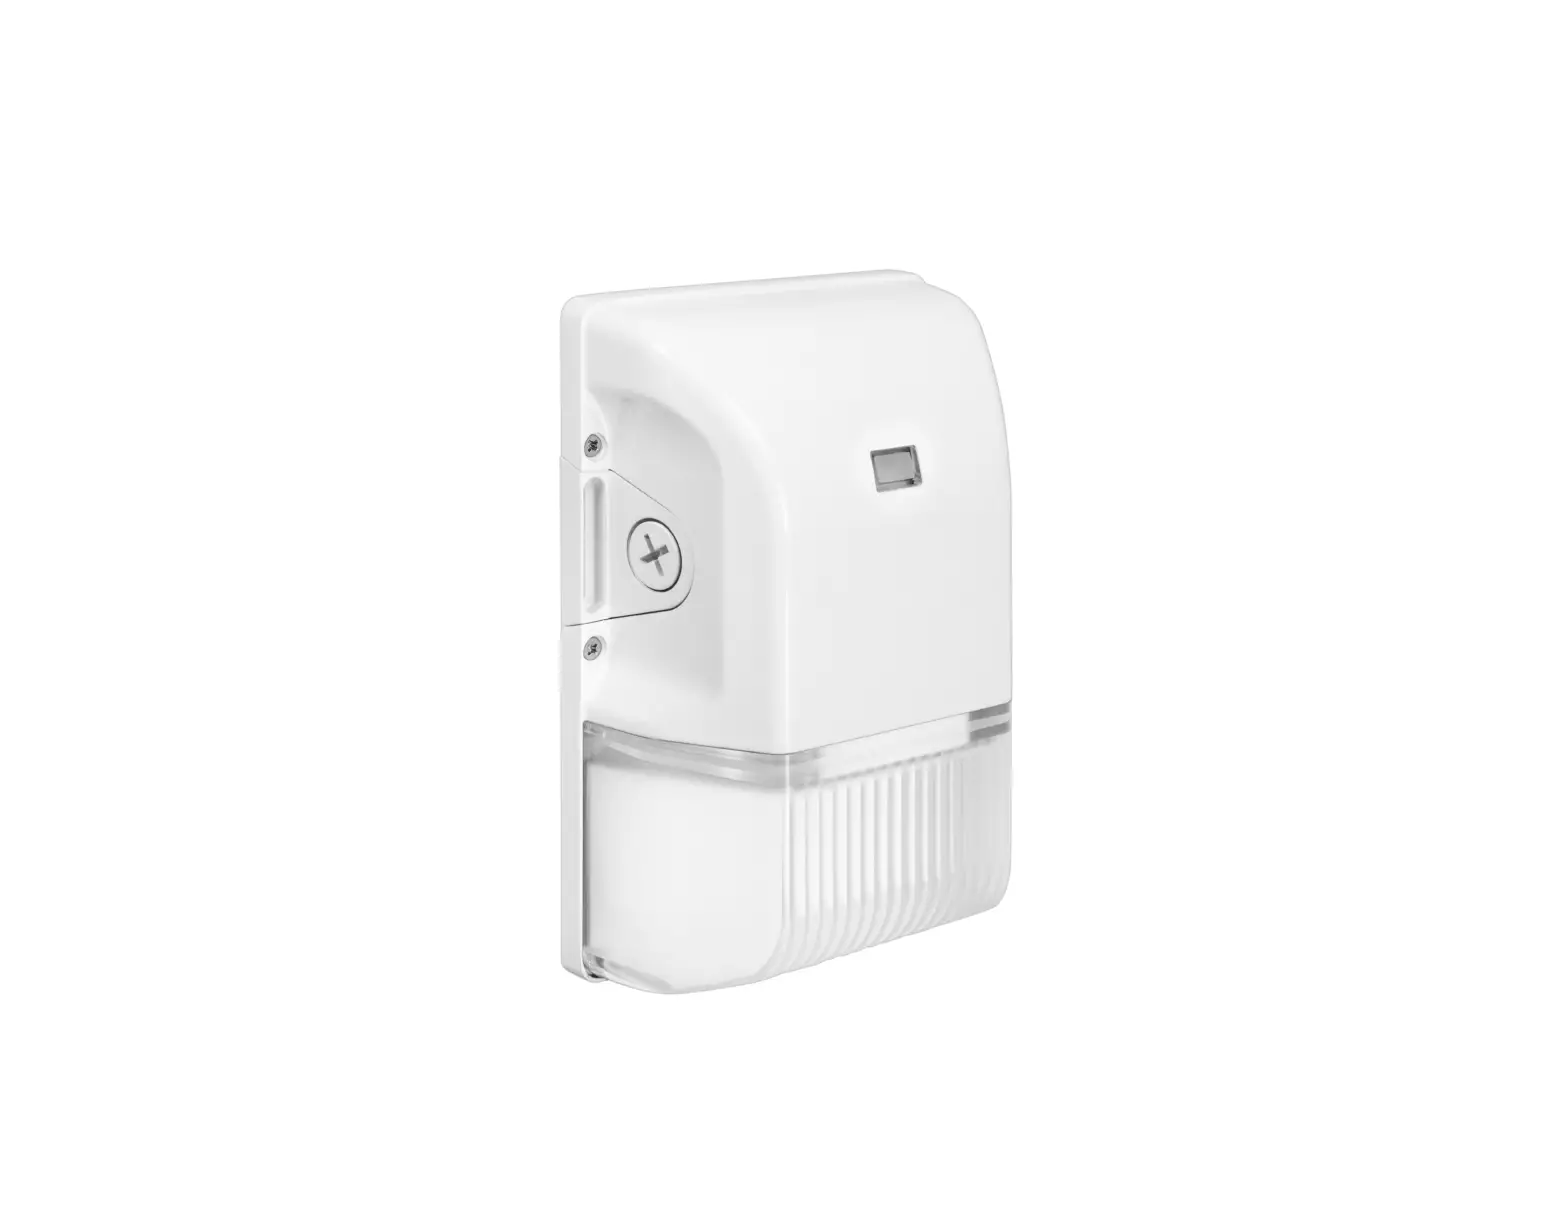
PLT SOLUTIONS PLTS-12365 Mini LED Wall Pack Fixture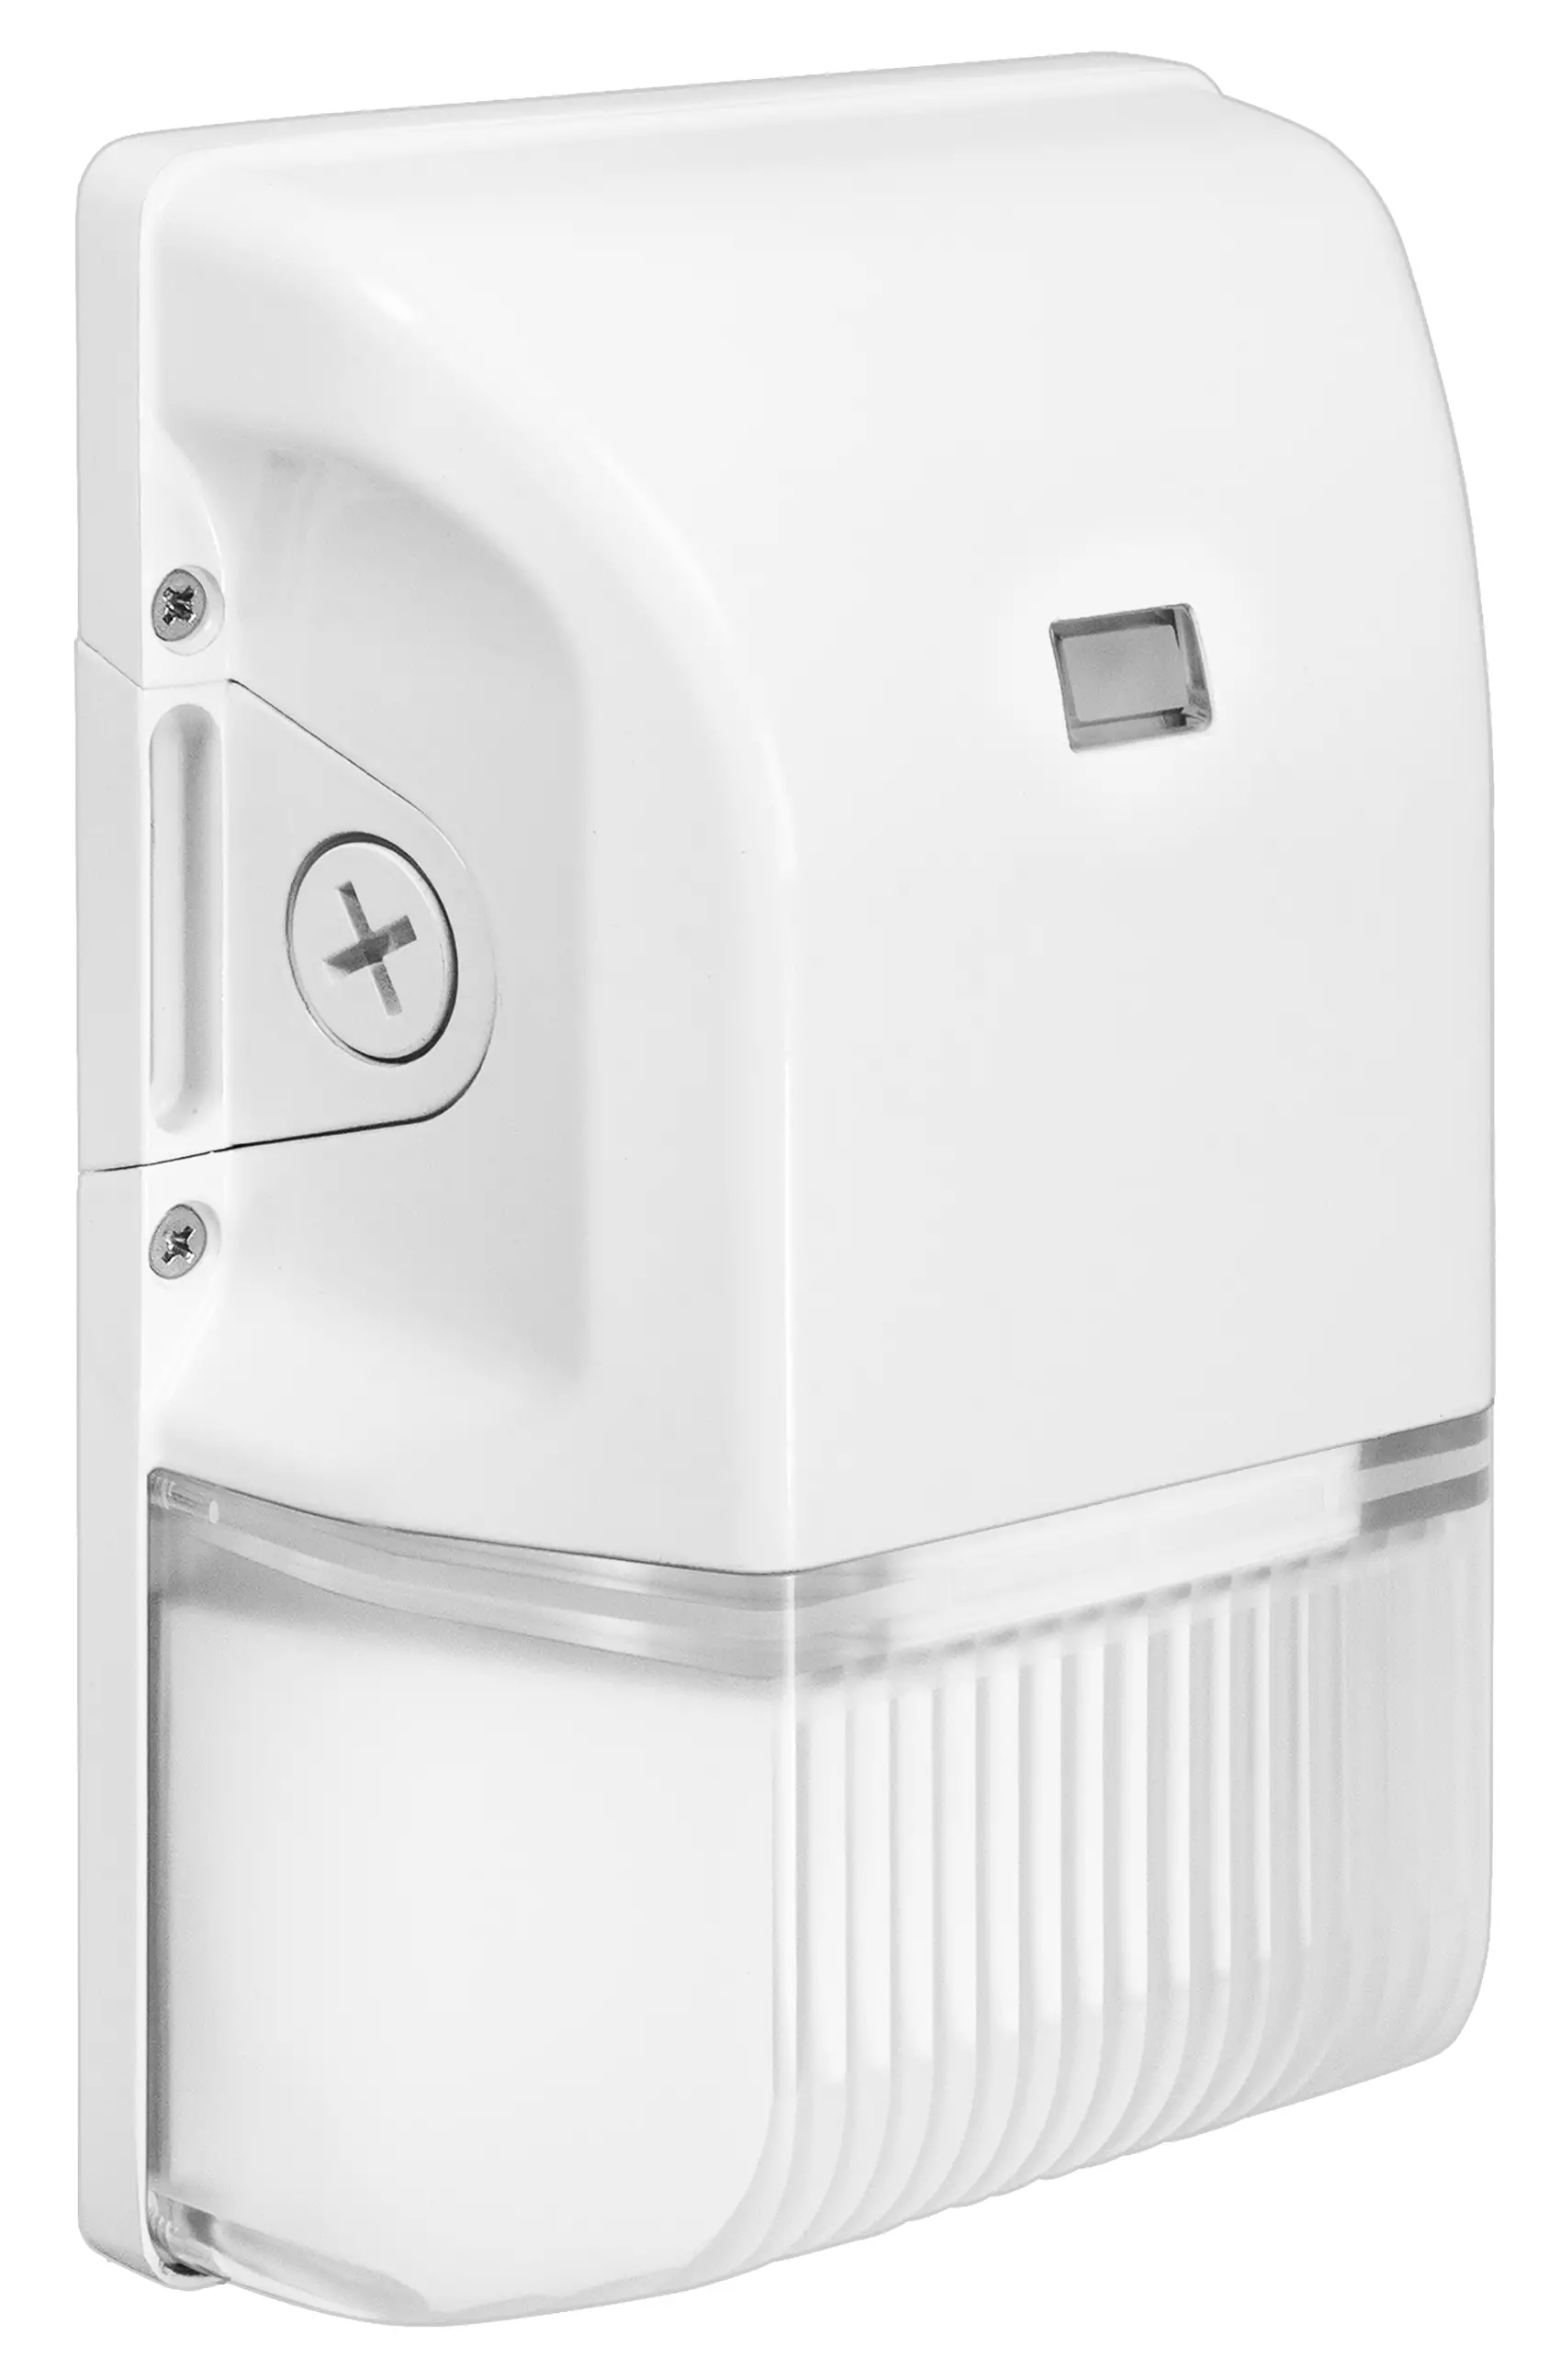
SAFETY AND INSTALLATION INSTRUCTIONS
![]() WARNING
WARNING
- Before installing, servicing, or performing routine maintenance upon this equipment, follow these general precautions.
- To reduce the risk of death, personal injury, or property damage from fire, electric shock, falling parts, cuts/abrasions, and other hazards, read all warnings and instructions included with and on the fixture box and all fixture labels.
- Proper grounding is required to ensure safety.
- Power must be turned off at the breaker before installation or maintenance.
- Installation, service, and maintenance of luminaires should be performed by a qualified licensed electrician.
- Wear gloves and eye protection at all times while installing, servicing, or preforming maintenance on the luminaire, and avoid direct eye exposure to the light source while it is on.
- Do not install damaged product. Inspect luminaire for damage that may have occurred during transit. If damaged, contact the manufacturer immediately.
- These instructions do not purport to cover all details or variations in equipment nor to provide every possible contingency to meet in connection with installation, operation, or maintenance. Should further information be desired or should particular problems arise which are not covered sufficiently for the purchaser’s or owner’s purposes, contact the manufacturer.
WARNING
- This luminaire is designed to operate in ambient temperatures ranging from 40°C to 45°C (-40°F to 113°F).
CAUTION
- Use minimum 75° supply conductors.
Installation Instructions
Method A
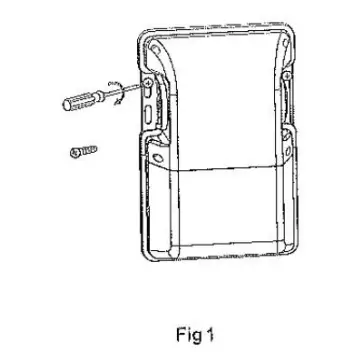
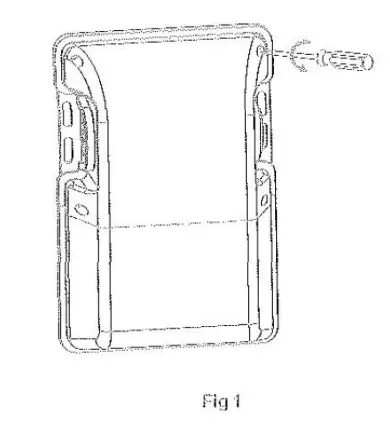
- Fix the fixture on the wall through the side ears with two 4mm wide screws (not provided). (Fig 1)

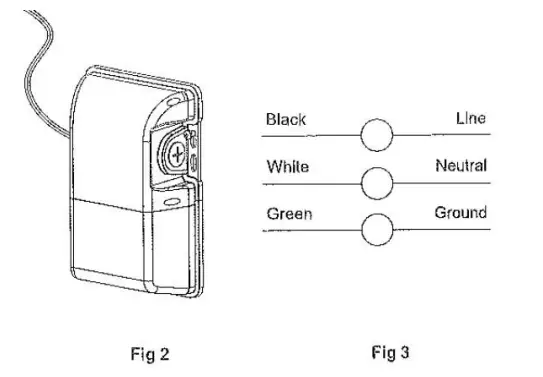
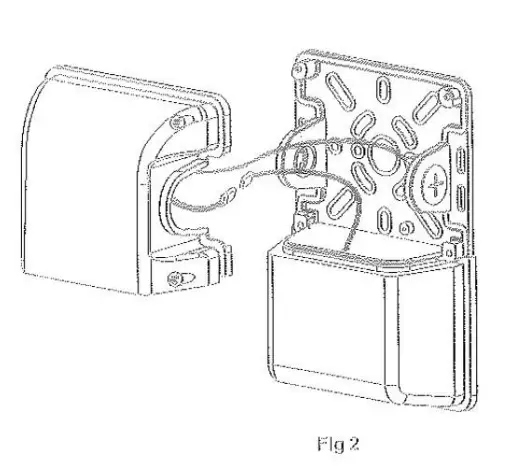
- Connect the wires as shown below in Fig 2 & 3.

Method B
- Unscrew the four 4mm wide screws on the front of the driver box cover. (Fig 1)

- Unplug the male and female connector, then remove the driver box. (Fig 2)

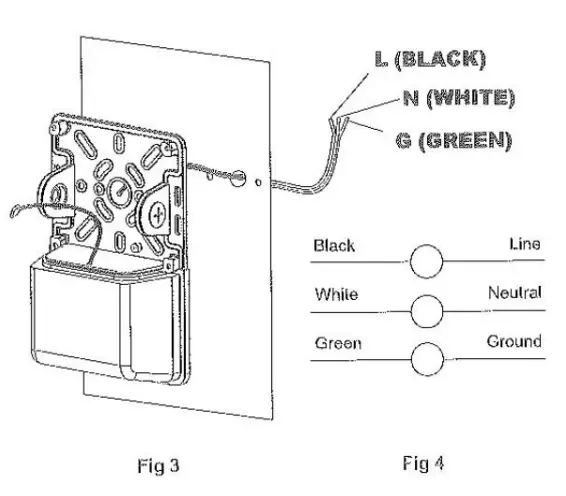
- Drill holes on the base according to the junction box or mounting position on the wall. Attach the fixture and then connect the wires as shown below in Fig 3 and 4.

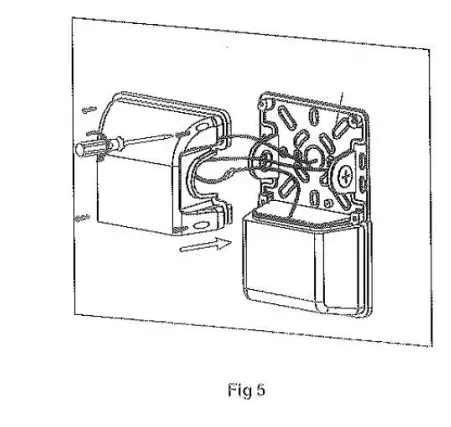
- Connect the male and female connectors. Tightly attach the front cover (driver box) back to the base using the four 4mm wide screws. (Fig 5)

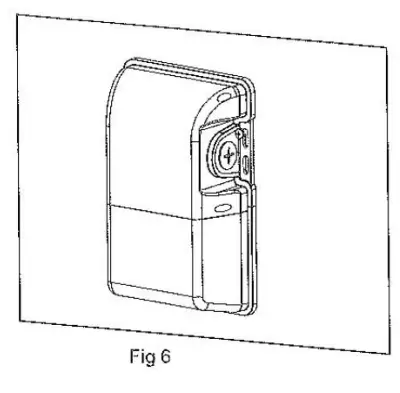
- Installation is complete. (Fig 6)

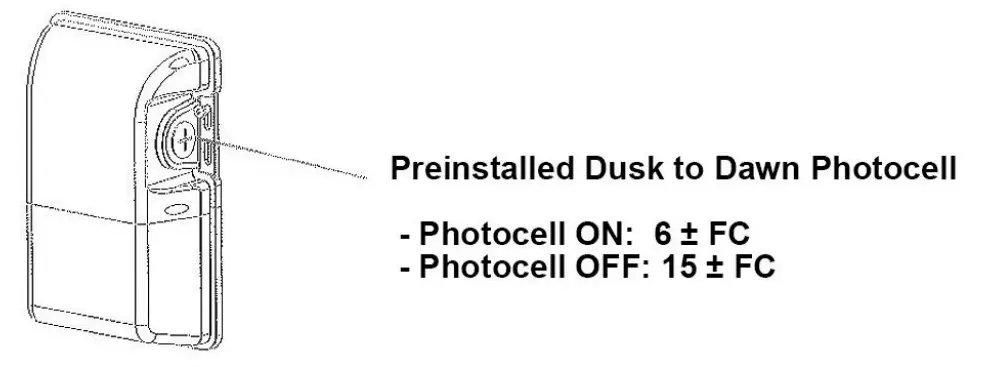
Dusk to Dawn Photocell
4 972-535-0926 I pltsolutions.com I ver 013023