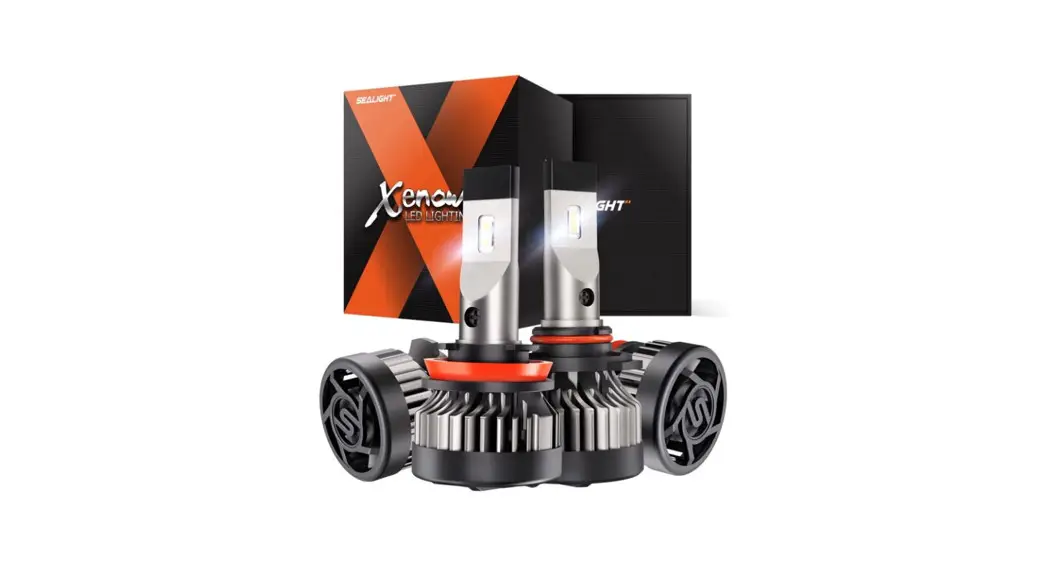
X2 9005-HB3 Brightest LED Headlight
User Manual
PRODUCT INTRODUCTION
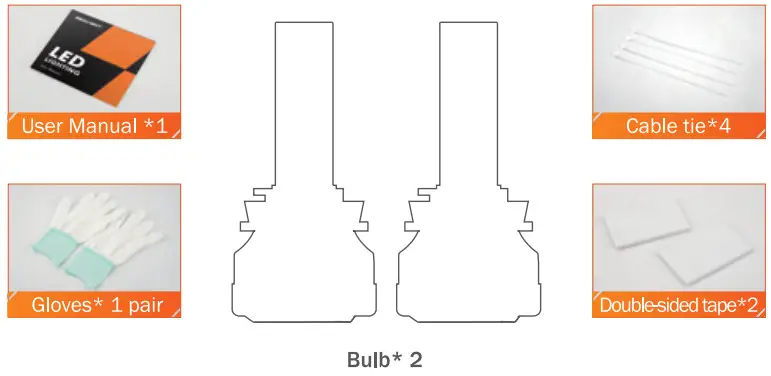
Accessories list (pictures for reference):
Features:
- Perfect beam pattern, fully illuminating the road during driving.
- High compatibility with Can8US system, fit most vehicle’s systems without error.
- Simple installation, plug and play, long life.
Product specifications
| Operating voltage | DC (9-16V ) |
| IP rating | IP67 |
| Color temperature | 6000 – 6500K |
| Operating temperature | -40 C-85 C |
| LED chips | High-brightness LED chips |
| Heat sink | 6063 aluminum alloy |
| Warranty | 2 years |
User instructions
- It is recommended to watch the headlight bulb installation video and installation instructions before installation
- Please purchase the product through official channels, otherwise we won’t provide after-sales service.
- As the product has small & sharp parts, please keep it away from children.
- After receiving the product, please carefully check whether it is damaged or any part is missing. If there is any problem, please contact Customer Service.
- This product is only fit for vehicles which use 12V batteries. High voltage may cause damage.
CUSTOMER SERVICE TEAM
E-mail: [email protected]
Tel: (+1)805-538-4353
If you have any questions, please contact our technical support team.
INSTALLATION INSTRUCTIONS
- Matters needing attention:
1. The OE halogen bulb would be extremely hot for a quite long time after shutting down . To avoid burns, please wait at least 0.5 hours before replacing the lamps.
2. Wear gloves while replacing the lamps, and do not touch the LED chips.
3. If the lamps do not light-up , please unplug the power line, connect it reversely and try again. - Models: H1/H3/H4/H7

Installation instructions
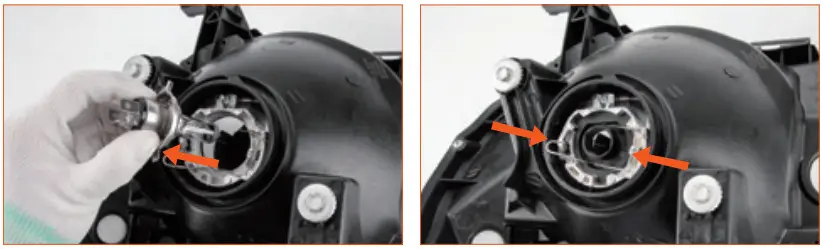
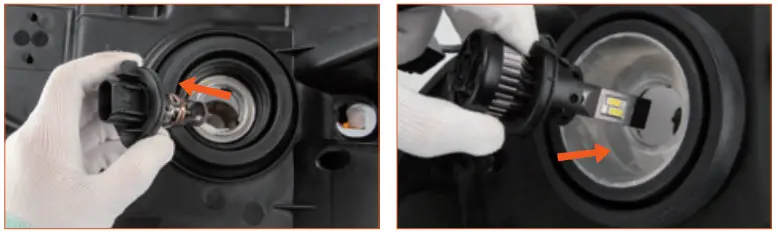
Fig. 1: Remove the dust cover and the OE Halogen bulb. and then remove the OE Halogen bulb;
Fig. 2: Insert the retainer holder into the assembly slot, match the tabs with slot, and lock the retainer holder with the buckle;
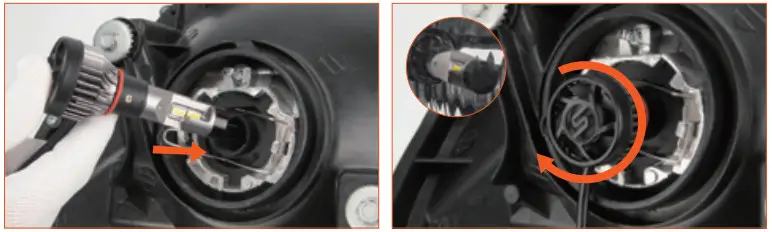
Fig. 3: Insert the lamps into the retainer holder with correct position ;
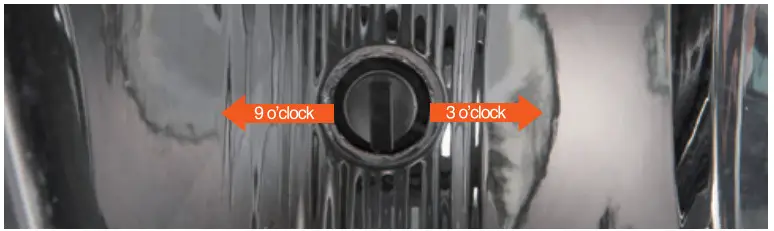
Note: H4 rotate clockwise until the LED chips face 3-9 o’ clock.
Fig. 4: Rotate the base of the lamps clockwise until it is in the correct position;
Fig. 5: Please double check the “+/-” polarity before connecting the plug. (Only apply for a few models).
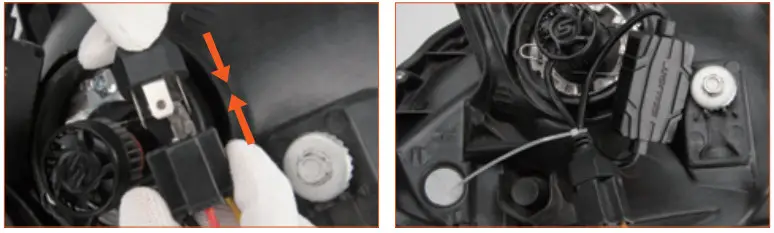
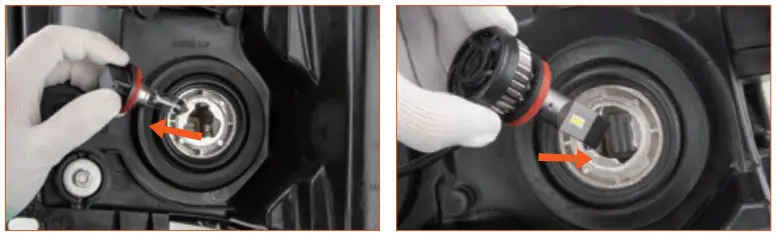
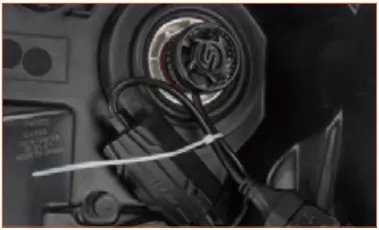
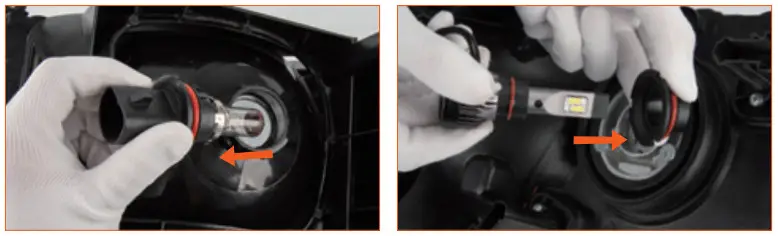
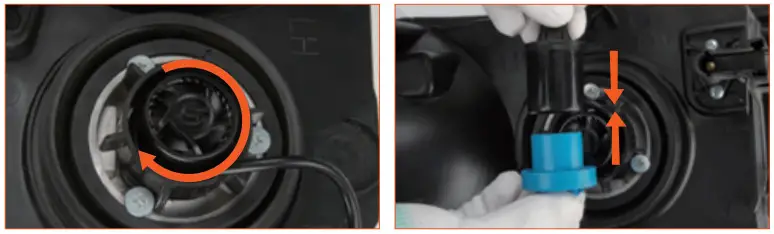
Fig. 6: Sort and fix the wiring harness with Zip Ties. - Models: H8/H9/H10/H11/H16/9005/9006/9012

Installation instructions
Fig. 1: Remove the dust cover and the OE halogen bulb.
Fig. 2: Line-up the retainer holder with the slot of the assembly.
Fig. 3: Insert the lamps , turn them clockwise, then clamp tightly,
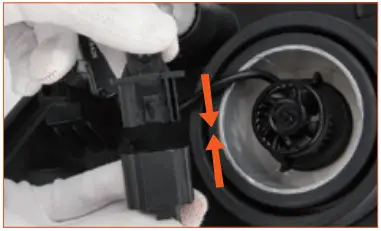
Fig. 4: Connect the power line.
Fig. 4: Sort and fix the wiring harness with Zip Ties. - Models: 9004/9007

Installation instructions
Fig. 1: Remove the bulb retainer and OE halogen bulb from the vehicle.
Fig. 2: Take apart the retainer holdet from LED lamps.
Fig. 3: Assemble the retainer holder with the bulb retainer together, and then insert them into the assembly.
Fig. 4: Insert the lamps into the retainer holder with correct position.
Note: Line up the tiny tab of LED lamps with the slot of retainer holder.
Fig. 5: Hold the base of the LED lamps, rotate clockwise until the LED chips face 3-9 0′ clock. ( if your highbeam and lowbeam are reverse, then rotate clockwise by 180º)
Fig. 6: Connect the power line.
Fig. 7: Sort and fix the wiring harness with Zip Ties. - Models: 9008/H13

Installation instructions
Fig. 1: Remove the OE halogen bulb
Fig. 2: Insert 9008, H13 into the assembly and rotate it clockwise, then lock it.
Note: If necessary, adjust the position of the retainer holder. use a screw driver to take apart the screws, hold the base of lamp and rotate it to the right position (The LED chips should face 3-9 o clock or power cable and ground are vertical). Place the screws back and fix them.
Fig. 3: Connect the power line.
Fig. 4: Sort and fix the wiring harness with Zip Ties. - Suggestions
Suggestions: According to most vehicles’ configurations, we recommend keeping the LED chips facing the 3 o clock and 9 o clock positions to ensure the best beam pattern and visual effect. However, it is impossible to adjust to this position for some vehicles. There is no need to worry about the position of the LED chips as long as the beam pattern is acceptable. Picture: LED chips facing 3 o’clock and 9 o’clock positions
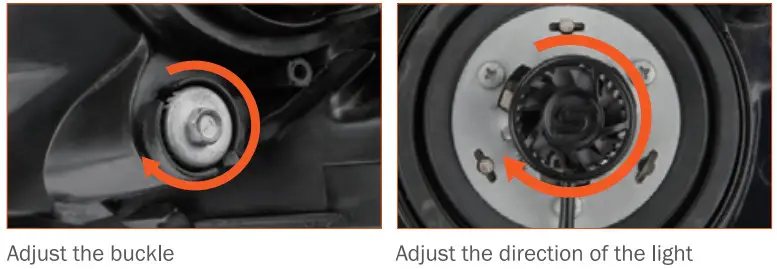
If you are not satisfied with the light pattern and visual effect after installation, please operate and adjust according to the figure


FAQ
Can I get an exchange for the correct model?
– A: Please contact our Customer Service for a replacement
– A: Some LED lamps are not in a 1:1 ratio with the OE halogen bulbs. The large base is for better heat dissipation and prolonging the life of the lamps.
– If the lamps are not suitable for installation, Please contact our Customer Service for a replacement.
– (1) Errors on instrument panel;
– (2) The Lamp keeps flashing;
– (3) Can’t switch between high and low beams;
– (4) High and low beam reversed,
– (5) The Lamp does not turn on or off.
– A: The above phenomenons are decoding problems, which are mainly caused by the automotive computer failing to detect the correct signal. You can contact Customer Service to obtain the decoder and solve the decoding problem.
– A: We recommend keeping the LED chips facing the 3 o’clock and 9 0’clock positions to ensure the best beam pattern and visual effect. However, it is impossible to adjust to this position for some vehicles. There is no need to worry about the position of the LED chips as long as the beam pattern is acceptable.
– A. If your Daytime Running Lamp and High beam is the same bulb, the case would be complicated to solve.
– Please contact Customer Service.
– A: lt is recommended to remove the lamp, rotate by 180 and install it again. If the problem still exists, please contact Customer Service.
WARRANTY DESCRIPTION
Thank you for purchasing our products. All of our products are manufactured with best quality control To protect your rights, you can extend the warranty period for 6 months by contacting us via the links below.
Extended warranty period:
https://sealight-led.com/membership
Links: https://sealight-led.com/membership
Made In China![]() www.sealight-led.com
www.sealight-led.com![]() [email protected]
[email protected]


