![]() Thoughtful Products for your Smart Home
Thoughtful Products for your Smart Home
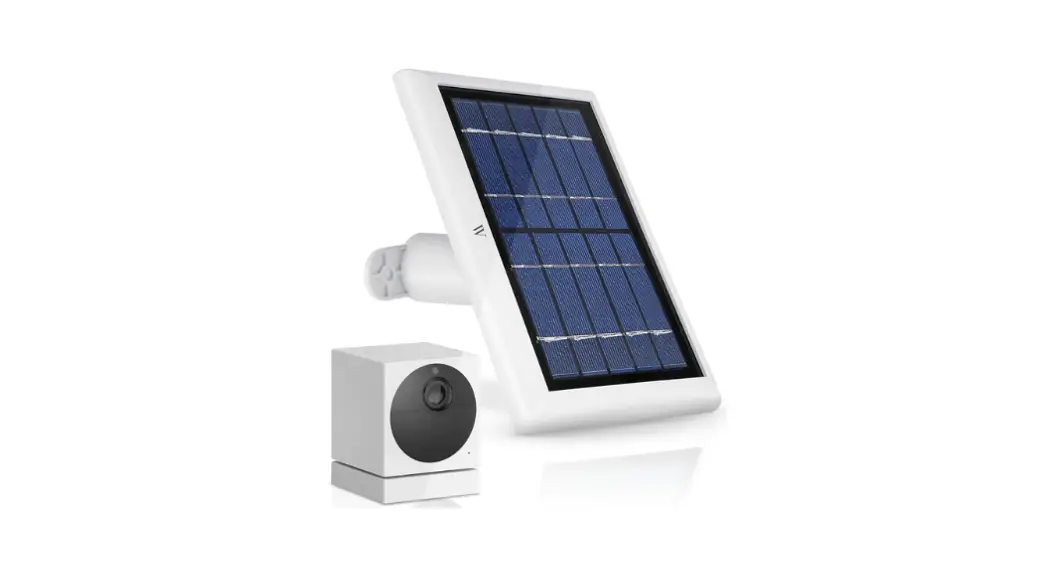
Solar Panel for Wyze
Cam Outdoor
USER MANUAL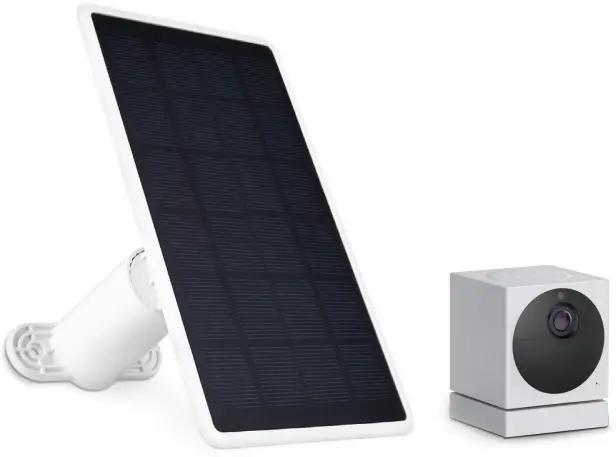
In the Box
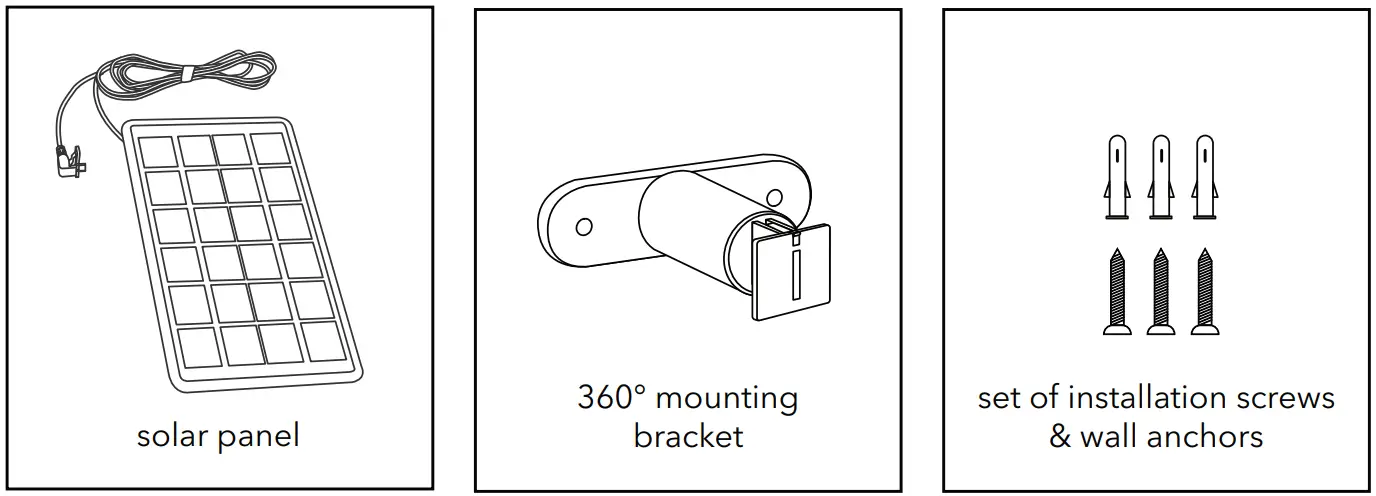 Important Note
- Make sure that your Wyze Cam Outdoor is fully charged before you connect it to the solar panel.
- Please place you solar panel at the position with best direct sunshine.
Warning
- Do not open or dismantle the solar panel for any reason.
- Keep the solar panel away from any heat source like a furnace, heater, or barbeque grill.
- Make sure that the outdoor charging cable is properly attached to your camera.
- Avoid bending, stretching, or cutting the charging cable.
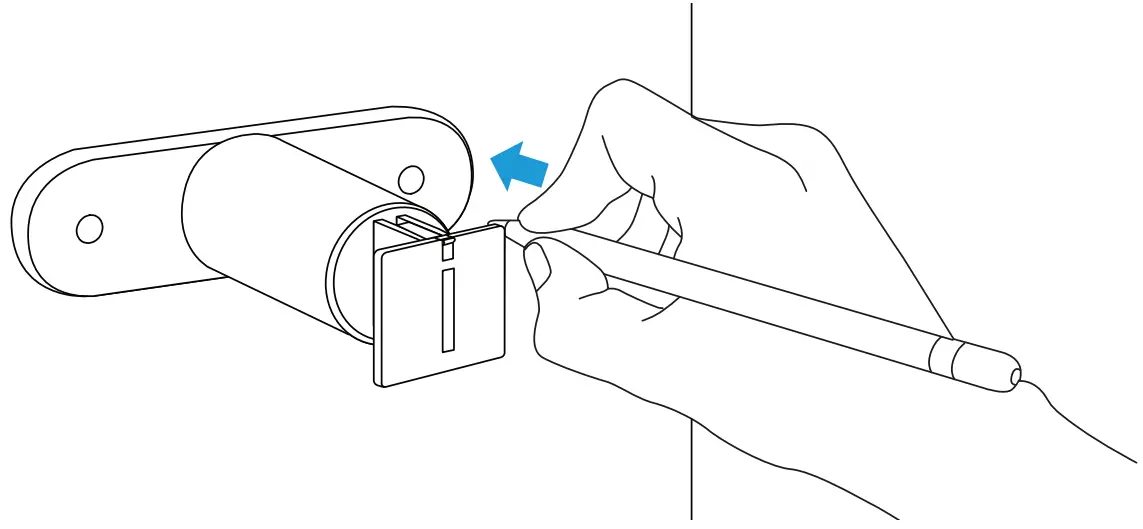
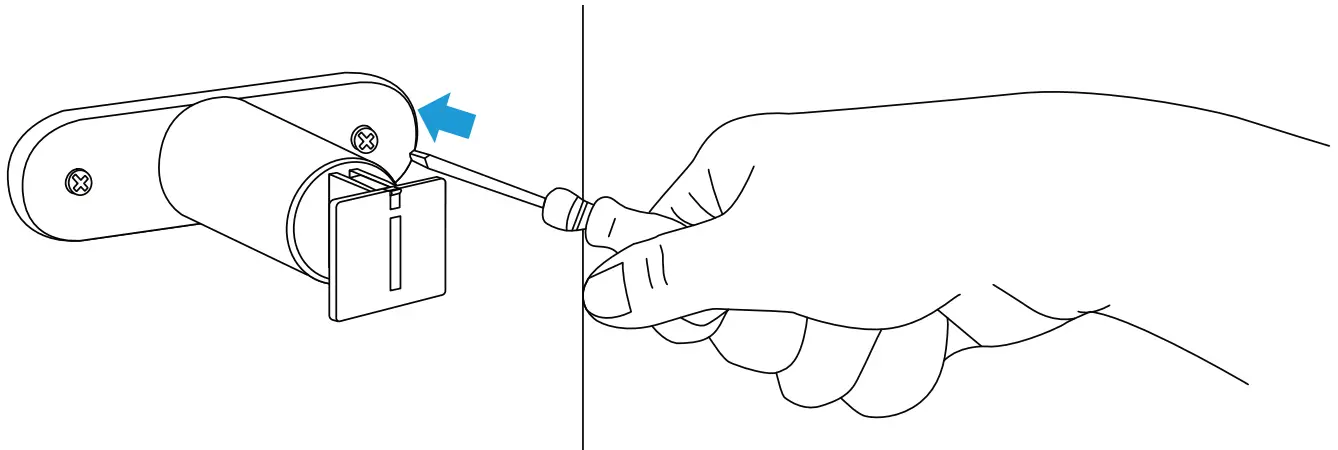
Installing Solar Panel
- Mark the holes using the bracket for guidance.

- Drill the holes.

- Insert the anchors and screw the mount to the wall.

- Slide the solar panel onto the mounting piece.


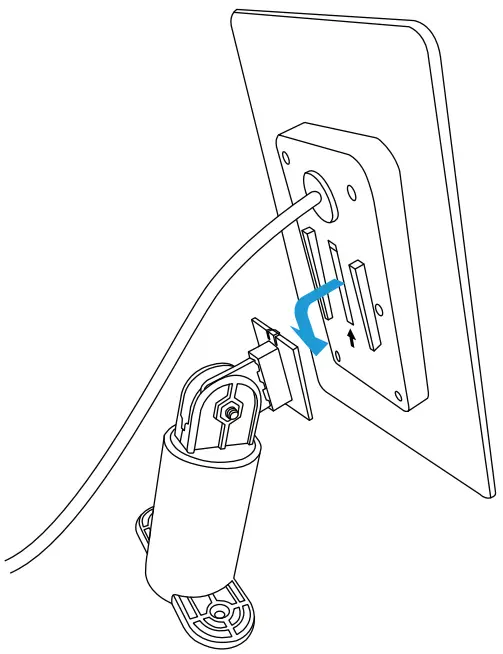
Adjusting your Solar Panel
The 360-degrees rotatable mounting bracket allows you to adjust the Solar Panel in the best position to absorb sunlight.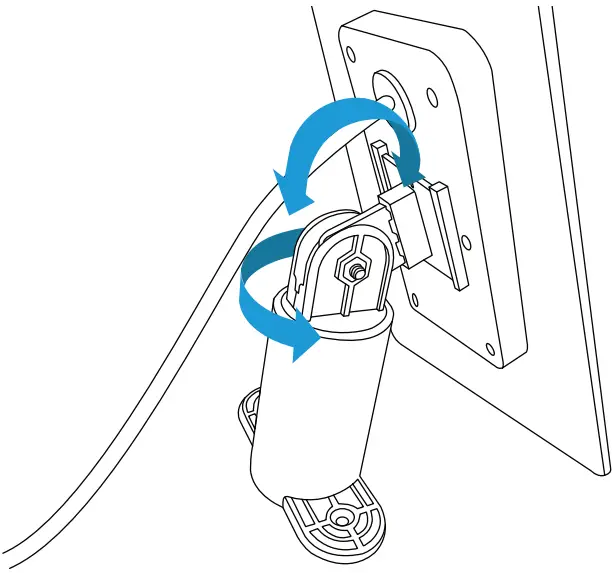 Connect the Solar Panel to your Wyze Cam Outdoor
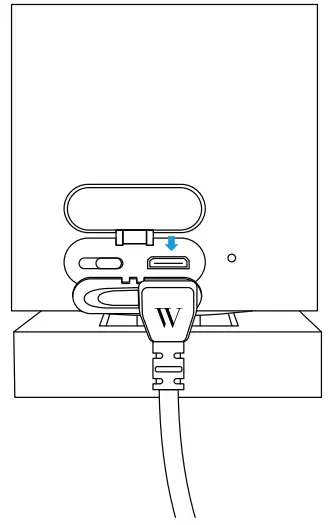
- Open the rubber cap at the back of your camera, and plug the cable firmly into the port.
- Place the solar panel under direct sunlight to continuously charge to your camera.
Specifications
| Dimension: | 7.5 x 4.37 x 0.79 in |
| Power: | 2 W |
| Voltage: | 5 V DC |
| Outdoor Cable length: | 13.5 ft |
| Materials: | ABS |
Get More Support
Scan the QR code below or email us at [email protected].

Wyze Cam Outdoor is not included.
Wyze Cam Outdoor is a trademark of Wyze Labs, Inc.
Wasserstein is not affiliated with Wyze Labs, Inc.
Wasserstein is a trademark of Dropcases Ltd.
![]() www.wasserstein-home.com
www.wasserstein-home.com
Made in China


