Smart WiFi Battery Camera Quick User Guide
Packing list
A1 Packing list:
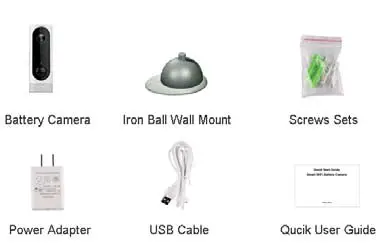
A3 Packing list: 
1pcs battery Camera, 1pcs bracket, 1pcs screw sets, 1pcs power adapter and USB cable; 1pcs User Guide
Product Details
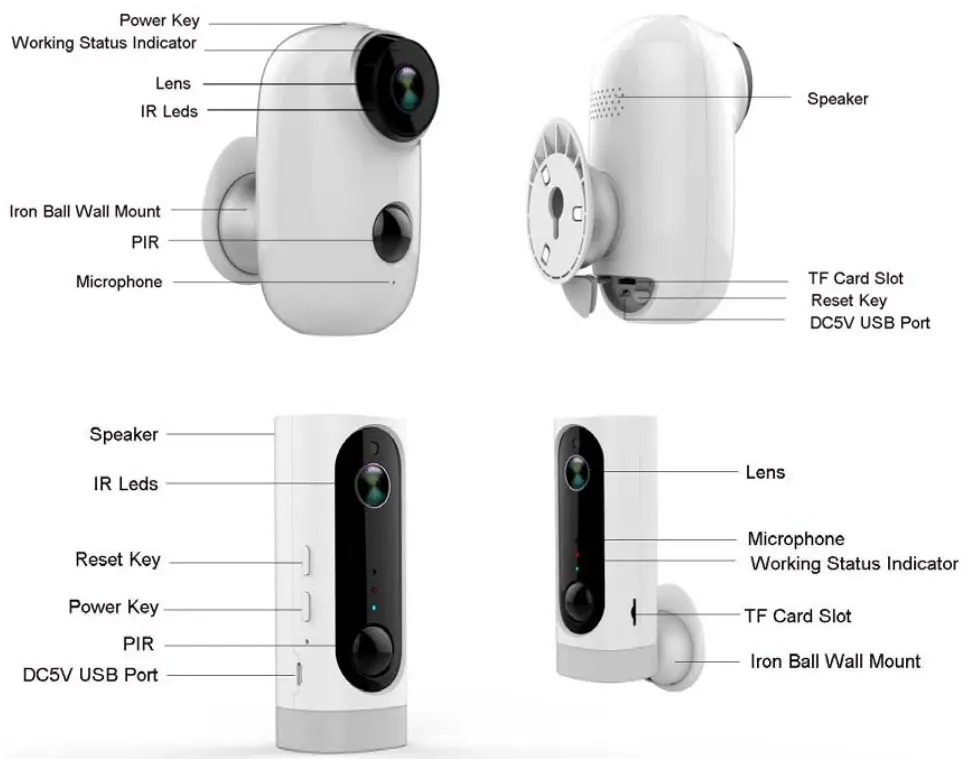
| No. | Camera key | Operation |
| 1 | Power Key | Press and hold for 5 seconds, it will power on/power off |
| 2 | Power Key | Press 1 second, it will wake up the camera |
| 3 | Reset Key | Press and hold for 5 seconds, it will restart |
Set up Camera
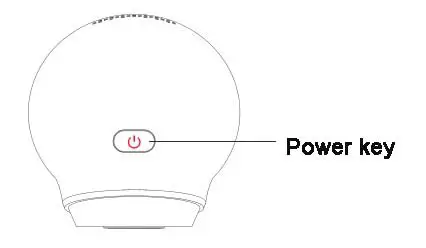
Power on the camera
Press the power key, as beside picture shown, and hold on for 5 seconds, it will power on
* NOTE: Note: The camera battery is not fully charged when it leaves the factory for safe delivery.
If it can not power on, please plug in the DC5V 1A USB power adapter to do charge.
If 100% no power, it will take about 5 hours to charge fully.
Important Note
Wi‐Fi battery camera is not designed for 24/7 full capacity running or around-the-clock live streaming. It is designed to record motion events triggered by PIR sensor.
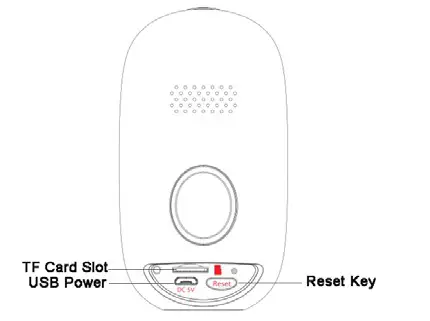
Plug-in Power or TF Card
Plugin camera by DC5V 1A USB Power adapter when needed, and insert the TF Card, as beside picture shown:
* NOTE: TF card max support 128GB
Recommended SanDisk brand Class 10
 Smartphone Wi‐Fi Connection
 Smartphone Wi‐Fi Connection
Bring the camera and phone within 1 to 3 feet (30 to 100 centimeters) of the router.
Note: Make sure the smartphone is connected to your wireless router.
Please note our camera only works under 2.4G Wi‐Fi, it doesn’t support 5G Wi‐Fi.
Install Cloudedge APP
Search “Cloudedge”in-app store or google play, or scan the below QR Code to download and install on the smartphone.

https://itunes.apple.com/app/id1294635090?mt=8

https://play.google.com/store/apps/details?id=com.cloudedge.smarteye
Register Account :
Launch the app from your smartphone and click the “SIGN UP” button. Follow the on‐screen instructions to register one account and login
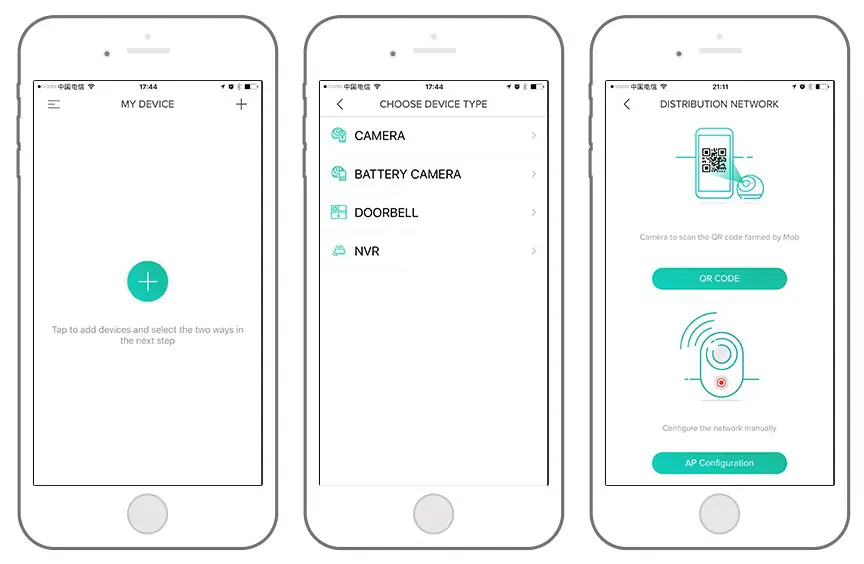
Add Camera
Click ![]() and select “BATTERY CAMERA”, as shown below, there are two ways to add a camera: QR Code Scan Mode and AP Configuration Mode
and select “BATTERY CAMERA”, as shown below, there are two ways to add a camera: QR Code Scan Mode and AP Configuration Mode
* NOTE: If you select another camera type, you can not add a battery camera.
QR Code Scan Mode
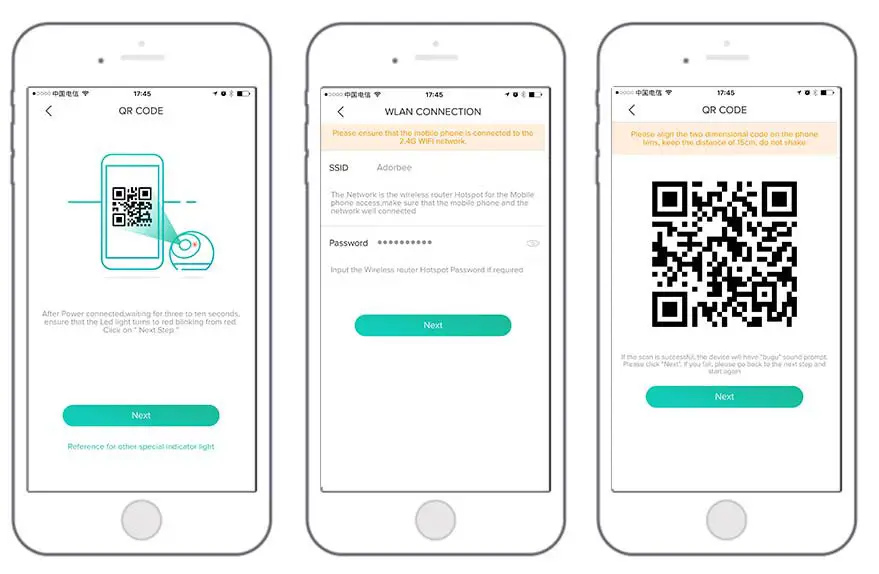
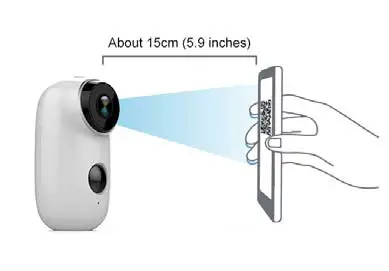
Input the WiFI SSID name and password
Follow the on-screen instruction, put the QR code in front the camera lens 15cm.
If the scan is successful, the device will have a “bugs” sound prompt. Please click “Next”. If you fail, please go back to the next step and start again.
 AP Configuration mode
 AP Configuration mode
Follow the on-screen instruction, as below picture shown:
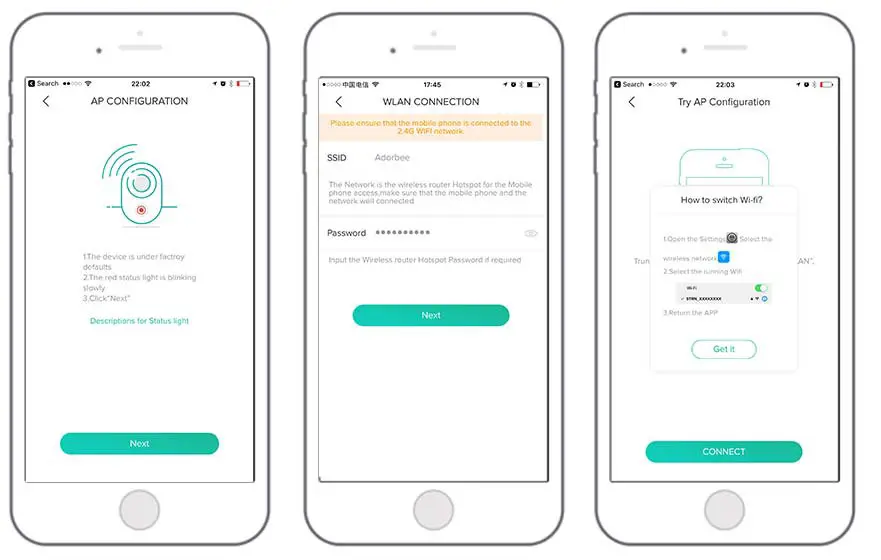
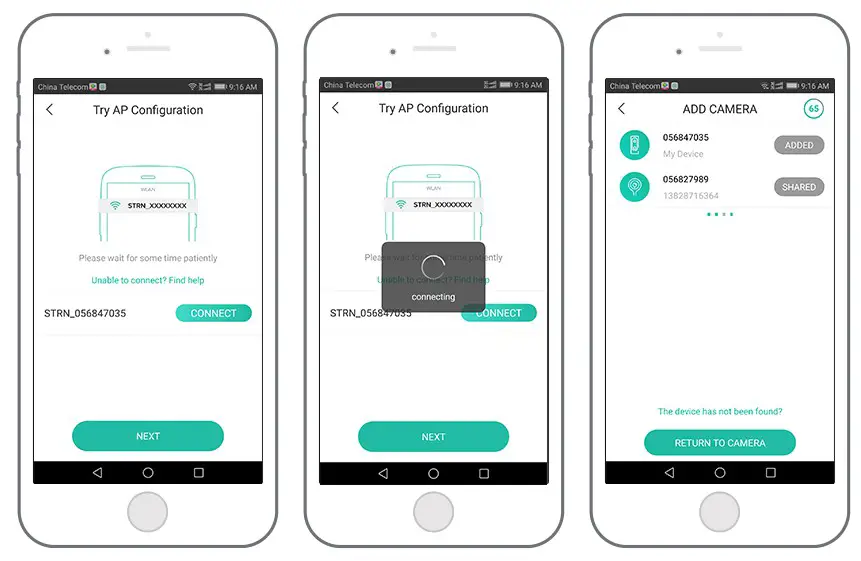
For Android phones, just follow the “NEXT”, and “CONNECT” to add a camera.
For iPhone, added one more step, manually open the settings and select “STRN_XXXXXXXX” WiFi to do WiFi configuration work.
View Help when unable to connect
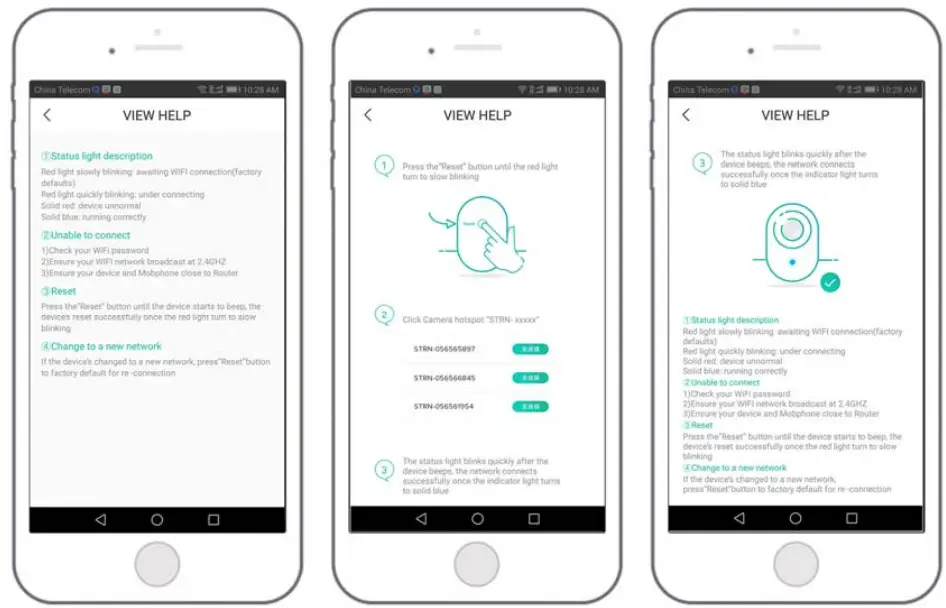
When adding a camera in QR Code or AP mode, If problems or failed connection, please view help as below pictures shown:
| No. | LED Status | Camera Status |
| 1 | Slow blinking Red | Awaiting WiFi Connection |
| 2 | Fast blinking Red | WiFi Connecting |
| 3 | Solid on Red | Network is abnormal |
| 4 | Solid on Blue | WiFi Connected |
| No. | Description | Solution and operation |
| 1 | Unable to connect | 1) Check your WiFi name and password 2) Ensure your WiFi is 2.4G, not support 5G 3) Ensure your camera and phone are close to the router |
| 2 | Reset | 1) Press and hold the reset button for 5 seconds 2) Hear one “bugu” sound 3) Red light turns to slow blinking |
| 3 | Change to a new network | 1) Press reset key to the factory default setting 2) Re-connection |
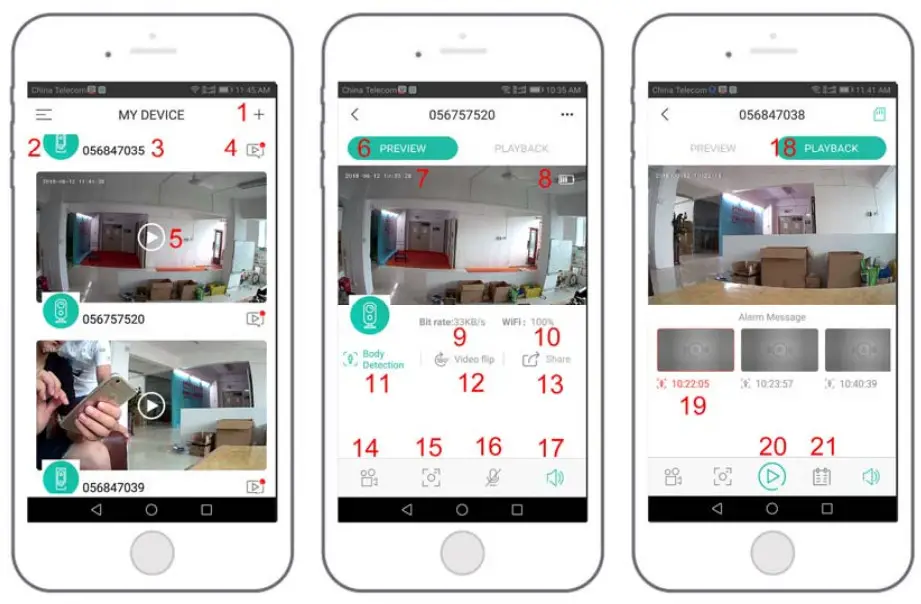
| 1. Add camera | 12. Video Flip option |
| 2. Camera type icon | 13. Share option |
| 3. Camera Name | 14. Record button |
| 4. Alarm Message icon, red dot means the alarm | 15. Snapshot button |
| happened | 16. Speaker button, hold it then can speak |
| 5. Live View button | 17. Microphone button |
| 6. Preview option | 18. Playback option |
| 7. Camera Time | 19. Recorded Alarm Video, click it to playback |
| 8. Battery Volume | 20. Play button |
| 9. Bit Rate | 21. Calendar option, click it to select date |
| 10. Network Signal Strength | |
| 11. Body Detection option, green color means enabled | |
Adjust the Detecting Distance of the PIR Sensor
The default sensitivity of the PIR sensor is at “Mid” and the detecting distance is 6 meters (20ft). If you want to adjust the sensitivity, please launch your App, and then click “Device Settings” ‐> “Body Detection”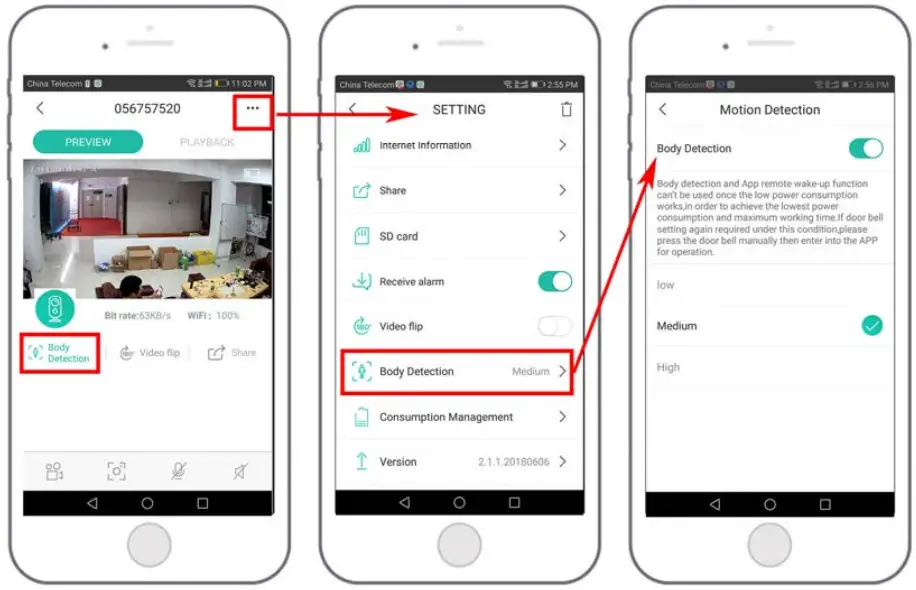
| Sensitivity | Detecting Distance (For moving and living things) |
| Low | Up to 4 meters (13ft) |
| Medium | Up to 6 meters (20ft) |
| High | Up to 8 meters (26ft) |
*NOTE: Higher sensitivity offers a longer detecting distance, but it would lead to more false alarms. You are advised to set up the sensitivity level to “Low” or “Medium” when you install the camera outdoors.
![]() Important Notes for Reducing False Alarms
Important Notes for Reducing False Alarms
To reduce false alarms, please note that:
- Do not install the camera facing any objects with bright lights, including sunshine, bright lamp lights, etc
- Do not place the camera too close to a place where there frequently moving vehicles. Based on numerous tests, the recommended distance between the camera and vehicle is 15 meters (55ft).
- Stay away from the outlets, including air conditioner vents, humidifier outlets, the heat transfer vents of the projectors, etc.
- Do not install the camera facing the mirror
- Keep the camera at least 1 meter away from any wireless devices, including Wi-Fi routers and phones, in order to avoid wireless interference.
Cover the Monitoring Area
When installing the camera, it’s not suggested to make the PIR sensor vertically face the moving object, otherwise, it may not detect the motion events. It is suggested to market the angular between the PIR sensor and detected object larger than 10 degrees.
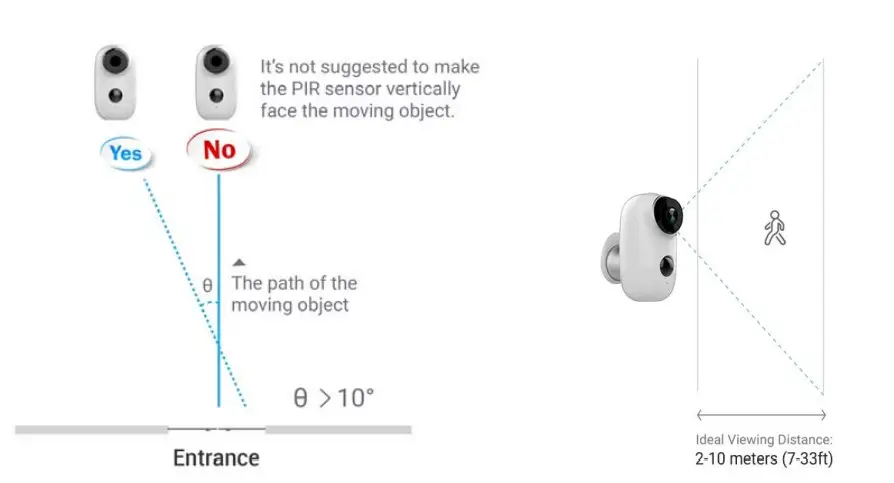
FYI:
The PIR sensor’s detecting distance: 20ft (in default)
The PIR sensor’s detecting angle: 120° (H)
Camera Installation
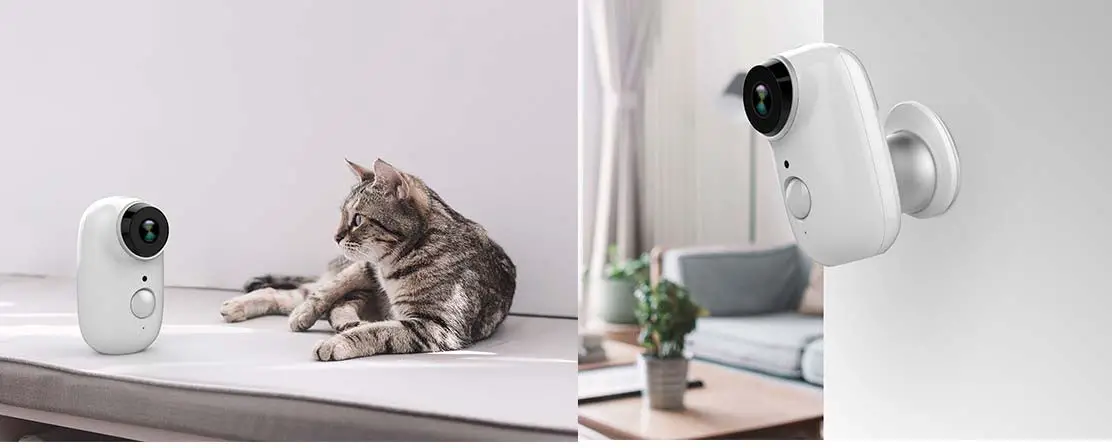
Table Mount
Wall Mount: Fix the iron ball bracket to the wall with screws, and then magnetize the camera to the iron ball. Installation is very convenient and also easy to adjust the angle