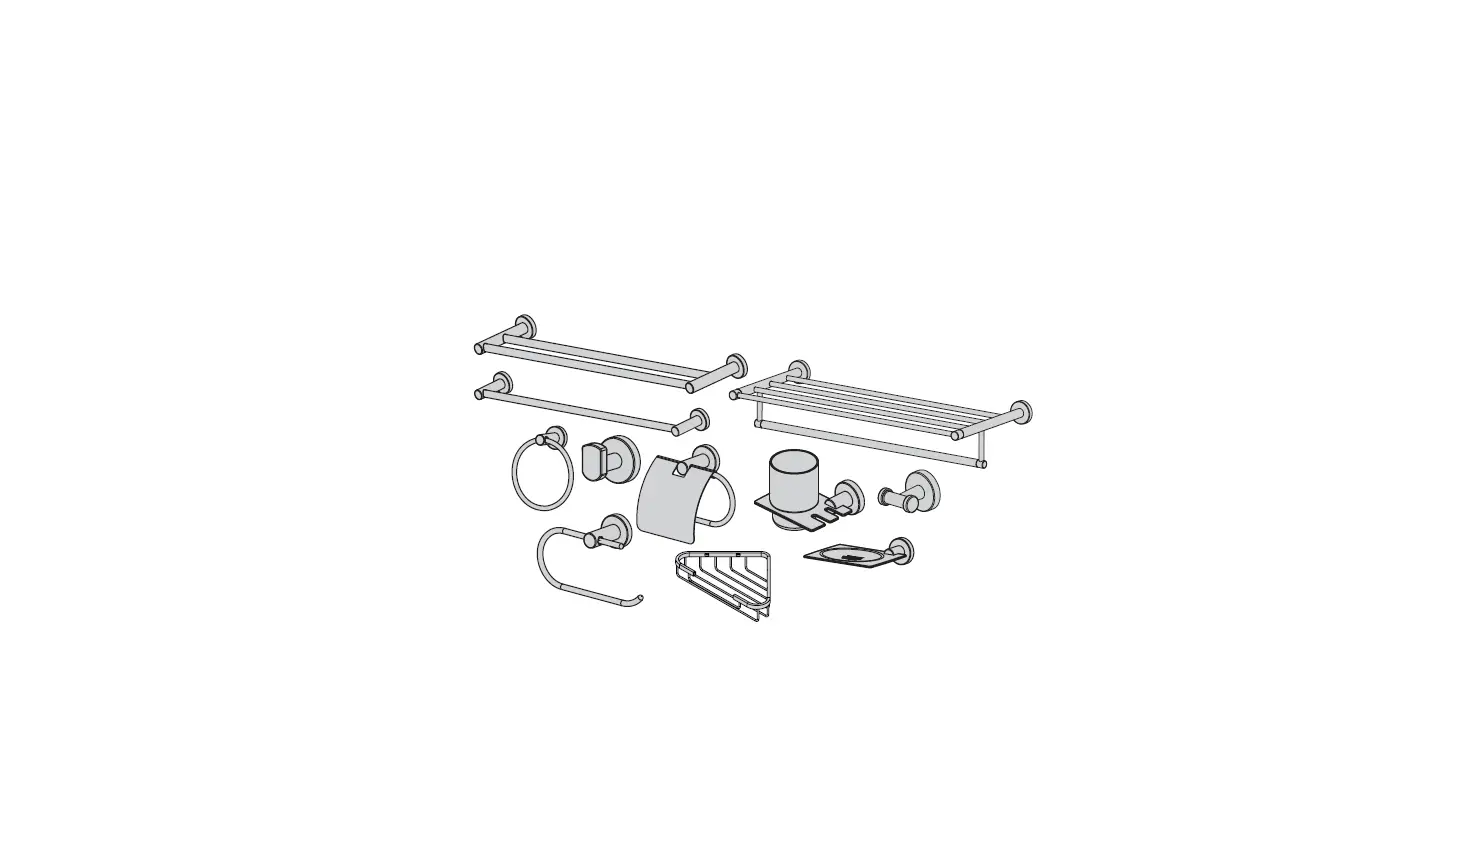
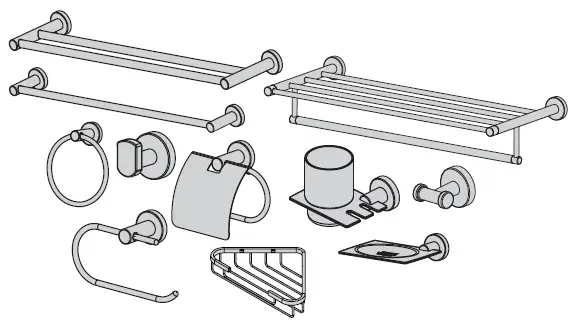
SYMMONS Dia Accessory Suite
Model Numbers
- 353DTB-18 18″ Double Towel Bar
- 353DTB-24 24″ Double Towel Bar
- 363TB-18 18″ Towel Bar
- 363TB-24 24″ Towel Bar
- 353TS-22 22″ Towel Shelf
- 363TR Towel Ring
- 353RH Robe Hook
- 353DRH Double Robe Hook
- 353TH Toothbrush Holder
- 353TP Toilet Paper Holder
- 353TPC Toilet Paper Holder
- 353SD Soap Dish
- 353-SD2 Soap Basket
Modifications
- -STN Satin Nickel finish
Note: Append appropriate -suffix to model number.
Specification
All premium accessories are constructed from metal materials and plated in a standard polished chrome finish.
Warranty
- Limited Lifetime – to the original end purchaser in consumer/residential installations.
- 10-Years – for commercial/industrial installations. Refer to www.symmons.com/warranty for complete warranty information.


Dimensions
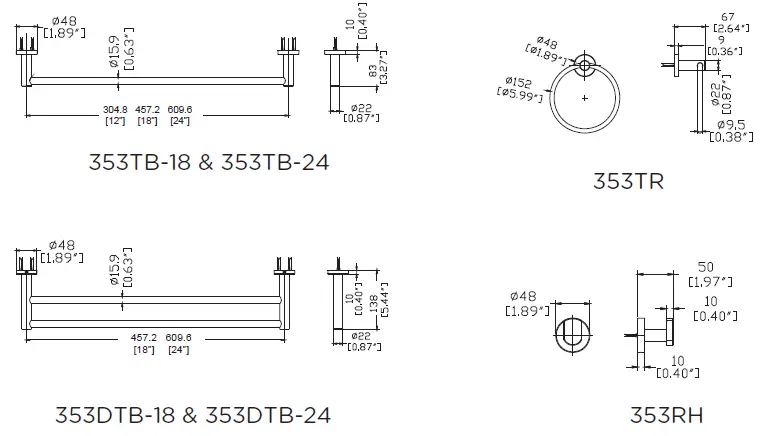
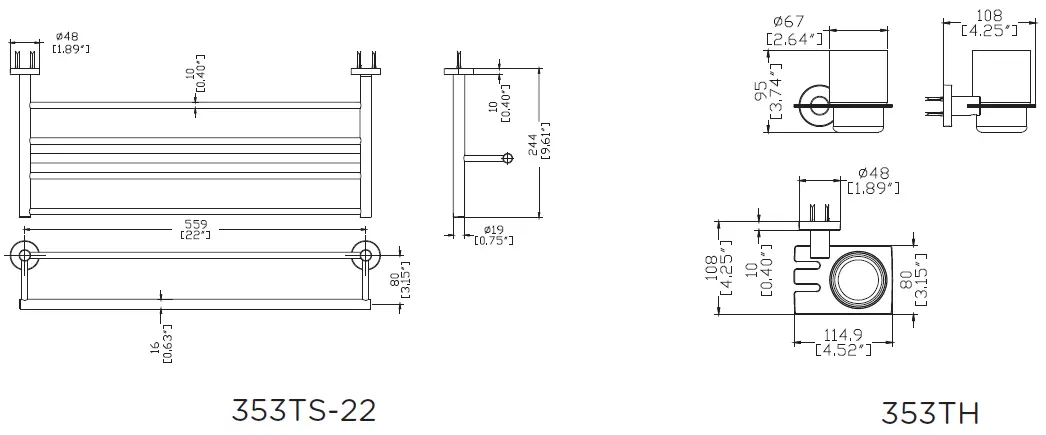

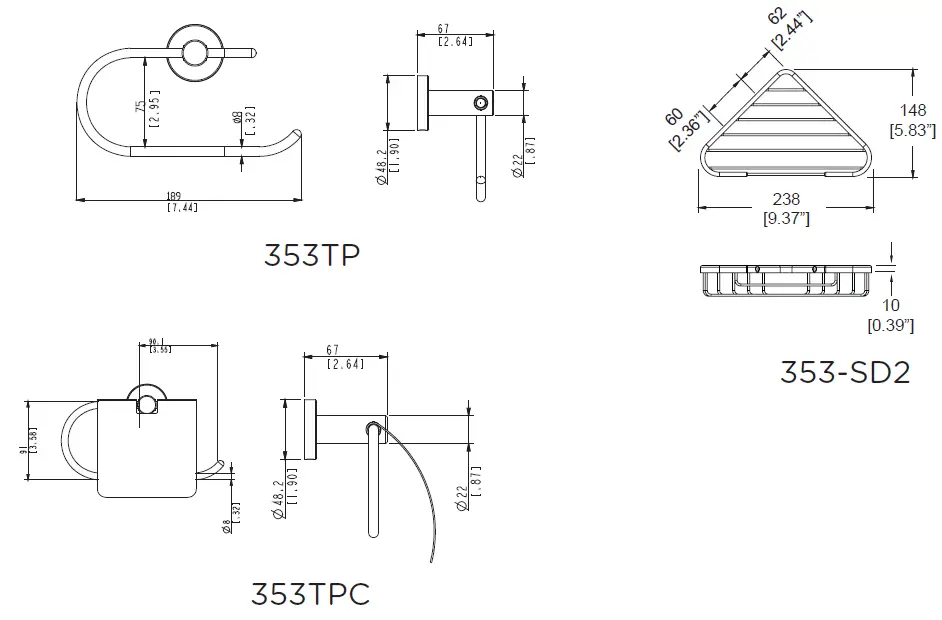
Note: Dimensions are subject to change without notice.
Replacement Parts
| Replacement Parts | |
| Description | Part Number |
| Mounting Hardware Kit Less Bracket | RA-017 |
| Mounting Hardware Kit With Bracket | RA-026 |
Installation
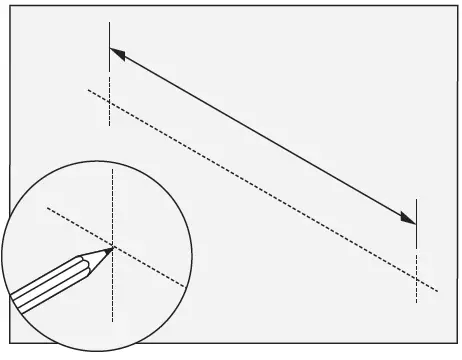
- Measure and mark centerlines for mounting bracket installation using dimensions.

Note:
365DTB-18, 353DTB-24, 353TB-18, 353TB-24, 353TS-22 only. Make sure both centerline marks are level. - Dry Wall Option:
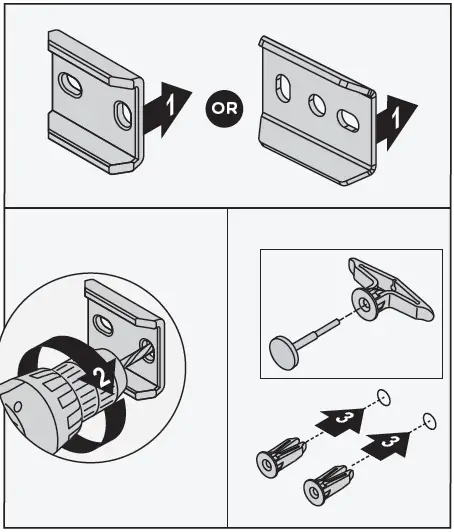
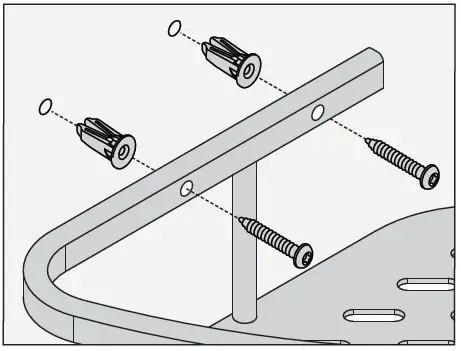
Place mounting brackets into the desired position. Using brackets as a guide, carefully drill 5/16″ holes into the wall. Remove brackets and install anchors.
Note:
For plaster walls 1/2″ thick or less, insert toggle tool into toggle to secure behind wall prior to installing accessory trim.- Stud Option:
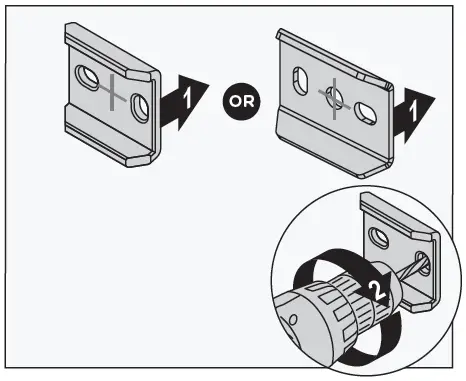
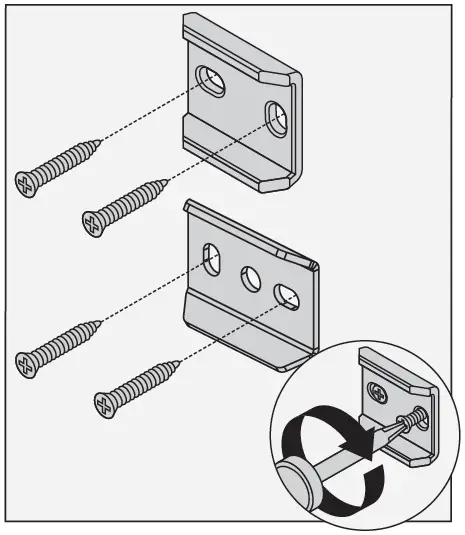
Center bracket on the centerline. Using brackets as a guide, carefully drill 3/16″ holes into the wall.
- Stud Option:
- With mounting brackets in position, secure to wall using screws. Use bracket as screw template

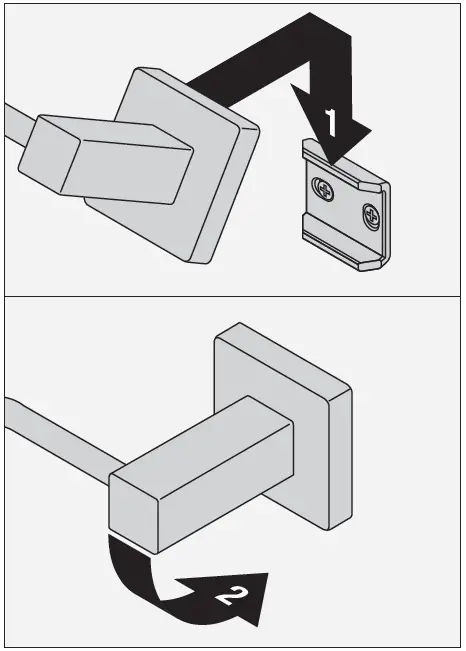
- Secure with set screw.

- Hang the top of the accessory on the mounting bracket. Lower into position.

353-SD2 Only: Carefully drill 5/16″ holes into the wall and install anchors. Secure to wall using screws.

Troubleshooting Chart
| Problem | Cause | Solution |
| The finish is spotting. | Elements in the water supply may cause water staining on the finish. | Clean the finished trim area with a soft cloth using mild soap and water or a non-abrasive cleaner and then quickly rinse with water. |
Symmons Industries, Inc. 31 Brooks Drive Braintree, MA 02184 Phone: (800) 796-6667 Fax: (800) 961-9621 Copyright © 2021 Symmons Industries, Inc. symmons.com. [email protected]. ZV-1098 REV L 031022.


