![]() ZD2733 Dehumidifier
ZD2733 Dehumidifier
User Manual
Thank you for choosing this product. Please read this instruction manual before using it.
Please allow the machine to stand upright for more than 2 hours before use.
ZANUSSI is a registered Trademark used under license from AB Electrolux (publ)
Safety Instruction
- To avoid electric shock, fire or injury, please read the user manual carefully before using the appliance and keep it for future reference.
- This appliance is for household use only. Please use suitable power source (220-240 r/50Hz).
- Never immerse the appliance in water or other liquids.
- Do not use the appliance under direct sunshine.
- Please turn off the appliance when not in use otherwise it may result in danger.
- Please turn off the appliance and unplug the socket when unattended otherwise it may result in danger.
- Keep the appliance away from children.
- The appliance is not intended for use by persons (including children) with reduced physical, sensory or mental capabilities, or lack of experience and knowledge, unless they have been given supervision or instruction concerning use of the appliance by a person responsible for their safety.
- Children should be supervised to ensure that they do not play with the appliance.
- With any indication of malfunction, please stop using the appliance immediately to avoid hazards. Contact the authorized service center for repair. Do not attempt to repair or change any parts by yourself.
- If the supply cord is damaged, it must be replaced by the manufacturer, its service agent or similarly qualified persons in order to avoid hazards.
- Please turn off and unplug the appliance before cleaning or maintenance.
- Clean the surface of the appliance with a dry cloth. Do not use corrosive detergent or solvent to clean. Do not swash the appliance with water.
- Please turn off and unplug the appliance when not in use. Make sure the power is off before pulling out the plug. Do not pull the cord.
- When the appliance is not in use for a prolonged period, please turn it off, unplug it, pack it well, and store it in dry cool place.
- Forbid to put flammable and explosive objects around the appliance, and do not use the appliance in an environment full of flammable gas and powder. Keep away from any fire and heat sources.
- Please put the power cord in the right place in order to avoid tripping the appliance over.
- Do not put any objects on the appliance or put the appliance below a socket-outlet.
- Please keep the air inlet and the air outlet unblocked to minimize the risk of fire or malfunction.
- Ensure no water or raindrop leaks into the appliance in order to avoid electric shock. Do not put flammable objects or wet clothes on the air outlet in order to avoid short circuit or fire.
- Please do not place the air inlet or the air outlet near to curtains or walls when operation because it will block the air current and cause fire. The appliance should be installed at minimum distant of 10 cm from the wall or other obstacles.
- To prevent spillage, please empty the water tank before relocating the appliance.
- Do not tip the appliance to any side as escaping water could damage the appliance.
- Please do not insert any objects into the air inlet or the air outlet in order to avoid electric shock.
- After a period of operation, abnormal noise and uneven air volume may appeared because of dust blocking airflow. It will disappear after cleaning the dust proof filter.
- Do not use any bug sprays or other flammable cleaners on the appliance.
Note: To avoid any malfunction or damage, do not tilt or place the appliance horizontally under any operation.
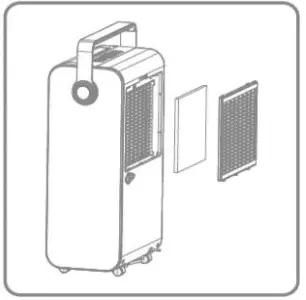
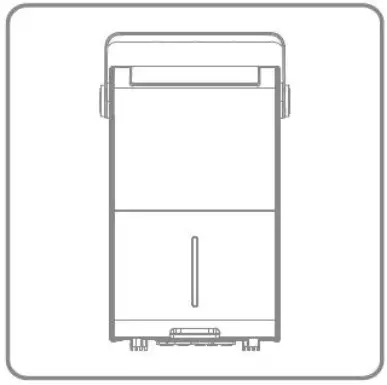
Parts Description
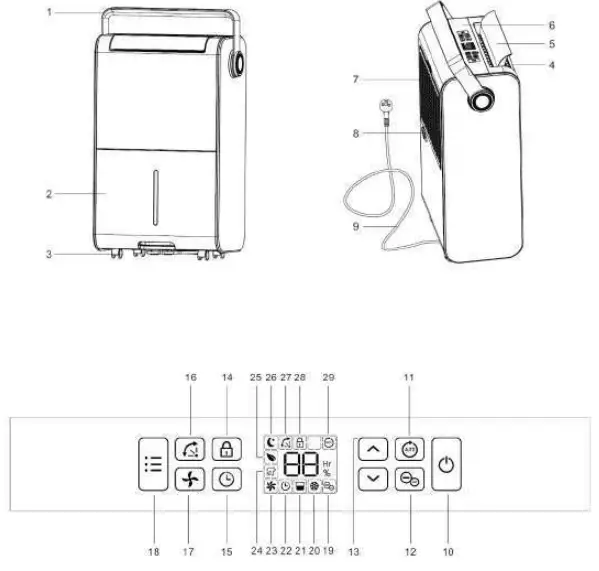
Components
- Handle
- Water tank
- Castors
- Air outlet filter
- Air deflector
- Control panel
- Air filter
- Water outlet cover
- Power cord
Control Panel - Power button
- Auto button
- Ionizer button
- Up and Down buttons
- Child lock button
- Timer button
- Air deflector button
- Fan speed button
- Mode selection button
- Ionizer indicator
- Defrost indicator
- Tank full indicator
- Timer indicator
- Fan speed indicator
- Laundry drying indicator
- Air purifying indicator
- Sleeping indicator
- Air deflector indicator
- Child lock indicator
- Auto dehumidifying indicator
Prior to Operation
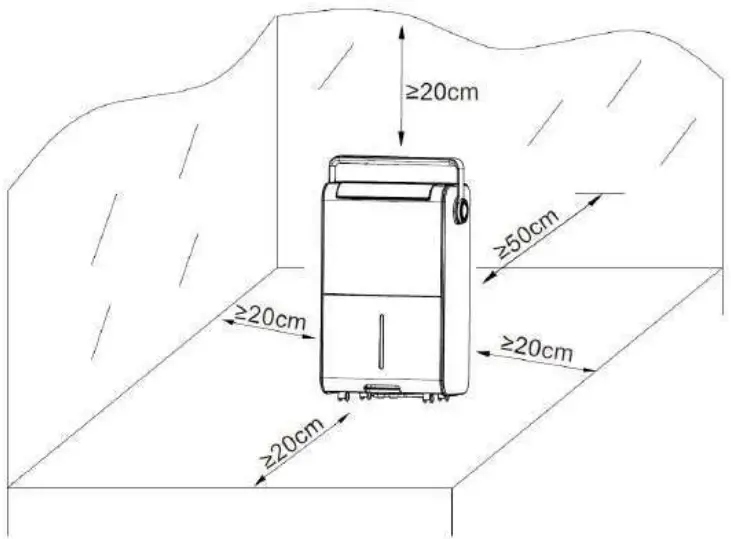
- Place the dehumidifier in an upright position on a stable, flat surface.
- Ensure the dehumidifier is at a safe distance at least 50cm away from a wall or furniture.
- Supply power should be in correspondence with the value on the nameplate, power outlet needs to be grounded.
- Ensure the tank is correctly fitted, if the tank is full or not in in lace, the tank full indicator sill be shown on LCD display, the dehumidifier will stop working.
- Turn on the power and run the machine as per instructions below.
Continuous Drainage
In general, water will be collected by tank, if you want to continuous drainage, please do steps as follows:
- Unplug the drainage outlet cover.
- Insert the drainage pipe with 14 mm inner diameter into water outlet. Please always make sure the pipe is going downhill, is not blocked or kinked.
Operation Instructions
Switch On/Switch Off The Unit [Power button]
 Connect to the power supply and press the power button once to turn on the unit, the unit runs by default mode on manual continuous dehumidifying with medium fan speed, the on/off indicator will be on.
Auto Dehumidifying Function [ Auto button ]
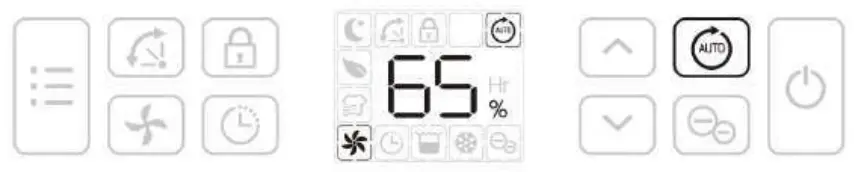 Press the auto button to select the Auto dehumidifying mode, the unit runs automatically accordance to the ambient humidity detected below.
| Ambient RH% detected | Compressor | Fan Speed Level |
| RH%>65% | Working | High |
| 55%RH%65% | Working | Low |
| RH%<55% | Stop working | Low |
![]() Up/Down buttons are invalid.
Up/Down buttons are invalid.
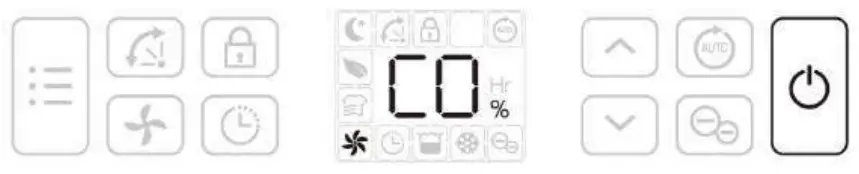
Humidity Setting [ Up/Down buttons]

Press the up/down buttons to select your preferred humidity from CO-35%-40%-45%-50%-55% -60%-65%-70%-75%-80%-CO. CO means continuous dehumidifying regardless of ambient humidity.
Auto Shut-off Timer Function [ Timer button ]

Press the timer button, then press up/down buttons to select your preferred timer hour from 00-24-00
for automatic shut off setting by each press.![]() Auto timer off setting will be canceled if press timer button for 2 times in 5 seconds.
Auto timer off setting will be canceled if press timer button for 2 times in 5 seconds.![]() Auto timer off setting will be canceled if switch off the unit and switch on again.
Auto timer off setting will be canceled if switch off the unit and switch on again.
Fan Speed Option [ Fan Speed button ]
 Press the fan speed button to select your preferred fan speed setting of low, medium and high to meet the different usage requirements.
![]() Fan speed button is invalid at auto mode and defrost mode.
Fan speed button is invalid at auto mode and defrost mode.
Air Deflector Function [ Air Deflector button ]
 Turn on the device, the deflector will move to the vertical position. Press air deflector button once, the deflector will keep waving between 45°to 90°.Press air deflector button again, the deflector will stop waving. Turn off the device, the deflector will close automatically.
Multifunction Optional [ Mode Selection button ]
- Laundry Drying Mode
 At manual mode, press the mode button once to select Laundry Drying mode, the unit runs in continuous dehumidification with high fan speed for 6 hours then switch off automatically.
 - Air Purifying Mode
 Press the mode button 2 times to select Air Purifying mode, the unit runs with high fan speed without dehumidifying.
 Add HPEA filter to enhance air purifying performance; Please note HEPA filter is not necessary for dehumidifying feature.
 - Sleeping Mode
 Press the mode button 3 times to select Sleep mode, the unit runs with a designated humidity setting of 55% along with low fan speed. All indicators will be off 5s after the setting is completed. Touch any button to activate the light, and to operate as usual. Fan speed button is valid. With no further operation after activate the light for 30s, lights will be off again. When the water tank is full on sleep mode, water tank full indicator will always be on.
 At manual mode, press the mode button once to select Laundry Drying mode, the unit runs in continuous dehumidification with high fan speed for 6 hours then switch off automatically.
 Press the mode button 2 times to select Air Purifying mode, the unit runs with high fan speed without dehumidifying.
 Press the mode button 3 times to select Sleep mode, the unit runs with a designated humidity setting of 55% along with low fan speed. All indicators will be off 5s after the setting is completed. Touch any button to activate the light, and to operate as usual.
Safety Child lock Function [ Safety Child lock Button ]
 Press the safety child lock button to lock all buttons with a beeping sound, the same operation can unlock it.
![]() Safety child lock function can be set at standby mode and working mode but can’t be activated when water tank is full.
Safety child lock function can be set at standby mode and working mode but can’t be activated when water tank is full.
Low Temperature Defrost Indicator
 When the ambient temperature is too low, dehumidifier will enter into the defrost mode, the unit runs with high fan speed without dehumidifying.
Auto Shut off with Water Tank Full Indicator
 The unit will enter into the standby mode when water tank is full or the water tank is not installed properly. After emptying the tank or install the tank properly the unit will go on to the previous mode.
![]() Except for the power button, all other buttons are invalid.
Except for the power button, all other buttons are invalid.
Memory Function:
a. When unplugged directly or power cut, then reconnect to the power supply, the dehumidifier will run with the mode prior to the shutdown. The timer setting will be kept. b. Press the power button to switch off the dehumidifier, and then press the power button to switch it back on. The dehumidifier will run with the mode prior to the shutdown. The timer setting will be canceled.
c. Switch off the dehumidifier and unplug the power cord, then reconnect the power supply and switch on the dehumidifier. It will run as factory preset mode the first time you received the dehumidifier.
Clean
When used regularly, the filter may become clogged with dust and particles. Therefore the filter should be cleaned at least every two weeks. Follow these steps:
- Switch the device off and remove the plug from the socket before cleaning.

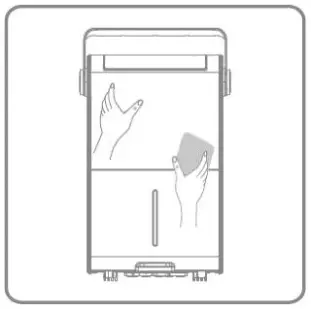
- Clean the housing with soft, dry cloth. If the device is extremely dirty, use a mild cleaning agent. Wipe the dehumidifier with a slightly damp cloth. Never spray the device with water.

- Remove the air filter and HEPA filter (if any), clean the filter with a vacuum cleaner or soapy, water no hotter than 40°C. Replace the HEPA filter regularly if used.

- Rinse and dry the filter completely before installing back to the device.

Storage
If the dehumidifier will not be used for a long period of time, take the following steps:
- Remove the plug from the socket and empty the tank, make the tank and the dehumidifier dry completely, this may take a couple of days.
- Clean the air filter.
- Check the dehumidifier for perfect condition to ensure a safe use of it after a long period of storage.
- Pack the device with the suitable packaging.
- Store the dehumidifier in a dust-free and out of direct sunlight location, preferably covered with a sheet of plastic.
Display Error Code
Please contact local distributor if any of the error codes below appears.
| Display Code | El | E2 |
| Error | Temperature sensor error | Humidity sensor error |
| Display | Flash every 30 seconds | Flash every 30 seconds |
| What is happening | Device still dehumidifies but is in defrost mode only. | Device still dehumidifies but is in continuous dehumidifying mode only. |
Trouble Shooting
Check the following before contacting technical support.
| PROBLEM | POSSIBLE CAUSE | SOLUTION |
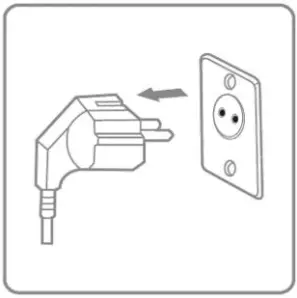
| The device does not work | The power is not connected | Insert the plug into the wall outlet |
| The water tank is full | Empty the tank | |
| The tank has not been replaced correctly | Replace the tank | |
| Water removal capacity is too low | Runtime is too short | Be patient and wait |
| Ambient temperature or humidity is too low | It is normal that the device does not dehumidify in these conditions | |
| The device works, but reduces the relative humidity insufficiently | The room is too big | We recommend using a dehumidifier with a greater capacity |
| There is too much ventilation | Reduce ventilation(e.g. close windows and shut doors) | |
| The air filter is clogged | Clean the air filter | |
| Set humidity is higher than the ambient humidity | Set the humidity lower than ambient humidity | |
| Dehumidifier is blowing out warm air | The dried air is passed over heating coils before it is blown into the room as part of the dehumidifying process | This is normal, a dehumidifier is not an air cooler |
| The display is not showing the humidity set point | The display shows the room relative humidity not the set point | Press the humidity control button once to see the target relative humidity |
| Water on floor | There is residual water in tank, and the device is lurched too much by moving | Be careful when move the tank |
| The dehumidifier is noisy | The air filter is blocked or the device is on an uneven surface | Clean the filter or put the device on a flat surface |
Specifications
| Model No.: | ZD 2733 |
| Dehumidify capacity: | 161/DAY (26.7°C RH=60%) 281/DAY (30°C RH=80%) |
| Rated Voltage: | 220 V- |
| Rated Frequency: | 50 Hz |
| Input power: | 240 W (26.7°C RH=60%) 380 W (35°C RH=80%) |
| Tank Capacity: | 6.0 L |
| Air Volume: | 175 m³/h |
| Refrigerant: | R134a/0.23 kg |
| Noise Level(sound Pressure): | 42dB(A) |
| Net weight: | 15.5 kg |
| Suction Pressure: | 1.0 MPa |
| Discharge pressure: | 2.5 MPa |
![]()
Note About Fluoridated Gasses
- Fluoridated greenhouse gases are contained in hermetically sealed equipment. For specific information on the type, the amount and the CO2 equivalent in tonnes of the fluoridated greenhouse gas(on some models), please refer to the relevant label on the unit itself.
- Installation, service, maintenance and repair of this unit must be performed by a certified technician.
- Product un installation and recycling must be performed by a certified technician.
![]()


