![]() mega macs 77
mega macs 77
 Quick Start Guide
QSMM77V6500ML0222S0
460 991-99 / 02.22
About this Quick Start Guide
Original Operating Instructions
The quick start guide comprises the most important information in a clearly visible form to facilitate the start with the mega macs 77.
1.1 Notes for the Use of the Quick Start Guide
This quick start guide contains important information relevant to operator safety.
Go to www.hella-gutmann.com/manuals to find all the manuals, instructions, references, and lists about our diagnostic devices, tools, and much more.
Please also visit our Hella Academy under www.hella-academy.com and expand your knowledge with various online tutorials and other training courses.
Please read the quick start guide entirely. Pay special attention to the first pages containing the safety instructions.
They are provided solely to assure your safety when working with the device.
You are recommended to read the individual work steps in the manual again while working with the device, in order to avoid danger to personnel and equipment or operating errors.
The device shall be operated exclusively by personnel qualified in vehicle engineering. Information and knowledge included in this training are not explained further in this quick start guide.
The manufacturer reserves the right to modify this quick start guide and the device itself without prior notice. We, therefore, recommend checking for any updates. This quick start guide must accompany the device in case of sale or other transfer.
The quick start guide must be kept for the entire service life of the device and accessible at any time.
1.2 Scope of Functions
The range of functions of the software may vary depending on the country, the licenses acquired, and/or the optionally available hardware. This documentation may therefore describe functions that are not available on the individual device. Missing functions can be enabled by acquiring a corresponding license subject to charge and/or additional
supporting hardware.
Safety Precautions
2.1 Safety Precautions – Risk of Injury

| When working on the vehicle, there is a risk of injury through rotating parts or rolling of the vehicle. Therefore regard the following:
|


2.2 Safety Precautions for the mega macs 77
| To prevent incorrect handling and resulting injuries to the user or destruction of the device, pay attention to the following:
|

2.3 Safety Precautions for Testing/Measuring Devices
|
|
Product Description
3.1 Delivery contents
Pieces | Designation | |
| 1 | mega macs 77 |  |
| 1 | Docking station | 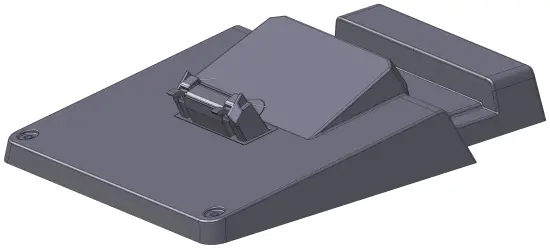 |
| 1 | DT VCI |  |
| 1 | USB cable for connection to the DT VCI | 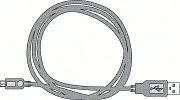 |
| 1 | USB cable for connection to a PC |  |
| 1 | Mains supply and power cable for the mega macs 77 | 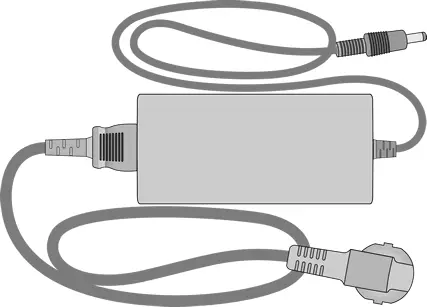 |
| 1 | HGS data carrier | 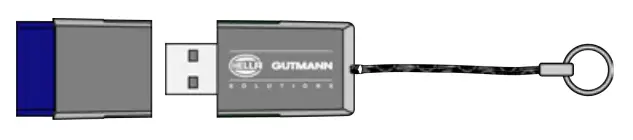 |
| 1 | Quick Start Guide |  |
3.1.1 Checking Delivery Contents
Please check the delivery contents upon receiving your device so that complaints can be issued immediately regarding any potential damage.
Proceed as follows to check the delivery contents:
- Open the package supplied and check for completeness based on the delivery slip.
Should you identify any damage to the package, then open the package in the presence of the delivery service and check the device for hidden damage. Any transport damage to the package supplied and damage to the device shall be registered in a damage report by the delivery service. - Take the device out of the packaging.

CAUTION
The danger of short circuits due to loose parts in or on the device.
The danger of destruction of the device/the automotive electronics
Never put the device into operation if you suspect that there are loose parts in or on it. Please contact the Hella Gutmann repair service or a Hella Gutmann trading partner immediately in this case. - Check the device for mechanical damage and shake it slightly to ensure that there are no loose parts inside.
3.2 Intended Use
The mega macs 77 is a mobile device for detecting and rectifying faults in automotive electronic systems.
The device enables access to extensive technical data such as wiring diagrams and service data, set values, and descriptions of vehicle systems. A lot of this data is transferred to the device directly from the Hella Gutmann diagnostic database via an online connection. Therefore, the device must be permanently online.
The device is not suitable for repairing electrical machines and tools or home electrics. Diagnostic devices from other manufacturers will not be supported.
If the device is used in a way not authorized by Hella Gutmann, the safety of the device may be influenced.
The device is intended for industrial use. Outside of industrial environments, e.g. in commercial areas or in the center of a town, radio interference suppression measures may be necessary.
3.3 Using the Bluetooth Function
The terms of use of the Bluetooth® function may be restricted or prohibited through law or corresponding legal regulations in certain countries.
Pay attention to the provisions in force in the respective country before using the Bluetooth function®.
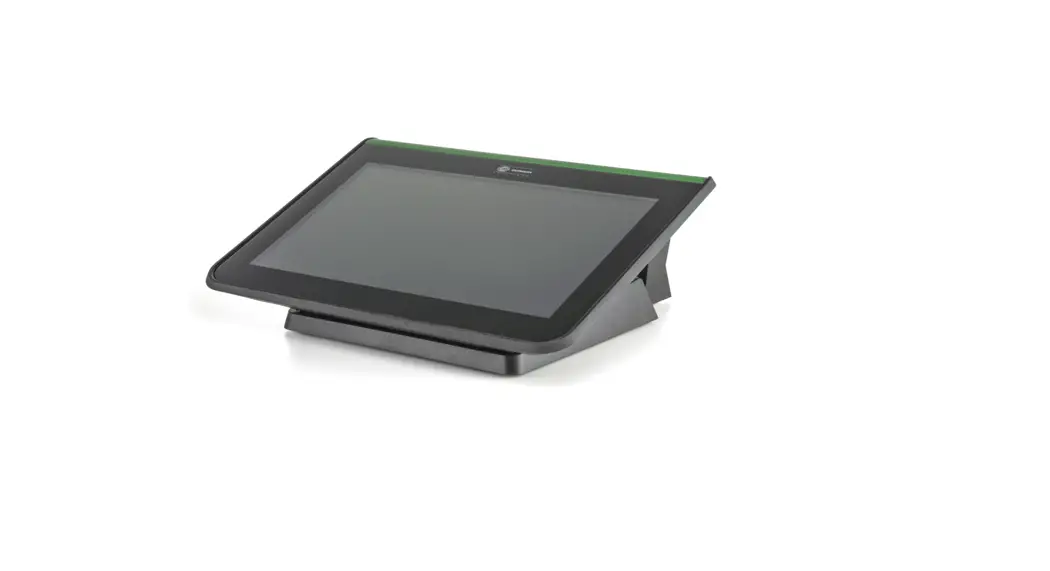
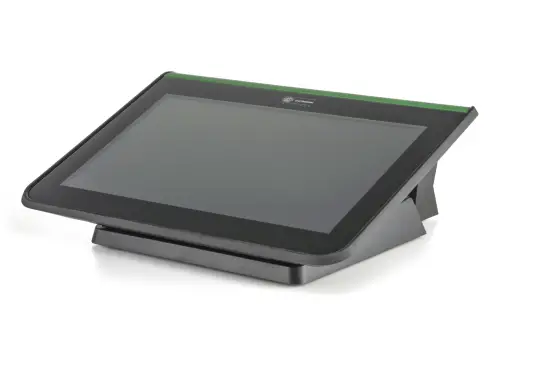
3.4 mega macs 77
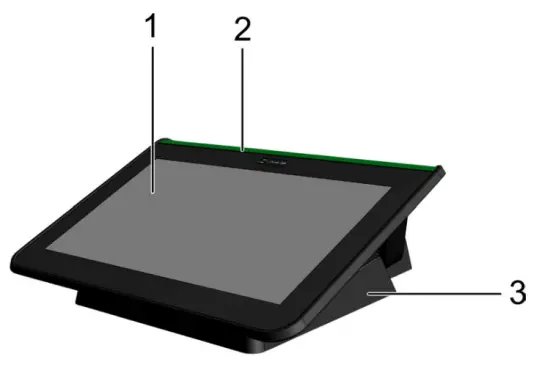
Designation | |
| 1 | TFT LCD (touch screen) |
| 2 | mega macs 77 |
| 3 | Docking station |
3.5 Operating the tool
| NOTICE |
|

3.6 Connections of the mega macs 77
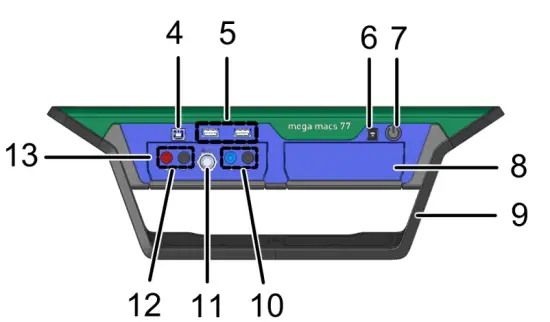
Designation | |
| 4 | USB device interface Use the USB device interface for data exchange between the PC and the device. |
| 5 | 2x USB host interface The USB host interfaces (USB interfaces for short) can be used to connect external tools such as a printer. |
| 6 | Power supply socket This is the power supply of the device and the internal battery charge connection. |
| 7 | ON/OFF button Switch the tool on or off. |
| 8 | Additional module slot Another module can be inserted here. |
| 9 | Positioning handle Using the positioning handle, the tool can be set up, carried, or fixed to the steering wheel in the vehicle. |
| 10 | Oscilloscope 1 connections Connect a test lead to Scope 1.
|
| 11 | ST3 connection Connect additional measuring instruments such as a clamp meter here. |
| 12 | Oscilloscope 2 connections Connect a test lead to Scope 2.
|
| 13 | Measurement module MT 77 This module contains a 2-channel oscilloscope for measured variables such as the following:
|
3.7 Connections of the Docking Station
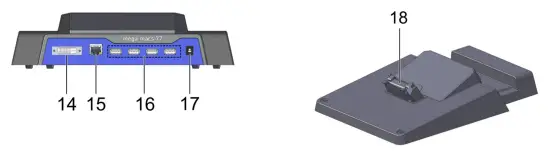
Designation | |
| 14 | DVI-D interface Transmit digital signals with the DVI-D interface. These signals can be depicted with the help of a screen or projector. |
| 15 | Ethernet interface Use the Ethernet interface to connect the device e.g. to the following hardware:
|
| 16 | 4x USB host interface The USB host interfaces (USB interfaces for short) can be used to connect external tools such as a printer. |
| 17 | Power supply socket Here you can supply the docking station with the power to charge the battery of the mega macs 77. |
| 18 | Docking interface Connect the device with the docking station here. |
3.8 DT VCI Connections
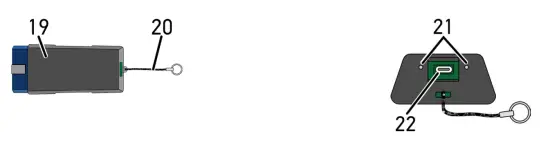
Designation | |
| 19 | DT VCI for diagnostic port in the vehicle |
| 20 | Retaining strap for mounting e.g. a lanyard |
| 21 | Green and blue indicator light (LED) The indicator lights show the operating condition of the DT VCI. |
| 22 | Micro USB interface for the USB cable to USB interface of the PC |
3.8.1 Meaning of the Flashing Frequencies
Status display | Meaning | |
Blue LED | Green LED | |
| LED switched off | LED switched off |
|
| LED flashes quickly (lx per sec.). | LED switched off |
|
| LED flashes slowly (every 3 sec.). | LED switched off |
|
| LED flashes slowly (every 3 sec.). | LED permanently on with regular brief interruptions | DT VCI ready for operation. |
Installation of the Hella Gutmann Drivers Package
4.1 System Requirements of Hella Gutmann Drivers
- Windows 7 SP1 or higher
- Windows administrator rights
4.2Installation of the Hella Gutmann Drivers Package
To obtain all the data about the related vehicle provided by Hella Gutmann, the device requires a permanent online
connection and the installed driver package Hella Gutmann Drivers. To keep the connection costs down, Hella
Gutmann recommends a DSL connection and a flat rate.
- Install the Hella Gutmann Drivers on the office or repair shop PC.
The driver package Hella Gutmann Drivers program is on the supplied HGS data carrier. - Connect the device to a web-compatible PC.
Once the symbol appears in the top toolbar, the connection to the HGS server is set up successfully and active.
Putting the mega macs 77 into Operation
This section gives a description of how to switch the device on and off as well as all the necessary steps for the first use of the device.
5.1 Charging the Battery with the Power Adapter
Prior to the initial start-up of the device, charge the battery for at least 8 to 10 h while the device is switched off.
Proceed as follows to charge the battery with the power adapter:
- Connect the power supply plug into the device’s socket.
- Plug in the power plug into the socket.
The battery will be charged.
5.2 Charging the Battery through Docking Station
Prior to the initial start-up of the device, charge the battery for at least 8 to 10 h while the device is switched off.
Proceed as follows to charge the battery through the docking station:
- Insert the voltage supply plug into the docking station port.
- Plug in the power plug into the socket.
- Place the mega macs 77 onto the docking station.
The battery will be charged.
5.3Switching On the Device
| NOTE |
|

Proceed as follows to switch on the device:
- Briefly push the ON/OFF button.
The general terms and conditions appear. - Read the GTCs and confirm them at the end of the text.
Now you can start working with the device.
5.4 Displaying Licenses
| NOTE |
| In order to use the full scope of the purchased licenses, you need to connect the device to the HGS server prior to the first start-up. |
Proceed as follows to have indicated the start of the contract, the date of purchase, and the included and additionally available licenses:
- Go to > Settings > User profile > Contracts.
- Select >My licenses<.
The window My licenses is indicated.
The start of the contract, the date of purchase, and the included and additionally available licenses are indicated.
5.5 Switching off the tool
Proceed as follows to switch off the device:
- Briefly push the ON/OFF button.
- Observe the confirmation prompt.
- Select >OK<.
The device will be switched off.
Configuring the device
Configure all interfaces and functions under a > Settings.
6.1 Configuring the Interfaces
Configure the interfaces for Wi-Fi and Ethernet (connection only through docking station) here. Configure the interfaces for Wi-Fi and Ethernet under a > Settings > Device.
Configure the interfaces for the printer under a’ > Settings > Print.
6.1.1 Configuring the Ethernet
Make your network settings here.
Proceed as follows to connect the device to a network (router) via the Ethernet interface of the docking station:
- Insert the Ethernet cable (not included in the delivery contents) into the Ethernet port of the docking station and the remote station.
- Use a
 to select >Settings
 - Select >Device<
- Select >Ethernet<
- Open the list under IP address mode with ∨.
If >Determine automatically (DHCP)< (recommended) is set, the DHCP server of the network will assign an IP address to the mega macs 77 automatically. This option is set ex-works.
If >Determine manually< is selected, enter a free network IP address, e.g. 192.168.246.002. under IP address. - Select >Determine automatically (DHCP)< (recommended) or >Determine manually<.
- Click to >Connect<. The selection will be saved automatically.
You can use the Ethernet connection now.
6.1.2 Configuring WLAN
Make your WLAN settings here.
WLAN stands for Wireless Local Area Network. Data is transmitted wirelessly via a router and DSL modem (access point). The various devices log in to the WLAN router.
6.1.2.1 Searching for and Installing a Wi-Fi Interface
Proceed as follows to connect the device to a network (router) through Wi-Fi:
- Use to select > Settings.
- Select >Device<.
- Select >Wi-Fi<.
- Select the check box Activate Wi-Fi to view available wireless networks. The available wireless networks are displayed.
- Select the requested wireless network.
- Open the list under IP address mode with “.
If >Determine automatically (DHCP)< (recommended) is set, the DHCP server of the network will assign an IP address to the mega macs 77 automatically. This option is set ex-works.
If >Determine manually< is selected, enter a free network IP address, e.g. 192.168.246.002. under IP address. - Select >Determine automatically (DHCP)< (recommended) or >Determine manually.< The selection will be saved automatically.
- Enter the Wi-Fi password.
- Click to >Connect<.
The input is saved automatically.
The name of the selected wireless network is displayed under Connected wireless network
Useto call up detailed information about the connected wireless network. - Once the WLAN symbol
 appears in the top toolbar, the online connection is set up between the device and the Internet. You can use the WLAN connection now.
6.1.2.2 Resetting the Wi-Fi Configuration
You can reset the Wi-Fi configuration if you wish to remove the automatic connection between the device and the already created wireless network.
Proceed as follows to delete all known wireless networks:
- Use = to select > Settings.
- Select >Device<
- Select >Wi-Fi<.
- Select
- Click to >Reset Wi-A configurations.
The Wi-A configuration is reset.
Working with the Device
7.1 Diagnostics
The manufacturer-specific vehicle communication enables the data exchange to the vehicle systems that shall be checked. The prevailing in-depth diagnostics and variety of diagnostics depend on the functional scope of the ECU.
The following parameters are available under Diagnostics:
- >Trouble codes<
Here you can read out and delete trouble codes stored in the trouble code memory of the ECU. Information on the fault code is available too. - >OBD diagnostics<
Start the OBD2 diagnostics through emission-relevant components here. Here you select merely the vehicle manufacturer and the fuel type. - >Parameters<
Here the device indicates the real-time data or conditions of the components from the ECU graphically and alphanumerically. - >Actuators<
Here you can activate or deactivate actuators with the help of the ECU. - >Basic settings<
Here you can reset components to their basic setting. - >Codings<
Here you can code components in the ECU. - >Test function<
Here you can perform special tests/self-tests. - >Service resets<
Here you can reset the service interval. The service reset can be done manually or with the diagnostic device.
7.1.1 Preparing Vehicle Diagnostics
The selection of the correct vehicle and sufficient vehicle electrical system voltage (>12 V) are two basic preconditions for trouble-free vehicle diagnostics. The device provides assistance to simplify the selection, e.g. indicating the installation position of the diagnostic port, vehicle identification through VIN, or indication of the battery voltage.
Proceed as follows to prepare vehicle diagnostics:
- Select a requested vehicle in the App launcher through >Vehicle selection<.
There are various options to select a vehicle. The following options are available:
• Vehicle database
The vehicle can be searched using the following parameters:
– Manufacturer
– Fuel type
– Model
• Vehicle search
The vehicle can be searched using the following parameters:
– VIN
– HGS number
– Manufacturer key no./Type key no.
• Car History
Select vehicles that are already saved and diagnostic results here.CAUTION
Rolling of vehicle
Risk of injury or material damages
Proceed as follows before startup:- Apply the parking brake.
- No gear is engaged.
- Regard the window with information and instructions.
NOTICE
The danger of short circuit and voltage peaks when connecting the DT VCI
The danger of destruction of automotive electronics
Switch off the ignition before connecting the DT VCI to the vehicle. - Insert the DT VCI into the vehicle’s diagnostic connector.
Both LEDs of the DT VCI flash. The DT VCI is ready for operation. - Select >OBD diagnostics< in the App launcher.
Now select the type of diagnostics.
7.2 Information
The following pieces of information are indicated here:
- Diagnostic database
- Service data
- Component location
- Technical data
| NOTE |
| You require an online connection if you wish to access all available information. |
Proceed as follows to call up vehicle information:
- Select the requested piece of information under Information in the App launcher.
- Observe the info window where necessary.
Certain pieces of information may not be available depending on the selected vehicle.
Measurements
| NOTE |
| The use of the measurements menu requires the optionally available measurement module (MT 77). |
Here you can select measured variables and channels. Then you can perform various measurements.
Measurement technology involves digital signal acquisition and output. A voltage signal is scanned and stored at intervals of a few microseconds. Once there are enough values stored, the scans are displayed as a signal curve onscreen.
Just perform measurements under >Oscilloscope<.
8.1 Performing Oscilloscope Measurements
Proceed as follows to perform oscilloscope measurements:
- Insert the test lead into the MT 77 and connect it to the relevant component.
- Select >Oscilloscope< in the app launcher.
The Oscilloscope window is displayed. - Activate the check box for the desired measured variable and the oscilloscope channel.
- Select >Start measurement<.
Measurement will be started.
![]() HELLA GUTMANN SOLUTIONS GMBH
HELLA GUTMANN SOLUTIONS GMBH
Am Krebsbach 2
79241 Ihringen
GERMANY
Phone: +49 7668 9900–0
Fax: +49 7668 9900–3999
[email protected]
www.hella-gutmann.com
© 2022 HELLA GUTMANN SOLUTIONS GMBH
1 STUECK/PIECE(S) Made in Germany


