![]()
AGES 14+
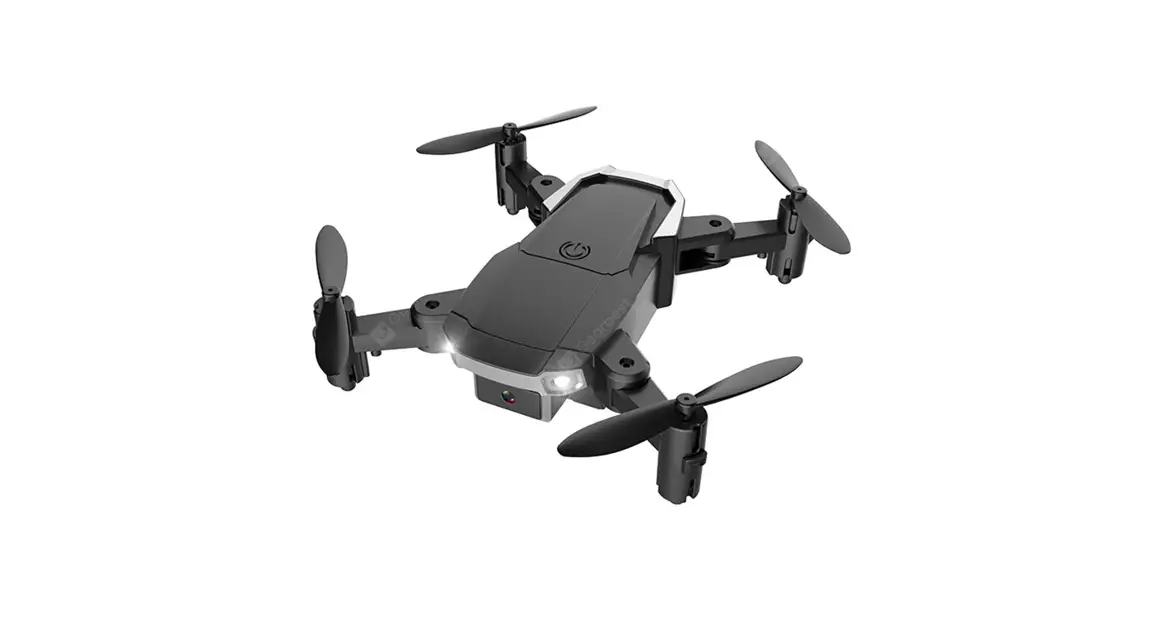
4-AXIS AEROCRAFT
INSTRUCTION MANUAL

2.4G 4-AXIS REMOTE CONTROL QUADCOPTER
function: up/down forward/backward turn left/right sideward fly
wind-resistant of force -6, throwing flight
KEY FEATURES OF QUADCOPTER
- Four-axis structure makes the quadcopter flexible and rapid when flying.
- Simple modulation design makes parts change easily.
- Built-in 6 axis gyroscope for precise hovering in the sky.
PLEASE READ COMPLETELY THE MANUAL AND KEEP IT WELL FOR USE REFERENCE
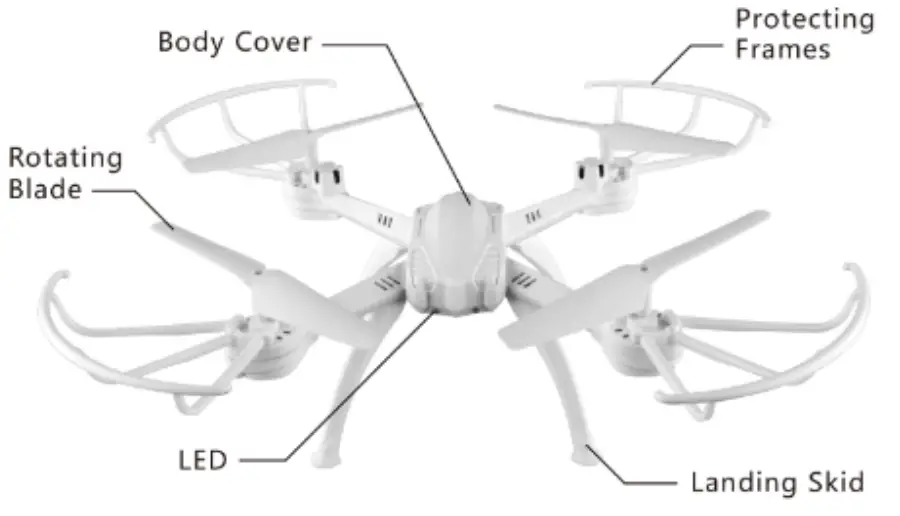
PARTS DESCRIPTION
PARTS DESCRIPTION OF THE REMOTE CONTROLLER

REMOTE CONTROLLER’ S BATTERIES INSTALL
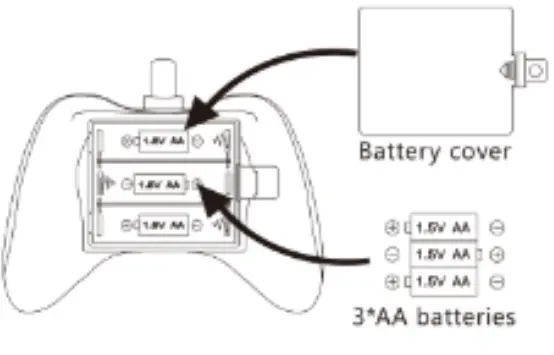
Batteries install: Open the batteries cover, install 3AAA (not included) batteries with correct polarity
Attention
- Install batteries with correct polarity
- Do not mix old and new batteries
- Do not mix different types of batteries
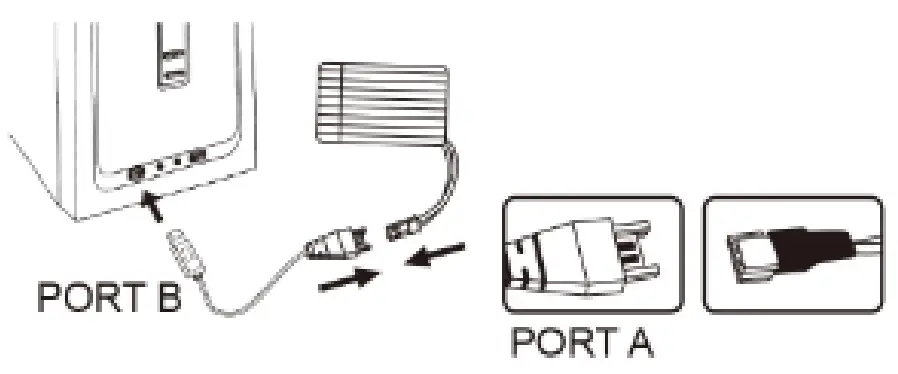
CHARGE BATTERIES OF QUADCOPTER
Push the switch of the quadcopter to OF position then open the battery cover..take out the battery. After connecting port A to the battery. and connect port B to the USB equipment 04 computer, you will see the red light on. when battery charging is full the red light will OFF.
Note:
Be sure IO correctly nub* the photo to the charging (-Art ar damage may occur. Do not charge overnight. Do not leave unattended with e charging.
When the drone’s battery is low power, the led lights on the drone will beget blinking fast, indicating that it just has a 40s loft to fly. At these tints, you need to fly it to the safe area and press down the one key landing button to land it. If yew flies it till It runs out of battery It will drop out of the sky.![]() Li-Po Battery Disposal & Recycling
Li-Po Battery Disposal & Recycling![]()
Wasted Lithium-Polymer batteries must not be placed with household Irish. Please contact the local environmental or waste agency or the supplier of your modal or your ‘leanest Li+.0 battery recycling center.
FLYING NI VIRON M NIT
- Fly under a clear and breezeless sky.
- Fly indoors where is specious, and make sure there is no obstruction.
S5/F1/F2 CAMERA INSTALLATION ( S4/F3/F5 OTHER ATTACHED )
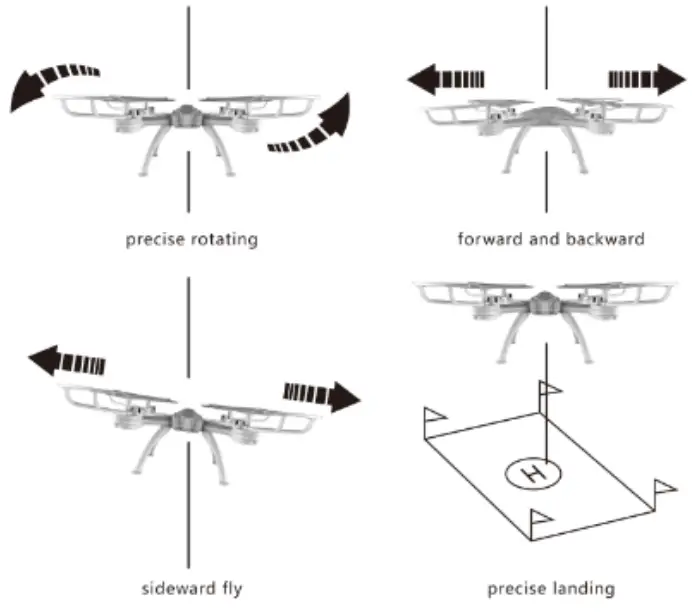
OPERATING DIRECTION
 | |
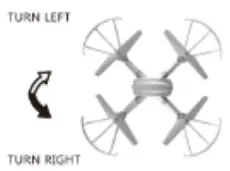 Pull the throttle left or right, the quadcopter turns to leave or right. Pull the throttle left or right, the quadcopter turns to leave or right. | 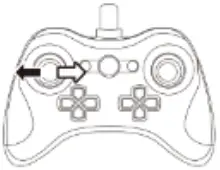 |
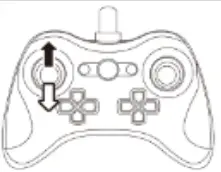
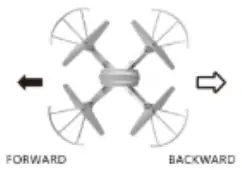 Push direction lever up or down. the quadcopter flies forward or backward. Push direction lever up or down. the quadcopter flies forward or backward. | 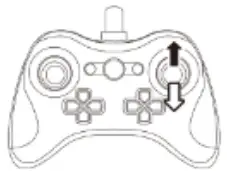 |
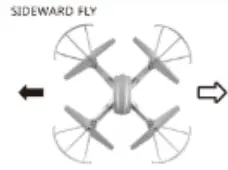 Pull the direction lever left or right, the quadcopter flies to the left or right side. Pull the direction lever left or right, the quadcopter flies to the left or right side. | 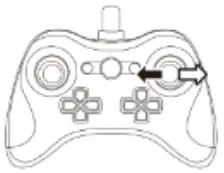 |
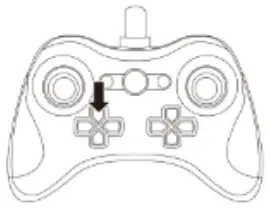
SPECIAL NOTICE
Without any operation of the control lever. the quadcopter keeps rotating in the sky, you can correct it by pressing the button “fine-tuning”
When the ‘craft from the ground is around 30cm the flight w II be affected by the aircraft tse I as the blades rotating, we call this as’ Ground Reaction’, the effects will be more strong when the craft get more close to the ground.
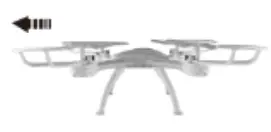
 When the quadcopter keeps flying backward, you can correct It by pressing the fine-tuning button up When the quadcopter keeps flying backward, you can correct It by pressing the fine-tuning button up | 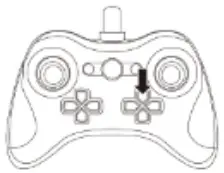 |
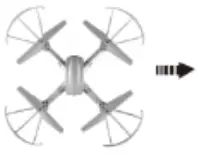
 When the quadcopter keeps flying forward you can correct It by pressing the fine-tuning button down. When the quadcopter keeps flying forward you can correct It by pressing the fine-tuning button down. | 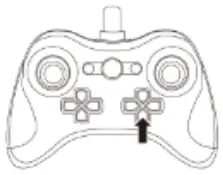 |
 When the quadcopter keeps flying to the left side you can Correct it by pressing the tine-tunic% button right. When the quadcopter keeps flying to the left side you can Correct it by pressing the tine-tunic% button right. | 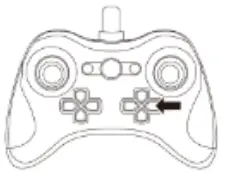 |
 When the quadcopter keeps flying to the right side. you can correct it by pressing the line-tuning button left. When the quadcopter keeps flying to the right side. you can correct it by pressing the line-tuning button left. |  |
FLYING EXERCISES
Try some exercise after familiar with some basic learning.
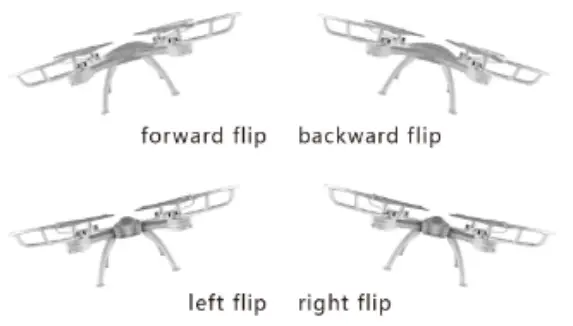
360° Flip
When you are familiar with the basic operation, you can do some awesome&exciting tricks and stunts, first of all, control the rubber 431 the controller to 100%, press the rotating button, you will hear the sound of -Dr, then you fly the aircraft to a height of more than 3 meters, push the right lever and then lose it to make 360′ flip. The exercise can be continuous if you can control it well.
HEADLESS FUNCTION
NOTE: Do not use the Headless Mode until you totally comprehend the instructions For Use. Flying in Headless Mode without sufficient experience might result in loss or damage to the device.
- Place the done m in front of the pilot before pairing the drone to the transmitter. Make sure the head of the drone lam forward and the tail faces towards the pilot_
- After pairing and calibration, press the Headless Made button to enter the Headless Mode function. A beep will be heard from the transmitter, and the led lights will stove flash, Indicating that the drone Is in headless mode.
- Press the headless mode button again, you will hear a beep and the lights on the drone will be solid which indicates the drone exits Me headless mode.
- Under Headless Mode, the forward direction Is the direction the pilot faces when the pilot pairs the drone with the transmitter,
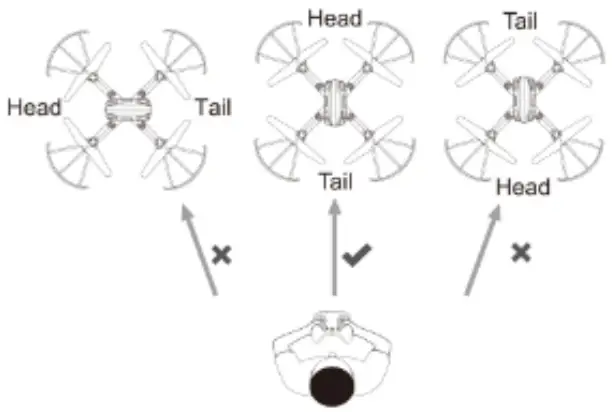
Please make sure the pilot stays in the same orientation as the drone head faces when the drone takes off_
It is very important that the pilot does not change the direction or orientation he or she faces, otherwise, the drone and transmitter will lose connection, causing controls to not perform as desired,
ATTENTION
- The control distance will be affected by the low battery,
- It is hard to fly or the height is not enough when the battery’s energy is low.
- If there are any damages occurred, please stop playing and take it to be repaired to avoid accidents_
- Please remove the batteries from the remote controller if a long time is not used to protect from batteries leakage
- To avoid the quadcopter from high falling or collision each other.
- If there is any problem occurred during using, please replace our factory’s original parts, or it may cause the damages easily_
PROBLEMS AND SOLUTIONS
| problems | causes | solutions |
| Power off of the remote controller | 1 The switch is on the position of “OFF’ | 1 Move to the position of ‘ON’ |
| 2 Batteries in the wrong polarity | 2 Checking and correcting the polarity of batteries | |
| 3 Power off | 3 Checking and changing the new batteries | |
| Remote controller has no response | 1 No turning on the energy | 1 Move to the position of “ON’ |
| 2 No connecting the aircraft’s batteries | 2 Checking and correct connect the power on | |
| 3 Strong wind | 3 Please play indoors where is spacious. | |
| Aircraft can not be up | 1 Rotor speed is too low | 1 Push up the accelerator |
| 2 The aircraft’s power is not enough | 2 Please make the aircraft’s batteries fully charged | |
| Out of control | Accelerator operated no return the aircraft upward | when you do the frequency modulation, the accelerator operated should he back to the original position |
| Out of the control distance | Please play within the effective distance | |
| Excessive landing | The speed of accelerator pulling is too fast. | Please pull the control lever slowly, maintain a smooth landing. |
FCC Warning Statement
Changes or modifications not expressly approved by the party responsible for compliance could void the user’s authority to operate the equipment. This equipment has been tested and found to comply with the limits for a Class B digital device, pursuant to Part 15 of the FCC Rules. These limits are designed to provide reasonable protection against harmful interference in a residential installation. This equipment generates uses and can radiate radio frequency energy and, if not installed and used in accordance with the instructions, may cause harmful interference to radio communications. However, there is no guarantee that interference will not occur in a particular installation. If this equipment does cause harmful interference to radio or television reception, which can be determined by turning the equipment off and on, the user is encouraged to try to correct the interference by one or more of the following measures:
- Reorient or relocate the receiving antenna.
- Increase the separation between the equipment and receiver.
- Connect the equipment into an outlet on a circuit different from that to which the receiver is connected.
- Consult the dealer or an experienced radio/TV technician for help.


