![]() Instruction Manual
Instruction Manual
3-in-1 Portacot 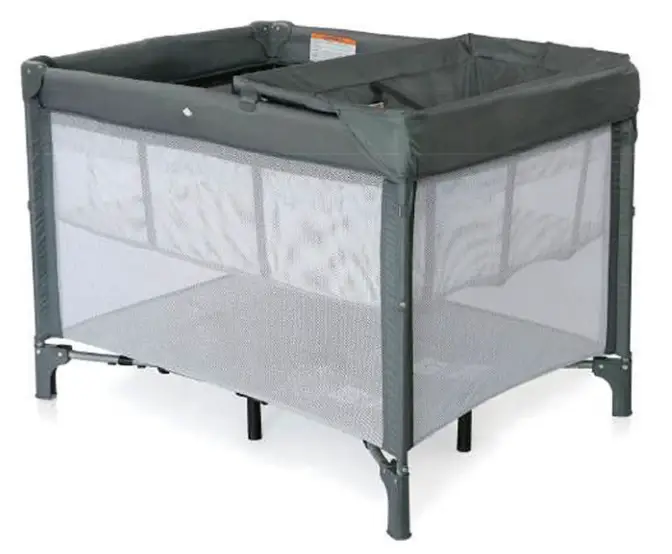
IMPORTANT
BEFORE ASSEMBLING THIS COT READ AND UNDERSTAND THE INSTRUCTIONS. Do not use mattresses other than the one supplied by the manufacturer. Incorrect mattresses can cause death. Use only accessories as recommended by the manufacturer. Ensure the top rails and base are fully locked. Stop using this cot if any part of the cot is broken, torn, or missing.
KEEP THESE INSTRUCTIONS IN A SAFE PLACE FOR FUTURE REFERENCE.
 WARNING:
RETAIN FOR FUTURE REFERENCE.
READ ALL INSTRUCTIONS CAREFULLY BEFORE ASSEMBLY AND USE OF THIS COT. ALWAYS FOLLOW THE INSTRUCTIONS. THE CORRECT USE AND MAINTENANCE OF THIS PRODUCT IS ESSENTIAL.
![]() WARNING
WARNING![]()
- USE ONLY THE MATTRESS SUPPLIED BY THE MANUFACTURER, INCORRECT MATTRESSES CAN CAUSE DEATH.
- USE ONLY ACCESSORIES AS RECOMMENDED BY THE SUPPLIER.
- ENSURE THE TOP RAILS AND BASE ARE FULLY LOCKED.
- DO NOT USE THIS COT IF ANY PART OF THE COT IS BROKEN, TORN, OR MISSING.
- THIS BASSINET SHOULD BE REMOVED BEFORE THE CHILD CAN SIT UP
- TO PREVENT FALLS, THE BASSINET MUST NOT BE USED ONCE A CHILD CAN SIT UP
- NEVER PLACE A CHILD IN THE COT WHEN THIS BASSINET IS IN PLACE.
- THIS BASSINET IS INTENDED FOR ONE CHILD UP TO 6 MONTHS OR WEIGHING UP TO A MAXIMUM OF 9KG.
- NEVER LEAVE THE CHILD UNATTENDED.
- NEVER PLACE A CHILD IN THE COT WHEN THE CHANGE TABLE IS IN PLACE.
- ALWAYS USE THE HARNESS WHEN USING THE CHANGE TABLE.
- THIS CHANGE TABLE IS INTENDED FOR ONE CHILD UP TO 12 MONTHS OR WEIGHING UP TO A MAXIMUM OF 11KG.
- Keep children away while assembling/disassembling the cot.
- Do not leave anything on the folding cot (such as toys) that provide a foothold.
- Do not use the folding cot near-naked heat sources, bar heaters, open fires, or exposed flames.
- Do not place more than one child in the cot at the same time.
- Do not add an extra mattress as this may cause suffocation.
- Do not use this cot with a child who can climb out, weighs more than 15kg, or is taller than 890mm.
- Keep the folding cot clear of trailing cables and hanging cords.
- Keep medication and small items that a child could choke on, away from the cot.
- Check that the assembly of the cot is correct and safe.
- Check that all locking devices are fully engaged.
- Folding cots with padded rims should not be used if the covering material has been bitten through.
- There is potential for fingers or parts of the body to be injured when the product is being folded or unfolded, and due care should be exercised.
- Take care when unpacking and during assembly.
- Dispose of all packing materials carefully after assembly.
- Regularly check that all fittings remain tight. Tighten if required.
- Inspect the product before assembly and periodically during use. Never use this product if there are any loose or missing fasteners, joints, or broken parts.
- Be aware of the risk of open fires and other sources of strong heat, such as electric bar fires, gas fires, etc. in the near vicinity of the product.
- Any additional or replacement parts should only be obtained from the manufacturer or distributor.
- Never substitute parts.
PARTS LIST
A 1-Carry Bag
B 1-Cot
C 1-Mattress
D 1-Change Table
E 3-Bassinet Compression Tubes
F 3-Bassinet Support Tubes
G 1-Bassinet 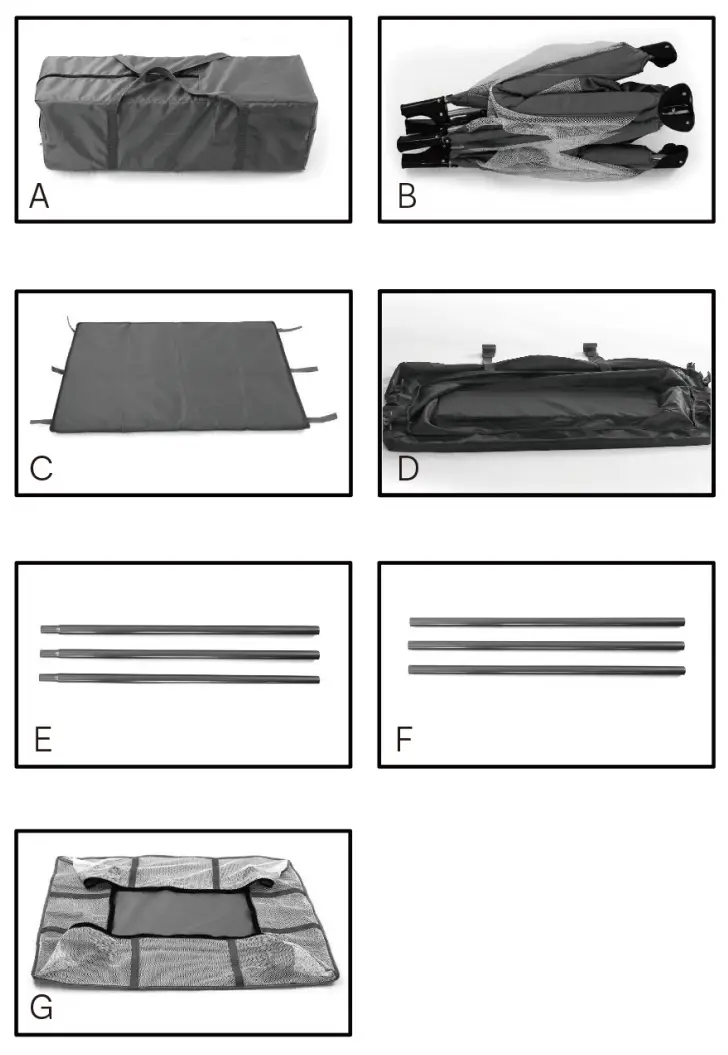
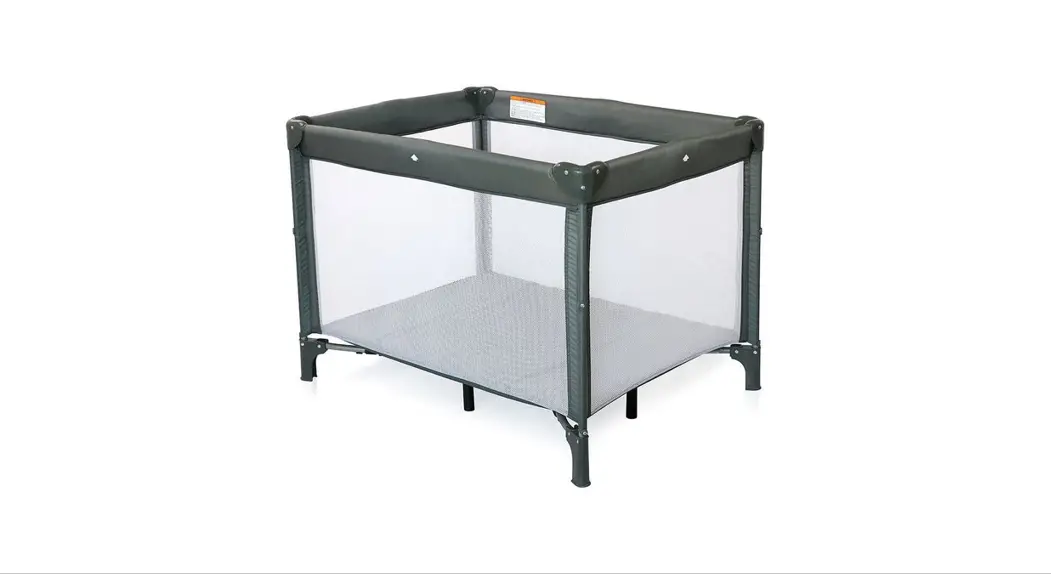
TO OPEN THE COT
![]() WARNING
WARNING
THESE STEPS WILL ENSURE THAT THE
THE COT IS CORRECTLY OPENED AND READY TO USE
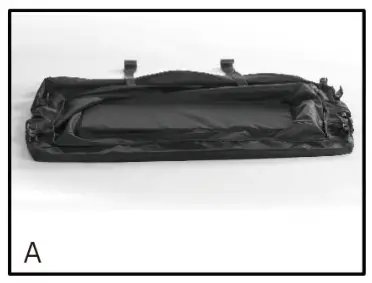
A Unzip and remove the carry bag.

B Remove the mattress by unfastening the hook & loop straps and take out the porta cot. 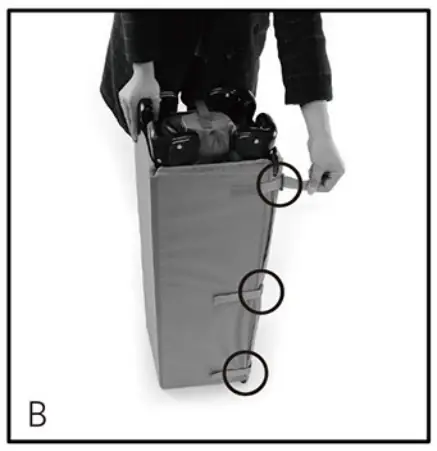
C Separate the legs of the cot.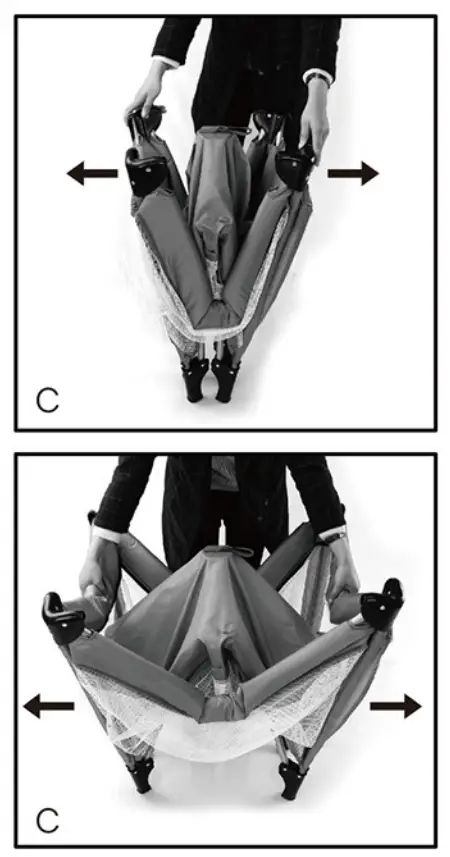
![]() CAUTION:
CAUTION:
TAKE CARE, AS FINGER PINCHING CAN OCCUR IN THE CORNER WHEN LOCKING THE RAILS IN PLACE.
D Starting with long rails, pull them up with both hands quickly until they are locked into place. 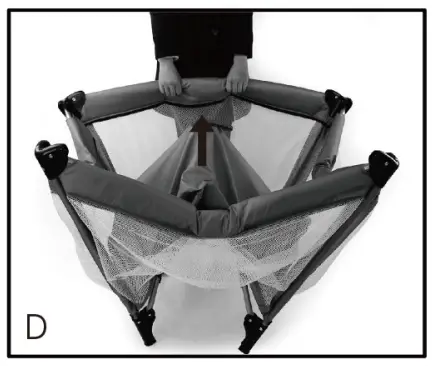
E Repeat the above step for the short rails.
NOTE: All the top rails should be locked in place. If they are not, release them and try again. The center of the cot base must be in a raised position to allow the rails to lock. Check for the secure engagement of the rails by pushing down them. 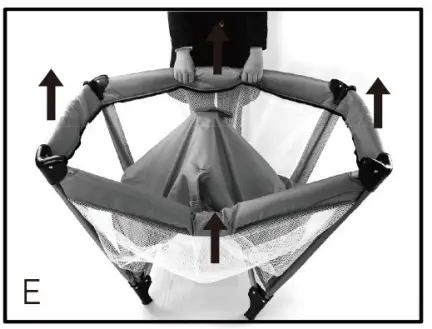
F Push the center folding lever downwards until it locks into place. 
G Place the mattress into the cot with its padded side facing up. 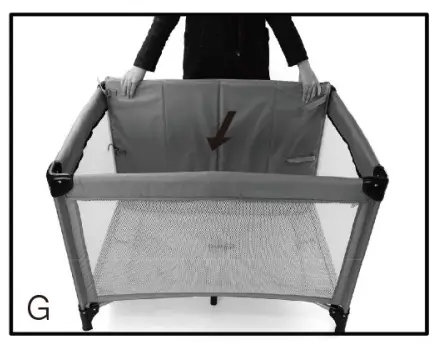
H Secure the mattress to the cot by fixing the hook & loop fasteners under the mattress onto the cot base.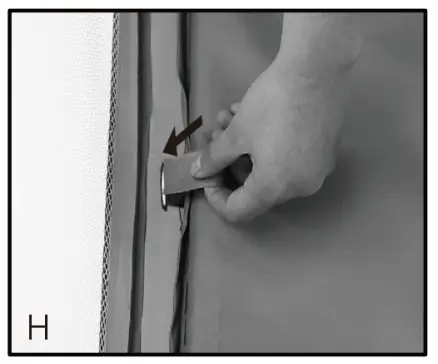
NOTE: Always secure the mattress before using the cot.
TO USE THE BASSINET
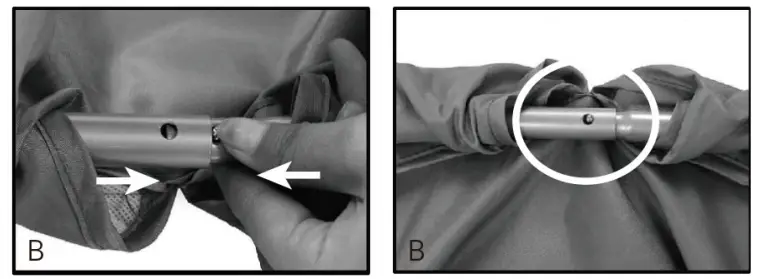
A Place the bassinet on the floor with sleeves facing upward, insert the support tubes (E+F ) into the sleeves until they are locked into place. Repeat the above steps for the rest of the support tubes to sleeves. 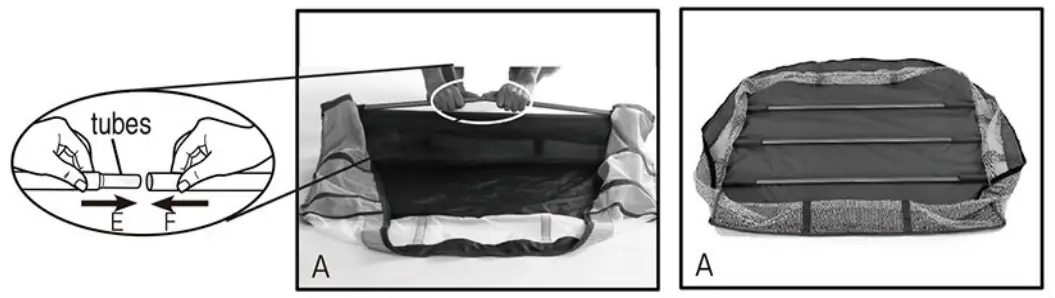
B Place the mattress into the bassinet with its padded side facing up. 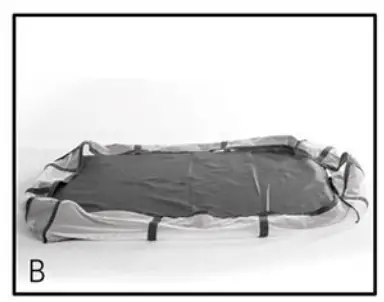
C Secure the mattress to the bassinet by fixing the hook & loop fasteners under the mattress onto the bassinet base.
NOTE: Always secure the mattress before using the bassinet. 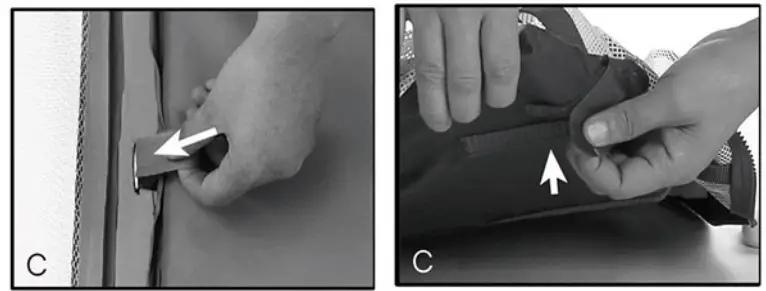
D Zip the bassinet with mattress into the porta cot. 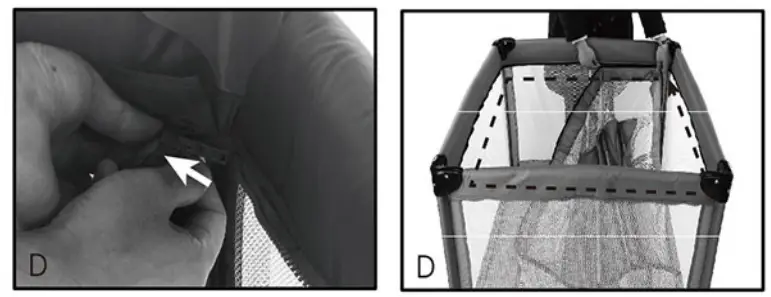
E Fix the hook & loop fastener to cover the zipper head after assembly. 
TO USE THE CHANGE TABLE
A Lay the changing table face down with the plastic hooks facing up.
B Connect the tubes together on both sides of the changing table until they are locked into place.
C Attach both plastic clips of the changing table to the short rail of the porta cot. Then place the changing table to the edge of the short rail as shown. 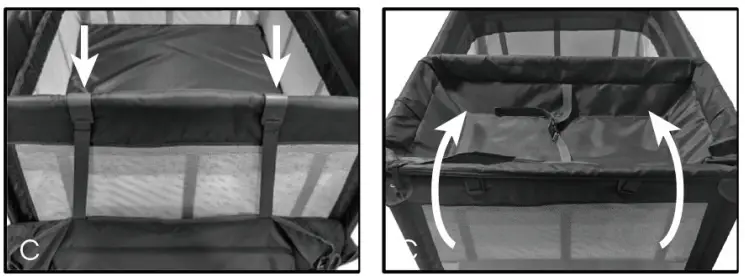
D Continue to attach both plastic clips of the changing table to the long rail of porta cot. Repeat for another side. 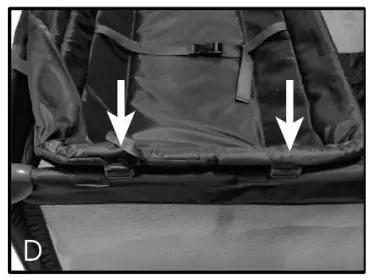
E Then attach the plastic clip to each leg as shown.
NOTE: Make sure the eight clips are attached to the top rails and legs. 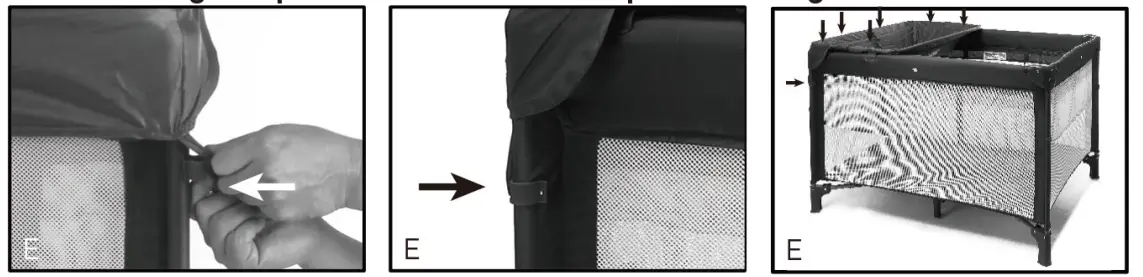
F To secure your child in the harness, push the buckle clip into the buckle housing until they snap into position. Adjust the slider to ensure a snug fit for your child. 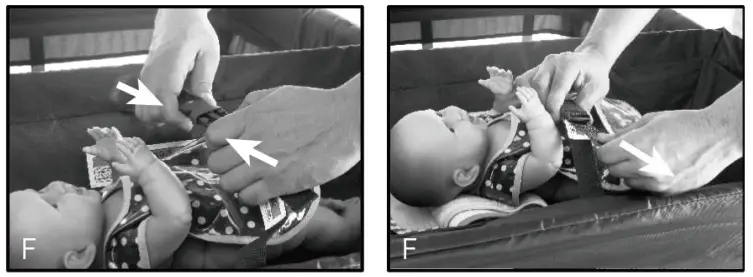
![]() WARNING:
WARNING:
USE THIS HARNESS AT ALL TIMES.
TO REMOVE THE CHANGE TABLE
A When the changing table is not in use, detach the plastic clip at each side of the leg. Continue to detach the four clips on long rails. 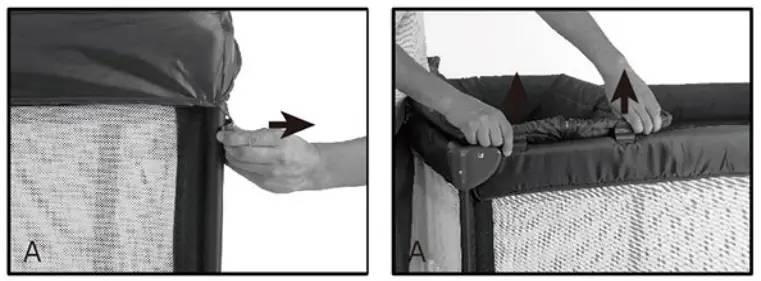
B Always flip over the changing table to the short rail until the next use. 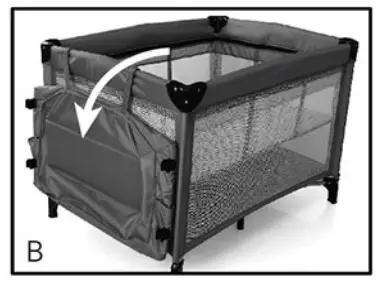
C To remove the changing table, detach the plastic clips on short rails. 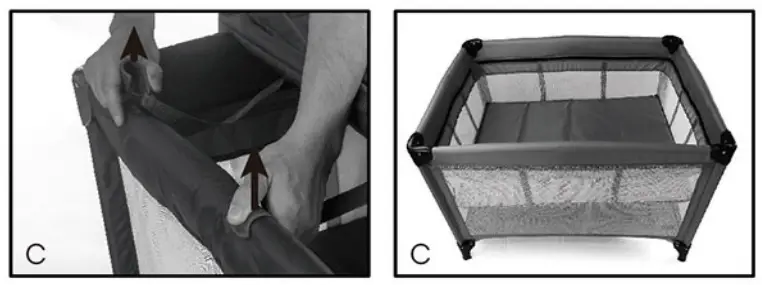
TO REMOVE THE BASSINET
A Unfasten the hook & loop fastener to unzip the bassinet. 
B Remove the mattress by unfastening the hook & loop straps from the bassinet. 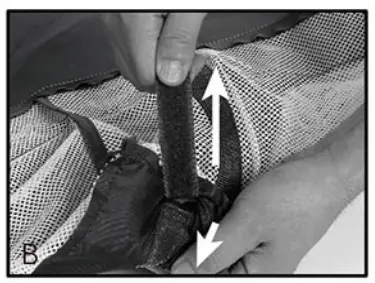
C Disconnect the support tubes (E+F) and remove them from the sleeves. 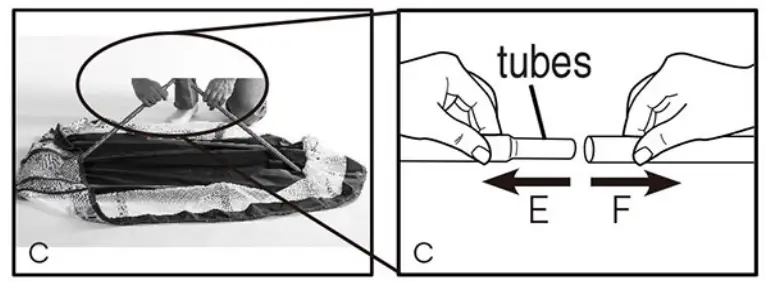
TO FOLD THE COT
THESE STEPS MUST BE FOLLOWED IN THIS ORDER TO EASILY FOLD THE COT.
A Remove the mattress by unfastening the hook & loop straps from the cot. 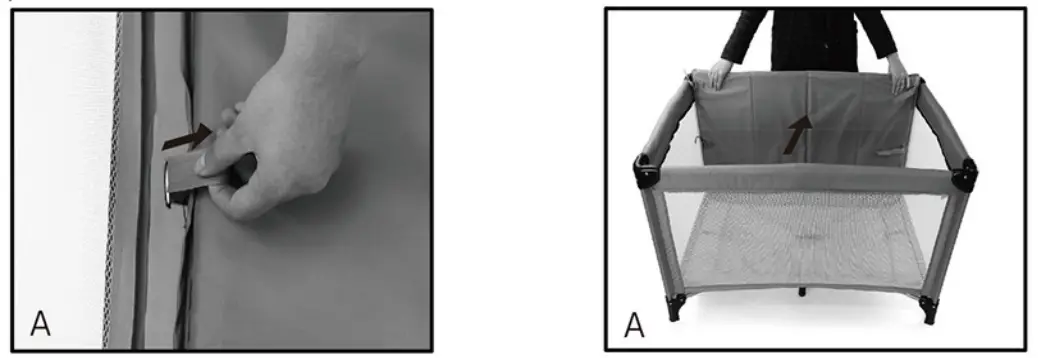
B Pull the center folding lever upwards. 
C Release each top rail by lifting the rail slightly and pressing the buttons located on the center joint of the rail. 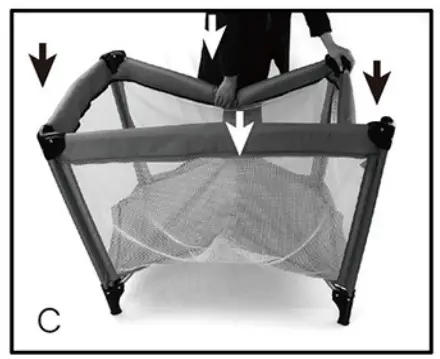
IF THE TOP RAILS DO NOT FOLD, DO NOT FORCE THEM – LIFT THE BASE HIGHER AND PRESS THE BUTTONS TO FULLY RELEASE THEM.
D Ensure each rail is fully released, then pull the center folding lever up until it is fully folded. 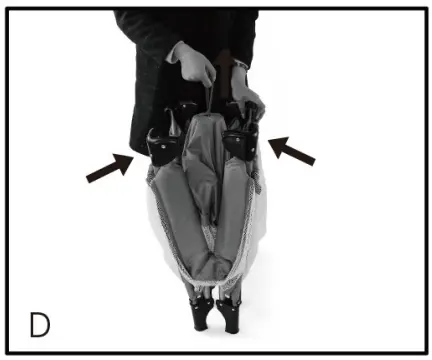
E Place the cot, bassinet, change table, and metal tubes in the mattress with the padded side facing inwards. 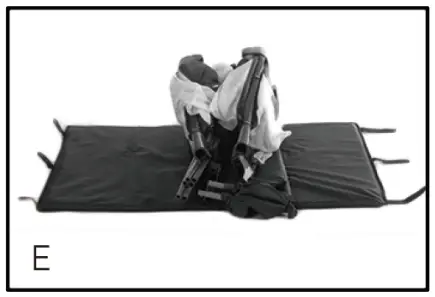
F Cover the folded cot with the mattress by fastening the hook & loop straps. 
G Place the folded cot with mattress in a carrying bag and zip it up. 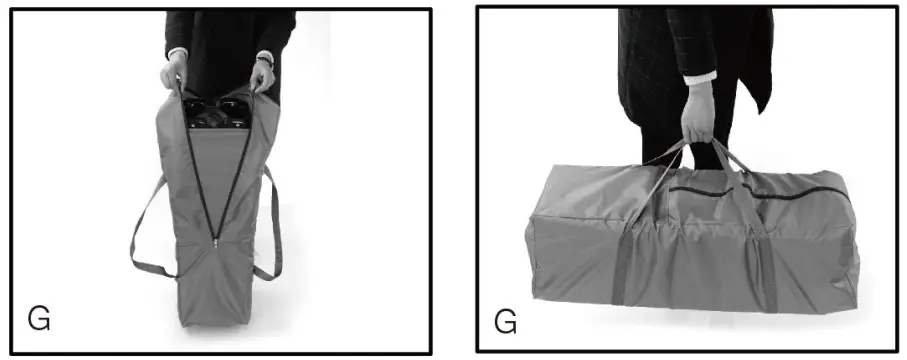
Care and maintenance
- All assembly fittings are to be tightened properly. Inspect regularly and re-tighten as necessary.
- Wipe clean with a damp cloth.
- Do not bleach.
- Do not iron.
- Do not dry clean.
- Do not use abrasive pads, bleach, or strong household cleaners.
IMAGES/ DRAWINGS IN THE MANUAL ARE FOR VISUAL PURPOSES ONLY. THE ACTUAL PRODUCT MAY VARY SLIGHTLY. THE MANUFACTURER RESERVES THE RIGHT TO CHANGE ANY SPECIFICATION OR FEATURE WITHOUT PRIOR NOTICE.
KEYCODE: 43-139-804
MADE IN CHINA
©KMART AUSTRALIA LIMITED
FOR AU / NZ: IMPORTED FOR KMART STORES IN AUSTRALIA AND NEW ZEALAND. KMART AUSTRALIA – 690 SPRINGVALE ROAD, MULGRAVE, VIC 3170 AUSTRALIA. KMART NEW ZEALAND – REGIONAL OFFICE C/O KMART PAPATOETOE STORE, HUNTERS PLAZA, GREAT SOUTH ROAD, PAPATOETOE, AUCKLAND, NEW ZEALAND.


