Muayb
YOUTUBE Quick Start Guide Demo

Please read this user manual carefully and thoroughly before any operation to this product and retain it for your future reference.
Features
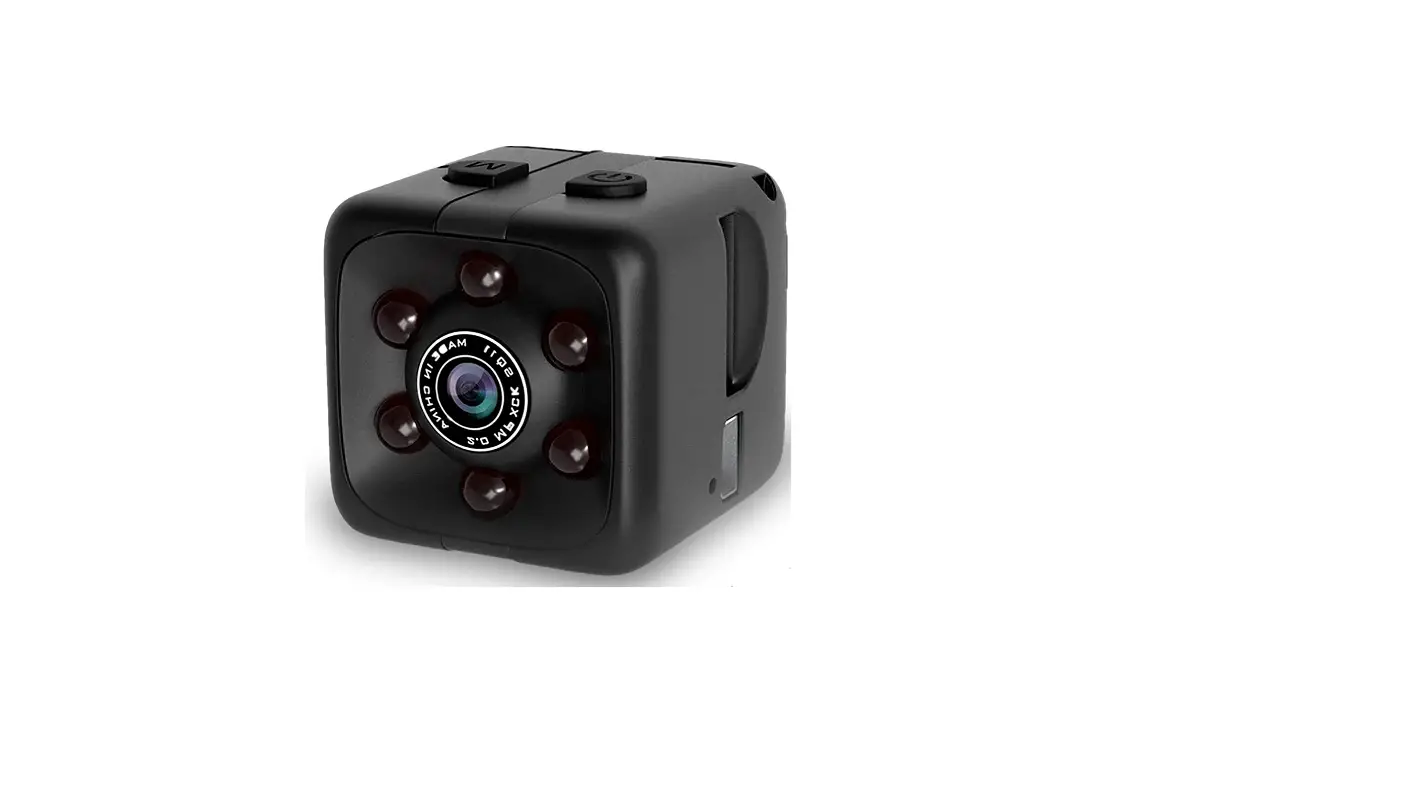
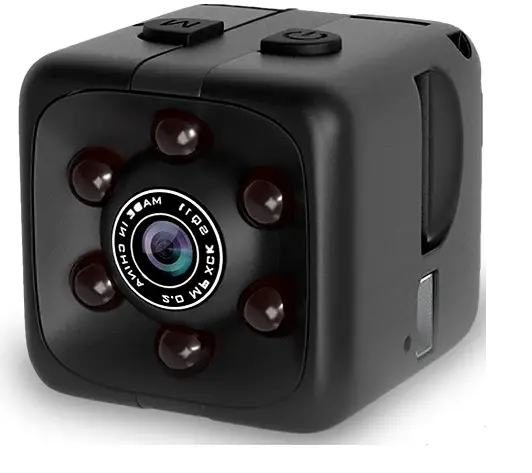
- MINI Sport DV Camera
- D 1920*1080P @30FPS
- Record videos with 2 modes (Loop recording and Motion detection).
- night vision with 6 pcs IR LEDs
- 7/24 Hours working while charging
- Max up to 32 GB memory card (Not included)
- 12M Photo Shooting.
- Mini Clip and Bracket
- Small and portable and easy to use
- This item is without waterproof.***
Product Details
***This camera could not work without memory card.
Please inserted an blank micro SD Card before using**
Tips: Using the pin to gently pry the memory card out of the camera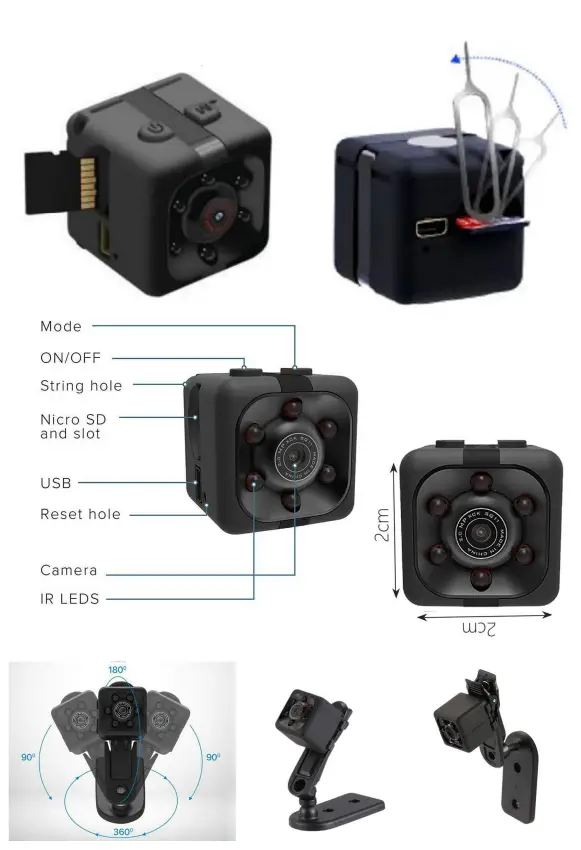
Special Notes :
No led lit during recording.
Media player software on Computer :
VLC Media Player Downloaded link: https://www.videolan.org/vlc/ Replay on Smart-phone: Standard out-put port of this camera is USB 2.0/ Type C ,you need to Nuse a suitable usb adapter for your phone (not included).
USB adapter :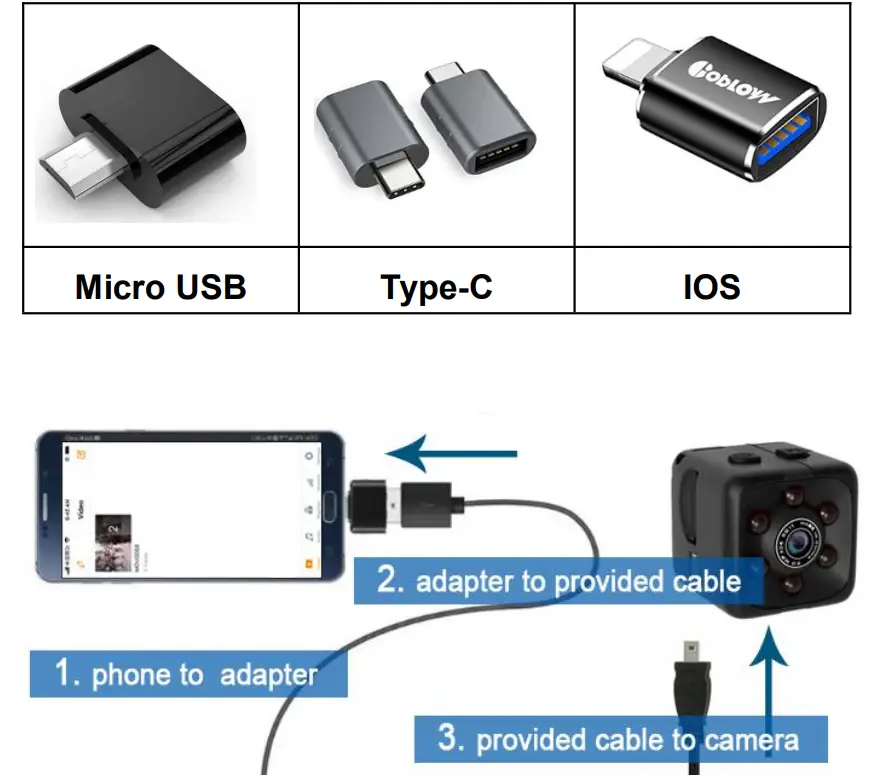
Media player software on Smart Phone : VLC Media Player
Download the App “VLC for Android” from Google Play Store (for Android)
Download the App “VLC for Mobile” from Apple Store (for iOS).
Getting Started
***A micro-SD card must be inserted for the camera to record**
Use only a high-speed Class 10 FAT empty Micro SD Card . The camera supports up to a maximum of 32 GB .
Please format the memory card before using it!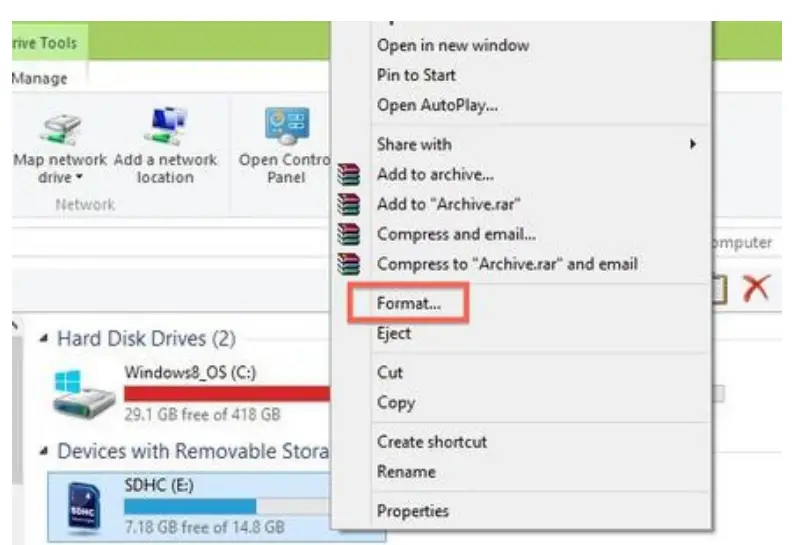
- Plug the type-c connector into the camera and the normal USB plug in your computer with the USB cable supplied.
- Right-click “USB DRIVE” appears on your PC, and select “Format” to complete the format.
Charging the Battery
- Special Notes: Power Less
- When the battery is in low capacity: A red/blue led light blinks 10 times after powering on the camera about 20 seconds , then the camera shuts down.
Charging the Battery, Fully charge the battery before first use.- Using the provided able connect the camera to computer-OR using a 5V 1A/2A Wall Charger.
- Charging is indicated with a flashing red LED light.
- A solid red LED light indicated that the battery is fully charged.
- On first charge, were commend charging the batter for an additional 30 minutes after the red LED is solid,We only recommend this for the first charge.
Note: Working While Charging
You can also use the camera while connected to an external power source for continuous recording **
Video Recording
If no micro-SD card is inserted, a blue LED will light for a few seconds. Afterward, a red/blue LED will flash and the camera will power off**
- Long press the on/off button for 3 seconds to power on the camera on ( indicated with a solid blue LED )
NOTE: Night Vision- Press and hold the on/off button for 2 seconds.
- A red LED will flash 2 times indicating you are now in Infrared mode
- Press and hold the on/off button for 2 seconds again to turn night vision off . ( a red led will flash 2 times)
- Press the on/off button one time to begin recording
- The blue LED will flash 3 times to indicate it has begun recording.
- During recording, there will be no LEDs lit.
- Push the on/off button one more time to stop recording.
- The solid blue LED will return
- To POWER OFF the camera, push the on/off button for 6 seconds and the camera will turn off.
*For long-time recording , the video streaming is saved and divided into separate clips each 5 minutes and continues recording until stopped**.
Photo Shooting Mode
- Long press the on/off button for 3 seconds to power on the camera on ( indicated with a solid blue LED )
NOTE: Night Vision- Press and hold the on/off button for 2 seconds.
- A red LED will flash 2 times indicating you are now in Infrared mode
- Press and hold the on/off button for 2 seconds again to turn night vision off . ( a red led will flash 2 times)
- To take a photo, press the “MODE” button one time, the red light flashes once.
- To POWER OFF the camera, push the on/off button for 6 seconds and the camera will turn off.
Motion Detection Mode
- Long press the on/off button for 3 seconds to power on the camera on ( indicated with a solid blue LED )
NOTE: Night Vision- Press and hold the on/off button for 2 seconds.
- A red LED will flash 2 times indicating you are now in Infrared mode
- Press and hold the on/off button for 2 seconds again to turn night vision off. ( a red led will flash 2 times)
- Push and hold the Mode button for 3 seconds.
- The blue/red LED will flash 3times Indicating motion detection is on
- No LED is lit during the recording
- The camera will now record a minimum sequence1min long when motion is detected
- As long as motion is detected, the camera will record ( up to five-minute long sequences ).
- After recording and saving a sequence, the camera will stop recording until a new motion is detected.
- Motion detection is indicated with a short blue/red flashing LED.
- Press the on/off button one time to stop motion detection mode.
- To POWER OFF the camera, push the on/off button for 6 seconds and the camera will turn off.
Video Replay:
Media player software on Computer: VLC Media Player
Downloaded link : https://www.videolan.org/vlc/
- Connect the camera to the computer/laptop with the USB cable.
- A new removable disk will appear on the computer.
- Open the removable disk to view the videos.
- Recommend VLC Media Player

***The camera does not support recording while the camera connect to a computer **
Webcam
It is possible to use the camera as a webcam, but not all programs support this camera.
One very interesting program is the ‘Debut Video Capture Software’ from NCH.
Click on this link to download the software: http://www.nchsoftware.com/capture/index.html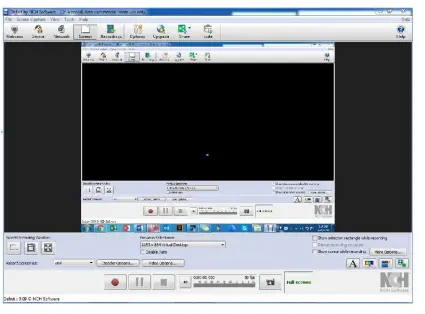 Installing and Using the software:
Download the program from the website and install it.
Connect your camera to your computer and wait until the drivers are installed. Push the ON/OFF button of the camera (additional drivers will be installed).
Open the ‘Tools’ menu, then ‘Options’. In the Video tab, choose the device ‘GENERAL-UVC’. The camera is now ready for use.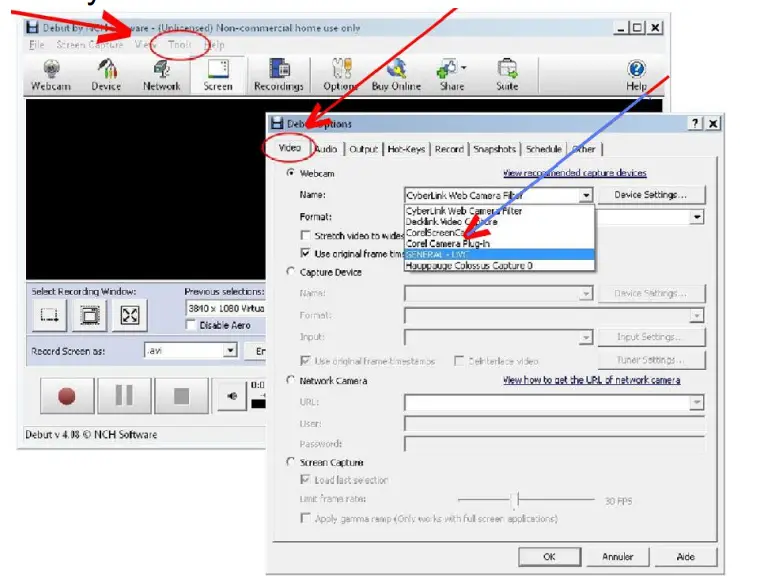
Time Stamp
- Connect camera to computer via USB cable.
- The camera will create a “TIMEREST.txt” file in the removable disk .
- Open the text file to revise the display time / date on your video .
The format is:
(Y for display, N for no display) - Save the file after revising.
- Remove the camera from the computer, then Turn on the camera to upgrade the time stamp.
Note: There is a space between numbers and letters, no spaces between numbers and numbers, and the final English letter needs to be capitalized.

Resetting the Camera
Reset the camera when it fails to operate normally. Use a Pin to poke into the hole near the mini USB socket.
The Led light will turn off once the camera reset is done. Turn on the camera to resume use.
Specifications
| Items | Specification |
| Video format | 1920Px1080P |
| Image resolution | WindowsME/2000/XP/2003/ Visa,MacOS, |
| Image proportion | M-JPEG |
| Support system | 12MP(4032×3024) |
| Linux Battery capacity | 180mAh |
| Working time | About 60 minutes |
| Charging time | About 2–3 hours |
| Charging Voltage | DC5V |
| Interface type | Mini 8Pin USB |
Contents
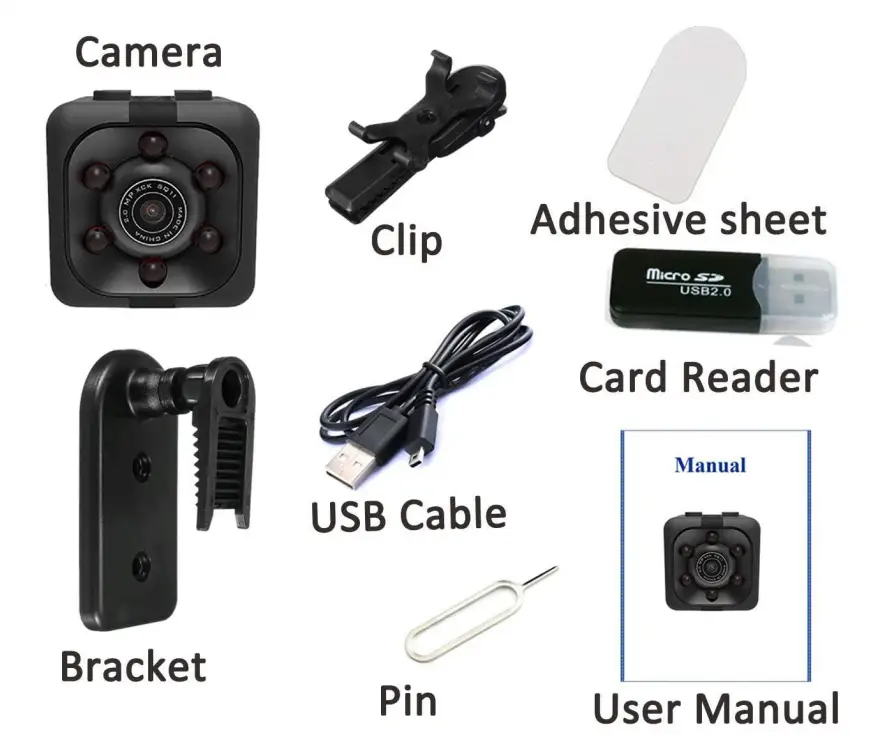
- 1PC——Camera
- 1PC——USB Cable (charging and data transfer)
- 1PC——Card Reader
- 1PC——Clip
- 1PC——Bracket
- 1PC——Pin ( Reset)
- 1PC——3M Sticker
- 1PC——Manual
Contact us
For any customer support question or honor your warranty, please write to [email protected]
Our usual response time is 24 hours. You can also, follow

FAQs
Why all my videos are just black screens and only with audio?
I think your PC replay media software are not fit the camera video format. Please try downloading the “VLC media player ” to playback the videos.
The description states the camera can record up to 60 minutes of footage. But why it only records a 5 minutes sequence per file.
The camera battery life is 60 minutes after fully charged . For long-time recording, video streaming is saved and divided into separate clips each 5 minutes and continuous recording until stopped.
Only could reply to the video on my Computer, How could i view the recordings on my cellphone?
The camera output port of this camera is USB 2.0, if you want to view recordings on a cellphone, you could buy a suitable USB adapter for your phone (USB 2.0 to Type C/IOS/ Micro USB adapter).
The description said it could be a webcam. Could it work with my Mac computer?
Yep, This camera could work as a webcam on Windows, Mac, and XP. Please use ‘Debut Video Capture Software’.
My camera doesn’t record for more than 10 or 15 seconds at a time. How do I get it to stay on until I want to turn it off?
- Make sure you fully charge it first (about 2 hours)
- Make sure your memory card is working and put in the correct position.
Then once in place, hold the button for a few seconds until the blue light comes on. (If the not used within 1 minute, it’ll turn off) Once the blue light is on, to record press the button once and it’ll flash 3 times; once the light is off, it is recording (To stop press it once again)
Could it record while connect with the computer as a webcam or video playback?
It could not record while you back play the video om computer or as a webcam.
You could use ‘Debut Video Capture Software’ to snap and record while the camera as a webcam . Is this camera Bluetooth and wifi capable?
No it is not. Must use the USB cable.
This mini camera works on 32 GB TF Card only? Would it work on 64 GB TF card as well?
It supports 32GB TF card (not included). It does not work with 64 GB TF card.
The camera stops recording automatically, what should I do?
Reset the camera or change SD card to a high speed C10 original memory card.
How long will battery hold with a single charge?
The mini Camera can hold from 30 to 100 mins depending on the extent of use.
What is the range of the camera to detect motion and will this record the entire time it detects motion?
The range is 5 meters, yes, it can record the entire time while on a Motion Detection mode.


