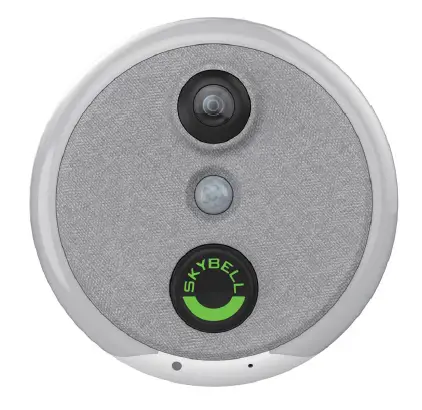
SKYBELL SBHD60 Skyguard Indoor Video Camera
Product Features
| Feature | Description |
| HD Video | See your home in up to 1080p HD video and 5x digital zoom. |
| Free Video Recording | SkyGuard can record each video so you can download or watch them at any time. |
| Activity History | Review the day’s events while you were away- Includes motion alerts. |
| Motion Sensor | SkyGuard alerts you even if the button is not pressed – providing additional security. |
| Multiple Users | Multiple people can receive alerts and you can have multiple devices on each account |
| Color Night Vision | Feel safe knowing you can see your home at night – in full color HD video. |
| Hear & Speak | 2-way audio means you can communicate with occupants. |
| Live Monitoring | Monitor your home at any time by starting the video from the mobile app. |
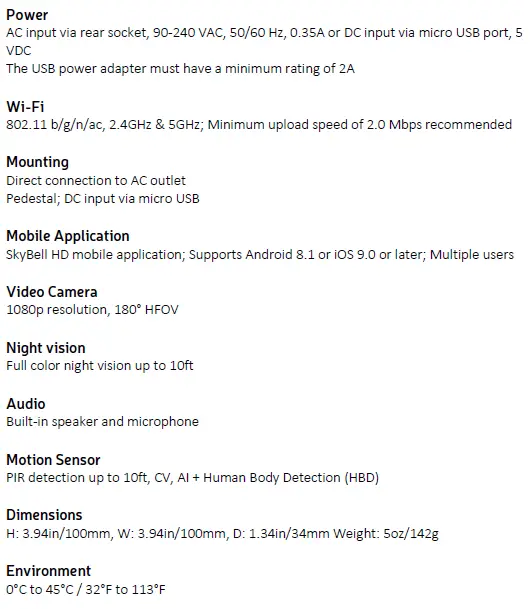
Technical Specifications
LED Indicator Reference Index
| LED Color | Status |
| Yellow Solid | SkyBell system is starting |
| Red/Green Alternating | Wi-Fi synchronization (AP) mode |
| Orange Flashing | Connecting to Wi-Fi, or Wi-Fi not detected |
| Blue/Green Alternating | Connected to Wi-Fi, waiting for SkyBell server connection |
| Green Solid | “Ready” mode |
| White Solid | “In-Call” mode; SkyBell is recording |
| Green Flashing | Initiating AP mode; Hold the button for 15 seconds |
| Blue Flashing | Power Cycle in progress; Hold the button for 45 seconds |
| Yellow Flashing | Factory Reset in progress; Hold the button for 60 seconds |
| Blue/Yellow Alternating | Firmware Update in progress (Do not power cycle the device!) |
Installation and Set Up
AC input via rear socket
- Attach the AC adapter to the back of the SkyGuard.
- Plug the SkyGuard into the AC outlet.
- The SkyGuard LEDs will illuminate yellow indicating the system is booting.
- When the LEDs flash red and green, the SkyGuard is in AP mode and ready for set up.
- Open the SkyBell mobile application on your mobile device and choose ADD NEW SKYBELL.
- Follow the on-screen instructions to complete the setup.
DC input via micro USB
- On the SkyGuard, press the button below the AC adapter and remove the adapter to access the micro USB port.
- Insert a 5V 2A DC micro USB power adapter into the micro USB port.
- Place the SkyGuard into the pedestal.
- Plug the power adapter into the AC outlet.
- The SkyGuard LEDs will illuminate yellow indicating the system is booting.
- When the LEDs flash red and green, the SkyGuard is in AP mode and ready for set up.
- Open the SkyBell mobile application on your mobile device and choose ADD NEW SKYBELL.
- Follow the on-screen instructions to complete the setup.
To reset the SkyGuard back to its factory defaults, press and continue to hold the front button until the LEDs flash yellow (about 10 seconds after the LEDs flash blue). Once the LEDs flash yellow, release the button and the SkyGuard will reboot. The button press/hold process will take at least 60 seconds.
Warning:
This device complies with part 15 of the FCC Rules. Operation is subject to the following two conditions: (1) This device may not cause harmful interference, and (2) this device must accept any interference received, including interference that may cause undesired operation.
FCC warning:
Any Changes or modifications not expressly approved by the party responsible for compliance could void the user’s authority to operate the equipment.
NoteThis equipment has been tested and found to comply with the limits for a Class B digital device, pursuant to part 15 of the FCC Rules. These limits are designed to provide reasonable protection against harmful interference in a residential installation. This equipment generates uses and can radiate radio frequency energy and, if not installed and used in accordance with the instructions, may cause harmful interference to radio communications. However, there is no guarantee that interference will not occur in a particular installation. If this equipment does cause harmful interference to radio or television reception, which can be determined by turning the equipment off and on, the user is encouraged to try to correct the interference by one or more of the following measures:
- Reorient or relocate the receiving antenna.
- Increase the separation between the equipment and receiver.
- Connect the equipment into an outlet on a circuit different from that to which the receiver is connected.
- Consult the dealer or an experienced radio/TV technician for help.
This equipment complies with FCC radiation exposure limits set forth for an uncontrolled environment. This equipment should be installed and operated with minimum distance 20cm between the radiator & your body.
This device complies with Industry Canada license-exempt RSS
standard(s).Operation is subject to the following two conditions:
- This device may not cause interference, and
- This device must accept any interference, including interference that may cause undesired operation of the device
The distance between user and products should be no less than 20cm. Operations in the 5.15-5.25GHz band are restricted to indoor usage only.
RF Exposure Statement:
The distance between user and products should be no less than 20cm.
Operations in the 5.15-5.25GHz band are restricted to indoor usage only.


