INDOORCYCLING Pairing of ANT
| TASK DESCRIPTION: Pairing of ANT+ Console & RPM transmitter. *Also refer to owner´s manual (pages 8-10) | ||
| Applicable for Product: | ANT+ Bike Computer Set ANT+ Console | |
| Applicable for Product Version: | ||
| Applicable for Product Art. No.: | CO-TK3WL-01 320-00-00001-01 | |
| Applicable for Product Serial No.: | 312130001 > …… | |
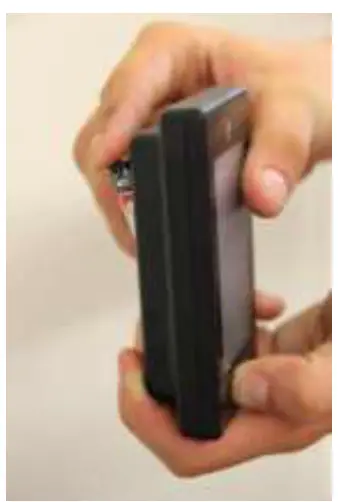
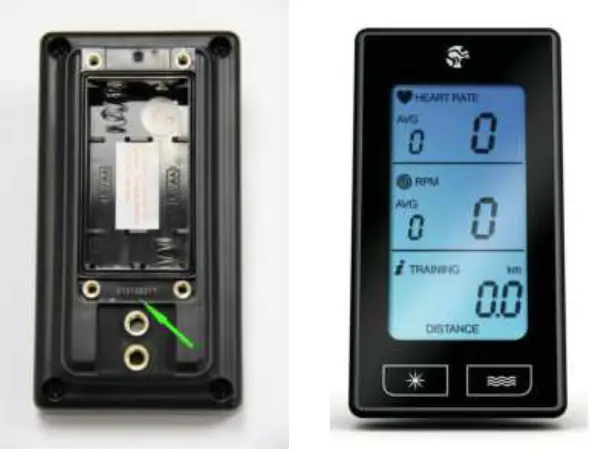
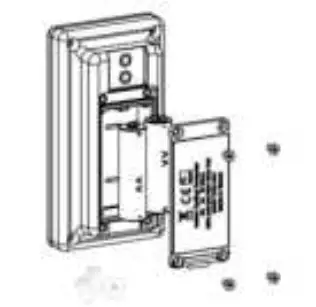
The Serial Number information can be found under the battery cover as shown below.
Please make sure to identify the product prior to performing any repair job.
ANT+ CONSOLE
AFFECTED PARTS
| SPARE PART | ICG ARTICLE NUMBER | PART DESCRIPTION | COMMENTS | NO. OF PARTS PER BIKE (OPTIONAL) |
| A | CO-TK3WL-01 | ANT+ BIKE COMPUTER SET | Includes: *ANT+ CONSOLE: 320-00-00001-01 – Owner manual – Phillips head machine bolt, M5 x 11 x 0,8P , ss304 STAINLESS STEEL, 2x – Counter sunk Hex. socket bolt, M3 x 8 x0,5P, ss304 STAINLESS STEEL, 4x – AA batteries, 2x *ANT+ BIKE MOUNTING & TRANSMITTER KIT: 320-00-00002-01 – Mounting manual – ANT+ Bike Transmitter – AAA batteries, 2x – ANT+ console bracket – Phillips head machine bolt, M5 x 11 x 0,8P , ss304 STAINLESS STEEL, 2x – Phillips head machine bolt, M5 x 53 x 0,8P , ss304 STAINLESS STEEL, 1x -Nut M5 x 0,8P, ss304 STAINLESS STEEL, 1x -Magnet, 1x -Rubber 90 x 9 x 0,9mm -Rubber 90 x 20 x 2,9mm | 1 |
| B | 320-00-00001-01 | ANT+ CONSOLE | Includes: *ANT+ CONSOLE: 320-00-00001-01 -Owner manual -Phillips head machine bolt, M5 x 11 x 0,8P , ss304 STAINLESS STEEL, 2x -Counter sunk Hex. socket bolt, M3 x 8 x 0,5P, ss304 STAINLESS STEEL, 4x – AA batteries, 2x | 1 |
REQUIRED TOOLS:
| TOOLS | SIZE MM | QUANTITY |
| Phillips screwdriver | PH 2 | 1 |
Warning!
Please pay attention that the bike is positioned stably and properly secured while repair work is being performed.
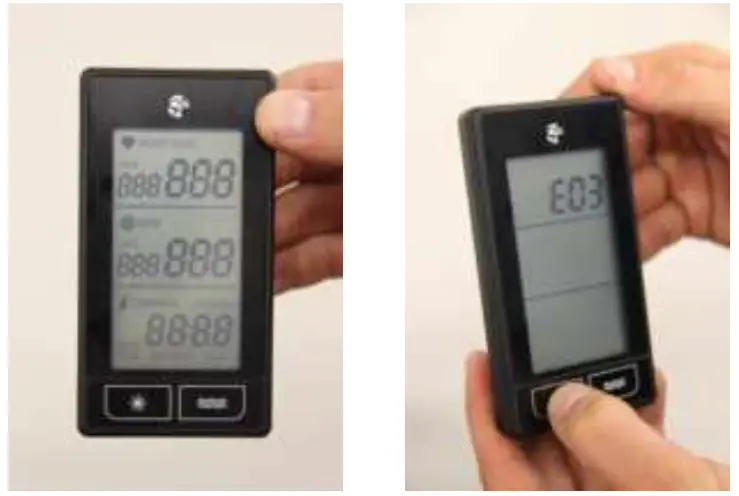
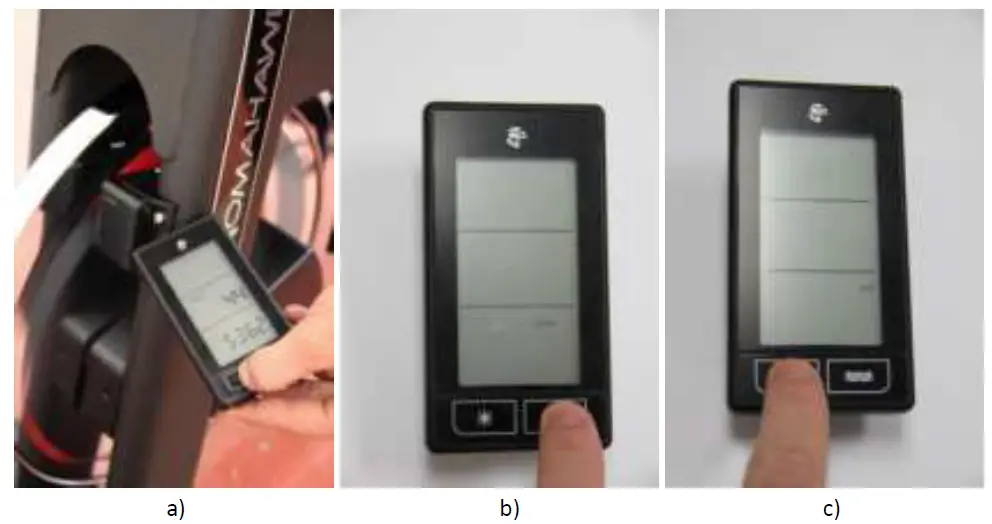
- Press any button while inserting batteries into the ANT+ console

- Press “SUN” button to display software version

- Press “SUN” button again to choose ANT+ RPM pairing mode

- Press “FLOW” button to start ANT+ RPM pairing
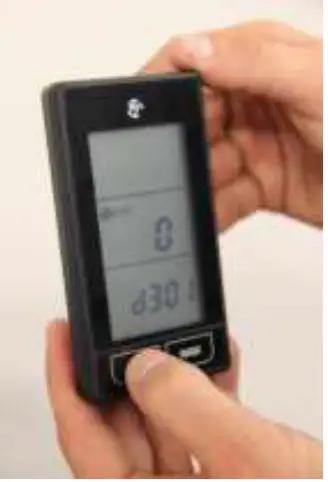
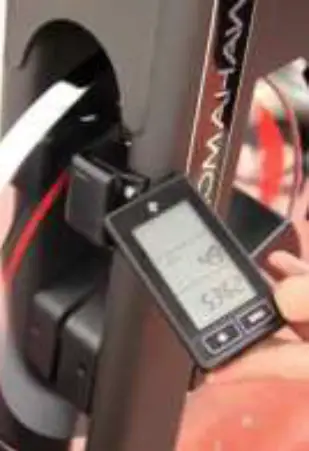
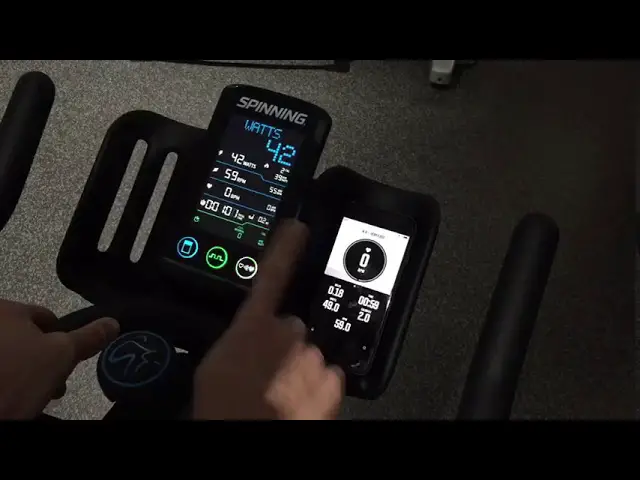
During the pairing process, make sure to:- Put the console as close as possible to the ANT+ bike transmitter.
- Keep the flywheel in motion by slowly turning the cranks by hand in order to provide a RPM signal.
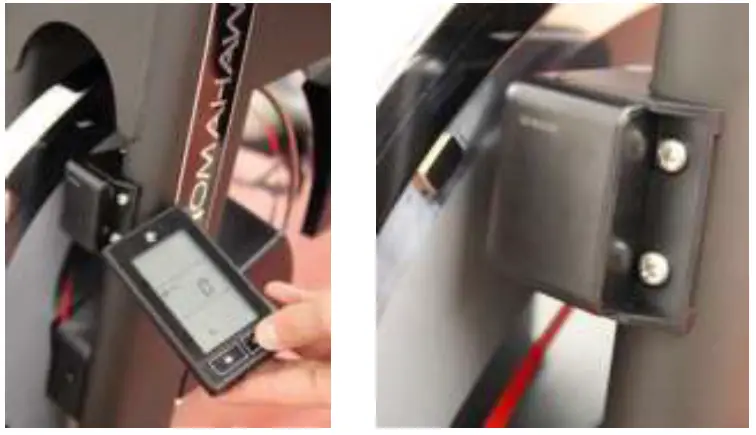
- Please make sure that the magnet is correctly positioned on the flywheel in order to provide a signal to the transmitter (see picture).

- As soon as a RPM signal is displayed, pairing of ANT+ RPM transmission is finished

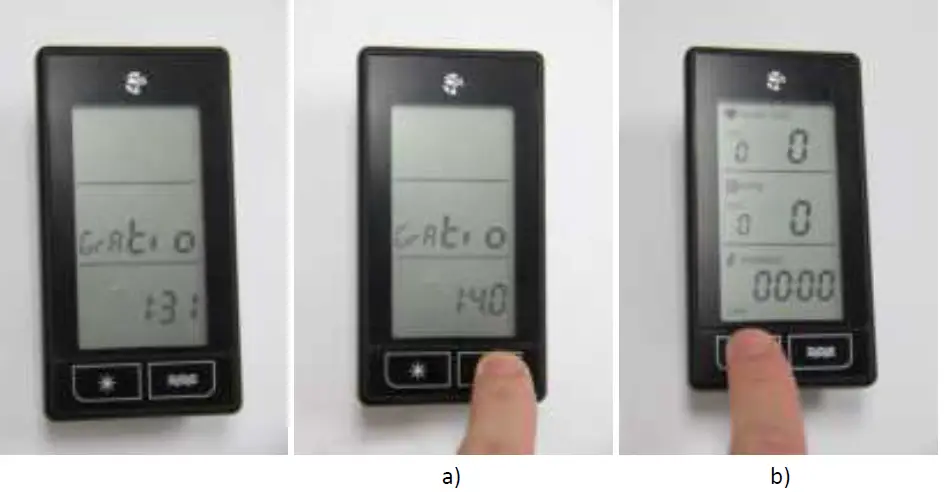
- KM / MILES settings

- a) Press the “SUN” button to enter KM / MILE setting.
- b) Press “FLOW” button to select between KM or MILES.
- c) Press “SUN” button to confirm your selection and enter gear ratio settings.
- Gear ratio settings
- Press “FLOW” button to select the gear ratios available:
- 1:3.1 for ICG bikes with V-Belt Drive. (IC3, S & E-Series).
- 1:4.0 for ICG bikes with Timing-Belt Drive.
- 1:4.3 for KRANKcycle.
- Press “SUN” button to confirm your selection and finish the basic settings process.

- Simulate a brief session and test if the ANT+ computer properly reads and displays all the information.
Please note: Heart rate will only be displayed when you use your personal HR chest belt (analog chest belts will be paired automatically; ANT+ chest belts must be paired manually).
- Simulate a brief session and test if the ANT+ computer properly reads and displays all the information.
- Press “FLOW” button to select the gear ratios available:
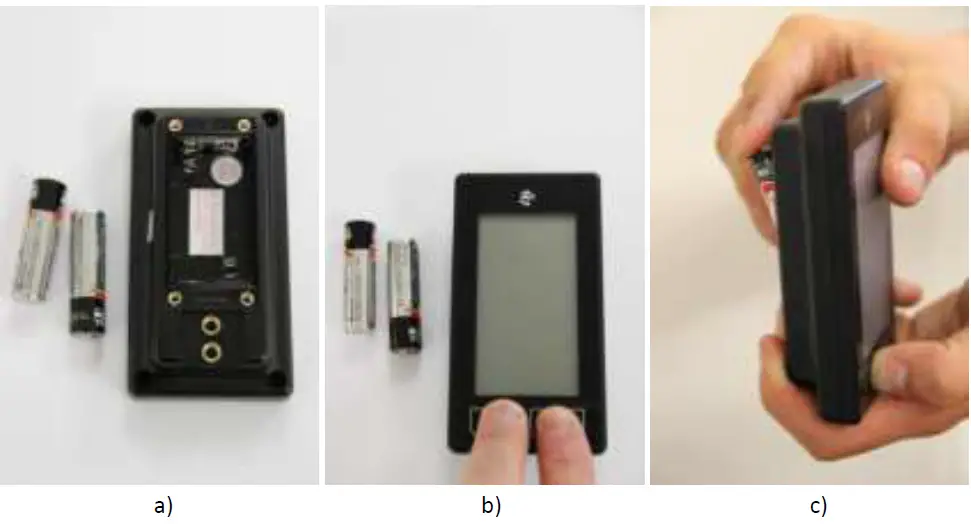
- Battery exchange and resetting of console in order to resolve any issues to the functioning. *see also the owner´s manual (page 14)
a) Remove the batteries of the ANT+ console.
b) Press both buttons on the front of the ANT+ console for at least 10 seconds.
c) After RESET reinsert the batteries and repeat steps 1-7.
- Battery exchange and resetting of cadence transmitter *see also the owner´s manual (page 15)
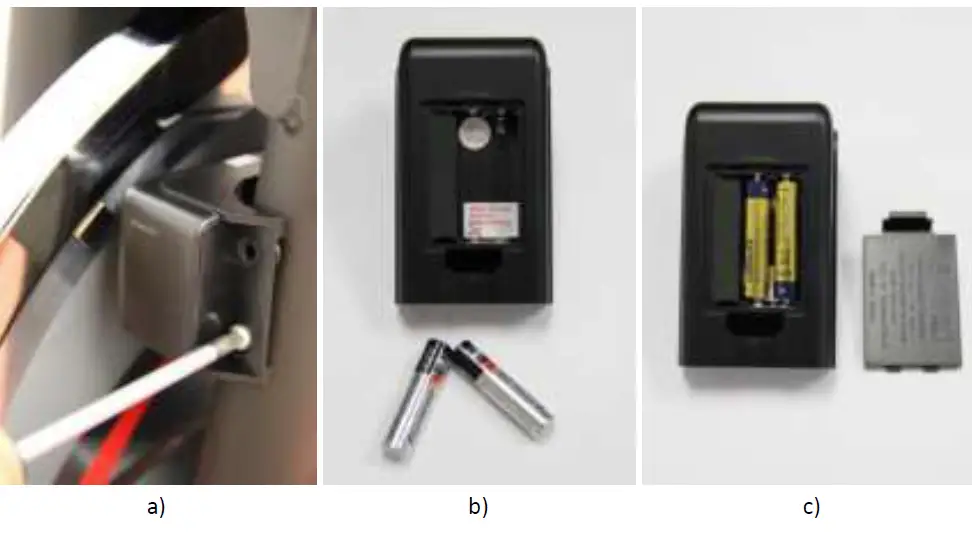
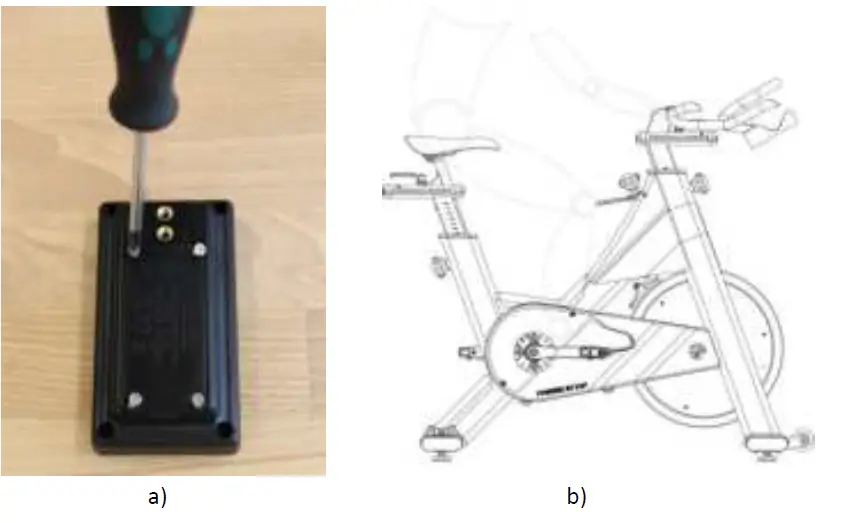
a) Use a screwdriver to remove the cadence transmitter from the bike/KRANKcycle frame.
b) Remove the batteries from the cadence transmitter.
c) Wait for at least 30 seconds before re-inserting the batteries and repeat steps 1-7.- Test the functionality of the cadence transmitter before re-attaching it to the bike/KRANKcycle frame.

- Test the functionality of the cadence transmitter before re-attaching it to the bike/KRANKcycle frame.
- End of the operation
a) Use the Phillips screwdriver to secure the batteries cover.
b) Simulate a brief session and test if the ANT+ computer properly reads and displays all the information.
Please note: Heart rate will only be displayed when you are using your personal HR chest belt (analog chest belts will be paired automatically; ANT+ chest belts must be paired manually).- Test the functionality of the ANT+ console before re-attaching it to its support bracket.

- Test the functionality of the ANT+ console before re-attaching it to its support bracket.