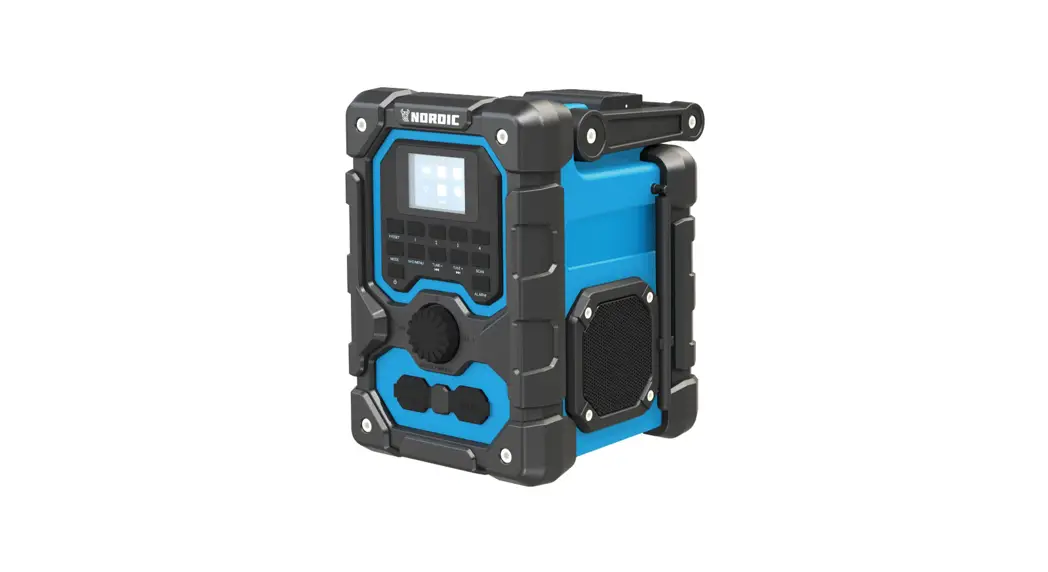
![]() 18V CORDLESS JOB SITE RADIO
18V CORDLESS JOB SITE RADIO
JR-L0218D
OPERATING MANUAL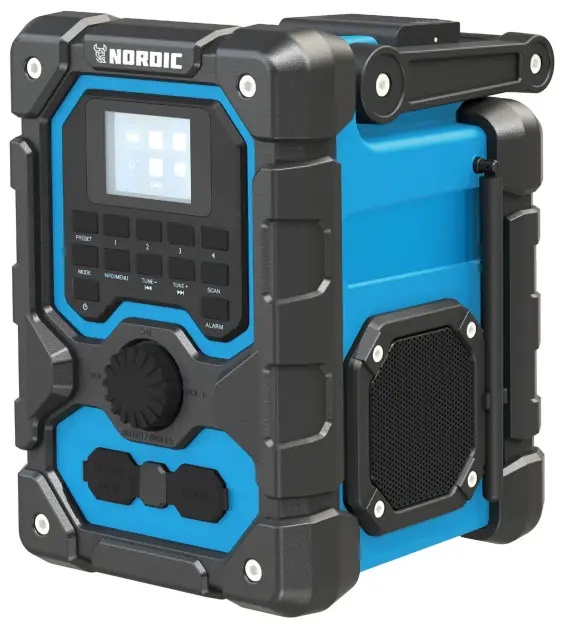
PRODUCT SPECIFICATION
| Voltage: | 18V |
| USB Output: | 5V 1.0Ah |
| DAB Frequency: | 174-240MHz |
| FM Frequency: | 87.5-108MHz |
GENERAL POWER TOOL SAFETY WARNINGS
Read all safety warnings and instructions. Failure to heed warnings and follow instructions may result in electric shock, fire and/or serious injury.
Keep safety warnings and instructions for future reference.
BEFORE USE
Remove any packing material and loose parts from unit.
Check the accessories before use. It should be fit with the machine and your purpose.
If the machine is new, the battery must first be charged.
Attention! After long time storage, the battery capacity will be reduce.
A new battery or one which has not been used for an extended period achieves full performance only battery is worn out and must be replaced.
WORKING AREA
- Keep work area clean and well lit. Cluttered and dark areas invite accidents.
- Do not operate in explosive atmospheres, such as in the presence of flammable liquids,gases or dust. Power tools create sparks which may ignite the dust or fumes.
ELECTRICAL SAFETY
- Always check that the power supply corresponds to the voltage on the rating plate.
- Plugs must match the outlet. Never modify the plug in any way. Do not use adapter plugs with earthed equipment.
Unmodified plugs and matching outlets will reduce the risk of an electric shock. - Avoid body contact with earthed surfaces such as pipes, radiators, kitchen ranges and refrigerators. There is an increased risk of an electric shock if your body is earthed.
- Do not expose to rain or wet conditions. If water gets inside, it will increase the risk of an electric shock.
- If operating in a damp location is unavoidable, use a power supply protected by a residual current device (RCD).
Using an RCD reduces the risk of an electric shock.
SERVICE
Your power tool should be serviced by a qualified specialist using only standard spare parts. This will ensure that it meets the required safety standards.
a) Use only the manufacturer’s recommended replacement parts and accessories.
b) Inspect and maintain the machine regularly. Have the machine repaired only by an authorized repairer.
c) When not in use, store the machine out of the reach of children.
ADDITIONAL SAFETY INSTRUCTIONS FOR BATTERIES AND CHARGERS
![]() Use only batteries and chargers applicable for this machine.
Use only batteries and chargers applicable for this machine.
BATTERIES
- Never attempt to open for any reason.
- Do not store in locations where the temperature may exceed 40 °C.
- Charge only at ambient temperatures between 4 °C and 40 °C.
- When disposing of batteries, follow the instructions given in the section “Protecting the environment”.
- Do not cause short circuits. If connection is made between the positive (+) and negative (-) terminal directly or via accidental contact with metallic objects, the battery is short circuited and an intense current will flow causing heat generation which may lead to casing rupture or fire.
- Do not heat. If batteries are heated to above 100 °C, sealing and insulating separators and other polymer components may be damaged resulting in electrolyte leakage and/or internal short circuiting leading to heat generation causing rupture or file. Moreover do not dispose of the batteries in fire, explosion and/or intense burning may result.
- Under extreme conditions, battery leakage may occur.
When you notice liquid on the battery, proceed as follows: - Carefully wipe the liquid off using a cloth. Avoid skin contact.
- In case of skin or eye contact, follow the instructions below:
1. Immediately rinse with water. Neutralize with a mild acid such as lemon juice or vinegar.
2. In case of eye contact, rinse abundantly with clean water for at least 10 minutes.
3. Consult a physician. Fire hazard! Avoid short-circuiting the contacts of a detached battery. Do not incinerate the battery.
CHARGERS
- Never attempt to charge non-rechargeable batteries.
- Have defective cords replaced immediately.
- Do not expose to water.
- Do not open the charger.
- Do not probe the charger.
- The charger is intended for indoor use only.
SYMBOLS
In this manual and/or on the machine the following symbols are used:
| Denotes risk of personal injury or damage to the tool. | |
| Read manual before use | |
| Wear eye protection | |
| Wear ear protection | |
| Wear safety gloves | |
| In accordance with essential requirements of the European directive(s) | |
| Class II – The machine is double insulated; Earthing wire is therefore not necessary (only for charger) | |
| Ambient temperature 40°C max. (only for battery) | |
 | Do not expose charger and battery pack to water |
 | Use battery and charger only in closed rooms |
 | Do not incinerate battery pack or charger |
 | Protect from the rain. |
OPERATION
Before using the equipment:
BATTERY CHARGER
The lithium-ion battery can be charged at any time and will not develop a “memory” when charged after only a partial discharge. It is not necessary to run down the battery pack charge before recharging. Remove the battery pack from the tool when convenient for you and your job. You can “top-off” your battery pack’s charge before starting a big job or long period of use.
Due to lithium-ion’s fade-free properties, the only time it is necessary to charge the lithium-ion battery pack is when the pack has reached the end of its charge. To signal the end of charge, power to the tool will drop quickly. Charge the battery pack as needed.
CHARGING THE BATTERY
This lithium-ion battery pack is shipped partially charged. Before using it the first time, fully charge the battery pack. A fully discharged battery pack with a temperature between 0°C and 40°C will charge in about 1 hour.
Plug the charger adapter into power source. The green light on the charger stand will illuminate, indicating the charger is powered.
Slide the battery all the way into the charger stand. The red light on the charger stand will illuminate, indicating that the battery is charging.
The red light will go off after charging is complete and a green light will appear.
![]() NOTE: Batteries may become warm while charging. This is normal. If the battery is hot after continuous use in the tool, allow it to cool down to room temperature before charging. This will extend the life of your batteries.
NOTE: Batteries may become warm while charging. This is normal. If the battery is hot after continuous use in the tool, allow it to cool down to room temperature before charging. This will extend the life of your batteries.![]() WARNING: Always disconnect the battery pack from the tool before any assembly, adjustments or changing accessories.
WARNING: Always disconnect the battery pack from the tool before any assembly, adjustments or changing accessories.
INSERTION AND REMOVAL OF RECHARGEABLE BATTERY
Depress the battery-release button located on the front of the battery pack to release battery pack.
Pull the battery pack out and remove it from the tool.![]() WARNING: Always remove the battery pack before making adjustments to the equipment.
WARNING: Always remove the battery pack before making adjustments to the equipment.
Be sure to read the following information before you put the cordless equipment into operation:
Charge the battery pack with the charger. An empty battery pack requires a charging period of approximately 0.5 to 1 hour.
CONTROL METHOD
- ON/OFF/STANDBY: Press the power button to turn on the radio. Once on press it again to enter standby mode or hold it to turn the radio off.
- Using the buttons: All the button actions are just a quick press unless otherwiase stated in the required action. This includes the button function of the dial.
- Using the dial: The dial on this radio is dual action. This means it will perform one action my turning the dial and another action by pressing it.
SETUP
- First time use: After removing the radio from the packaging, connect the radio to the mains using the adaptor supplied into the battery compartment in the base. Fully extend the aerial and press the power button to turn on the radio.
- The date and time will automatically be set from the DAB+ signal recieved. The radio will then proceed to scan for the first time.
- The number to the right of the display indicates the amount of channels found in your region during this scan.
- After the scan is complete the radio will rune itself to the first alphabetically listed station available in DAB+ mode.
DAB+MODE
- Selecting A Station: Use the tune +/- buttons to cycle through the available DAB+ stations on the display. Press the dial to tune the radio into the station that is shown on the display.
- Scan: You can retune or refresh the amount of DAB+ stations by pressing the ‘Scan’ button. It is recommended you do this when the radio has been moved or if you are getting a poor DAB+ signal.
DAB+ OPTIONS
- Menu Options: Press and hold the ‘info/menu’ button until you see ‘Full Scan’
- Press the tune +/- buttons to cycle the options and press the dial to select. The options here are here are Full scan > Manual Tune > DRC > Prune > System
FULL SCAN
- To fully erase and retune all of the available DAB+ stations select ‘Full Scan’ in the menu options.
- The radio will now scan through all the available channels.
- All the channels found will be shown in alphabetical order.
MANUALLY TUNE DAB+
- This option will allow you to retune to an individual local frequency without performing a full scan.
Using this feature can help clear up a poor signal or interference without affecting the rest of the station list. - Press and hold the ‘Info/Menu’ button until the screen displays the DAB+ menu list. Rotate the dial to highlight ‘Manual Tune’ and give the dial a quick press to select it.
- The next option will display all the DAB+ frequencies that are available to this radio. Rotate the dial to cycle through the list and highlight the frequency that you preferred. Give the dial a quick press to select it.
CLEANING AND MAINTENANCE
![]() DANGER! Always pull out the mains power plug before starting any cleaning work.
DANGER! Always pull out the mains power plug before starting any cleaning work.
CLEANING
Keep all safety devices, air vents and the motor housing free of dirt and dust as far as possible. Wipe the equipment with a clean cloth or blow it with compressed air at low pressure.
We recommend that you clean the device immediately each time you have finished using it.
Clean the equipment regularly with a moist cloth and some soft soap. Do not use cleaning agents or solvents; these could attack the plastic parts of the equipment. Ensure that no water can seep into the device. The ingress of water into an electric tool increases the risk of an electric shock.
MAINTENANCE
There are no parts inside the equipment which require additional maintenance.
DRC
DRC or Dynamic Range Compression is a feature that some DAB+ stations use. This enables the audio to be evened out by raising the volume of the quieter audio levels and lowering the volume of the louder audio levels.
To change this select ‘DRC’ in the menu option.
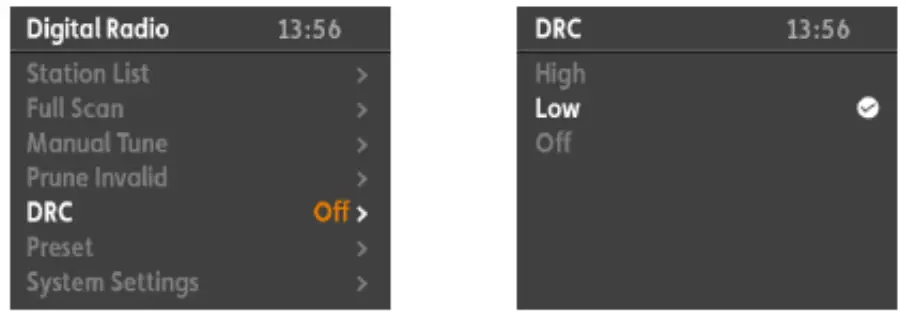
| Mode: | Description: |
| High | Minimal audio volume output changes |
| Low | Moderate audio volume output changes |
| Off | DRC disabled |
The asterisk in the top right corner indicates the current selection.
Prune
You can remove DAB+ stations from the radio that are listed with a’?’ in front of their name by using the prune function.
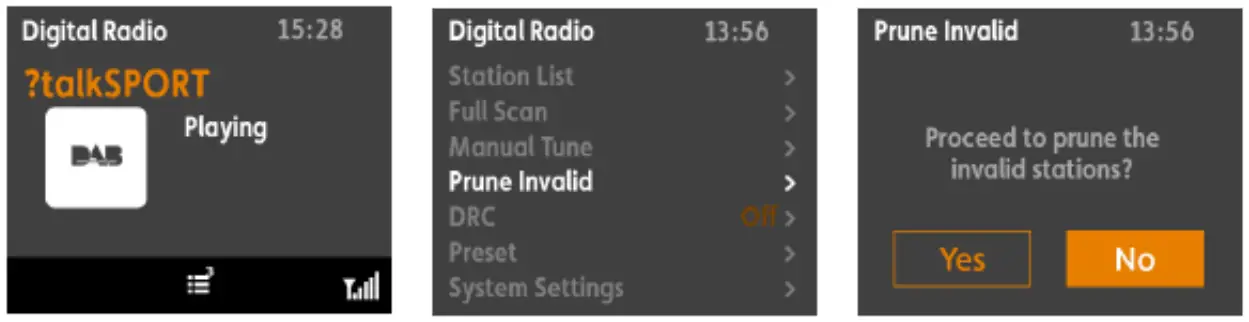
Once you’ve selected a station you wish to remove, select ‘Prune’.
from the menu options. You will be presented with the choice ‘Yes’ or ‘No’. Select ‘Yes’ to remove the station. Use the tune+/- buttons to go through the options and press the dial to confirm.
FM Mode
Select FM Mode
Press ‘Mode’ to change from DAB+ to the FM function.
Auto Tune FM
To auto tune to the next available radio station press and hold either ‘Tune +/-‘ buttons for 3 seconds. This will start the FM auto scan.
‘+’ will scan up the channel and ‘-‘ will scan down the channel.
The scan will always stop at the next signal received.
Save as a preset if required (see page 15).
Manually Tune FM
Press either ‘Tune +/-‘ buttons to manually tune the radio in FM mode. This helps in poor signal areas to get a clear signal.
Save as a preset if required (see page 15).
FM Options
FM Menu Options
Press and hold the ‘Info/Menu’ button until you see ‘Scan Setting’.
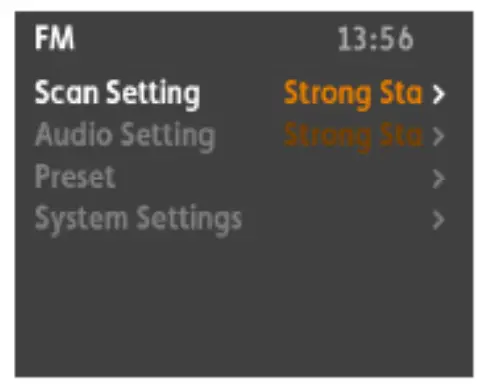
Press the tune +/- buttons to cycle the options and press the dial to select.
The options here are:
Scan Setting > Audio Set > Preset > System (See page 11 ).
Scan Settings
You can change the Auto Tune search ability between ‘all stations’ and ‘strong stations’. Select ‘Scan Settings’ from the menu options.
Press the tune +/- buttons to cycle between either ‘Strong Stations’ or ‘All Stations’. Press the dial to select the required option.
The asterisk in the top right corner indicates current selection.
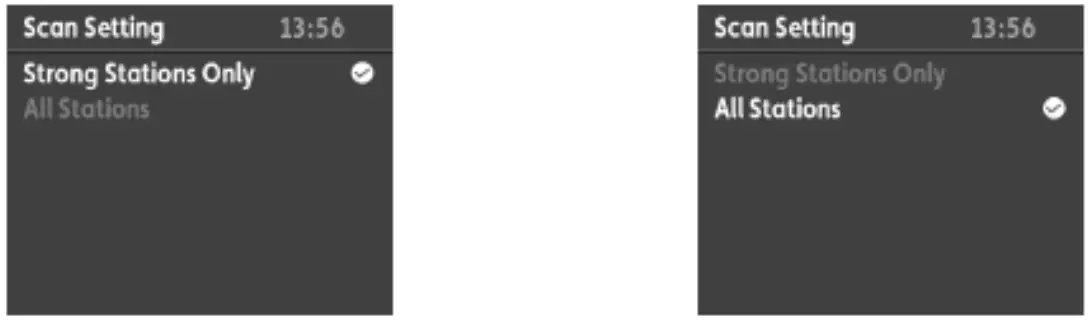
| Option: | Description |
| Strong Stations Only | Auto scan will use strong radio signals detected only |
| All Station | Auto scan will use all radio signals detected |
You will be sent to the previous menu once a selection has been made. Press the ‘Info/Menu’ button to return to the main screen.
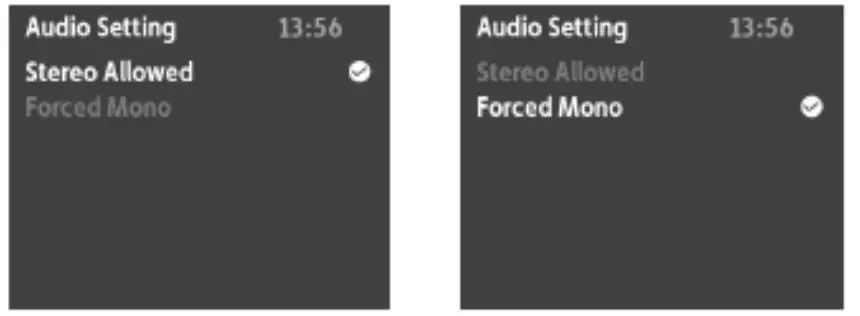
Audio Settings
You can change the sound output from stereo to mono with this option. Select ‘Audio Set’ from the menu option.
| Option: | Description |
| Strong Stations Only | Auto scan will use strong radio signals detected only |
| All Station | Auto scan will use all radio signals detected |
Then Press the tune +/- buttons to chose from ‘Stereo Allowed’ and ‘Forced Mono’ options and press the dial to confirm. The asterisk in the top right corner indicates which option is currently in use.
Bluetooth Mode
Select Bluetooth Mode
To select Bluetooth press ‘Mode’ until ‘Bluetooth’ shows on the display.
Pairing
The radio is automatically in pairing mode and show ‘Disconnected’ on the display.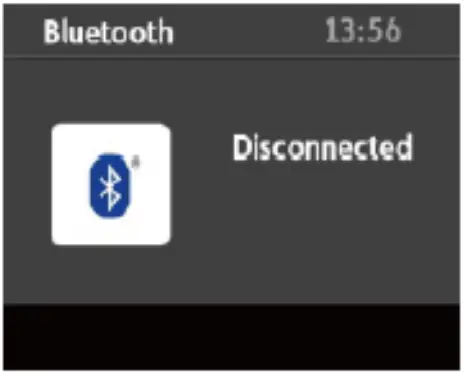
Activate the bluetooth on your device and search for available devices. Look for and add ‘SAS+ALL RADIO’. The radio will automatically pair with the device and no code is required.
The display will show ‘Connected’ if the pairing is successful.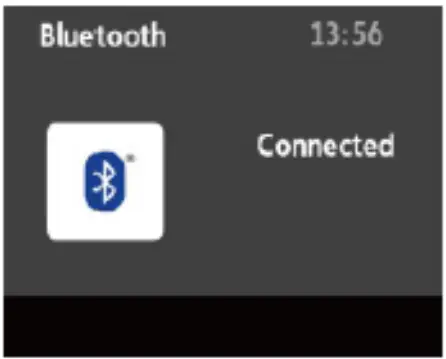
Using Bluetooth
Make sure the source device has the maximum volume set.
You can use the following functions on the radio.
| Function: | Button: |
| Play/Pause | |
| Skip Forward | |
| Skip Back |
The volume is controlled in the normal way by turning the dial.
System Options
System Menu Options
Press and hold the ‘Info/Menu’ button until you see either ‘Scan Setting’ in FM mode or ‘Full Scan’ in DAB+ mode. Press the tune +/- button to cycle through the options until you get to ‘System’ then press the dial to select it.
The options here are:
Sleep > Alarm> EQ > Time > Backlight > Inactive Standby > Lang. > Reset > SW Ver.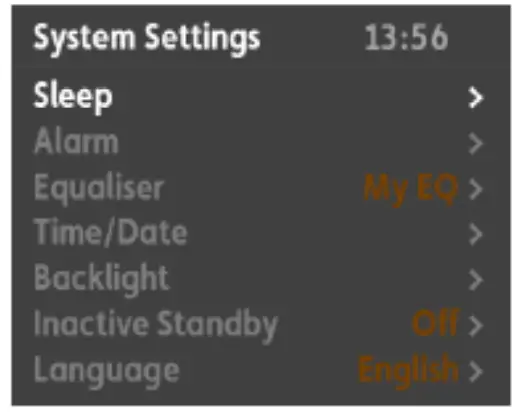
Sleep
You can set the length of time the radio is on for with this feature.
Once selected from the system options you with have access to: Sleep off > 15 > 30 > 45 > 60 > 90 (Minutes)
Alarm
See Page 16.
EQ
You can change the sound output preference with this feature.
Once selected from the system options you with have access to: Normal > Classic > Jazz > Pop > Rock > Speech > My EQ’
You can customise the EQ by using the sub menu under ‘My EQ’ Here you can change the following:
| Loudness | YIN |
| Treble | +/-7 |
| Bass | +/-7 |
Use the dial to cycle through the options and press it to select.
Time
All the time and date functions and preferences can be altered here.
Press the tune+/- buttons to cycle through the options and press the dial to select.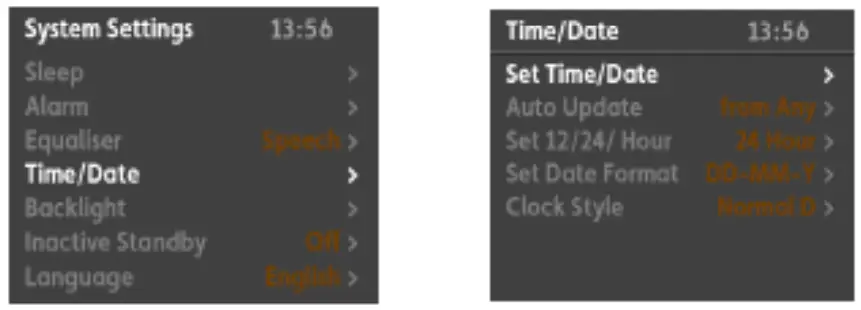
The options here are:
Time/Date > Auto Update > Set 12/24 > Date Format> Clock Style
Time/Date
With this option you can manually set the time and date.
Once selected from the ‘Time’ sub menu you will see the hours flashing. Press the tune +/- buttons to cycle through the hours and press it to select the required hour value.
Once the hour has been set you will have the minutes flashing.
Repeat the process for choosing the hour for the minutes. Once selected you will move on to the next screen for setting the date.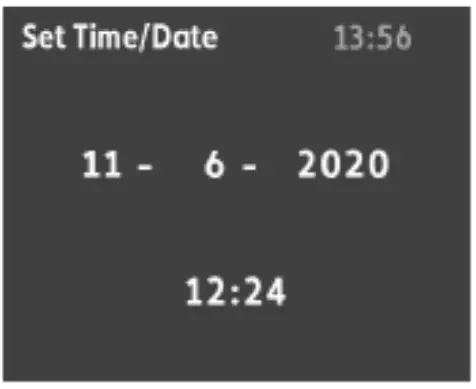
Similar to setting the hour and minute, you cycle through the numbers with the tune +/- buttons and press the dial to select your chosen value, and then move to the next value to set. When the last value is set the display will confirm that the new time and date has been saved.
All the preferences can be altered by pressing the tune +/- buttons to cycle through the options and press the dial to select.

Back light
You can change the brightness and light duration of the display.
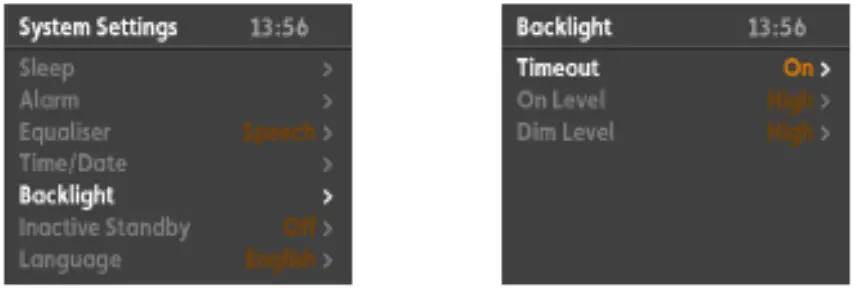
The options here are:
Time Out > On Level > Dim
Time Out
This is to set the duration of time before the display dims. Choose from the options by turning the dial and pressing it to select: On > 10 >20 > 30 > 45 >60 > 90 > 120 > 180 (Seconds)
The asterisk in the top right corner indicates current selection.
On Level
This option lets you set the active display light level.
Choose from the options by turning the dial and pressing it to select: High > Med > Low
The asterisk in the top right corner indicates current selection.
Dim
This option lets you set the inactive display light level.
Choose from the options by turning the dial and pressing it to select: High > Med > Low
The asterisk in the top right corner indicates current selection.
Inactive Standby
You can set the radio to change to standby mode after a preselected period of time with this feature. Once selected from the system options you will have the following options: OFF > 2 > 4 > 5 > 6 (Hours)
Cycle through the options with the tune +/- buttons and press the dial to select an option.
Each number value is a period in hours. The radio will continue to play for the selected duration until you select ‘OFF’. An asterisk in the top right corner will indicate which is the currently selected option.
Language
With this option you can choose what language the radio uses to display the menu options in.
The language options available are: English.Polski, Deutsch. Francais.
Slovensky jazyk. Cesky Jazyk, Limba Romana. Magyar nyelv. Lietuviu kalba.
Latviesu valoda.

Cycle through the options with the tune +/- buttons and press the dial to select an option. The asterisk in the top right corner indicates current selection.
Reset
Selecting this option from the ‘System’ menu will reset the radio and clear any presets saved. Use this option if the DAB+ signal is still poor after re-scanning for stations or any possible faults.
SW Ver.
This will display the current software version in use.
DAB+/FM Preset
Storing a Preset
Press and hold ‘Preset’ for 2 seconds, release the button, then use the ‘Tune +/-‘ buttons to cycle through the available preset slots.
Press the dial to save the station. You will see a saved message appear if successful.
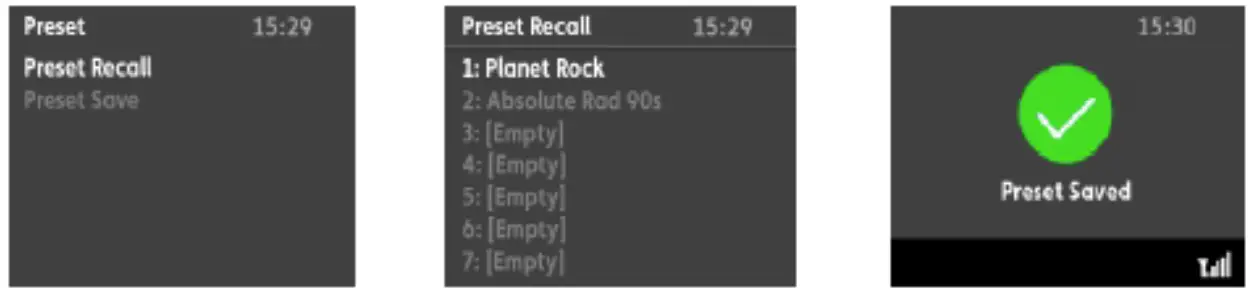
The radio has 10 preset slots for both DAB+ and FM selections.
Recall a Preset
To recall a saved preset press ‘Preset’ quickly once, then use the ‘Tune+/-‘ buttons to cycle through the saved options. Press the dial to tune in your preset selection.
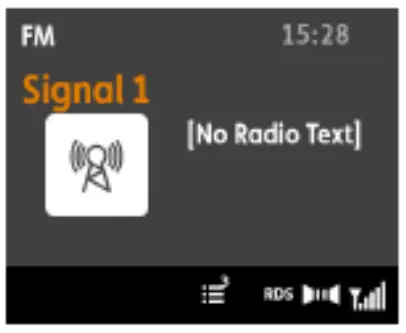
DAB+/FM Information
Information Details
When listening in DAB+ or FM mode you can cycle through the available information from the broadcasting service and the radio by pressing the ‘Info’ button.
The information cycle:
| DAB· • Now Playing • Signal Strength • Music genre • National/Local designation • MHz Frequency • Kbps data transfer rate • Power Type • Date | FM • Now Playing • Station Name • Music genre • Mono/Stereo • Power Type • Date |
Alarm
Setting the Alarm
There are 2 alarms you are able to set on this radio when the radio is on and not in standby press ‘Alarm’ once to set alarm 1 or press ‘Alarm’ twice to set alarm 2 and press the dial to select.
The process is controlled by using tune +/- buttons to cycle through the available options and pressing the dial to select it. Once an option has been selected it will move on to the next option to set.
Process flow:
Time: Hour > Minutes
Duration: 15 >30 >45 >60 > 90 >120 (Minutes)
Alert: Buzz > ‘DAB > ‘FM
‘If ‘DAB’ or ‘FM’ selected: Last Listened > Preset (1-10)
Repeat: Daily > “Once >Weekend >Weekday
If ‘Once’ selected: Day > Month > Year
Volume: Select Volume Level
Alarm: On > Off
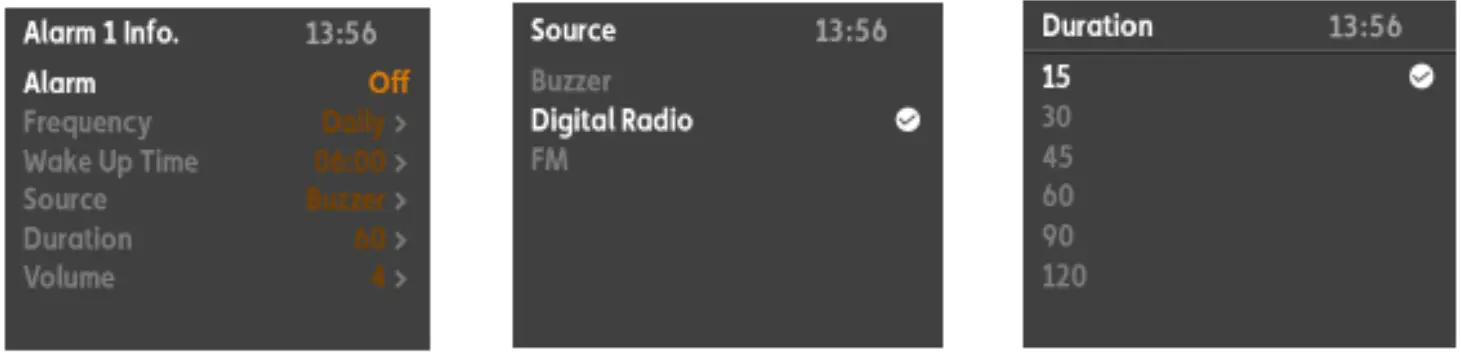
Once the alarm is successfully set ‘Alarm Saved’ will be seen on the display to confirm.
You can set or disable the alarm from the last action in the flow process.
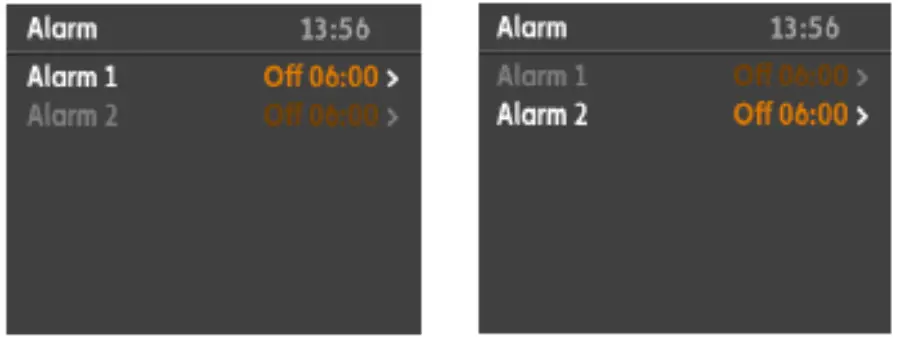
Turning The Alarm On/Off
When the radio is in standby mode press the ‘Alarm’ button and use the tune +/- buttons to cycle through the options on the display and press the dial to select. The combination options with icons are:
Alarm 1: Off > On > Off > On
Alarm 2: Off > Off > On > On

Disable/Snooze Alarm
When the alarm is sounding you can press ![]() to stop the alarm and the radio remains in standby or you can press the dial to activate the snooze function with maximum of 30 minutes. A Countdown will appear on the display if you choose the snooze option.
to stop the alarm and the radio remains in standby or you can press the dial to activate the snooze function with maximum of 30 minutes. A Countdown will appear on the display if you choose the snooze option.

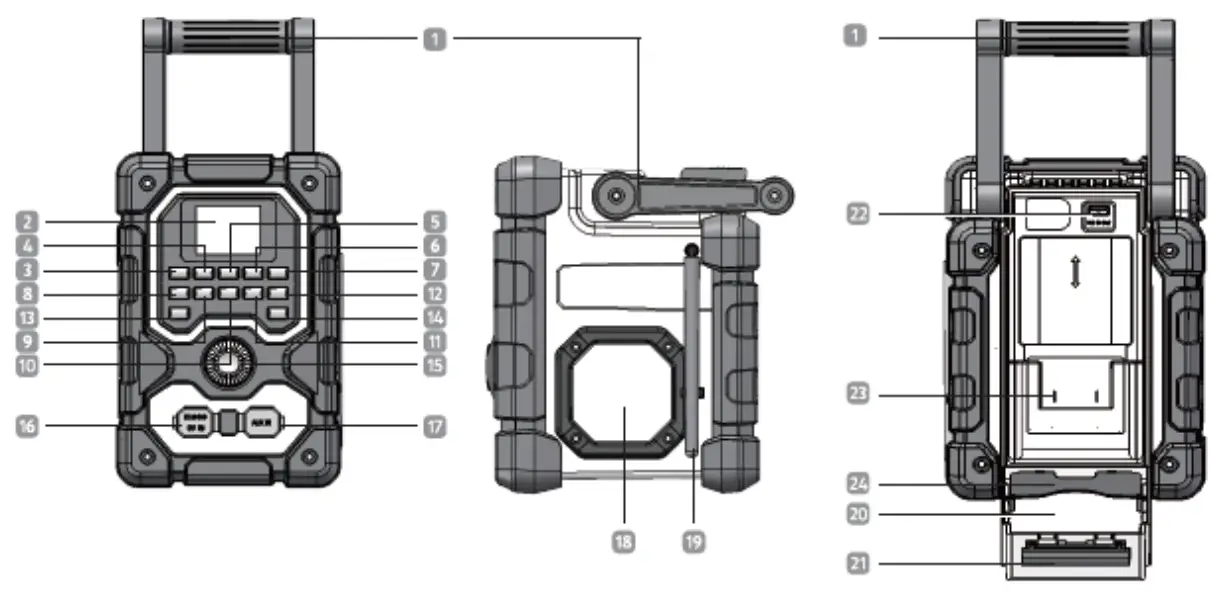
Description
| 1 | Carry Handle | 13 | On I Off/ Standby Button |
| 2 | Screen | 14 | ALARM Button |
| 3 | Preset Button | 15 | Multifunction Dial (MFD) |
| 4 | Preset1 | 16 | 9V/2A DC In Port |
| 5 | Preset 2 | 17 | AUX In Port |
| 6 | Preset 3 | 18 | Speaker |
| 7 | Preset 4 | 19 | Aerial |
| 8 | MODE Button | 20 | Storage Bay Cover |
| 9 | INFO/MENU Button | 21 | Clasp |
| 10 | TUNE-/ Ski Back Button | 22 | 5V/1A USB Charge Port |
| 11 | TUNE +/ Skip Forward Button | 23 | Battery Charger |
| 12 | SCAN Button | 24 | Mobile Device Holder |
![]()


